
Hand Placement for CPR: Complete Guide to Proper Technique, ACLS Algorithm, and Life Support Skills
Master hand placement for CPR, ACLS algorithm steps, infant CPR technique, and life support skills. 🟢 Includes adult, child, and infant positioning guides.
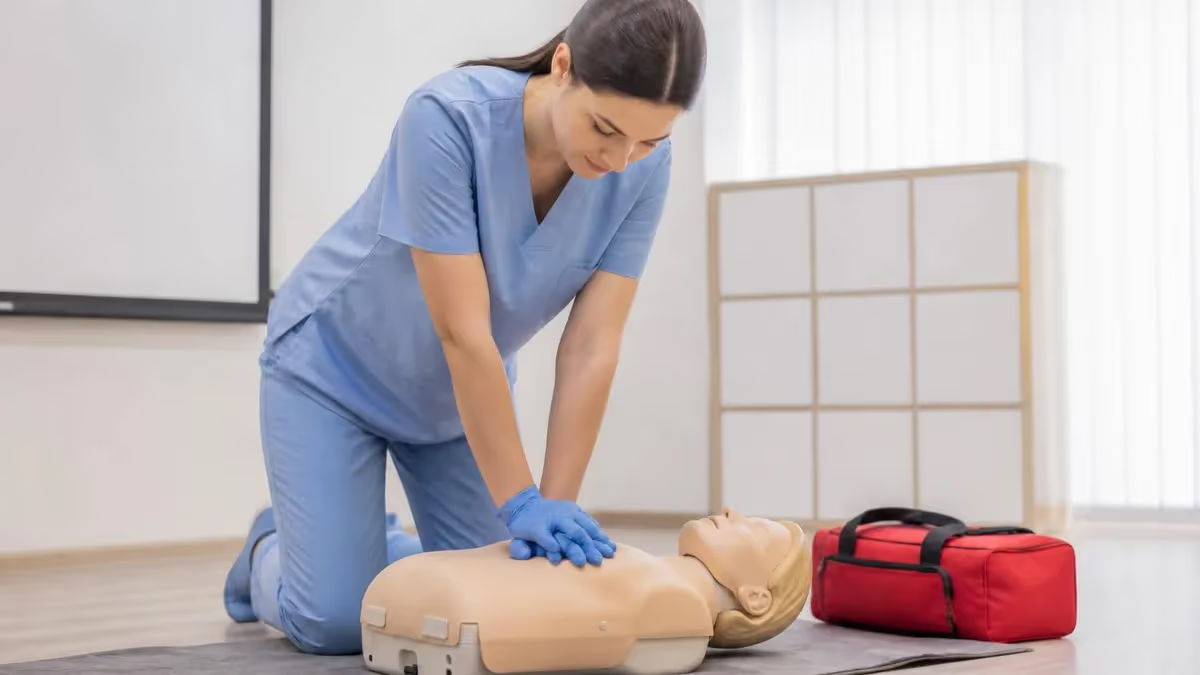
Correct hand placement for cpr is the single most important mechanical factor that separates effective chest compressions from compressions that fail to circulate blood. When a cardiac arrest occurs, every second without adequate circulation causes brain cells to die, so knowing exactly where to position your hands before you even begin can mean the difference between life and death. The American Heart Association, the National CPR Foundation, and every major resuscitation body in the United States agree that improper hand placement is one of the top correctable errors rescuers make in the field.
The ACLS algorithm — Advanced Cardiovascular Life Support — provides a structured, evidence-based framework that healthcare providers follow during cardiac emergencies. While the algorithm covers far more than hand positioning alone, the foundational step of every cycle is high-quality CPR, which begins with correct hand placement. Understanding where and how to place your hands ensures that your compressions actually compress the lower half of the sternum, creating enough intrathoracic pressure to push oxygenated blood toward the brain and vital organs.
Many people confuse the requirements for adult CPR, child CPR, and infant CPR, leading to dangerous technique errors. Adult patients require a two-handed technique with the heel of the dominant hand placed on the center of the chest, directly on the lower half of the sternum. Children between one and eight years old may be resuscitated with one or two hands depending on the child's size. Infants under one year require only two fingers placed just below the nipple line, reflecting the dramatically smaller anatomy and the risk of injury from excessive force.
Life support training — whether basic BLS, intermediate PALS certification (Pediatric Advanced Life Support), or advanced ACLS — always begins with mastering hand placement because every other skill builds on this foundation. Respiratory rate, compression depth, and recoil all interact with positioning to determine the effectiveness of each compression cycle. A rescuer who places hands even one inch too high risks compressing the upper sternum rather than the lower half, dramatically reducing cardiac output and wasting precious minutes during a cardiac emergency.
Beyond the immediate physical technique, understanding the anatomy behind hand placement helps rescuers adapt when conditions are imperfect. Obese patients, pregnant women, patients with barrel chests or skeletal deformities, and patients on soft surfaces all require technique adjustments. Knowing why the heel of the hand goes where it does — directly over the ventricles, optimizing pressure transfer — gives rescuers the reasoning framework to adapt correctly rather than mechanically following a memorized rule that breaks down at the edges.
This guide covers every dimension of CPR hand placement: adult technique, pediatric technique, infant technique, two-thumb encircling method, common errors and their consequences, and how hand placement integrates with the ACLS algorithm and broader life support protocols. Whether you are a first-time learner preparing for a certification exam, a seasoned nurse refreshing your skills, or a parent who wants to be ready for a family emergency, this resource will give you the precise, evidence-based guidance you need to act with confidence.
We also address related topics that rescuers frequently search for alongside hand placement, including what does AED stand for, how to use an automated external defibrillator after compressions, recovery position techniques, and the role of respiratory rate monitoring during two-rescuer CPR. By the end of this article, you will have a thorough, actionable understanding of one of the most critical skills in emergency medicine.
CPR Hand Placement by the Numbers
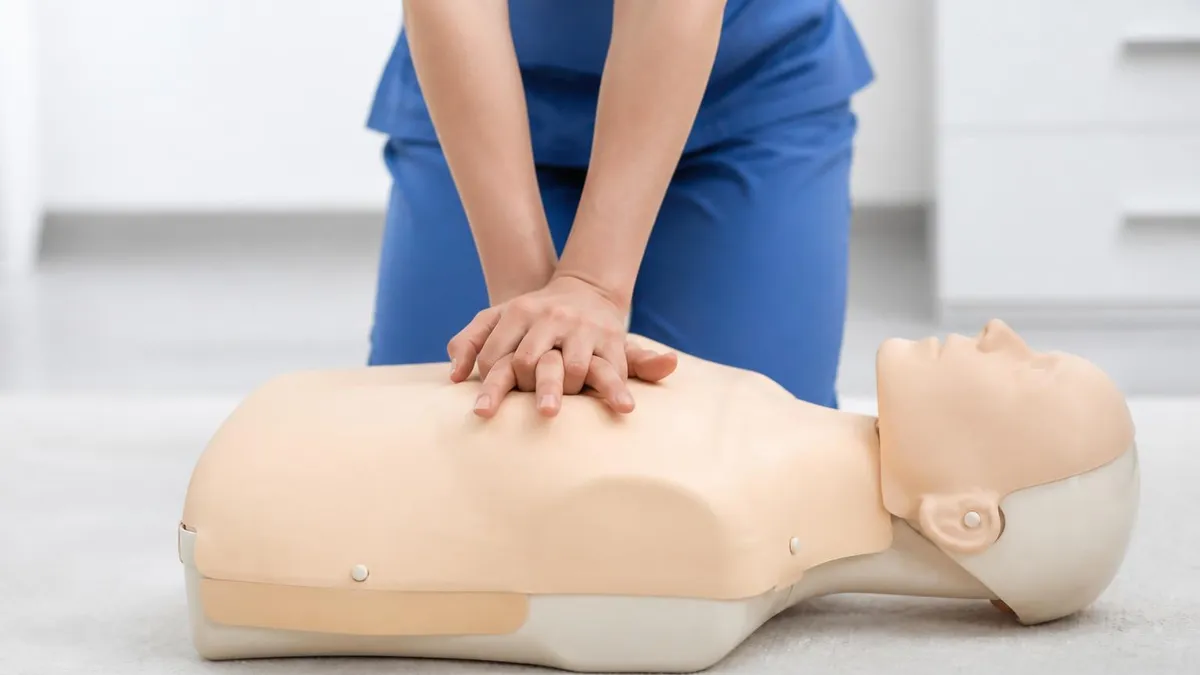
Step-by-Step CPR Hand Placement: Adult Technique
Confirm Scene Safety and Responsiveness
Position the Patient on a Firm, Flat Surface
Find the Lower Half of the Sternum
Stack and Interlace Both Hands
Position Your Body for Maximum Force Transfer
Compress and Allow Full Chest Recoil
Adult CPR hand placement follows the two-handed stacked technique described above, but significant anatomical differences between adults, children, and infants require completely different approaches for younger patients. The National CPR Foundation and the American Heart Association make clear distinctions in their certification curricula, and understanding these distinctions is critical for anyone pursuing PALS certification or working in environments where patients of all ages may require emergency intervention.
For children between one year and puberty, rescuers may use either one or two hands depending on the child's body size. A large eight-year-old may require the full adult two-handed technique to achieve adequate compression depth, while a small two-year-old can be effectively compressed with a single hand. Regardless of the number of hands used, the landmark remains the same: the lower half of the sternum, avoiding the xiphoid process. Target compression depth for children is at least one-third the anterior-posterior diameter of the chest, roughly two inches in most children.
Infant CPR — for patients under one year of age — requires the most significant technique modification. For a single rescuer, the standard technique uses two fingers (typically the middle and index fingers of the dominant hand) placed on the sternum just below the nipple line. This positioning targets the same anatomical landmark — the lower half of the sternum — but uses minimal force appropriate for the infant's fragile ribcage. Target depth is at least 1.5 inches, approximately one-third of the infant's chest depth.
When two trained rescuers are present for infant CPR, the preferred technique shifts to the two-thumb encircling method. Both rescuers place their thumbs side by side on the lower half of the sternum while the fingers of both hands wrap completely around the infant's torso, supporting the back. This technique generates higher peak aortic pressure and better coronary perfusion pressure than the two-finger method, making it the preferred approach in hospital settings and during PALS certification scenarios.
The recovery position is a related but distinct skill used after a patient regains consciousness or begins breathing normally. In the recovery position, the patient is rolled onto their side to prevent aspiration of vomit or secretions while maintaining an open airway. Understanding when to transition from compressions to the recovery position — and back again if breathing stops — is a key competency tested in both basic CPR courses and advanced ACLS algorithm training. The position recovery decision integrates directly with pulse and breathing checks performed every two minutes during CPR cycles.
Respiratory rate monitoring becomes relevant during two-rescuer CPR when one rescuer manages the airway while the other performs compressions. During CPR with an advanced airway in place (such as an endotracheal tube or supraglottic device), the compression-to-breath ratio changes from 30:2 to continuous compressions at 100–120 per minute with one breath every 6 seconds — a respiratory rate of approximately 10 breaths per minute. Exceeding this respiratory rate causes hyperventilation, which raises intrathoracic pressure, reduces venous return, and worsens cardiac output during resuscitation.
Knowing what does AED stand for — Automated External Defibrillator — and how to integrate AED use with correct hand placement is equally important. When an AED arrives, compressions should continue until the device is ready to analyze. After delivering a shock, immediately resume compressions with correct hand placement without waiting to recheck the pulse. The AED pads are positioned on the right upper chest and the left lateral chest, and they must not interfere with hand placement during compressions between shock cycles. This seamless integration of compressions and defibrillation is drilled extensively in ACLS algorithm training.
CPR Practice Test Questions
Prepare for the CPR Cardiopulmonary Resuscitation Practice exam with our free practice test modules. Each quiz covers key topics to help you pass on your first try.
CPR Basic CPR
CPR Exam Questions covering Basic CPR. Master CPR Test concepts for certification prep.
CPR and First Aid
Free CPR Practice Test featuring and First Aid. Improve your CPR Exam score with mock test prep.
CPR (Cardiopulmonary Resuscitation) Adult ...
CPR Mock Exam on (Cardiopulmonary Resuscitation) Adult CPR and AED Usage. CPR Study Guide questions to pass on your first try.
CPR (Cardiopulmonary Resuscitation) Airway...
CPR Test Prep for (Cardiopulmonary Resuscitation) Airway Obstruction and Choking. Practice CPR Quiz questions and boost your score.
CPR (Cardiopulmonary Resuscitation) Cardio...
CPR Questions and Answers on (Cardiopulmonary Resuscitation) Cardiopulmonary Emergency Recognition. Free CPR practice for exam readiness.
CPR (Cardiopulmonary Resuscitation) Child ...
CPR Mock Test covering (Cardiopulmonary Resuscitation) Child and Infant CPR. Online CPR Test practice with instant feedback.
CPR (Cardiopulmonary Resuscitation) High-P...
Free CPR Quiz on (Cardiopulmonary Resuscitation) High-Performance Team Dynamics. CPR Exam prep questions with detailed explanations.
CPR (Cardiopulmonary Resuscitation) Legal ...
CPR Practice Questions for (Cardiopulmonary Resuscitation) Legal and Ethical Considerations. Build confidence for your CPR certification exam.
CPR for Specific Populations
CPR Test Online for for Specific Populations. Free practice with instant results and feedback.
CPR Airway & Breathing Management
CPR Exam Questions covering Airway & Breathing Management. Master CPR Test concepts for certification prep.
CPR Assessment & Recognition of Cardiac Ar...
Free CPR Practice Test featuring Assessment & Recognition of Cardiac Arrest. Improve your CPR Exam score with mock test prep.
CPR Chest Compressions & Defibrillation
CPR Mock Exam on Chest Compressions & Defibrillation. CPR Study Guide questions to pass on your first try.
CPR Post-Resuscitation Care & Recovery
CPR Test Prep for Post-Resuscitation Care & Recovery. Practice CPR Quiz questions and boost your score.
ACLS Algorithm Integration with Hand Placement and Life Support
The ACLS algorithm — with a search volume of 22,200 monthly queries — is the systematic decision framework used by healthcare providers to manage cardiac arrest, stroke, and other cardiovascular emergencies. At its core, every cycle of the ACLS algorithm begins with high-quality CPR, meaning correct hand placement, adequate depth, full recoil, and minimal interruptions. Compressions must pause for no more than 10 seconds for any intervention, including rhythm checks, pulse checks, and intubation attempts, to maximize coronary perfusion pressure during resuscitation.
The algorithm branches based on cardiac rhythm: shockable rhythms (ventricular fibrillation and pulseless ventricular tachycardia) receive immediate defibrillation followed by two minutes of CPR, while non-shockable rhythms (pulseless electrical activity and asystole) are managed with continuous CPR and epinephrine every 3–5 minutes. In both pathways, the quality of chest compressions — anchored entirely by correct hand placement — is the primary determinant of whether enough blood reaches the brain and coronary arteries to create a viable window for return of spontaneous circulation.
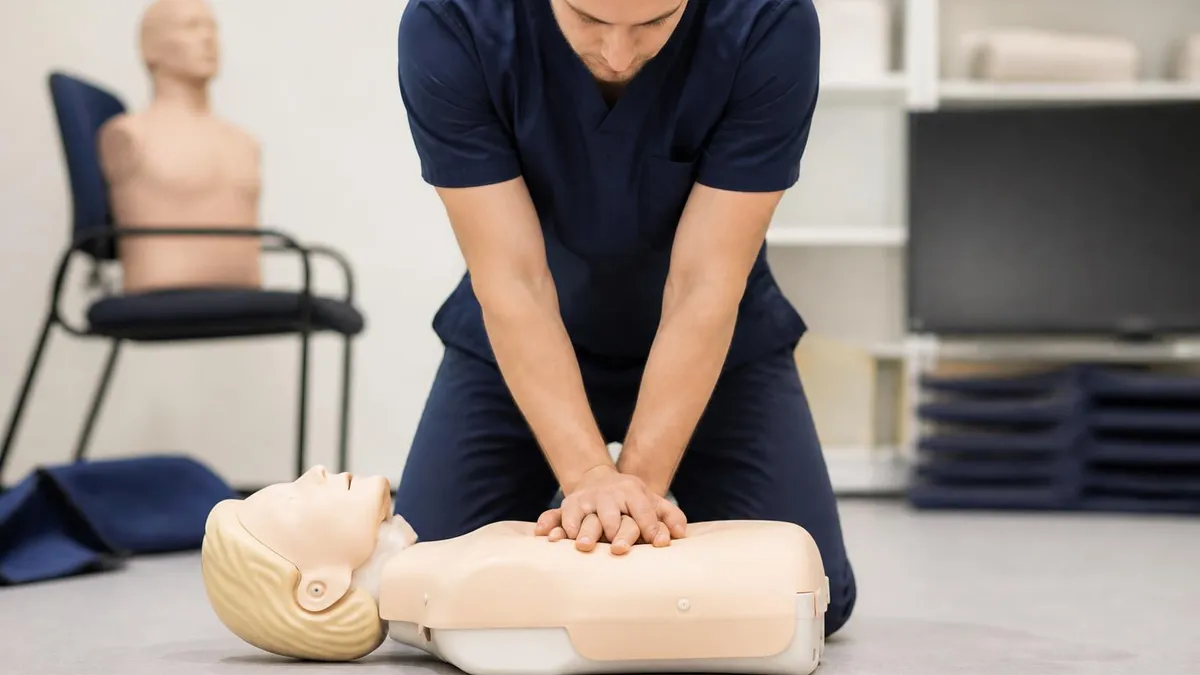
Two-Handed vs. One-Handed CPR: When Each Technique Is Appropriate
- +Two-handed technique delivers greater compression depth in adults and large children, meeting the 2-inch minimum requirement reliably
- +Stacked hand position concentrates force through the heel, reducing rib fractures compared to flat-palm contact
- +Interlaced fingers prevent accidental pressure on ribs and xiphoid during high-rate compressions
- +Two-handed compressions better sustain adequate depth as rescuer fatigue sets in after 90–120 seconds
- +Vertical body-weight alignment with two hands allows even smaller rescuers to generate sufficient force on larger patients
- +Two-handed technique is universally applicable across all adult and large-child scenarios, reducing cognitive load during high-stress emergencies
- −Two-handed technique can cause excessive compression depth (more than 2.4 inches) on small adults, risking internal injury
- −Requires both hands, making it impossible to simultaneously manage airway or hold mask during single-rescuer CPR
- −Rescuer arm fatigue accumulates faster with two-handed technique during prolonged resuscitation without rotation
- −Improper interlacing can cause wrist strain and compromise technique quality after 3–4 minutes of continuous compressions
- −Two hands make it harder to quickly transition to AED pad placement without losing the correct sternal landmark
- −For infants and small children, two hands cover too large an area and compress the wrong anatomical structures
CPR Hand Placement Checklist: Verify Before Every Compression Cycle
- ✓Confirm the patient is on a firm, flat surface before beginning compressions — never on a mattress or couch.
- ✓Locate the xiphoid process and place the heel of your dominant hand one inch above it on the lower sternum.
- ✓Stack your non-dominant hand on top and interlace fingers to lift them off the chest wall.
- ✓Lock both elbows straight and align your shoulders directly above your hands for maximum force transfer.
- ✓Confirm compression depth reaches at least 2 inches but does not exceed 2.4 inches on adult patients.
- ✓Allow complete chest recoil after every compression — do not lean on the chest between pushes.
- ✓Maintain a rate of 100–120 compressions per minute using a timer, metronome app, or song with the right tempo.
- ✓Limit all interruptions in compressions to under 10 seconds for pulse checks, rhythm checks, and airway interventions.
- ✓Switch compressor roles every 2 minutes to prevent fatigue-related decline in compression quality.
- ✓For infants, transition to two-finger or two-thumb encircling technique immediately — never use the adult two-handed method.
The Lower Half of the Sternum Is Not Optional
Studies using manikin simulations and clinical data consistently show that hand placement errors are among the most common and most correctable CPR mistakes. Placing the heel of the hand even 2–3 centimeters too high shifts compression force away from the ventricles, reducing cardiac output by up to 30%. During every AHA-accredited CPR training, instructors specifically evaluate landmark identification because this single variable has the greatest impact on whether the patient survives to hospital discharge.
Common hand placement errors fall into several predictable categories, each with distinct consequences for the patient. The most frequent mistake is placing the hands too high on the sternum — over the manubrium or the sternal body above the midpoint. This error is especially common among new rescuers who confuse the center of the sternum with the center of the chest.
The center of the chest anatomically corresponds to the midpoint of the sternum, but the correct compression landmark is specifically the lower half, not the midpoint. Compressions applied to the upper sternum fail to compress the ventricles effectively and increase the risk of sternal fractures in elderly patients.
The second most common error is compressing over the xiphoid process — the cartilaginous tip at the very bottom of the sternum. Xiphoid compressions create very little cardiac output because this structure does not overlie the ventricles. Far more dangerously, the xiphoid can snap off under repeated compression force and lacerate the liver, causing life-threatening internal hemorrhage. This is precisely why all CPR training emphasizes placing the heel one full inch above the xiphoid rather than directly on the lowest palpable point of the sternum.
Off-center compression — where the heel drifts to the left or right of the sternum's midline — is another significant error pattern. Lateral drift causes inefficient force transfer to the cardiac chambers and increases the probability of rib fractures because rib cartilage, not the sternum itself, absorbs the compressive load when alignment is off-center. During the inevitable fatigue that sets in after 90 seconds of solo compressions, lateral drift becomes more common as shoulder muscles weaken and body posture degrades. This is one of the strongest arguments for switching compressors every two minutes during two-rescuer CPR.
Leaning on the chest between compressions — failing to allow full recoil — is a subtler but equally dangerous error. When the rescuer's hands maintain even slight downward pressure between compressions, intrathoracic pressure remains elevated, venous return to the right heart is impaired, and coronary perfusion pressure falls dramatically. Studies have shown that even 30% leaning (maintaining roughly one-third of compression depth between beats) can reduce coronary perfusion pressure below the threshold needed to sustain myocardial viability. Many rescuers lean without realizing it, especially when fatigued, which is another reason the two-minute rotation rule is critical.
Inconsistent compression depth — where the rescuer delivers some compressions at adequate depth but allows others to be shallow — creates an uneven perfusion pattern that is worse than consistently shallow compressions in some respects. During cardiac arrest, the heart requires sustained pressure to maintain any perfusion pressure gradient. Alternating between adequate and inadequate depth causes perfusion pressure to cycle up and down, never building the sustained gradient needed to push blood through the coronary arteries against resistance. Maintaining body-weight-driven, locked-elbow technique throughout every compression is the only reliable way to eliminate this error.
Excessive compression depth — going beyond 2.4 inches in adults — is less discussed but documented as a real risk, particularly in small adults, women, and elderly patients with osteoporotic bones. Excessive depth increases the probability of rib fractures, flail chest, pneumothorax, and cardiac contusion. While a fractured rib during CPR does not necessarily indicate incorrect technique (ribs do fracture in some percentage of even correctly performed resuscitations), consistent cracking sounds accompanied by resistance changes should prompt a rescuer to reassess hand placement and body weight distribution.
Finally, poor body mechanics — performing compressions with bent elbows or with the rescuer's body off to one side rather than directly over the patient — converts the compression motion from a vertical body-weight-driven push into a horizontal arm press. Not only does this dramatically increase arm fatigue, it also makes it nearly impossible to sustain compression depth after the first 60–90 seconds. Correct posture, with both arms straight and shoulders stacked above the sternum, is not merely a formality — it is the biomechanical foundation that makes sustained, high-quality compressions physically possible for a non-superhuman rescuer.
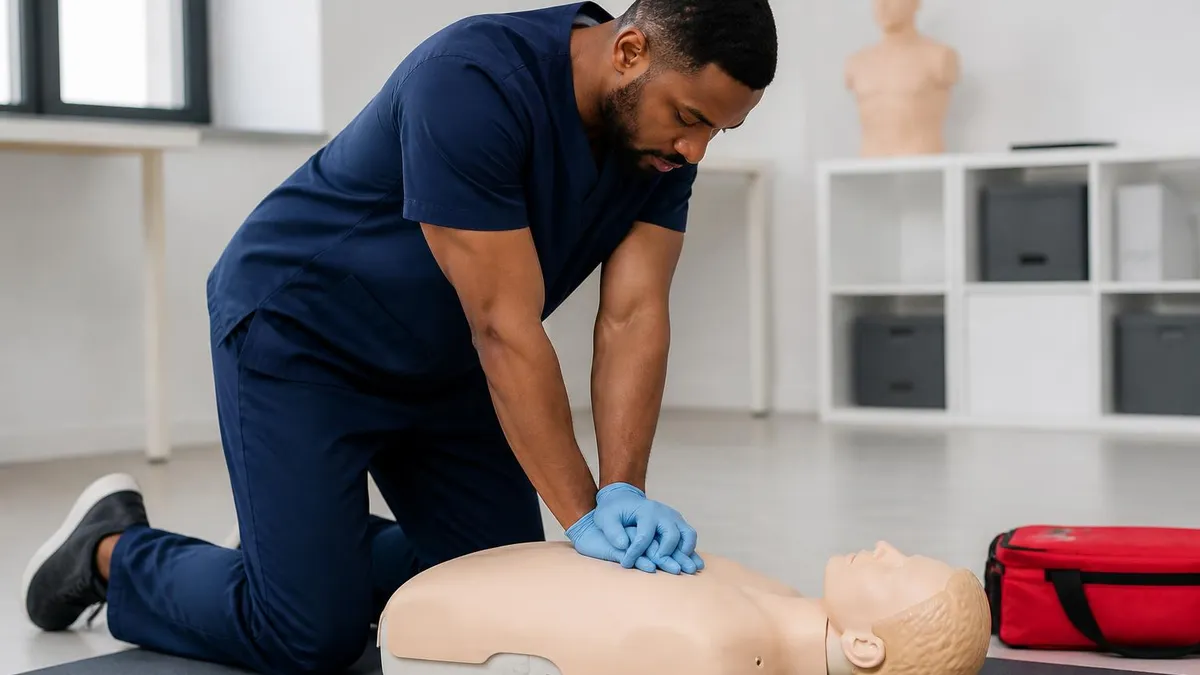
For every minute of cardiac arrest without CPR, survival rates decrease by approximately 7–10%. Pausing compressions for more than 10 seconds — even to check for a pulse or prepare for intubation — allows coronary perfusion pressure to drop to near zero, requiring 15–30 subsequent compressions just to rebuild the pressure needed to resume effective perfusion. The AHA's 2020 guidelines explicitly recommend minimizing hands-off time above all other technique considerations during cardiac arrest resuscitation.
CPR certification in the United States is offered through several major organizations, each with its own curriculum structure, renewal requirements, and target audience. The American Heart Association (AHA) is the largest certifying body and offers BLS (Basic Life Support), ACLS, and PALS certifications used by the vast majority of healthcare professionals. The National CPR Foundation offers online CPR certification that is accepted by many employers and meets OSHA guidelines for workplace safety training. Red Cross CPR certification is widely accepted for childcare, education, and community volunteer contexts.
The National CPR Foundation specifically emphasizes hands-on skill demonstration alongside written testing, recognizing that reading about hand placement and actually performing it correctly under pressure are entirely different competencies. Their curriculum requires candidates to demonstrate correct sternal landmark identification, proper hand stacking, adequate compression depth, full recoil, and correct rate during a timed compression evaluation. Many online certifications offered through the National CPR Foundation can be completed in two to four hours and include video instruction specifically covering hand positioning for each age group.
PALS certification requires familiarity with the pediatric chain of survival and the age-specific modifications to hand placement described throughout this article. The two-day PALS course covers assessment-based management, systematic approach to the pediatric patient, rhythm recognition, and pharmacology in addition to hands-on skills. Candidates must pass both a written examination (typically 50 questions with a passing score of 84%) and multiple hands-on megacode scenarios where hand placement errors are immediately flagged by an AHA-certified instructor.
ACLS algorithm certification, required for most emergency department nurses, critical care nurses, paramedics, and physicians, places hand placement in the context of a complete resuscitation team. During ACLS megacode testing, one team member manages compressions while others handle airway, IV access, medication administration, and rhythm interpretation. The compressor role rotates every two minutes, and each incoming compressor must immediately identify the correct sternal landmark without disrupting the team's rhythm or allowing interruption time to exceed 10 seconds. This high-pressure scenario testing reveals hand placement deficiencies that written tests cannot detect.
Renewal requirements vary by certification level and organization. AHA BLS certification is valid for two years, while ACLS and PALS certifications also carry two-year validity periods. Many healthcare employers require recertification before expiration and mandate skills verification in addition to written testing during renewal. The National CPR Foundation offers two-year certifications with optional annual blended-learning modules that include updated hand placement guidance when AHA guidelines are revised, as they were most recently in 2020.
For layperson rescuers — the overwhelming majority of people who perform bystander CPR — the most accessible entry point is a Heartsaver CPR/AED course through the AHA or a community CPR class through the Red Cross or National CPR Foundation. These courses typically last two to four hours, cover adult, child, and infant hand placement, and include AED training. Research consistently shows that bystander CPR — when performed by someone who has taken even a basic certification course — more than doubles survival rates compared to no CPR at all while waiting for emergency medical services to arrive.
Many employers in healthcare, education, childcare, and public safety require current CPR certification as a condition of employment, making certification both a life-saving skill and a professional necessity. The investment of a few hours in a hands-on course — where an instructor can immediately correct hand placement errors that self-study cannot reveal — pays dividends in both workplace compliance and genuine emergency preparedness. Whether you pursue certification through the National CPR Foundation, the AHA, or the Red Cross, prioritizing the in-person skills component is the single most important decision you can make about your CPR training.
Practical preparation for real-world CPR situations goes well beyond memorizing the correct hand placement landmark. Research in emergency medicine consistently shows that skill degradation begins within weeks of certification if there is no ongoing practice. Compression quality — including correct hand placement, adequate depth, and full recoil — degrades measurably within three to six months without reinforcement. The most effective countermeasure is brief, frequent practice on a CPR manikin rather than annual recertification alone.
Many healthcare facilities now deploy mini-manikins, CPR skill reporter devices, and manikin apps that provide real-time feedback on compression depth, rate, and recoil during brief practice sessions. These tools allow nurses, physicians, and emergency responders to spend five minutes per week on compression skill practice, which research shows effectively maintains technique quality between formal certifications. For lay rescuers, community access manikin programs at fire stations, libraries, and community centers provide similar opportunities for free ongoing practice.
Mental rehearsal is a surprisingly effective complement to physical practice for hand placement specifically. Visualizing the correct sequence — locate xiphoid, position heel one inch above it, stack hands, interlace fingers, straighten arms, align body over hands, begin compressions — creates neural pathways that activate under stress. Sports psychology research consistently shows that mental rehearsal of specific motor sequences improves performance under pressure conditions similar to what rescuers experience during a real cardiac arrest.
Equipment factors also influence hand placement effectiveness. Loose clothing over a patient's chest should be cut away or pulled aside to allow accurate landmark identification and prevent fabric bunching that raises the hands above the correct sternal contact point. For patients wearing bras or restrictive undergarments, cutting is faster and more reliable than removal. AED pads placed correctly will not interfere with hand placement during subsequent compression cycles, but rescuers should verify that pad placement does not shift their sternal landmark reference point.
Surface matters more than most lay rescuers appreciate. A study published in Resuscitation found that compressions performed on a mattress delivered only 60–70% of the intended force to the patient's sternum, with the remainder absorbed by the compliant mattress surface. Hospital backboards, CPR boards, and even placing the patient on the floor immediately when feasible can dramatically improve effective compression depth without changing hand placement technique at all. In field settings — parking lots, sidewalks, grassy areas — surface quality is rarely a limiting factor, but in homes, the kitchen or bathroom floor is always preferable to a bed.
Temperature extremes can affect hand grip and body mechanics during outdoor CPR. In cold environments, gloved hands may reduce tactile sensitivity needed to identify sternal landmarks accurately. In heat, sweat can cause the hands to slip during compressions. Carrying a pocket mask or CPR barrier device — which most modern certification cards fit into a wallet-sized case — ensures that airway management remains possible even when hands are compromised by environmental conditions, though hands-only CPR without breaths remains highly effective for adult cardiac arrest in the first several minutes.
Finally, understanding when not to perform CPR — or when to stop — is as important as knowing correct technique. Obvious signs of irreversible death (rigor mortis, dependent lividity, decapitation, or a valid do-not-resuscitate order) should prevent initiation of compressions.
In community settings, termination of resuscitation is generally at the discretion of arriving EMS personnel, but lay rescuers should continue until relieved by professional responders, an AED advises no shock and the patient shows signs of life, or the rescuer is physically unable to continue safely. Correct hand placement throughout the entire resuscitation — not just the first minute — is what gives every patient the best possible chance of survival.
CPR Questions and Answers

CPR Courses: Complete Guide to ACLS Algorithm, PALS Certification, and Life Support Training in 2026
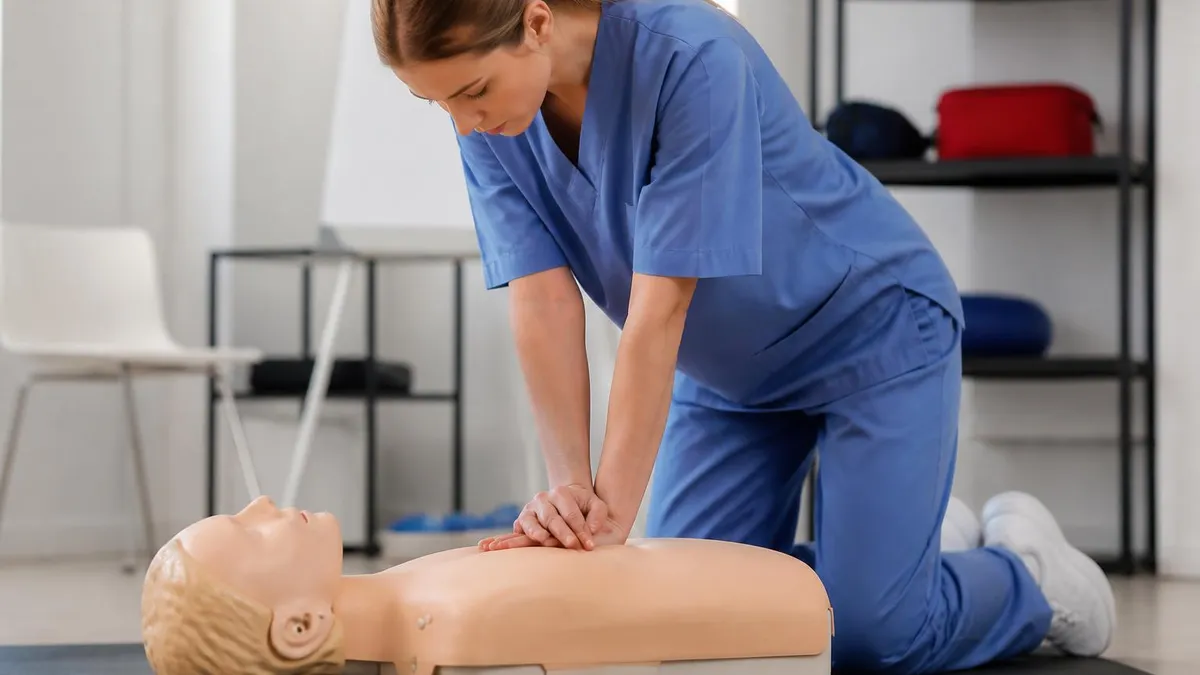
Types of CPR Training: From Basic Life Support to ACLS Algorithm Mastery in 2026
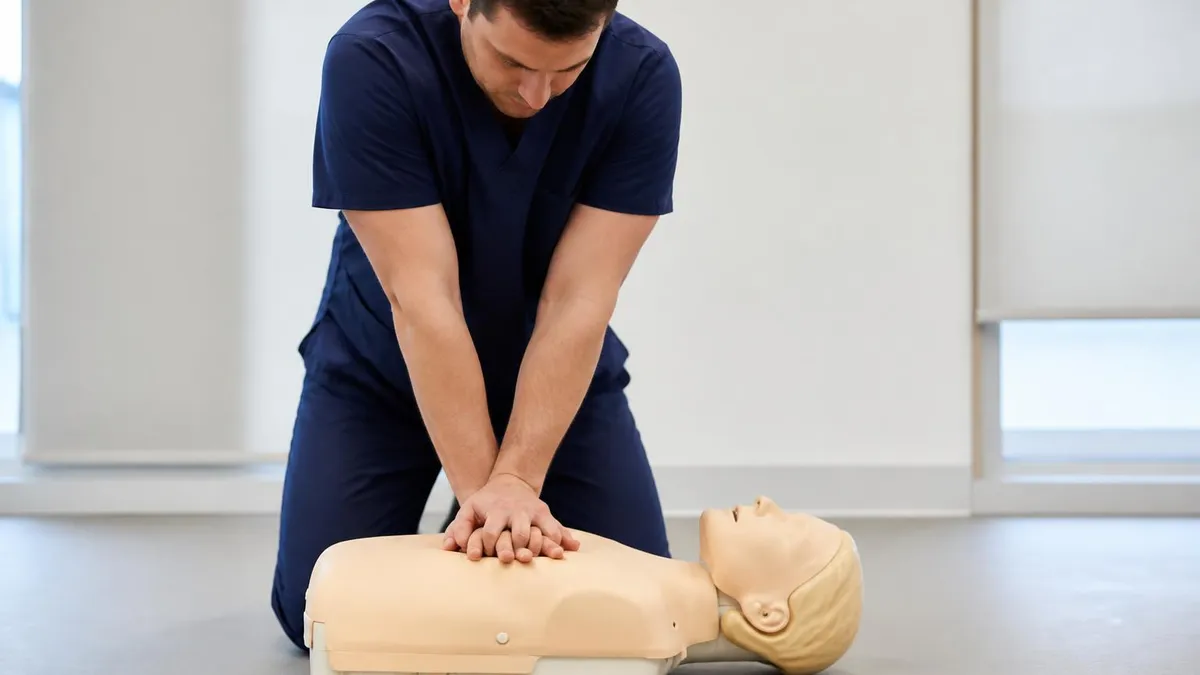
BLS vs CPR: Is BLS the Same as CPR? Complete 2026 Guide
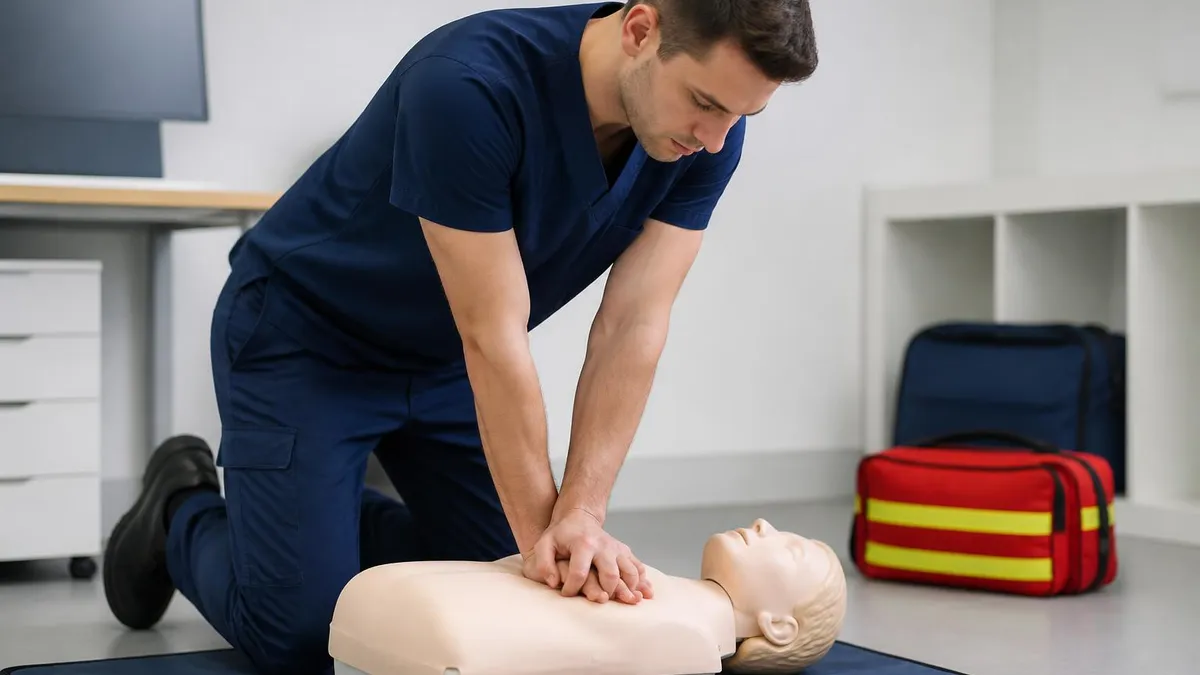
Adult CPR: Complete Step-by-Step Guide to Hands-Only and Standard CPR in 2026
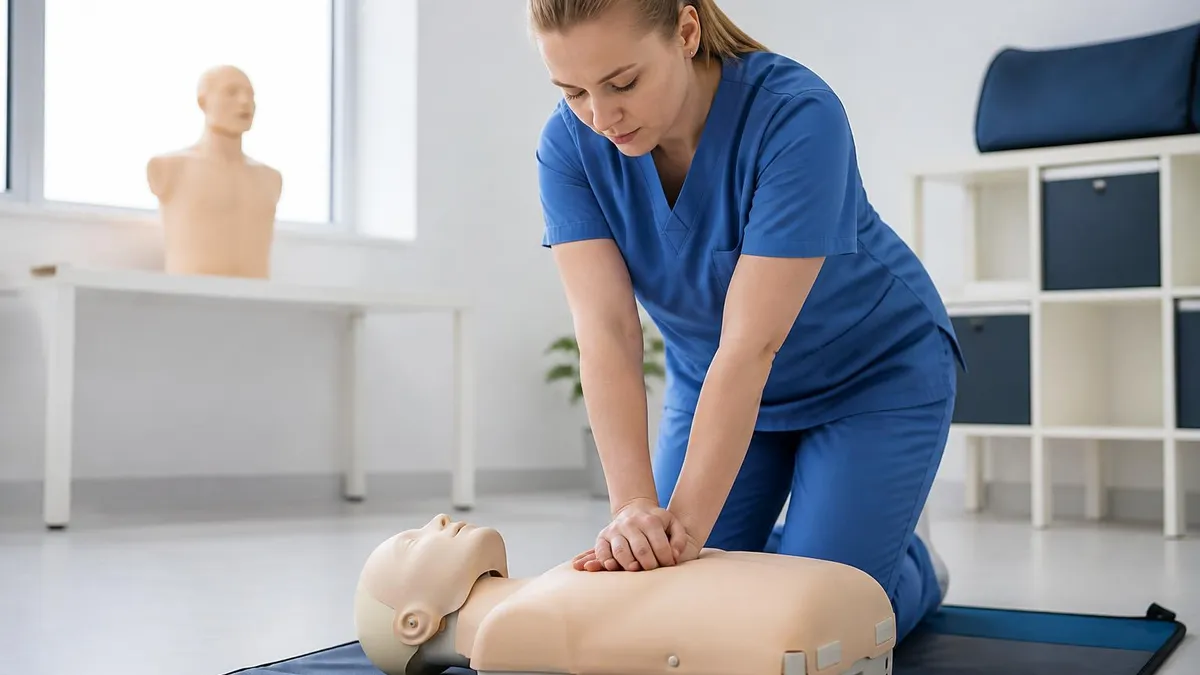
Free CPR Training: Complete Guide to ACLS Algorithm, PALS Certification, and Life Support Skills in 2026
About the Author

Registered Nurse & Healthcare Educator
Johns Hopkins University School of NursingDr. Sarah Mitchell is a board-certified registered nurse with over 15 years of clinical and academic experience. She completed her PhD in Nursing Science at Johns Hopkins University and has taught NCLEX preparation and clinical skills courses for nursing students across the United States. Her research focuses on evidence-based exam preparation strategies for healthcare certification candidates.
Join the Discussion
Connect with other students preparing for this exam. Share tips, ask questions, and get advice from people who have been there.
View discussion (5 replies)