
Steps to Give CPR: Complete Step-by-Step Guide to Performing Lifesaving CPR in 2026 September
Learn the exact steps to give CPR for adults, children, and infants. 🎯 ACLS algorithm, compression depth, AED use, and rescue breaths explained.
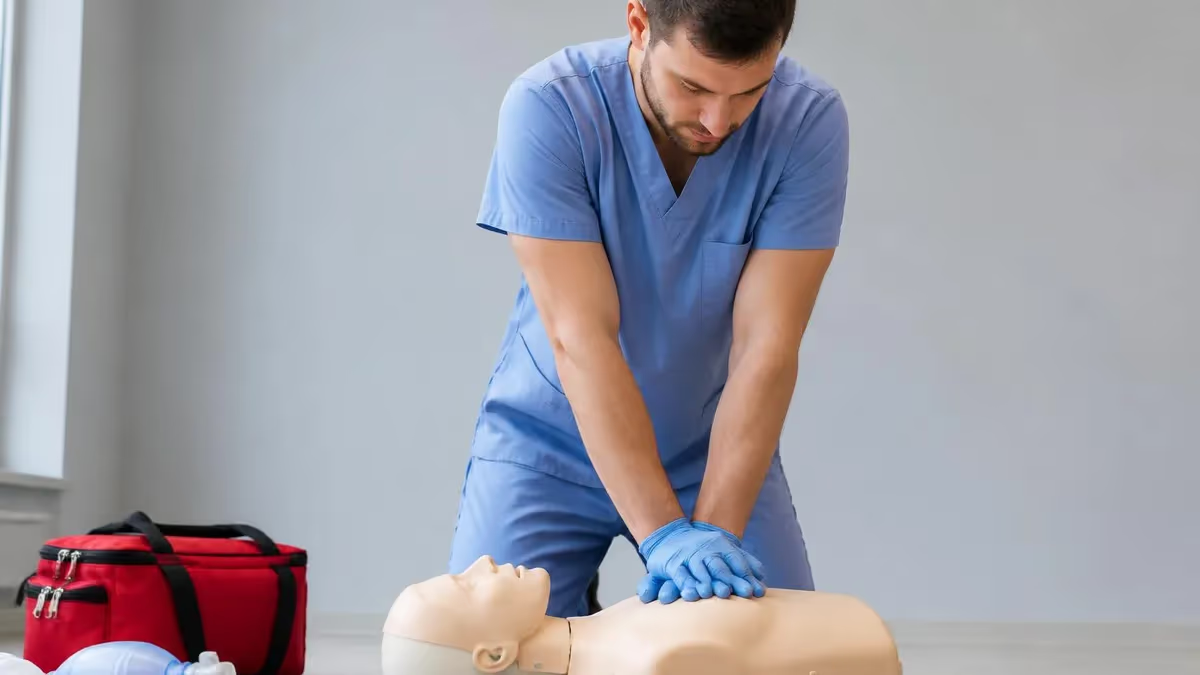
Knowing the steps to give CPR can mean the difference between life and death when sudden cardiac arrest strikes. Cardiopulmonary resuscitation is a manual emergency technique that keeps oxygenated blood circulating to the brain and vital organs until advanced life support arrives. The American Heart Association estimates that immediate bystander CPR can double or even triple a victim's chance of survival, yet only about 40 percent of out-of-hospital arrest victims receive it before paramedics get there.
The current adult resuscitation framework follows the C-A-B sequence: Compressions, Airway, Breathing. This order replaced the older A-B-C approach because early, hard, and fast chest compressions are the single most important intervention for restoring circulation. The acls algorithm built on top of CPR adds rhythm analysis, defibrillation, and medications, but every advanced protocol still depends on uninterrupted high-quality compressions delivered at 100 to 120 per minute and at least two inches deep on an adult chest.
This guide walks through every step you need to perform CPR confidently on an adult, a child, or an infant. We cover scene safety, recognition of cardiac arrest, hand placement, compression depth and rate, ventilation ratios, AED operation, and the recovery position used once a pulse returns. You will also learn how to coordinate with 911 dispatchers, when to switch rescuers to avoid fatigue, and how respiratory rate factors into ventilation decisions during prolonged resuscitation efforts.
Whether you are studying for a basic life support card through the national cpr foundation, refreshing skills before a workplace audit, or preparing for pals certification in a pediatric setting, the underlying mechanics remain the same. Push hard. Push fast. Minimize interruptions. Use the AED as soon as it arrives. Continue cycles until the person shows signs of life or until emergency medical services formally take over the resuscitation effort with their team.
CPR is not complicated, but it is physically demanding and emotionally intense. Many first-time rescuers freeze when faced with an unconscious adult or, even worse, an unresponsive infant. The antidote to that freeze response is rehearsal. Reading the steps once is not enough. You must practice on a manikin, time your compressions to a beat, and verbalize each step aloud until the motions become automatic. That muscle memory is what carries you through the chaos of a real emergency.
Throughout this article, we reference compression depth in inches and centimeters, ventilation ratios for one and two rescuer scenarios, and the exact verbal cues used by 911 telecommunicators. By the end, you will have a clear, repeatable mental script for any sudden collapse, from a coworker in an office to a swimmer at a public pool to your own child at home. Bookmark this guide, share it with family members, and revisit it before your next certification renewal cycle.
CPR by the Numbers

Scene Safety and Cardiac Arrest Recognition
Check the Scene
Check for Response
Call 911 and Get an AED
Check Breathing
Begin Compressions
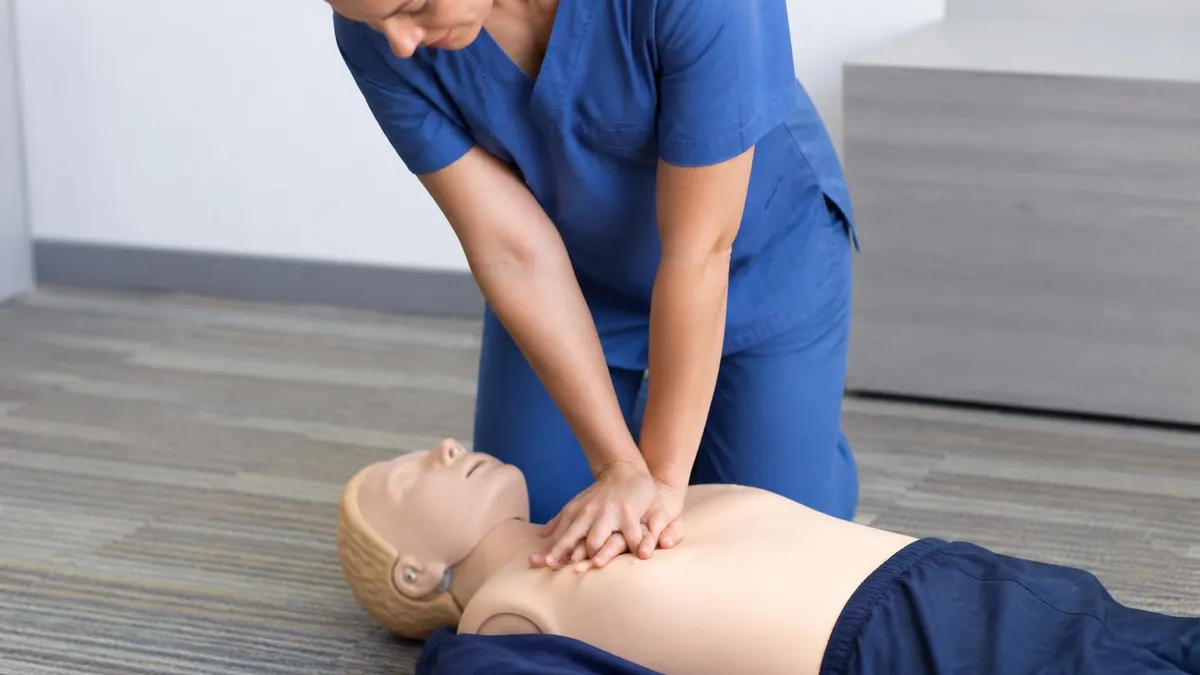
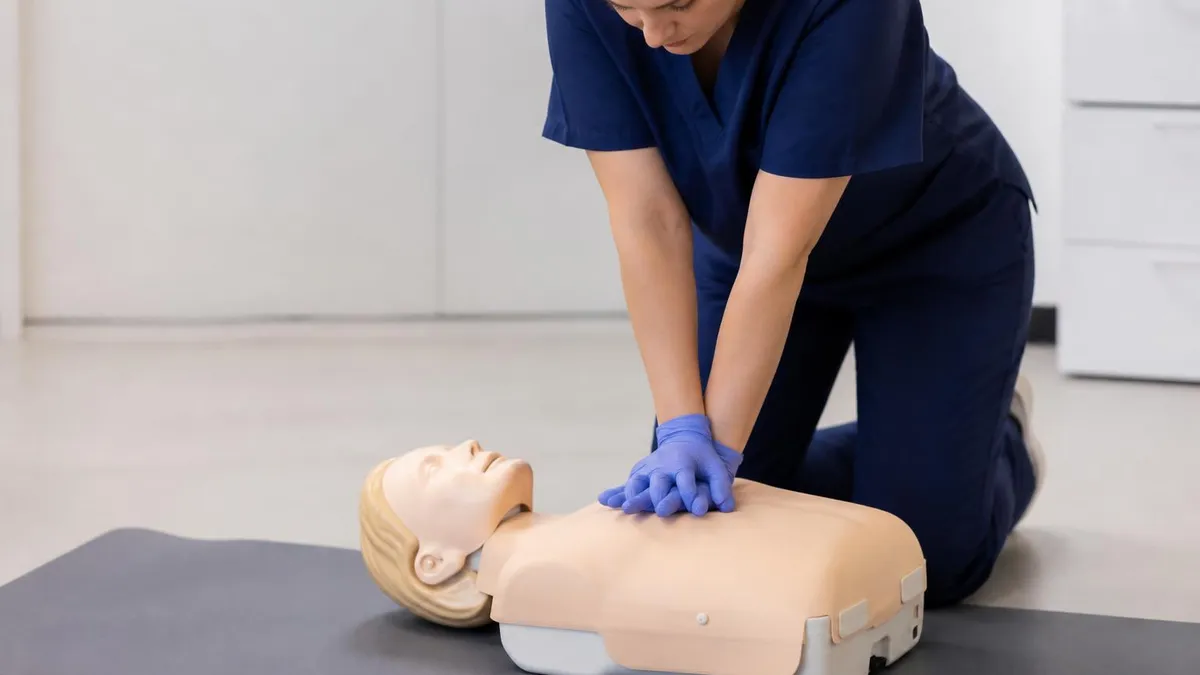
Once you have confirmed unresponsiveness, called 911, and verified that the victim is not breathing normally, you move into the compression phase. Kneel beside the chest with your knees shoulder-width apart for balance. Expose the chest if clothing is heavy or layered, because hand placement accuracy directly affects compression effectiveness and rib fracture risk. Locate the lower half of the sternum, roughly between the nipples on an adult male, and place the heel of your dominant hand there with fingers lifted off the ribs.
Stack your non-dominant hand on top, interlace the fingers, and lock both elbows so that your shoulders are directly over your hands. This straight-arm posture transfers your body weight efficiently through the heel of the hand and into the chest. Pushing with bent elbows fatigues you within ninety seconds and produces shallow compressions. Drive downward using your hips and core, not your biceps, and allow the chest to fully recoil between each compression so the heart can refill with blood.
The target depth for an adult is at least two inches, but no more than 2.4 inches. Going too shallow fails to generate adequate stroke volume. Going too deep, especially beyond 2.4 inches, increases the risk of broken ribs, sternal fractures, and damage to internal organs. The target rate is 100 to 120 compressions per minute. A useful mental metronome is the chorus of 'Stayin' Alive' by the Bee Gees, which clocks in at exactly 103 beats per minute and matches the lower end of the recommended cadence.
After thirty compressions, deliver two rescue breaths if you are trained and willing. Tilt the head back with one hand on the forehead and lift the chin with two fingers of the other hand. This opens the airway by moving the tongue away from the back of the throat. Pinch the nose closed, seal your mouth over the victim's mouth, and blow steadily for one second until the chest rises visibly. Allow the chest to fall, then deliver the second breath.
If you are untrained or unwilling to give breaths, hands-only CPR is officially endorsed for adult cardiac arrest. Continuous compressions without ventilations have been shown in multiple registries to produce survival outcomes equal to traditional CPR in the first several minutes of arrest, because residual oxygen remains in the bloodstream and lungs. The most important factor is that compressions never stop. Every interruption longer than ten seconds dramatically reduces coronary perfusion pressure and worsens survival odds.
Switch rescuers every two minutes, or every five cycles of thirty compressions and two breaths, to prevent fatigue from degrading compression quality. The transition should take less than five seconds. If you suspect you need a refresher on the full sequence, this guide pairs well with our deeper walkthrough of compression mechanics and hand positioning so you can audit your own technique before your next certification class. Continue cycles until the victim shows signs of life, an AED instructs you to stop, or EMS personnel formally take over.
Keep in mind that respiratory rate during CPR is governed by the compression cycle, not by your own breathing pattern. Each adult cycle delivers exactly two breaths per thirty compressions, producing an effective ventilation rate of roughly six to eight breaths per minute when an advanced airway is in place. Over-ventilating, either by blowing too forcefully or by delivering breaths too frequently, raises intrathoracic pressure and reduces venous return to the heart, which directly lowers the odds of return of spontaneous circulation.

CPR Practice Test Questions
Prepare for the CPR Cardiopulmonary Resuscitation Practice exam with our free practice test modules. Each quiz covers key topics to help you pass on your first try.
CPR Basic CPR
CPR Exam Questions covering Basic CPR. Master CPR Test concepts for certification prep.
CPR and First Aid
Free CPR Practice Test featuring and First Aid. Improve your CPR Exam score with mock test prep.
CPR (Cardiopulmonary Resuscitation) Adult ...
CPR Mock Exam on (Cardiopulmonary Resuscitation) Adult CPR and AED Usage. CPR Study Guide questions to pass on your first try.
CPR (Cardiopulmonary Resuscitation) Airway...
CPR Test Prep for (Cardiopulmonary Resuscitation) Airway Obstruction and Choking. Practice CPR Quiz questions and boost your score.
CPR (Cardiopulmonary Resuscitation) Cardio...
CPR Questions and Answers on (Cardiopulmonary Resuscitation) Cardiopulmonary Emergency Recognition. Free CPR practice for exam readiness.
CPR (Cardiopulmonary Resuscitation) Child ...
CPR Mock Test covering (Cardiopulmonary Resuscitation) Child and Infant CPR. Online CPR Test practice with instant feedback.
CPR (Cardiopulmonary Resuscitation) High-P...
Free CPR Quiz on (Cardiopulmonary Resuscitation) High-Performance Team Dynamics. CPR Exam prep questions with detailed explanations.
CPR (Cardiopulmonary Resuscitation) Legal ...
CPR Practice Questions for (Cardiopulmonary Resuscitation) Legal and Ethical Considerations. Build confidence for your CPR certification exam.
CPR for Specific Populations
CPR Test Online for for Specific Populations. Free practice with instant results and feedback.
CPR Airway & Breathing Management
CPR Exam Questions covering Airway & Breathing Management. Master CPR Test concepts for certification prep.
CPR Assessment & Recognition of Cardiac Ar...
Free CPR Practice Test featuring Assessment & Recognition of Cardiac Arrest. Improve your CPR Exam score with mock test prep.
CPR Chest Compressions & Defibrillation
CPR Mock Exam on Chest Compressions & Defibrillation. CPR Study Guide questions to pass on your first try.
CPR Post-Resuscitation Care & Recovery
CPR Test Prep for Post-Resuscitation Care & Recovery. Practice CPR Quiz questions and boost your score.
Infant CPR, Child CPR, and Adult CPR Compared
For anyone past puberty, use two hands stacked on the lower half of the sternum. Compress at least two inches deep but not beyond 2.4 inches, at a rate of 100 to 120 per minute. The single-rescuer ratio is 30 compressions to 2 breaths. With a second trained rescuer, the ratio remains 30:2 until an advanced airway is placed, at which point compressions become continuous.
Attach an AED as soon as it arrives. Adult pads go on the upper right chest and lower left side. Allow the device to analyze, then deliver a shock if advised. Resume compressions immediately after shock delivery. Do not perform a pulse check between cycles. Switch compressors every two minutes to maintain depth and recoil quality throughout the resuscitation.
Hands-Only CPR vs Traditional CPR with Breaths
- +Easier for untrained or uncertified bystanders to perform without hesitation
- +Eliminates barrier device concerns and infection transmission worries
- +Produces survival outcomes equal to traditional CPR in the first 4 to 6 minutes of adult sudden cardiac arrest
- +Maintains continuous coronary perfusion pressure without interruption for ventilation
- +Easier to coordinate over the phone with a 911 telecommunicator giving instructions
- +Reduces rescuer fatigue from the head-tilt and breath-delivery cycle
- −Not appropriate for arrests of respiratory origin such as drowning, overdose, or pediatric cases
- −Provides no supplemental oxygen once initial reserves in the lungs and blood are depleted
- −Less effective in prolonged arrests lasting longer than 6 to 8 minutes
- −Not recommended for infants, children, or any victim of suspected asphyxia
- −Bystanders may still tire quickly without proper compression technique training
- −Does not satisfy professional life support certification skill requirements

Complete Steps to Give CPR Checklist
- ✓Confirm the scene is safe for you, the victim, and bystanders before approaching
- ✓Tap the shoulders and shout to check for responsiveness from the victim
- ✓Call 911 immediately or direct a specific bystander to call by pointing at them
- ✓Request an AED be brought to the scene as quickly as possible
- ✓Check for normal breathing for no more than 10 seconds while observing the chest
- ✓Position the victim flat on a firm surface with the chest exposed for compressions
- ✓Place the heel of one hand on the lower half of the sternum with fingers lifted
- ✓Compress at least 2 inches deep at a rate of 100 to 120 per minute with full recoil
- ✓Deliver 2 rescue breaths after every 30 compressions if trained in ventilation
- ✓Attach AED pads as soon as it arrives and follow the device's voice prompts exactly
- ✓Switch compressors every 2 minutes to prevent fatigue and maintain depth quality
- ✓Continue cycles until EMS arrives, the victim moves, or you are physically unable to continue
Push Hard, Push Fast, Don't Stop
Every second without compressions reduces survival odds by roughly 10 percent. Even imperfect CPR is dramatically better than no CPR at all. If you are untrained or unsure, hands-only compressions at the beat of 'Stayin' Alive' will keep oxygenated blood reaching the brain until professional help arrives at the scene.
The automated external defibrillator, or AED, is the second pillar of out-of-hospital cardiac arrest survival. Many people ask what does aed stand for, and the answer is exactly that: an automated external defibrillator. It analyzes the heart rhythm and delivers a measured electrical shock to convert ventricular fibrillation or pulseless ventricular tachycardia back into a perfusing rhythm. CPR alone rarely restarts a heart in these rhythms; defibrillation is the definitive treatment, and every minute of delay drops survival by about ten percent.
When the AED arrives, power it on immediately and follow the voice prompts. Modern devices guide you through every step in plain English, including pad placement, rhythm analysis, and shock delivery. Wipe the chest dry, remove any medication patches, and shave excessive chest hair only if a razor is included in the kit and time allows. Place the upper pad on the right side of the chest just below the collarbone, and the lower pad on the left side just below the armpit at the mid-axillary line.
During rhythm analysis, ensure no one is touching the victim. The device will announce either 'shock advised' or 'no shock advised.' If a shock is advised, loudly call 'clear,' visually confirm everyone is back, and press the shock button. Immediately resume compressions without checking for a pulse. The AED will reanalyze every two minutes, which conveniently aligns with the recommended rescuer rotation interval.
The acls algorithm builds directly on this foundation by adding intravenous access, epinephrine every three to five minutes, antiarrhythmic medications like amiodarone or lidocaine for refractory ventricular fibrillation, and advanced airway management. Healthcare providers pursuing pals certification follow a parallel pediatric algorithm that emphasizes reversible causes such as hypoxia, hypovolemia, and hypothermia, which cause most pediatric arrests. Both algorithms still rely on the same high-quality basic life support layered underneath them.
One frequent point of confusion is the difference between life support certifications and unrelated services that share the CPR acronym. Searches for cpr cell phone repair and cpr phone repair refer to a national chain of mobile device repair shops, not to resuscitation training. Make sure you are enrolling with an accredited training organization such as the American Heart Association, American Red Cross, or the national cpr foundation when you sign up for a course, because employer audits and licensing boards only recognize cards from recognized providers.
Documentation matters as much as the skill itself in clinical settings. Healthcare providers must record the time of arrest, time of first compression, time of first shock, medications given, and the rhythm at each two-minute pulse check. This data feeds into quality improvement registries and helps hospitals track resuscitation performance over time. Even lay rescuers benefit from noting the time they began CPR and any observations about the victim's initial condition, since EMS providers will ask for this handoff information when they assume care of the patient.
Lay rescuers should never spend more than 10 seconds checking for a pulse. Even trained healthcare providers frequently misidentify the presence or absence of a pulse under stress. If the victim is unresponsive and not breathing normally, assume cardiac arrest and begin compressions immediately. The risk of compressing a beating heart is far lower than the risk of delaying CPR.
Once a victim regains a pulse and begins breathing on their own, your job transitions from active resuscitation to monitoring and protection. The recovery position is a stable, side-lying posture that keeps the airway open, prevents the tongue from blocking the throat, and allows fluids such as vomit or saliva to drain out of the mouth rather than into the lungs. Mastering the position recovery technique is just as important as compressions because aspiration after return of spontaneous circulation is a common cause of secondary cardiac arrest.
To place an adult into the recovery position, kneel beside them. Extend the arm closest to you above their head. Bring the far arm across their chest and place the back of their hand against the cheek nearest you. Bend the far knee up so the foot is flat on the floor. Gently roll the person toward you by pulling on the bent knee, and adjust the head so the airway remains open and the cheek supports the jaw. Continue to monitor breathing every minute until EMS arrives.
Pregnant victims should be placed on their left side to relieve pressure on the inferior vena cava from the gravid uterus. Trauma victims with suspected spinal injury require a modified high-arm in endangered spine, or HAINES, position to maintain cervical alignment while still protecting the airway. Children and infants follow the same general principles but may be cradled in the rescuer's arms in a head-down tilt if a flat surface is unavailable or unsafe.
Life support does not end when the ambulance arrives. Give the paramedics a concise handoff: time of collapse, witnessed or unwitnessed, what you did, AED shocks delivered, current responsiveness, and any medical history you know. This SAMPLE-style report helps the receiving team continue care without losing momentum. If you used a public AED, the device's memory card will contain the rhythm strip and shock log, which the hospital can download for the cardiology team.
Post-resuscitation care often includes targeted temperature management, where the patient is cooled to 32 to 36 degrees Celsius for 24 hours to reduce neurologic injury, along with coronary catheterization if a heart attack caused the arrest. Survivors typically spend several days in the intensive care unit and may need rehabilitation for cognitive or physical deficits. Knowing that your bystander CPR set this entire chain in motion is one of the most meaningful experiences a layperson can have.
Take care of yourself after the event. Performing CPR, especially on a family member or a child, is psychologically taxing. Many EMS systems and hospitals offer critical incident stress debriefing for bystanders involved in resuscitations. Talk with friends, a counselor, or your primary care provider if you experience intrusive thoughts, sleep disturbance, or anxiety. Compassionate self-care does not diminish the heroism of the act; it ensures you will be ready and willing to help the next time someone needs you.
Finally, treat every resuscitation as a learning opportunity. Replay the sequence in your mind: did you call 911 quickly enough, did you delay compressions for a pulse check, did your hands stay in the right position, did the AED pads adhere properly? Honest self-assessment, combined with regular refresher training every two years at minimum, is how good rescuers become great ones. The next person whose life you save may very well be someone you love.
Practical readiness comes from rehearsal, equipment, and mindset. Start by enrolling in a hands-on certification class taught by an instructor who watches your technique on a manikin with feedback technology. Online-only courses can teach knowledge, but only physical practice trains the muscles to push hard enough and fast enough without conscious effort. Plan to recertify every two years, since skill decay is well documented and most people lose competence within six to twelve months of their last course.
Equip your home, vehicle, and workplace with the basics: a CPR barrier mask with a one-way valve, a pair of nitrile gloves, and ideally a publicly accessible AED if your workplace or building qualifies. Many municipalities and state laws now require AEDs in schools, gyms, dental offices, and public buildings. Familiarize yourself with where the nearest device is located in every space you spend more than an hour in each week. The PulsePoint AED app crowdsources device locations across most of the United States.
Practice the verbal script you will use in an emergency. Saying the steps out loud during real events helps you remember them and recruits bystanders effectively. A useful script: 'You in the red shirt, call 911 and put it on speaker. You in the blue jacket, find an AED and bring it here. I am starting CPR.' Direct, specific commands cut through panic and prevent the diffusion of responsibility that paralyzes crowds during sudden medical emergencies in public spaces.
Strength and stamina matter more than most people realize. Two minutes of high-quality compressions is genuinely exhausting, and depth typically falls below the two-inch threshold after ninety seconds of continuous effort. Regular cardiovascular exercise and upper-body strength training translate directly into better CPR performance. If you work in a profession that may demand resuscitation, such as healthcare, lifeguarding, or law enforcement, treat compression endurance as part of your job-specific fitness routine.
Talk to your family about CPR. Walk children through the steps in age-appropriate language. Teenagers can absolutely perform effective adult CPR, and many high school graduation requirements now include a CPR competency demonstration. Older relatives benefit from knowing that compressions, even imperfect ones, are far better than waiting for an ambulance. Print a one-page steps to give cpr reference card and post it on the refrigerator near the emergency contact list.
Stay current with guideline updates. The American Heart Association publishes guideline revisions every five years, with focused updates in between. The most recent updates have emphasized minimizing pre-shock pauses, eliminating routine pulse checks during the algorithm, and reconsidering the role of high-dose epinephrine. Subscribe to email updates from a recognized training organization and review the changes during each recertification cycle so your practice reflects current evidence rather than outdated habits.
Finally, advocate for community CPR readiness. Push your workplace to install an AED if there is not one already. Volunteer to teach a hands-only CPR demonstration at your child's school or a local community center. Sign up for emergency notification apps that alert nearby trained responders to nearby cardiac arrests so you can run to the scene before EMS arrives. Every layperson who feels confident performing CPR makes the community measurably safer for everyone who lives, works, or visits there.
CPR Questions and Answers
CPR Card Lookup: How to Verify, Replace, and Access Your CPR Certification in 2026
Adult CPR: Complete Step-by-Step Guide to Hands-Only and Standard CPR in 2026
CPR - Cardiopulmonary Resuscitation: Complete Study Guide 2026
Inappropriate CPR Songs: What Not to Play, Why It Matters, and Better Beat-Per-Minute Alternatives
AHA CPR Recertification: How to Recertify CPR Online with the American Heart Association in 2026
About the Author

Registered Nurse & Healthcare Educator
Johns Hopkins University School of NursingDr. Sarah Mitchell is a board-certified registered nurse with over 15 years of clinical and academic experience. She completed her PhD in Nursing Science at Johns Hopkins University and has taught NCLEX preparation and clinical skills courses for nursing students across the United States. Her research focuses on evidence-based exam preparation strategies for healthcare certification candidates.
Join the Discussion
Connect with other students preparing for this exam. Share tips, ask questions, and get advice from people who have been there.
View discussion (5 replies)