CPR Pictures: A Visual Guide to ACLS Algorithm Steps, Infant CPR, and Life Support in 2026
Learn CPR pictures step by step: hand placement, infant CPR, AED use, and the ACLS algorithm. A clear visual guide to life support for 2026.

Searching for clear cpr pictures is one of the smartest things you can do before an emergency ever happens, because a single well-labeled image can teach your hands where to go faster than a paragraph of text. Pictures show you the exact center-of-chest landmark, the depth of a compression, and the angle of a head-tilt chin-lift in a way that sticks. When seconds matter and adrenaline floods your system, your brain reaches for the visual memory it stored, not the dense instructions you skimmed. That is why visual learning sits at the heart of every modern resuscitation course.
Cardiopulmonary resuscitation combines chest compressions and rescue breaths to keep oxygenated blood moving to the brain and heart when a person's circulation stops. Good cpr pictures break this single skill into freeze-frame moments: locating the lower half of the breastbone, stacking your hands, locking your elbows, and pushing at least two inches deep. Each frame removes guesswork. A photo of correct hand placement, for instance, instantly corrects the common mistake of pressing on the soft upper abdomen, which is both ineffective and dangerous to the victim.
Images also clarify the differences between adult, child, and infant techniques that words alone blur together. An adult diagram shows two hands and full body weight, while an infant cpr diagram shows just two fingers or two encircling thumbs on a tiny sternum. Seeing those side by side prevents you from applying adult force to a baby. The same is true for the recovery position: a picture of a person rolled onto their side with the top knee bent communicates the posture far more reliably than a list of joint angles ever could.
Beyond the basics, visual references help learners understand how lay rescuer CPR connects to advanced care. A simple flowchart of the acls algorithm shows how a collapse leads to a 911 call, to compressions, to an automated defibrillator, and finally to a paramedic team running medications. Even if you never push a drug yourself, knowing where your hands-only effort fits in that chain helps you stay calm and keep going until professionals arrive. Pictures turn an abstract system into a story you can follow.
This guide pairs clear descriptions with the kind of step-by-step framing you would find on a printable CPR poster, so you can build accurate mental images even without a physical chart in front of you. We will walk through compressions, breaths, AED pads, choking relief, and the recovery position, and we will explain what each diagram is really trying to teach. Whether you are a parent, a teacher, a new lifeguard, or simply a prepared neighbor, this visual approach will make the skill far more memorable.
The goal throughout is confidence, not perfection. Studies consistently show that bystanders who freeze do so because they fear doing it wrong, yet imperfect CPR vastly outperforms no CPR at all. By the time you finish reading, you will be able to picture every phase of a rescue in your mind, recognize the warning signs of cardiac arrest, and understand why hands-only compressions remain the single most powerful tool an untrained bystander can offer in those first critical minutes before help arrives.
CPR Pictures and Survival by the Numbers
How to Read CPR Pictures Step by Step
Check the Scene
Call for Help
Open the Airway
Begin Compressions
Add Rescue Breaths
Use the AED
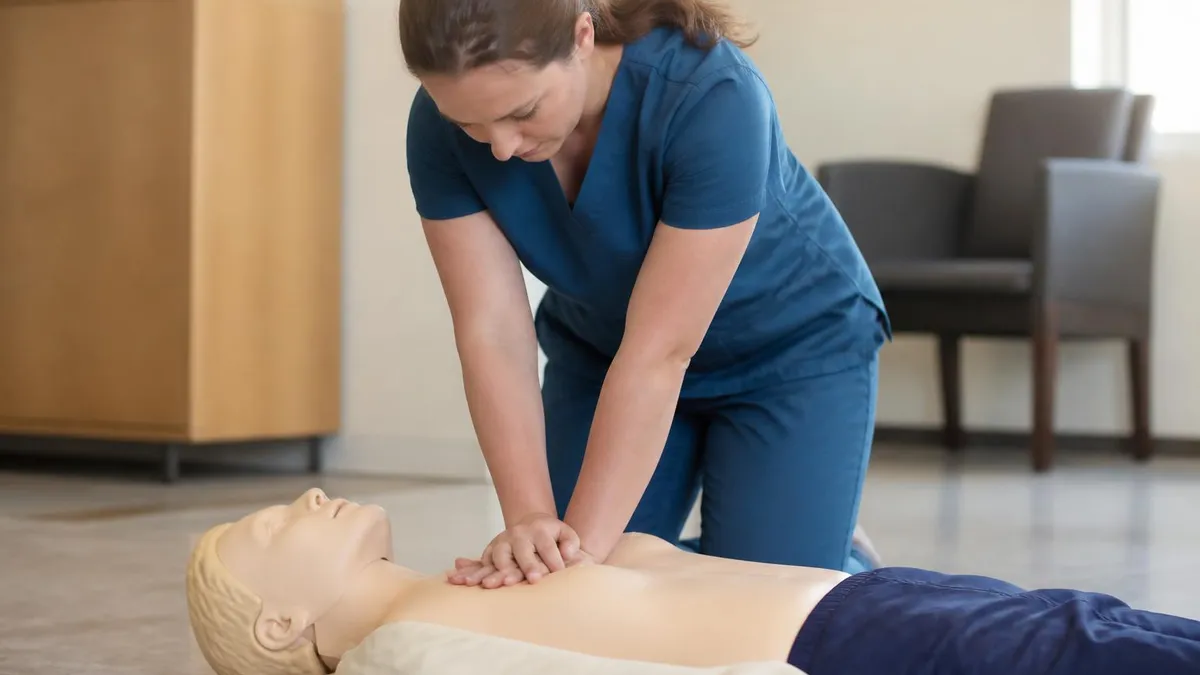
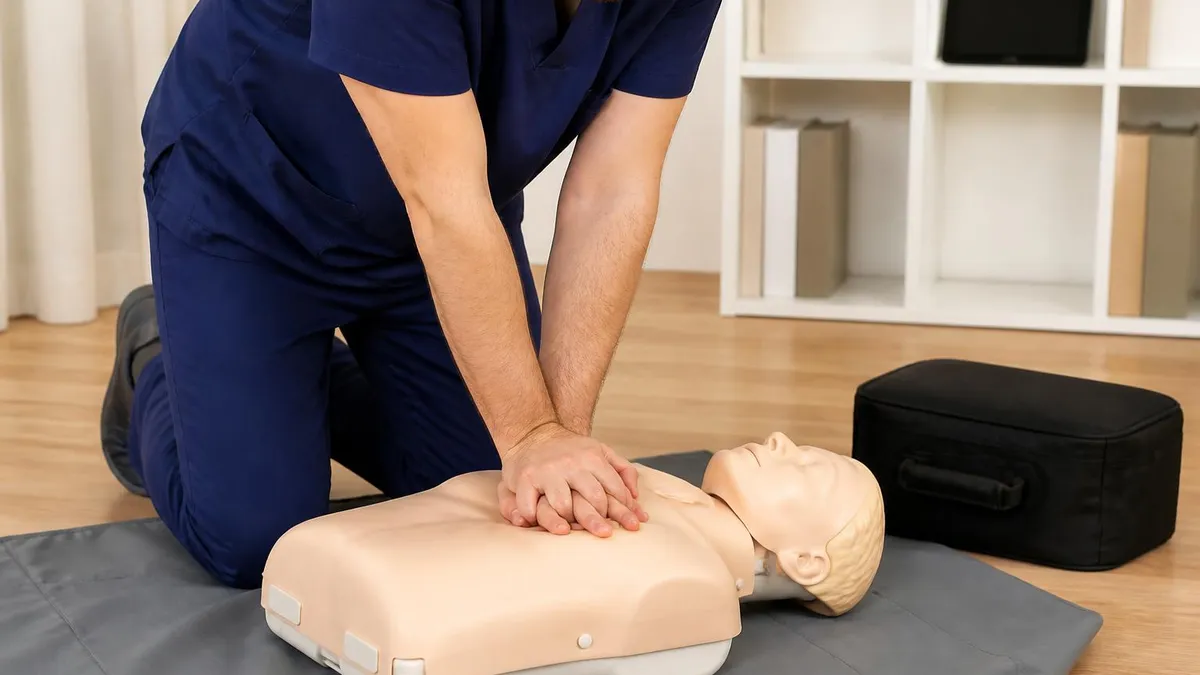
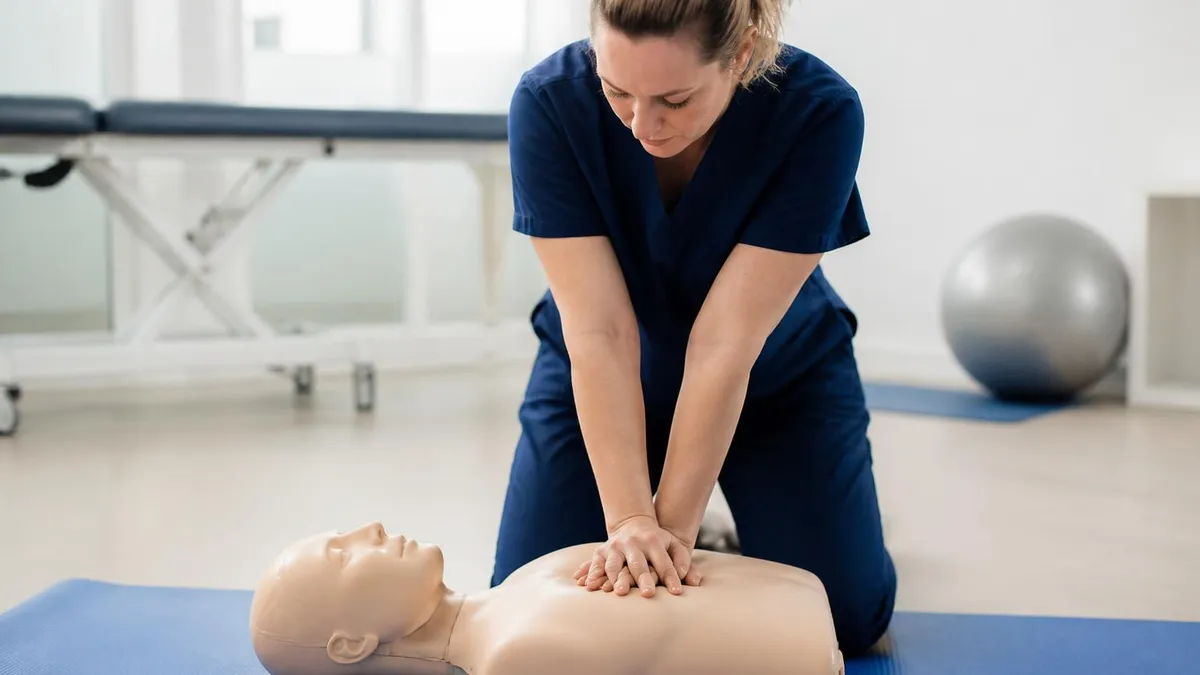
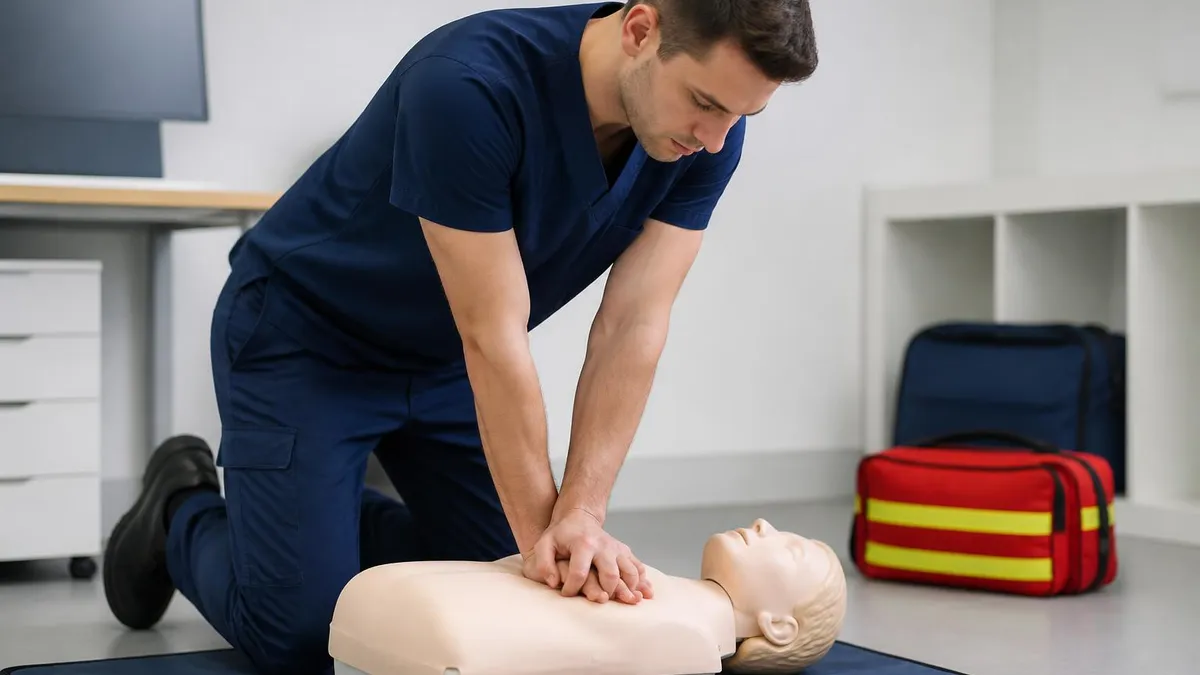
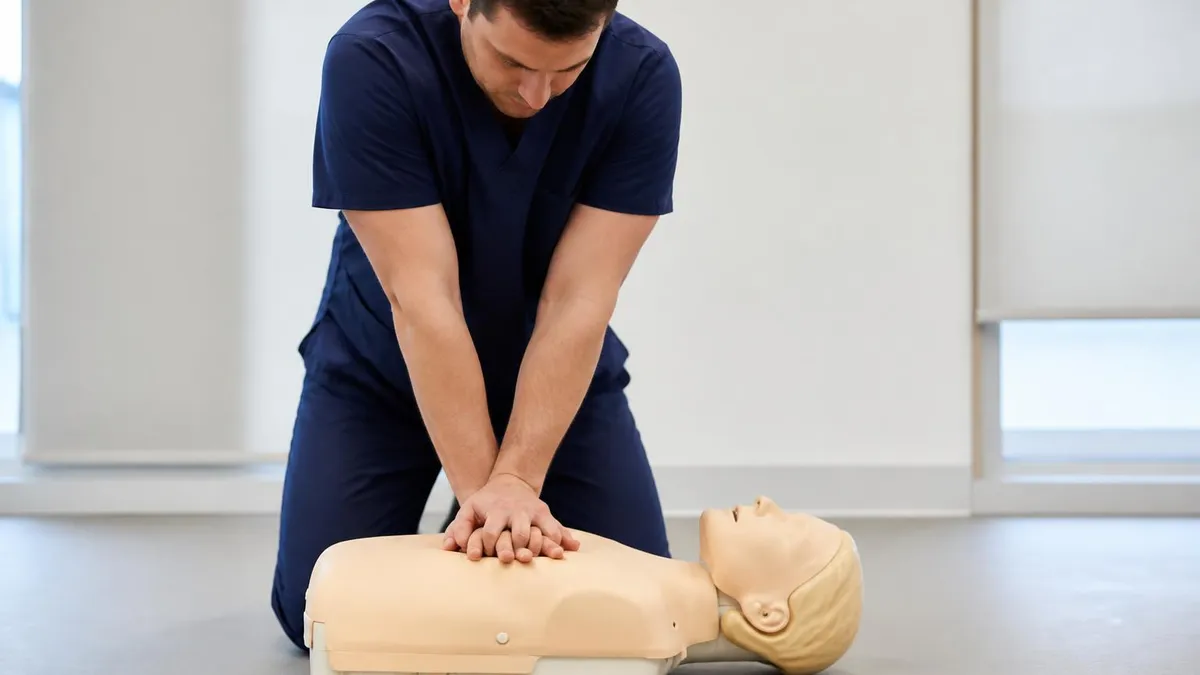
Correct hand placement is the detail that cpr pictures communicate best, and getting it right changes everything about how effective your compressions will be. The classic diagram shows the heel of one hand on the center of the chest, on the lower half of the breastbone, with the second hand stacked on top and fingers interlaced or lifted off the ribs. Your shoulders should sit directly over your hands so the force comes from your torso, not your tired arms. This posture lets you sustain a steady rhythm without burning out in the first minute.
Depth and rate are the two numbers every visual guide drills into you. For an adult, you press at least two inches deep but no more than 2.4 inches, at a rate of 100 to 120 compressions per minute. Many people picture the beat of a familiar upbeat song to hold that tempo. Equally important is full chest recoil: a good picture exaggerates the chest springing back up, reminding you to lift your weight completely between strokes so the heart can refill with blood before the next push.
Hands-only CPR has become the default recommendation for untrained bystanders, and the imagery reflects that shift. Instead of complicated breath diagrams, modern posters often show a single message: push hard, push fast, do not stop. Research found that continuous chest compressions alone keep enough oxygen circulating in the first several minutes of a sudden cardiac arrest, since the blood is still oxygen-rich. Removing the breathing step also removes the hesitation many people feel about mouth-to-mouth with a stranger, which means help starts sooner.
Even so, rescue breaths still matter in certain situations that good visuals highlight. Drowning victims, children, and people whose arrest stemmed from a breathing problem benefit from added ventilation. The diagram for breaths shows a tilted head, a pinched nose, and a complete mouth seal, with the chest rising as proof of a successful breath. The standard ratio is 30 compressions to 2 breaths for a single rescuer, a cycle you repeat until the AED arrives or the person shows signs of life.
A frequent mistake that pictures help correct is leaning too high on the chest or too far toward the abdomen. Pressing on the xiphoid process, the small tip at the bottom of the sternum, can break it and injure the liver, while pressing too high wastes force on the upper ribs. A well-marked image places a clear target on the lower-center sternum so your hands land in the safe, effective zone every single time you reset your position.
Fatigue is the silent enemy of quality compressions, and trainers use it as a teaching point. Studies show rescuers begin to push too shallow within about two minutes without realizing it. That is why visuals encourage swapping rescuers every two minutes when more than one trained person is present, ideally during the brief pause when the AED analyzes the rhythm. Picturing that hand-off in advance means you will execute it smoothly rather than fumbling when your own arms start to shake under the strain.
Finally, remember that the surface matters as much as your hands. CPR pictures almost always show a victim flat on their back on a firm, hard surface like the floor, never a soft bed or couch. A mattress absorbs your downward force, so compressions that look deep barely reach the heart. If someone collapses in bed, the diagram tells you to move them to the floor first, then begin, ensuring every ounce of your effort actually drives circulation where it is needed.
Infant CPR vs Child and Adult Pictures
Diagrams for infant cpr look strikingly different from adult ones, and that difference can save a baby's life. For a child under one year, pictures show two fingers placed just below the nipple line, or two thumbs encircling the chest when two rescuers work together. Compressions go about 1.5 inches deep, roughly one-third the depth of the chest, at the same 100 to 120 per minute rate used for everyone else regardless of age.
The airway image for infants is gentler too. Because a baby's neck is delicate, the head is tilted to a neutral sniffing position rather than the deep extension used for adults. Over-tilting can actually close the soft airway. Rescue breaths are small puffs from your cheeks, not full lungfuls, and the picture shows the rescuer covering both the infant's nose and mouth with their own mouth to form a complete, gentle seal.

Are CPR Pictures Enough, or Do You Need Hands-On Training?
- +Pictures build fast, durable visual memory of hand placement and depth
- +Free posters and diagrams are accessible to anyone, anywhere
- +Visuals clarify the differences between infant, child, and adult technique
- +Flowcharts make the acls algorithm and emergency chain easy to follow
- +Great refresher between formal certification renewals
- +Reduce hesitation by showing exactly where hands and pads go
- −Pictures cannot teach the physical feel of correct compression depth
- −No feedback on whether your rate or recoil is actually correct
- −Static images miss the timing and rhythm of real cycles
- −Hands-on manikin practice builds muscle memory pictures cannot
- −Certification, required by many jobs, needs an in-person or blended course
- −Diagrams alone may not prepare you for a chaotic real scene
AED and Position Recovery Checklist for Life Support
- ✓Confirm the person is unresponsive and not breathing normally before starting.
- ✓Send a specific bystander to call 911 and fetch the nearest AED.
- ✓Bare the chest and wipe away sweat or water before placing AED pads.
- ✓Place one pad upper-right chest, the other lower-left side, as the diagram shows.
- ✓Stand clear and let the AED analyze the heart rhythm without touching the victim.
- ✓Deliver a shock only when the device advises, then resume compressions instantly.
- ✓Continue 30 compressions to 2 breaths cycles between AED prompts.
- ✓Once breathing returns, roll the victim into the recovery position on their side.
- ✓Bend the top knee and tuck a hand under the cheek to keep the airway open.
- ✓Monitor breathing continuously and be ready to restart CPR if it stops again.
What does AED stand for, and why it changes survival odds
AED stands for Automated External Defibrillator, a portable device that reads the heart's rhythm and delivers a shock if needed. When used within the first few minutes alongside CPR, an AED can more than double survival from cardiac arrest. The machine talks you through every step, so even an untrained bystander can use one safely and effectively.
The acls algorithm is the structured roadmap that healthcare professionals follow during a cardiac arrest, and understanding its picture helps even lay rescuers appreciate where their efforts fit. ACLS stands for Advanced Cardiovascular Life Support, and its flowchart begins exactly where bystander CPR does: with high-quality chest compressions and early defibrillation. From there, the diagram branches based on the heart's rhythm, separating shockable rhythms like ventricular fibrillation from non-shockable ones like asystole. Each branch then specifies timed medications and reassessment points that paramedics and hospital teams carry out.
What makes the ACLS picture powerful is its emphasis on continuity. The flowchart loops every two minutes, prompting the team to pause briefly, check the rhythm, swap the person doing compressions, and decide whether to shock again. This rhythmic structure prevents the chaos that otherwise overwhelms a resuscitation. Even though a layperson never administers epinephrine or interprets a cardiac monitor, seeing this loop explains why your steady, uninterrupted compressions are described as the foundation that every advanced step is built upon.
Closely related is pals certification, which stands for Pediatric Advanced Life Support and applies the same algorithmic logic to infants and children. The PALS flowchart accounts for the fact that pediatric arrests usually start as breathing emergencies, so it places heavier emphasis on airway management and oxygenation. Nurses, pediatricians, and emergency responders who care for young patients pursue this credential, and its visual decision trees mirror the adult ACLS structure while adjusting drug doses and compression depths for smaller bodies.
Both ACLS and PALS sit on top of a foundation called Basic Life Support, or BLS, which is essentially formalized, high-quality CPR. The relationship is best pictured as a pyramid: BLS at the base, then ACLS or PALS layered above for trained clinicians. When you perform bystander CPR, you are executing the BLS layer, the most important part, because nothing the advanced team does will work if blood was not kept moving during those first crucial minutes before they arrived on scene.
Respiratory rate is another concept the algorithm visuals reinforce, since breathing and circulation are tightly linked. In a healthy adult, a normal respiratory rate sits between 12 and 20 breaths per minute, and a dramatic drop or absence of breathing is a key trigger for starting CPR. During a resuscitation, advanced providers control ventilation carefully to avoid over-inflating the lungs, which can reduce blood return to the heart. Pictures of the airway sequence help everyone understand that breathing support complements, but never replaces, strong compressions.
For lay rescuers, the takeaway from studying these algorithms is reassurance rather than memorization. You do not need to recall drug doses or rhythm names. You need to recognize an emergency, push hard and fast, attach an AED, and keep going. The professional life support team will seamlessly take the baton when they arrive, slotting your bystander effort into the top of their flowchart. Seeing the whole system mapped out removes mystery and replaces it with a calm sense of exactly what your role is.
It also helps to understand that the chain of survival is only as strong as its weakest link. The ACLS diagram is often drawn as a series of interlocking rings: early recognition, early CPR, early defibrillation, advanced care, and post-arrest recovery. If any ring is missing or delayed, survival drops sharply. Bystanders own the first three rings, which is why your visual preparation truly matters. The professionals cannot compensate for minutes lost while a victim lay on the ground with no one acting.
Lay rescuers should not waste time hunting for a pulse, which is unreliable even for professionals under stress. If an adult is unresponsive and not breathing normally, assume cardiac arrest and begin compressions immediately. Every ten-second delay measurably lowers the chance of survival, so acting fast on the obvious signs always beats waiting for certainty.
Beyond saving lives, the search term cpr pictures sometimes surfaces unrelated results that confuse new learners, and it is worth clearing those up so your study time stays focused. Queries like cpr cell phone repair and cpr phone repair refer to a national electronics repair franchise that shares the same three-letter abbreviation. If you are studying resuscitation and stumble onto a page about cracked screens, you have simply hit a naming coincidence. Knowing this saves you from wading through irrelevant phone-fixing content when you are trying to learn life support skills.
The acronym overlap is a good reminder to verify the source of any CPR diagram you save or print. Reputable resuscitation pictures come from recognized training bodies and medical organizations whose guidelines are updated regularly. The national cpr foundation and similar groups publish posters, step charts, and certification materials designed to match current resuscitation science. When you download a chart, check that it reflects the latest compression rate of 100 to 120 per minute and the current depth recommendations, since outdated images can teach habits that no longer match best practice.
Visual learners benefit enormously from building a personal mental flipbook of the rescue sequence. Picture the scene check, then the 911 call, then your stacked hands driving deep, fast compressions, then the AED pads on a bare chest, and finally the recovery position once breathing returns. Rehearsing this slideshow in your mind during calm moments wires the steps into long-term memory. When a real emergency strikes, your brain replays the familiar frames automatically, and you act instead of freeze. That mental rehearsal is one of the most underrated forms of preparation.
Printable posters placed in high-traffic spots reinforce that imagery without any extra effort. Many workplaces, gyms, and schools mount CPR and AED charts beside their defibrillator cabinets. Glancing at one regularly keeps the steps fresh between formal renewals. If you manage a space where people gather, posting a clear, current diagram is a low-cost way to prime every passerby to act. Familiarity breeds the confidence that turns a hesitant onlooker into someone who steps forward and starts compressions without delay.
The cpr pictures you study should always be paired with an understanding of when not to act in a way that could harm. For a person who is breathing and has a pulse but is unconscious, the correct move is the position recovery technique rather than compressions. Diagrams of this side-lying posture show how gravity keeps the airway clear and lets fluids drain from the mouth, preventing choking. Confusing this with full CPR could injure someone who simply fainted, so the distinction in the imagery genuinely matters.
Ultimately, the best pictures inspire action by making the skill feel achievable. They strip away intimidation and show ordinary people doing something extraordinary with nothing but their hands and a willingness to help. Cardiac arrest survival in any community rises when more bystanders feel ready to step in. By internalizing these visual lessons today, you join the ranks of prepared people who could be the decisive link in someone's chain of survival, and that readiness is a gift you may one day give a stranger or a loved one.
Keep in mind that pictures evolve as guidelines update, so treat your visual library as a living resource rather than a one-time download. Resuscitation science is reviewed regularly, and small refinements to depth, rate, or AED handling do appear. Bookmarking a trusted source and rechecking it every couple of years ensures the images in your head stay accurate. The few minutes it takes to confirm your mental pictures are current is a tiny investment against the enormous payoff of a correct response.
Turning what you have seen into reliable skill takes a few practical habits, and the first is choosing the right learning format for your needs. If your job requires certification, a blended course that pairs online video pictures with a short in-person manikin session gives you both the visual memory and the physical feel of correct compressions. If you simply want to be a prepared bystander, free hands-only CPR videos and printable posters are an excellent, low-pressure starting point that you can revisit anytime your confidence dips.
Practice the rhythm even without a manikin. Set a metronome or play a song with roughly 110 beats per minute and tap out compressions on a firm cushion, focusing on consistent depth and full release. This builds the tempo into your hands so it feels automatic later. Pair the physical practice with the mental slideshow described earlier, narrating each step aloud. Speaking the sequence while moving your hands engages more of your memory and makes the whole routine far stickier than silent reading.
Refresh your knowledge on a schedule rather than waiting for it to fade. Formal certifications typically expire after two years, but skills decay much faster than that without use. A quick monthly review of a CPR poster or a short practice quiz keeps the steps sharp. Many people set a recurring reminder tied to an easy-to-remember date, like the start of each season, so the habit never slips. Small, regular touches beat one intense session you forget within months.
Learn your environment before an emergency forces you to. Walk through your workplace, gym, or community center and note where the nearest AED cabinet hangs. Read the label so you know the brand and how its pads are arranged. Knowing this in advance shaves precious seconds off your response, because you will not be searching while a person's brain starves for oxygen. The same applies at home: keep emergency numbers visible and make sure family members know the basic compression steps too.
Practice the choking response alongside CPR, since the two emergencies often appear together. Picture the back blows and abdominal thrusts for a conscious choking adult, and remember that if they go unconscious, you lower them to the floor and begin compressions. For infants, the technique shifts to five back blows and five chest thrusts. Running these scenarios in your mind, ideally with a few practice questions, ensures you will not freeze when an airway emergency unfolds in front of you at a meal or gathering.
Finally, give yourself permission to be imperfect. The biggest barrier to bystander action is the fear of doing harm or doing it wrong, yet the data is unambiguous: any compressions are dramatically better than none. You cannot make a person without a heartbeat worse by trying. Cracked ribs heal; a brain starved of oxygen does not recover. Carry that reassurance with you, keep your mental pictures current, and trust that your willingness to act is the single most valuable thing you bring to any emergency scene.
As a last step, share what you have learned. Teaching a friend or family member the compression rhythm and showing them a CPR diagram doubles the number of prepared people in your circle and reinforces your own memory in the process. Communities with widespread CPR awareness see measurably higher survival rates after cardiac arrest. Every conversation you start, every poster you hang, and every quiz you pass adds another capable pair of hands to the network that keeps people alive long enough for professional help to arrive.
CPR Questions and Answers
CPR Full Form: What CPR Stands For and Why It Matters

CPR Courses: Complete Guide to ACLS Algorithm, PALS Certification, and Life Support Training in 2026

Types of CPR Training: From Basic Life Support to ACLS Algorithm Mastery in 2026
Adult CPR: Complete Step-by-Step Guide to Hands-Only and Standard CPR in 2026
BLS vs CPR: Is BLS the Same as CPR? Complete 2026 Guide
About the Author
Registered Nurse & Healthcare Educator
Johns Hopkins University School of NursingDr. Sarah Mitchell is a board-certified registered nurse with over 15 years of clinical and academic experience. She completed her PhD in Nursing Science at Johns Hopkins University and has taught NCLEX preparation and clinical skills courses for nursing students across the United States. Her research focuses on evidence-based exam preparation strategies for healthcare certification candidates.
Join the Discussion
Connect with other students preparing for this exam. Share tips, ask questions, and get advice from people who have been there.
View discussion (3 replies)