MRI Scan Images: A Complete Guide to Understanding Magnetic Resonance Imaging Pictures
MRI scan images explained: how they're created, what different sequences show, and how radiologists interpret anatomy and pathology in modern MRI pictures.
MRI scan images are some of the most detailed pictures medicine can produce, and they have transformed the way clinicians diagnose disease across nearly every organ system. Unlike X-rays or CT scans, which rely on ionizing radiation, magnetic resonance imaging uses powerful magnetic fields and radiofrequency pulses to map the behavior of hydrogen protons inside the human body. The result is a series of high-contrast cross-sectional pictures that reveal soft tissue anatomy with extraordinary clarity, from brain white matter tracts to knee meniscus tears and cardiac valve motion.
The first thing most patients notice about MRI scan images is how different they look compared to other modalities. Bone appears dark, water and cerebrospinal fluid can appear bright or dark depending on the sequence, and subtle abnormalities like multiple sclerosis plaques, small tumors, and ligament tears jump out with a contrast that no other imaging tool can match. This is because MRI does not measure density, as CT does, but rather measures relaxation properties of tissue, which means each pulse sequence essentially answers a different clinical question.
For students preparing for the ARRT MRI registry or technologists refreshing their skills, learning to read MRI scan images is a layered process. You start with anatomy, then move into sequence recognition, then into pathology, and finally into the artifact and quality control issues that affect interpretation. Each layer builds on the last, and the most experienced radiologists will tell you they are still learning new patterns decades into their careers because hardware, software, and clinical protocols continue to evolve year after year.
This guide walks through what MRI scan images actually represent, how the different pulse sequences produce their characteristic appearance, what normal versus abnormal looks like, and which sequences to choose for which clinical questions. Along the way we will cover the role of gadolinium contrast, common artifacts that can mimic disease, and the screening and safety considerations that make MRI such a uniquely demanding modality compared to other diagnostic studies.
If you are a patient about to undergo a study, understanding MRI scan images can help you ask better questions and feel less anxious about the process. If you are a technologist, the goal is to develop a workflow that consistently produces diagnostic-quality images even on uncooperative patients or technically difficult anatomy. And if you are a clinician, sharper image interpretation can prevent unnecessary follow-up studies, reduce diagnostic delays, and ultimately get patients to treatment faster.
We will reference the history of MRI at several points because the development of the technology directly explains why certain sequences exist and why the field continues to push toward higher field strengths, faster acquisitions, and more sophisticated post-processing. Knowing where MRI came from makes it much easier to understand where it is heading and what tomorrow's images will look like compared to those taken today.
By the end of this article you should feel comfortable looking at a basic brain, spine, or musculoskeletal MRI and identifying the sequence, the anatomy, and at least a few of the common pathologies that appear on it. That foundation is the first major hurdle in MRI education, and once you cross it, every subsequent learning step becomes substantially faster and more rewarding.
MRI Scan Images by the Numbers
How an MRI Scan Image Is Created
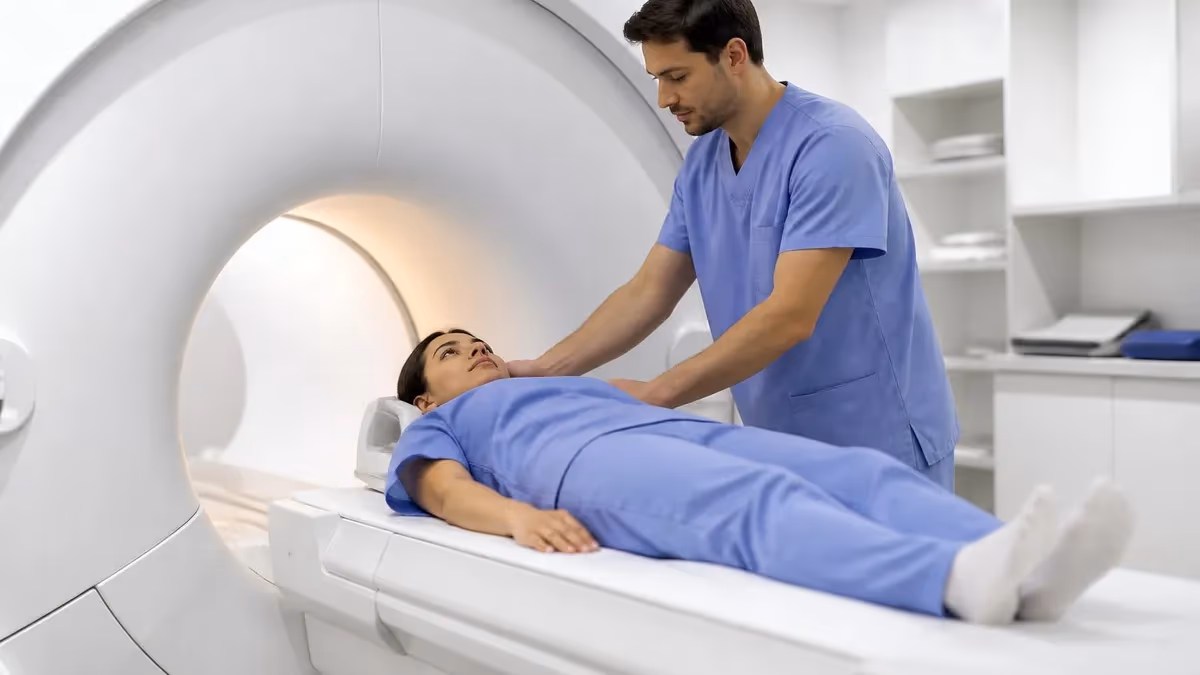
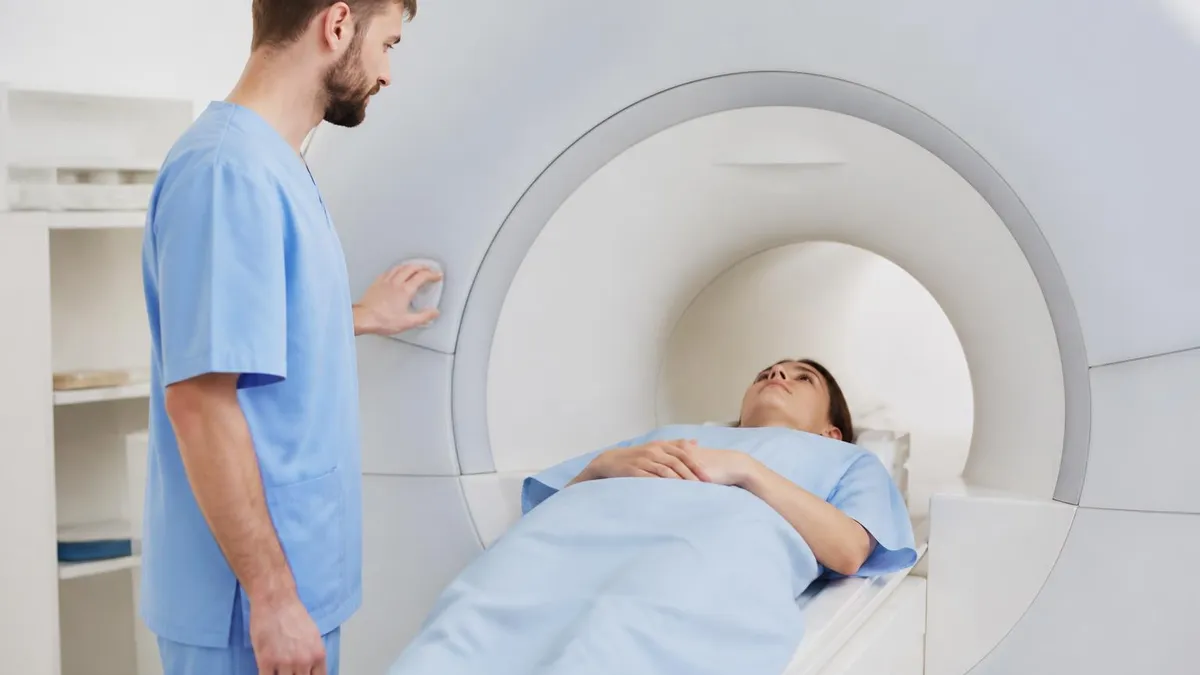
Patient Alignment in the Magnet
Radiofrequency Excitation
Spatial Encoding with Gradients
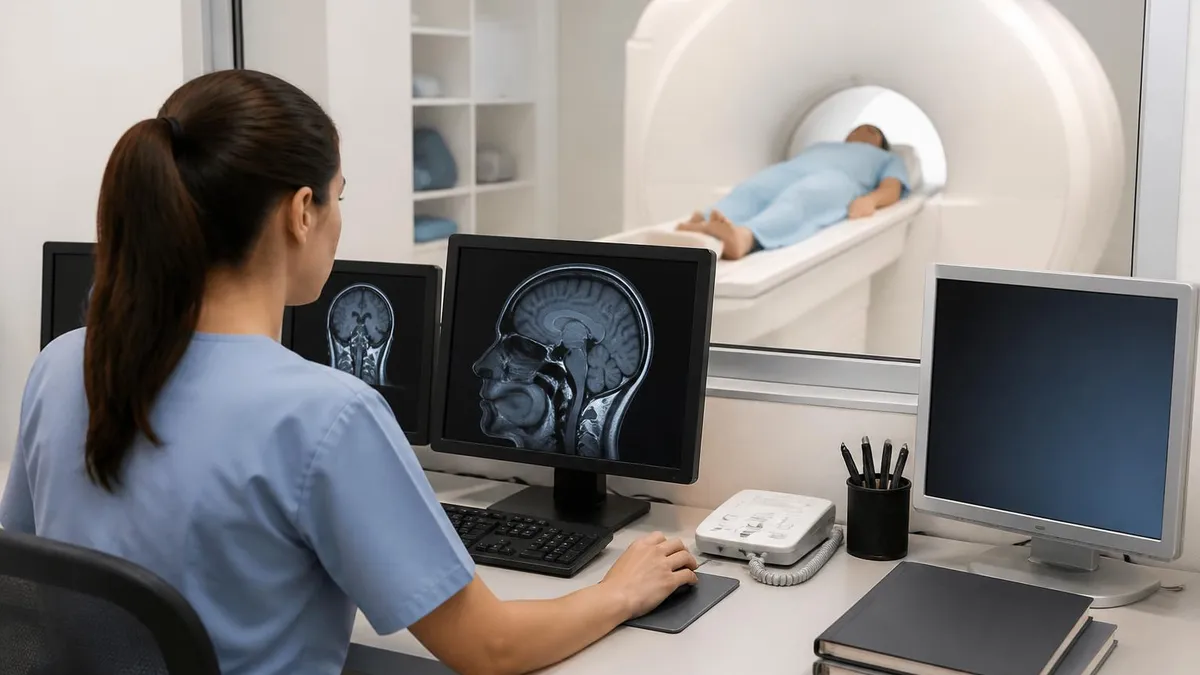
Signal Reception
Fourier Reconstruction
Once the raw signal becomes an image, the next critical concept in MRI scan images is the pulse sequence. A pulse sequence is essentially a recipe that tells the scanner when to apply RF pulses, when to read out signal, and how long to wait between excitations. Two parameters dominate the appearance of the image: the repetition time, or TR, and the echo time, or TE. By manipulating these two values, technologists can emphasize T1, T2, or proton density characteristics of tissue and dramatically change what the radiologist sees on the final picture.
T1-weighted images use a short TR and short TE. On these scans, fat appears bright and water appears dark. T1 sequences are excellent for showing anatomy with high spatial detail, which makes them the workhorse for brain anatomy, post-contrast imaging, and bone marrow evaluation. When you scroll through a T1 series, you are essentially seeing the body as if illuminated by its fat content, with cerebrospinal fluid and edema appearing dark against the brighter surrounding tissues.
T2-weighted images use a long TR and long TE. Water and fluid appear bright, while fat is typically intermediate depending on whether fat suppression is applied. T2 imaging is the cornerstone of pathology detection because most disease processes, from tumor to infection to demyelination, involve increased tissue water. The classic teaching pearl is that pathology is bright on T2, and although there are exceptions, this rule holds true often enough that beginners should make it their default starting point when reviewing images.
Proton density sequences sit between T1 and T2 and emphasize the actual number of hydrogen protons present in each voxel. They are particularly valuable in musculoskeletal imaging, where the contrast between cartilage, ligaments, and fluid is optimized for evaluating internal derangement of joints. Many knee and shoulder MRI scan images rely on fat-suppressed proton density images as the primary sequence for spotting meniscal tears, labral injuries, and bone contusions.
Beyond these foundational contrasts, modern MRI offers fluid-attenuated inversion recovery, diffusion-weighted imaging, susceptibility-weighted imaging, MR angiography, and dynamic contrast-enhanced sequences. Each one answers a specific clinical question. Diffusion-weighted imaging, for instance, is extraordinarily sensitive to acute stroke within minutes of symptom onset, while susceptibility-weighted imaging detects microbleeds and iron deposition that other sequences miss entirely. The total exam protocol is essentially a carefully ordered combination of these specialized tools.
Choosing the right protocol depends on the clinical indication, the body region, and sometimes the suspected pathology. Patients often ask why an MRI takes so long compared to a CT scan, and the answer is that each sequence acquires data slowly compared to the millisecond rotations of a CT gantry. The trade-off is information density: a thirty-minute brain MRI yields multiple distinct image sets, while a thirty-second CT produces a single dataset that must answer all clinical questions at once.
Many imaging protocols also include contrast-enhanced sequences. Learning the role of gadolinium is essential, and a detailed comparison of MRI with and without contrast helps clarify when enhancement is necessary versus when a non-contrast study will provide all the diagnostic information required for the clinical question being asked.
Anatomy on MRI Scan Images by Body Region
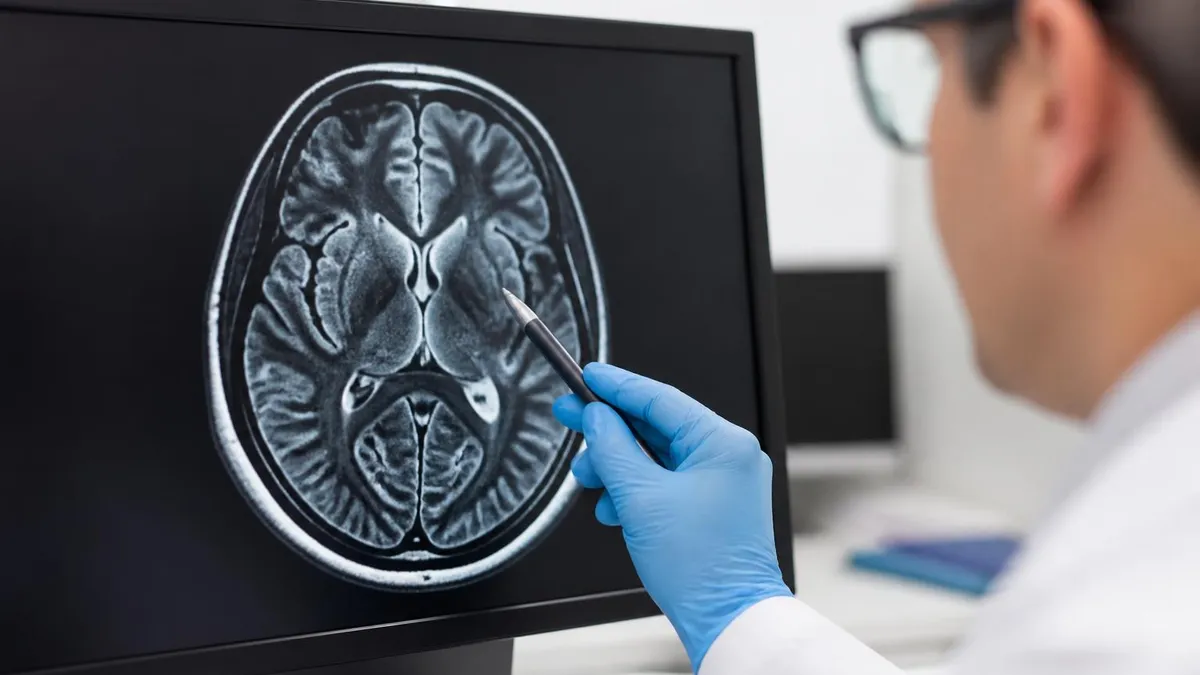
Brain MRI scan images typically include sagittal T1, axial T2, axial FLAIR, diffusion-weighted imaging, and gradient echo or susceptibility-weighted sequences. On T1 images you can identify gray matter as slightly darker than white matter, with cerebrospinal fluid appearing dark in the ventricles. The corpus callosum, basal ganglia, and brainstem structures stand out clearly because of their distinct lipid and water composition.
FLAIR is particularly important for spotting periventricular and subcortical white matter lesions, including multiple sclerosis plaques and small vessel ischemic disease. Diffusion-weighted images turn acute infarcts bright within minutes of symptom onset, making MRI the gold standard for stroke imaging. When reviewing brain images, always check the ventricles for symmetry and the cortical sulci for mass effect or atrophy.
Strengths and Limitations of MRI Scan Images
- +No ionizing radiation makes MRI safe for children and repeated imaging
- +Superior soft tissue contrast compared to CT and ultrasound
- +Multiplanar acquisition without repositioning the patient
- +Highly sensitive to early pathology including edema and ischemia
- +Functional information possible with diffusion, perfusion, and spectroscopy
- +Gadolinium contrast provides detailed vascular and lesion characterization
- −Long scan times increase risk of motion artifact and patient discomfort
- −Strict safety screening required due to magnetic field hazards
- −Claustrophobic patients may require sedation or open MRI alternatives
- −Higher cost per study compared to CT or ultrasound
- −Limited availability in rural and underserved regions
- −Implants and foreign bodies can cause significant image distortion
MRI Scan Images Quality Control Checklist
- ✓Confirm patient positioning matches the requested anatomy and protocol
- ✓Verify coil selection and placement maximize signal in the region of interest
- ✓Check field of view and slice thickness for the clinical question
- ✓Ensure correct sequence parameters for T1, T2, and fat suppression contrast
- ✓Review images immediately after acquisition for motion or wrap artifact
- ✓Confirm contrast timing for post-gadolinium sequences when ordered
- ✓Document any safety screening findings before scanning the patient
- ✓Validate matrix size and resolution meet diagnostic standards
- ✓Apply parallel imaging only when SNR allows acceptable image quality
- ✓Save and label all sequences with consistent series descriptions for the radiologist
Always identify the sequence before the pathology
Many beginners try to diagnose abnormalities before confirming whether they are looking at a T1, T2, FLAIR, or diffusion-weighted image. This leads to mistakes because the same tissue can look bright or dark depending on the sequence. Develop the habit of glancing at the sequence label, the appearance of cerebrospinal fluid, and the relationship of fat to water before making any interpretation about pathology in the scan.
Artifacts are an unavoidable part of MRI scan images and represent one of the most challenging aspects of image interpretation. Unlike CT, where artifacts are relatively few and well categorized, MRI produces dozens of distinct artifact patterns related to motion, magnetic susceptibility, chemical shift, aliasing, truncation, and gradient nonlinearity. Knowing how to recognize these artifacts and distinguish them from real pathology is a skill that develops over years of clinical practice and review of thousands of cases across many anatomical regions.
Motion artifact is by far the most common problem in clinical MRI. Patient movement, breathing, swallowing, and cardiac pulsation all create ghost images that appear in the phase-encode direction. Modern scanners use respiratory triggering, cardiac gating, and motion-correction algorithms to minimize these effects, but no technology can fully overcome a patient who cannot lie still. When you see ghost images repeating in a regular pattern, motion is almost always the culprit and the affected sequence often needs to be repeated.
Magnetic susceptibility artifact arises at the interface between tissues of different magnetic properties, most commonly at air-tissue or metal-tissue boundaries. Dental hardware, surgical clips, and orthopedic implants create characteristic signal voids surrounded by distortion that can obscure adjacent anatomy. Susceptibility-weighted sequences exploit this same phenomenon to detect microbleeds and calcifications, which illustrates how the same physics that creates artifact in one context provides diagnostic information in another.
Chemical shift artifact occurs because fat and water resonate at slightly different frequencies. At the interface between them, a bright band on one side and a dark band on the other appears in the frequency-encode direction. This is most noticeable around the kidneys, vertebral endplates, and orbital fat. Knowing the direction and magnitude of chemical shift helps determine whether you are looking at real pathology or a predictable artifact that can be eliminated by adjusting bandwidth or applying fat suppression.
Truncation artifact, also called Gibbs artifact, appears as parallel bands near high-contrast interfaces such as the cord and surrounding cerebrospinal fluid. It can mimic syringohydromyelia within the spinal cord and is one of the classic teaching examples of an artifact that has fooled inexperienced readers into reporting nonexistent pathology. Increasing the matrix or applying post-processing filters reduces this artifact, but recognizing it remains the best defense against misinterpretation.
Aliasing or wrap artifact occurs when anatomy outside the field of view folds back into the image. This typically happens in the phase-encode direction and can be reduced by oversampling or increasing the field of view. Each artifact type has predictable patterns, and developing a mental library of these patterns is essential for technologists and radiologists alike. The best teachers in MRI often have entire lecture series devoted to artifact recognition because it is so foundational to everyday practice.
The final category of pitfalls includes sequence-specific findings that can mimic pathology. Pulsation artifact from large vessels, magic angle effects in tendons, and partial volume averaging at thick slice boundaries all create signal abnormalities that may look concerning. Experienced readers learn to verify any suspicious finding on at least two sequences and in at least two planes before committing to a diagnosis on the final report sent to the referring clinician.
Never bring ferromagnetic objects into the scanner room. Pacemakers, cochlear implants, certain aneurysm clips, and metallic foreign bodies in the eye are potentially life-threatening contraindications. Complete the safety questionnaire thoroughly for every patient, every time, and verify implant compatibility with manufacturer documentation before scanning. A single safety lapse can cause projectile injury, device malfunction, or thermal burns that have devastating consequences.
Reading MRI scan images systematically is the most reliable way to avoid missed findings. Experienced radiologists develop personal templates that walk through every anatomical region in a fixed order, and these templates differ by body part. For a brain MRI, a typical pattern is to start with the ventricles, move to the gray-white interface, then the deep nuclei, then the posterior fossa, then the cranial nerves, then the calvarium and extracranial soft tissues. Following the same sequence on every study reduces the risk of satisfaction of search bias.
The same disciplined approach applies to spine imaging. Begin with overall alignment on sagittal images, then evaluate vertebral body height and marrow signal, then disc spaces and any disc herniations, then the conus and cord signal, and finally the paraspinal soft tissues. On axial images, work through each level methodically, evaluating the canal, the lateral recesses, the foramina, the facets, and the surrounding musculature. Skipping levels is one of the most common sources of error in spine MRI interpretation.
Musculoskeletal MRI demands an even more granular checklist. For a knee, that means evaluating each meniscus, each cruciate ligament, each collateral ligament, each compartment of articular cartilage, the patellofemoral joint, the extensor mechanism, the popliteal fossa, and the bone marrow signal throughout. Missing a single structure can mean missing a clinically significant finding, so checklists exist specifically to enforce completeness on every study read.
For abdominal and pelvic MRI, organ-by-organ review is essential. The liver, gallbladder, pancreas, spleen, kidneys, adrenals, retroperitoneum, bowel, and pelvic organs all require dedicated attention on the appropriate sequences. Multiphase contrast imaging adds another layer because enhancement patterns at arterial, portal venous, and delayed phases distinguish many lesions that look similar on noncontrast studies. Reading these studies without a system is a recipe for inconsistent diagnostic performance.
Cardiac MRI is its own discipline with cine imaging, perfusion, and late gadolinium enhancement sequences. Reading cardiac studies requires familiarity with chamber size and function, valve motion, myocardial signal characteristics, and the pattern and distribution of any late enhancement, which guides diagnosis of conditions from myocarditis to infiltrative cardiomyopathies. Few imaging studies demand more integration of anatomy and physiology than a complete cardiac MRI.
Beyond individual studies, comparison with prior imaging is critical. Many findings become diagnostic only when seen as new, stable, or changing over time. Always pull up the prior MRI side by side with the current study and scroll through the same sequences in the same orientation. This habit catches subtle interval changes that would otherwise be missed and provides reassurance when an incidental finding has been stable for years on multiple prior examinations spanning a long observation window.
The administrative side of MRI also matters, especially in outpatient practice. Understanding the role and structure of MRI imaging centers helps both patients and referring clinicians navigate scheduling, insurance authorization, and protocol selection. Independent outpatient centers often handle the majority of nonemergent imaging in many communities, and knowing how they operate is part of the broader MRI knowledge base.
Practical tips for working with MRI scan images come from years of trial and error. The first and most important tip is to slow down. Modern PACS workstations make it easy to scroll quickly through hundreds of slices, but the small lesions that change patient management are often only visible on one or two images. Force yourself to scroll deliberately and pause at any signal abnormality before deciding whether it is real or artifact. Speed comes with experience, but accuracy must come first.
The second tip is to use windowing and leveling aggressively. Many radiologists keep brightness and contrast at default settings and miss subtle findings as a result. Adjusting the window for soft tissue, then bone, then fluid emphasis on the same image can reveal pathology that was invisible at the default setting. Modern viewers also offer presets for stroke imaging, marrow evaluation, and other specialized applications that should become part of your standard workflow during interpretation.
The third tip is to know your scanner. Different vendors and different field strengths produce slightly different image appearances, and the same anatomic structure can look different on a 1.5T system versus a 3T system. Higher field strength offers better signal-to-noise but more artifact, particularly susceptibility artifact near air-tissue interfaces. Becoming familiar with the strengths and quirks of the specific scanners you work with helps you anticipate which sequences will be most reliable.
The fourth tip is to communicate proactively with technologists. When a scan looks suboptimal, ask whether additional sequences or repeat acquisitions are possible while the patient is still in the magnet. Once the patient leaves, calling them back for additional imaging is logistically difficult and frustrating for everyone involved. Building a collaborative relationship with the technologist team yields better images and ultimately better patient care across the entire imaging department.
The fifth tip is to study artifacts as carefully as you study anatomy. Most missed diagnoses in MRI come not from failure to recognize pathology but from misinterpretation of artifact as pathology or vice versa. Dedicated artifact training, ideally with side-by-side examples of real findings and their mimickers, is one of the highest-yield ways to improve diagnostic accuracy. Many academic teaching files now include curated artifact collections for this exact purpose.
The sixth tip is to keep up with literature. MRI is a rapidly evolving field, and new sequences, contrast agents, and applications appear every year. Reading journals like Radiology, AJR, and Magnetic Resonance in Medicine regularly will expose you to techniques that may not yet be in your local practice but will likely arrive within a few years. Staying current is what separates good radiologists from great ones over the long arc of a career in diagnostic imaging.
Finally, build study habits that emphasize repetition and feedback. Practice tests, case reviews, and conference presentations all reinforce pattern recognition in ways that passive reading cannot. The single best predictor of MRI interpretation skill is the number of cases reviewed under expert supervision, and the second best predictor is the quality of feedback received on those cases. Make sure your learning environment includes both elements at every stage of your professional development as a clinician or technologist.
MRI Questions and Answers
About the Author
Medical Laboratory Scientist & Clinical Certification Expert
Johns Hopkins UniversityDr. Sandra Kim holds a PhD in Clinical Laboratory Science from Johns Hopkins University and is certified as a Medical Technologist (MT) and Medical Laboratory Scientist (MLS) through ASCP. With 16 years of clinical laboratory experience spanning hematology, microbiology, and molecular diagnostics, she prepares candidates for ASCP board exams, MLT, MLS, and specialist certification tests.