HVAC Installations: The Complete Guide to Planning, Pricing, and Getting It Right the First Time
HVAC installations explained: sizing, costs, permits, ductwork, and timelines. A complete homeowner and contractor guide to getting it right the 📚
HVAC installations are one of the largest mechanical investments a homeowner or building owner will ever make, and the choices made during the planning phase shape comfort, energy bills, and equipment lifespan for the next 15 to 25 years. A modern central system involves more than dropping a condenser on a pad and connecting a furnace in the basement. It involves load calculations, duct design, refrigerant line sizing, electrical upgrades, condensate handling, permitting, and a startup procedure that ensures the equipment performs at its rated efficiency on day one rather than three service calls later.
The average American home now uses HVAC for nearly half of its annual utility spend, and the equipment chosen during installation determines whether that spend climbs each year or stays flat. A correctly sized 16 SEER2 heat pump installed with sealed ductwork and a properly commissioned thermostat will run quieter, dehumidify better, and cost less to operate than a 20 SEER2 unit installed sloppily with leaky returns and an undersized line set. Installation quality, not nameplate efficiency, is the single biggest predictor of real-world performance in residential systems.
This guide walks through every phase of a residential or light commercial HVAC installation, from the first Manual J load calculation through final commissioning and homeowner walkthrough. It covers central air conditioners, heat pumps, gas furnaces, mini-splits, and hybrid dual-fuel systems, and explains how each subsystem interacts with the others. Whether you are a homeowner getting bids, an apprentice studying for licensure, or a contractor refining your installation standards, the framework below applies.
Pricing varies enormously by region, equipment tier, and house complexity. A straightforward like-for-like replacement of a 3-ton split system in a single-story ranch might land between $7,500 and $11,000 in 2026, while a full system swap with new ductwork, a heat pump conversion, and electrical panel upgrade can exceed $25,000. Understanding what drives those numbers — and which line items are negotiable versus mandatory — is the difference between a fair deal and an expensive surprise.
Permitting and code compliance are not optional. Most jurisdictions require a mechanical permit for any new system or change-out, and many require a separate electrical permit when the disconnect or breaker is replaced. Inspectors check refrigerant line insulation, condensate routing, combustion air, flue clearances, and the presence of a working float switch on horizontal evaporator coils. Skipping the permit to save a few hundred dollars often voids the manufacturer warranty and creates a disclosure headache when the home is later sold.
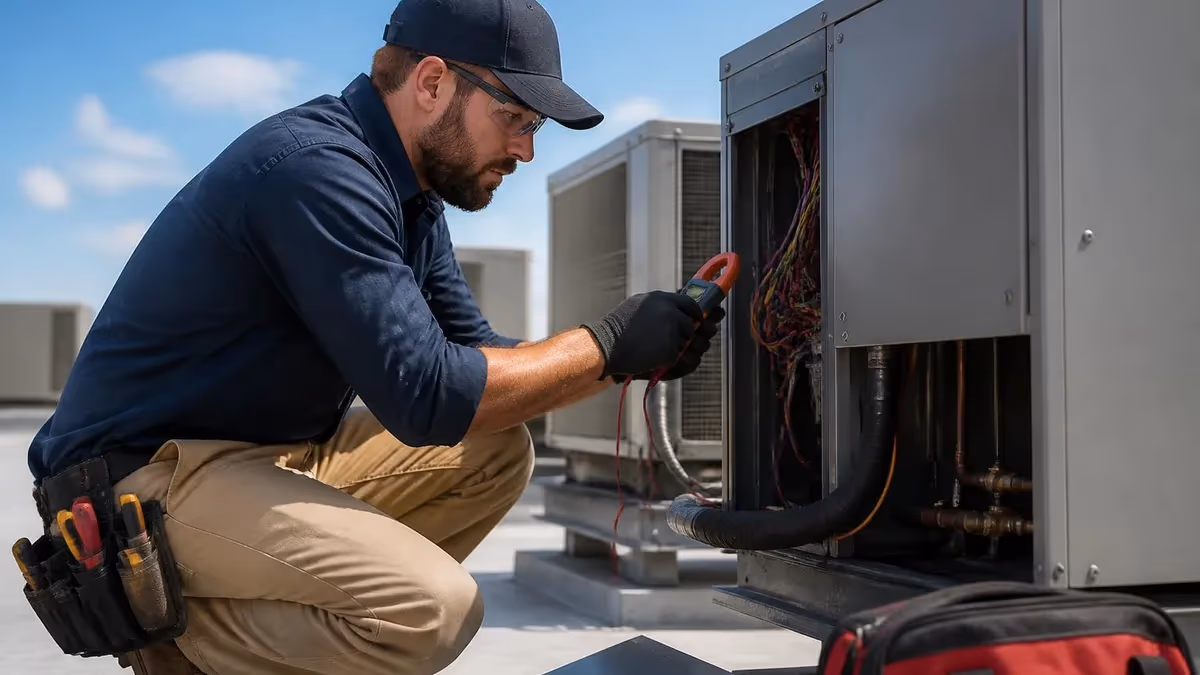
The technician installing the system matters as much as the equipment itself. A NATE-certified installer who pulls a deep vacuum, weighs in the refrigerant charge, measures static pressure, and documents the commissioning numbers will deliver a system that meets its rated efficiency. An unlicensed installer who triple-evacuates with a screwdriver and eyeballs the charge will deliver a system that limps along, ices up in July, and quietly costs the owner thousands in wasted electricity over its life. Workmanship is the warranty.
Throughout this guide we reference adjacent skills and topics — duct sizing, electrical controls, code provisions, and refrigerant handling — that every installer needs to master. If you are exploring the field as a career, our overview of HVAC technician jobs near me covers wages, apprenticeships, and pathways into the trade. The installation phase is where craftsmanship shows, and where the difference between a hack job and a professional install becomes obvious within the first cooling season.
HVAC Installations by the Numbers
The HVAC Installation Timeline From Quote to Commissioning
Site Survey & Load Calculation
Equipment Selection & Proposal
Permits & Scheduling
Removal & Rough-In
Startup & Commissioning
Inspection & Walkthrough
Sizing is the foundation of every good HVAC installation, and it is also where most jobs go wrong. The Air Conditioning Contractors of America (ACCA) publishes Manual J for load calculation, Manual D for duct design, Manual S for equipment selection, and Manual T for register selection. These four documents form the engineering backbone of residential HVAC, yet field audits consistently show that 30 to 40 percent of installed systems are oversized — often by a full ton or more — because contractors rely on rules of thumb like 500 square feet per ton instead of running the actual numbers.
An oversized air conditioner short-cycles. It satisfies the thermostat quickly, shuts off, and never runs long enough to dehumidify. The result is a clammy 72-degree house in July where occupants feel cold but sticky and reach for the dehumidifier they should not have needed. Oversizing also stresses the compressor, raises electricity bills, and wears the contactor and start components faster than a properly sized unit. A correctly sized system runs longer at lower capacity, removes more moisture, and cycles less.
Manual J inputs include the building envelope, window types and orientations, ceiling height, infiltration rate, occupant count, internal gains from appliances, and the local design temperatures pulled from ACCA Table 1A. A house in Phoenix has a 109-degree cooling design and a 34-degree heating design, while a house in Minneapolis is the opposite. The same square footage in those two climates needs radically different equipment, and a thorough CFM HVAC basics approach to airflow becomes critical once the load is known.
Ductwork sizing follows Manual D and depends on the total external static pressure the air handler can tolerate. Most residential blowers are rated at 0.5 inches of water column total external static, yet field measurements often find systems running at 0.9 or higher because returns are undersized, filters are too restrictive, or supply runs are pinched. High static pressure starves the coil of airflow, drops capacity, and shortens blower motor life. Sizing returns generously — at least one return per bedroom in modern designs — solves most pressure problems.
Refrigerant line sizing matters too. A 3-ton system typically uses a 7/8-inch suction line and a 3/8-inch liquid line, but long line sets or significant vertical rise require traps, larger diameters, or both. Undersized suction lines cause excessive pressure drop, lost capacity, and oil return problems on the compressor. The manufacturer's installation manual specifies the maximum equivalent length and any required line-size adjustments — these tables are not suggestions, they are warranty conditions.
Electrical sizing is the third leg of the sizing stool. The condenser nameplate lists Minimum Circuit Ampacity (MCA) and Maximum Overcurrent Protection (MOCP). The MCA tells the electrician what wire gauge to run, and the MOCP sets the maximum breaker size. A 3-ton condenser with an MCA of 18.5 and MOCP of 30 needs a 10-gauge conductor and a 30-amp double-pole breaker. Older homes with 100-amp service may require a load calculation to confirm the panel can carry the new equipment.
Putting it all together, a good installation begins with a measured load, proceeds to equipment selection that matches that load, sizes ducts and lineset to deliver the capacity, and confirms electrical service can carry the draw. Skipping any of these steps creates a comfort problem that no amount of post-install tweaking can fix. Sizing is not a sales document — it is the engineering specification that determines whether the system performs for two decades or fights itself from day one.
HVAC Practice Test Questions
Prepare for the HVAC - Heating Ventilation and Air Conditioning exam with our free practice test modules. Each quiz covers key topics to help you pass on your first try.
HVAC Air Conditioning
HVAC Exam Questions covering Air Conditioning. Master HVAC Test concepts for certification prep.
HVAC Code Compliance
Free HVAC Practice Test featuring Code Compliance. Improve your HVAC Exam score with mock test prep.
HVAC Electrical Controls
HVAC Test Prep for Electrical Controls. Practice HVAC Quiz questions and boost your score.
HVAC Energy Efficiency
HVAC Questions and Answers on Energy Efficiency. Free HVAC practice for exam readiness.
HVAC Heating Systems
HVAC Mock Test covering Heating Systems. Online HVAC Test practice with instant feedback.
HVAC Load Calculations
Free HVAC Quiz on HVAC Load Calculations. HVAC Exam prep questions with detailed explanations.
HVAC Tools and Equipment
HVAC Practice Questions for HVAC Tools and Equipment. Build confidence for your HVAC certification exam.
HVAC Refrigeration
HVAC Test Online for Refrigeration. Free practice with instant results and feedback.
HVAC Safety Practices
HVAC Study Material on Safety Practices. Prepare effectively with real exam-style questions.
HVAC System Design
Free HVAC Test covering System Design. Practice and track your HVAC exam readiness.
HVAC Thermodynamics
HVAC Exam Questions covering Thermodynamics. Master HVAC Test concepts for certification prep.
HVAC Equipment Types Compared
Traditional split systems pair an outdoor condenser with an indoor evaporator coil mounted on a furnace or air handler. They remain the most common residential configuration in the United States because they offer strong cooling capacity, broad parts availability, and modest installation complexity. A 3-ton 15 SEER2 split with a matched gas furnace typically installs in one to two days when replacing existing equipment and ductwork is in good condition.
Split systems shine in homes that already have ducts and a dedicated mechanical room. The main downsides are the long refrigerant line set required between the indoor and outdoor units, which limits placement, and the reliance on a single thermostat for the whole zone unless the ductwork is reconfigured for zoning dampers. Modern variable-speed split systems can modulate down to 40 percent capacity, dramatically improving humidity control.
Replacing Versus Repairing an Older HVAC System
- +New equipment carries a 10-year parts warranty and often a 5-year or lifetime compressor warranty
- +Modern variable-speed systems use 30–50% less electricity than 15-year-old single-stage equipment
- +Rebates and federal tax credits can offset $2,000–$8,000 of installation cost
- +Refrigerant compatibility is preserved (R-410A and newer A2L refrigerants like R-454B)
- +Improved humidity control and quieter operation from variable-speed blowers
- +Smart thermostat integration and remote diagnostics for proactive maintenance
- −Upfront cost ranges from $7,500 to $25,000 depending on scope
- −New refrigerant transitions may require lineset flushing or replacement
- −Possible electrical panel upgrade for higher-amperage heat pumps
- −Permit and inspection adds 1–2 weeks of administrative time
- −Disposal of old equipment and refrigerant recovery adds labor cost
- −Learning curve on new thermostats and zoning controls for homeowners
Pre-Installation Checklist for HVAC Installations
- ✓Confirm a written Manual J load calculation, not a rule-of-thumb estimate
- ✓Verify the proposed equipment model numbers and AHRI matched-system certificate
- ✓Check that the electrical panel has capacity for the new equipment's MCA and MOCP
- ✓Inspect existing ductwork for leakage, insulation, and proper return sizing
- ✓Confirm the contractor is pulling a mechanical permit and scheduling inspection
- ✓Ask for proof of EPA 608 certification for refrigerant handling
- ✓Verify warranty registration will be completed within 60 days of install
- ✓Confirm condensate routing, pump location, and float switch placement
- ✓Clear access to the indoor unit, outdoor pad, and electrical disconnect
- ✓Discuss rebate paperwork, utility forms, and federal tax credit documentation
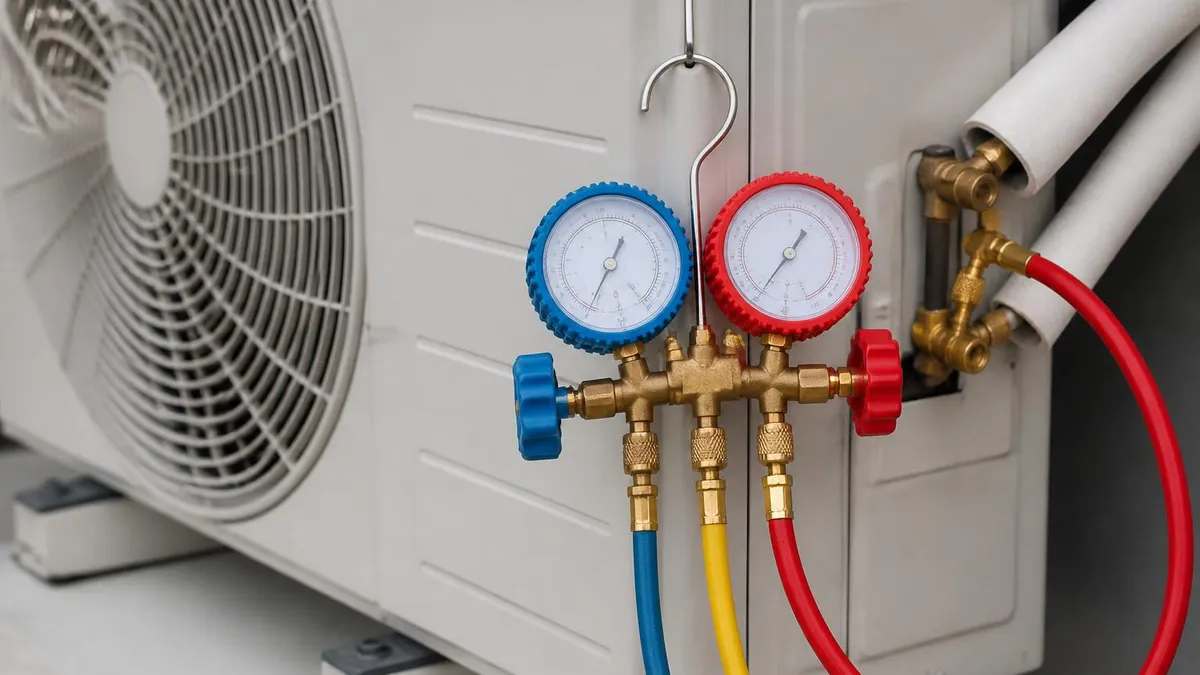
Total External Static Pressure Should Be At Or Below 0.5" w.c.
If your installer does not measure total external static pressure before leaving, the commissioning is incomplete. High static is the single biggest hidden cause of capacity loss, blower failure, and high utility bills — and it is invisible without a manometer. Insist on the measurement.
Cost is the question every homeowner asks first, and the honest answer is that HVAC installation pricing is more variable than almost any other home improvement category. A like-for-like 3-ton split system change-out in a suburban Texas ranch with accessible equipment and existing ductwork might land at $8,500, while the same nameplate capacity installed in a three-story Boston row home with an attic air handler, new line set, and electrical panel upgrade could approach $22,000. Both prices can be fair — the difference is scope, access, and code requirements.
Equipment cost typically represents 40 to 55 percent of the installed price. A baseline single-stage 14.3 SEER2 condenser wholesales around $1,800, while a top-tier variable-speed 20 SEER2 heat pump can wholesale above $5,500. Add an indoor coil or air handler, line set, pad, disconnect, thermostat, and refrigerant, and the equipment package alone can range from $3,500 to $9,000 before any labor. Manufacturers run spring and fall promotional pricing that can shave several hundred dollars off matched systems.
Labor varies by region and complexity. A two-person crew on a one-day change-out bills 14 to 20 labor hours at $95 to $165 per hour, depending on local wages and overhead. Add brazing, vacuum, charging, electrical, condensate work, permit pickup, and inspection time, and labor lands between $1,400 and $3,500 for straightforward jobs. Difficult attics, crawl space access, multi-story line set runs, and asbestos abatement on legacy ducts can push labor far higher.
Permits and inspections typically run $75 to $400 depending on jurisdiction. Some cities bundle mechanical and electrical permits; others require separate filings. Inspectors check the AHRI certificate matches what was installed, verify clearances, confirm condensate routing, and ensure the disconnect is within sight of the outdoor unit. Working with established commercial HVAC contractors near me on larger projects ensures permits are pulled correctly and inspections scheduled efficiently.
Rebates and incentives can dramatically change the math. The federal 25C tax credit covers 30 percent of qualifying heat pump installation costs up to $2,000 per year, and the High-Efficiency Electric Home Rebate program offers point-of-sale rebates up to $8,000 for income-qualified households. Utility rebates layer on top, often $500 to $2,000 for high-efficiency equipment. Together these programs can offset 30 to 50 percent of a heat pump installation in many states, especially when combined with state-level clean energy incentives.
Financing is widely available through manufacturer-partnered lenders like Synchrony and Wells Fargo, with promotional 0 percent interest periods of 12 to 60 months for qualified buyers. Be cautious with deferred-interest plans — if the balance is not paid in full by the promotional end date, interest accrues from the original purchase date, often at 25 to 30 percent APR. Read the fine print and budget to pay off the full balance before the promotional period expires.
Finally, do not pay the full balance upfront. Industry standard is a 25 to 50 percent deposit at scheduling, with the balance due upon completion and successful inspection. Beware of contractors demanding full payment before the equipment is installed or the inspection is signed off. A reputable installer is comfortable waiting for the inspector's approval before collecting the final check, because their work passes inspection routinely.
As of January 1, 2025, R-410A is being phased out for new equipment in favor of A2L refrigerants like R-454B and R-32. Verify your installer is trained on A2L handling, leak detection, and the updated brazing and venting requirements — A2Ls are mildly flammable and have different installation rules than R-410A.
Commissioning is the step that separates a professional HVAC installation from a hack job, and it is invisible to most homeowners. Commissioning means measuring, recording, and verifying that the installed system actually delivers the capacity and efficiency it is rated for. Without it, you have a box of equipment, not a functioning HVAC system. Every reputable installer leaves behind a commissioning sheet with measured values, not just signatures.
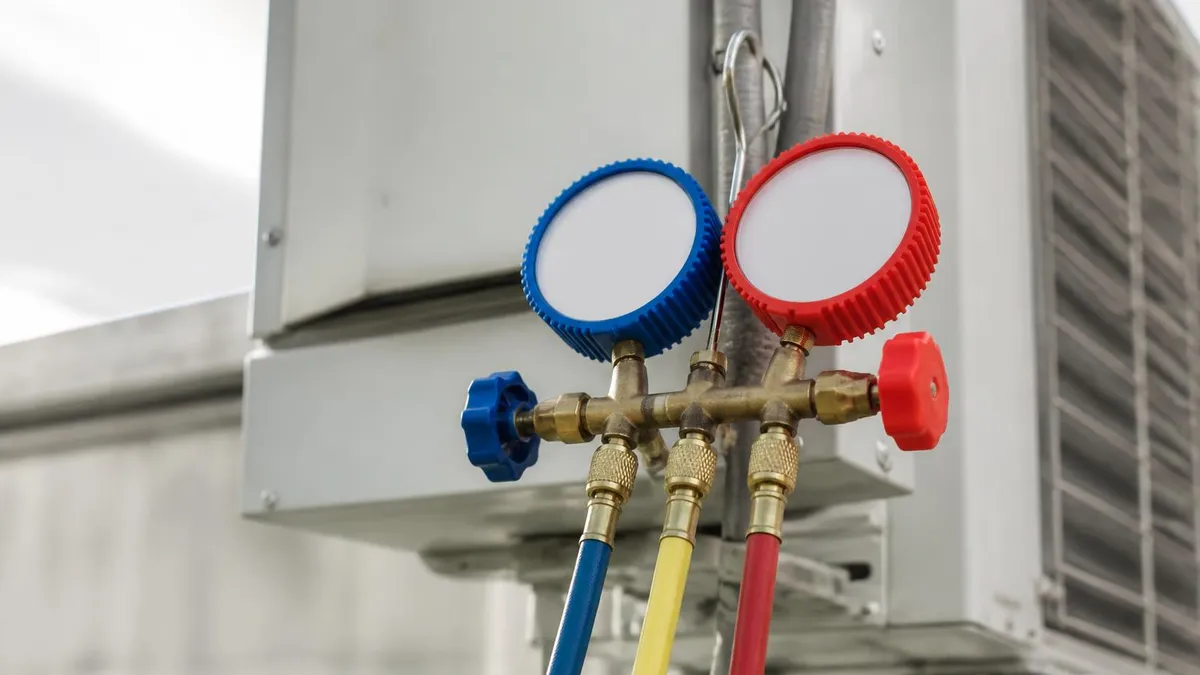
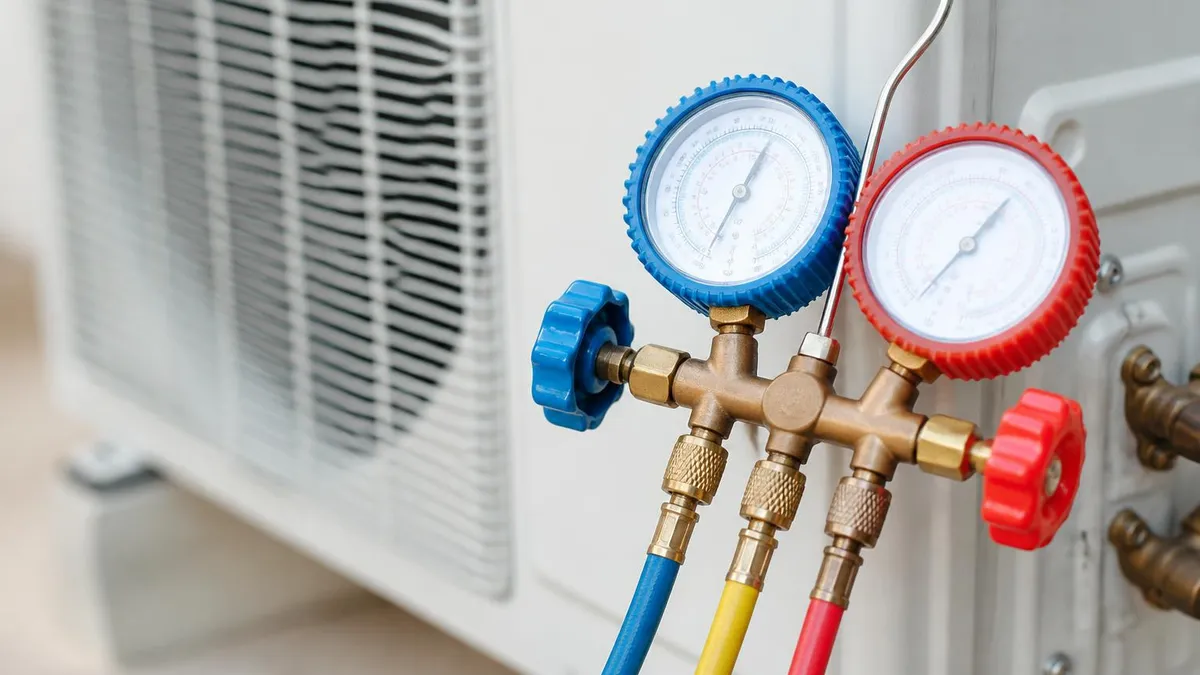
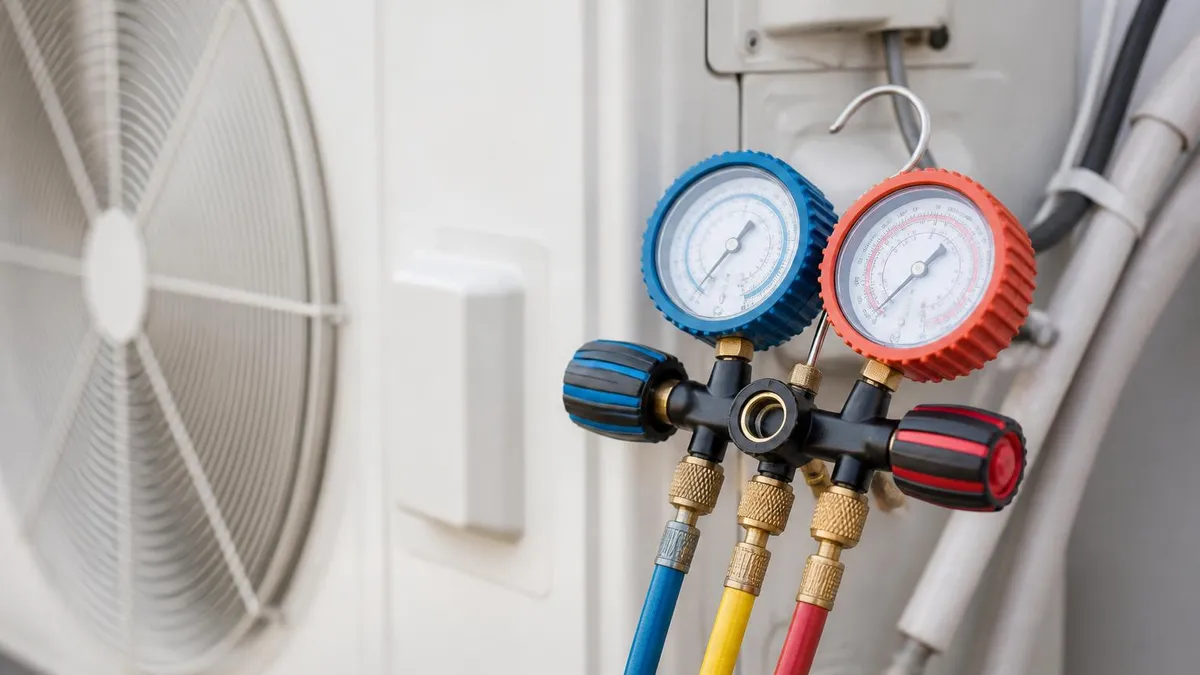
The first commissioning step is pulling a deep vacuum on the refrigerant lines — typically 500 microns or lower, held for 15 minutes after the vacuum pump is isolated. A deep vacuum removes moisture and non-condensables that would otherwise damage the compressor, freeze the metering device, or react with the refrigerant oil to form acid. Triple-evacuation with nitrogen breaks between vacuums is the gold standard for new line sets longer than 25 feet.
Refrigerant charging follows the manufacturer's instructions, not the gauge readings alone. Most modern systems are charged by weight using a digital scale, with the factory pre-charge in the condenser sized for a specific lineset length. Additional refrigerant is weighed in for longer line sets at the rate listed on the data plate. Final verification uses subcooling on TXV systems and superheat on fixed-orifice systems, measured at the service ports with calibrated gauges.
Airflow verification is equally critical. Total external static pressure is measured at the air handler with a manometer, and supply CFM is calculated from the blower performance chart at that static pressure. Individual register flows are measured with a hood meter and balanced by adjusting dampers. The target is 350 to 400 CFM per ton of cooling, lower in dehumidification mode for high-humidity climates. Working with certified HVAC contractors ensures these measurements are taken and documented.
Electrical verification includes measuring voltage drop at startup, confirming the contactor pulls in cleanly, and checking amp draw against the rated load amperage on the data plate. High amp draw indicates a charging problem, restricted airflow, or a failing component. Low amp draw can indicate undercharge or a slipping compressor. The startup amps and running amps both belong on the commissioning sheet, along with line and load side voltage at the disconnect.
Condensate management is the most common post-install service call. The primary drain must slope at least 1/8 inch per foot, the trap must be deep enough to prevent blower pressure from breaking the seal, and the secondary pan or auxiliary drain must have a float switch wired to shut the system down before water reaches the ceiling below. Float switches cost five dollars and prevent ten thousand dollar drywall and flooring repairs.
The final commissioning step is the homeowner walkthrough. The installer demonstrates thermostat operation, locates filters and explains the change schedule, shows the condensate cleanout and pan tablet location, points out the outdoor disconnect and breaker, and reviews the warranty registration. A printed commissioning report — including subcooling, superheat, static pressure, amp draw, and refrigerant weight — should be left with the homeowner along with all manufacturer literature and the AHRI certificate.
Choosing the right installer is the most consequential decision in the entire project, more important than brand or SEER2 rating. The best equipment installed poorly will underperform a mid-tier system installed by a meticulous technician every single time. Start by collecting three to five written bids, but resist the temptation to simply pick the lowest. Compare the scope line by line — load calculation included, permit included, commissioning included, warranty registration included, removal and disposal included — because the cheap bid usually omits something you will pay for later.
Verify credentials. The installer should hold a state HVAC contractor's license, carry general liability and workers' compensation insurance, and employ EPA 608 certified technicians for refrigerant handling. NATE certification is a strong indicator of technician competence, and membership in ACCA suggests adherence to industry standards like Manual J and Quality Installation 5. Ask for license numbers, then verify them on your state's licensing board website before signing a contract.
Read reviews carefully, but read past the star count. Look for patterns in negative reviews — repeated mentions of no-shows, callbacks for the same issue, or refusal to honor warranty work. Look in positive reviews for specifics like commissioning, follow-up calls, and helpful homeowner education. Generic five-star reviews that read like marketing copy are less informative than detailed three-star reviews that describe a specific problem and how it was resolved.
Once installation is complete, your job as the homeowner is not over. Register the warranty within 60 days — most manufacturers require online registration to activate the extended 10-year parts coverage, and unregistered equipment defaults to 5 years. Save the AHRI certificate, the permit, the inspection sign-off, and the commissioning sheet in a digital folder. These documents are essential for warranty claims, insurance, and resale.
Schedule annual maintenance before the second cooling season. Tune-ups catch refrigerant slow leaks, dirty coils, capacitor degradation, and condensate clog risk before they become emergency calls in July. A 30-minute tune-up extends compressor life, maintains rated efficiency, and is required by most manufacturers to keep the warranty in force. Many installers offer maintenance plans that bundle two annual visits plus priority service for $200 to $400 per year.
Plan for replacement before failure. Modern systems last 15 to 20 years with good maintenance, but capacity and efficiency degrade over time, and refrigerant transitions can make repair of older units uneconomical. Around year 12, start budgeting and watching for utility bill creep, longer run times, and rising repair frequency. Replacing a 15-year-old system on your timeline costs significantly less than replacing it during a July heat wave when you have no leverage. For brand-specific considerations and pricing comparisons, review options like Ameristar HVAC and other mid-tier manufacturers.
The final piece of advice is patience with the process. A great HVAC installation takes weeks from initial consultation to inspection sign-off, not days. The contractor doing measurements, running calculations, pulling permits, and scheduling inspections is doing the work that produces a 20-year asset. The contractor offering same-week installation with no permit and no load calc is producing a problem you will live with for the next two decades. Choose accordingly, and the system rewards you with quiet, efficient comfort for the long haul.
HVAC Questions and Answers
HVAC Technician Jobs Near Me: How to Find, Land, and Grow in Local HVAC Careers
CFM HVAC Basics: How Airflow, Sizing, and System Performance Work Together

Commercial HVAC Contractors Near Me: How to Find, Vet, and Hire the Right Local Pro for Your Building
Certified HVAC Contractors: How to Find, Vet, and Hire the Right Professional for Your Home or Business

Ameristar HVAC: Complete Guide to Units, Reliability, Costs, and Buyer Considerations
About the Author
NATE Certified HVAC Technician & Licensing Exam Trainer
Universal Technical InstituteMike Johnson is a NATE-certified HVAC technician and EPA 608 universal-certified refrigerant handler with a Bachelor of Science in HVAC/R Technology. He has 19 years of commercial and residential HVAC installation and service experience and specializes in preparing technicians for NATE certification, EPA 608, A2L refrigerant safety, and state HVAC contractor licensing examinations.