
MRI Safety With Metal: Can an MRI Machine Rip Out a Piercing? 2026
🔎 Can an MRI machine rip out a piercing? Learn which metals are risky, how screening works, and how pelvic MRI CPT codes 72195-72197 apply.
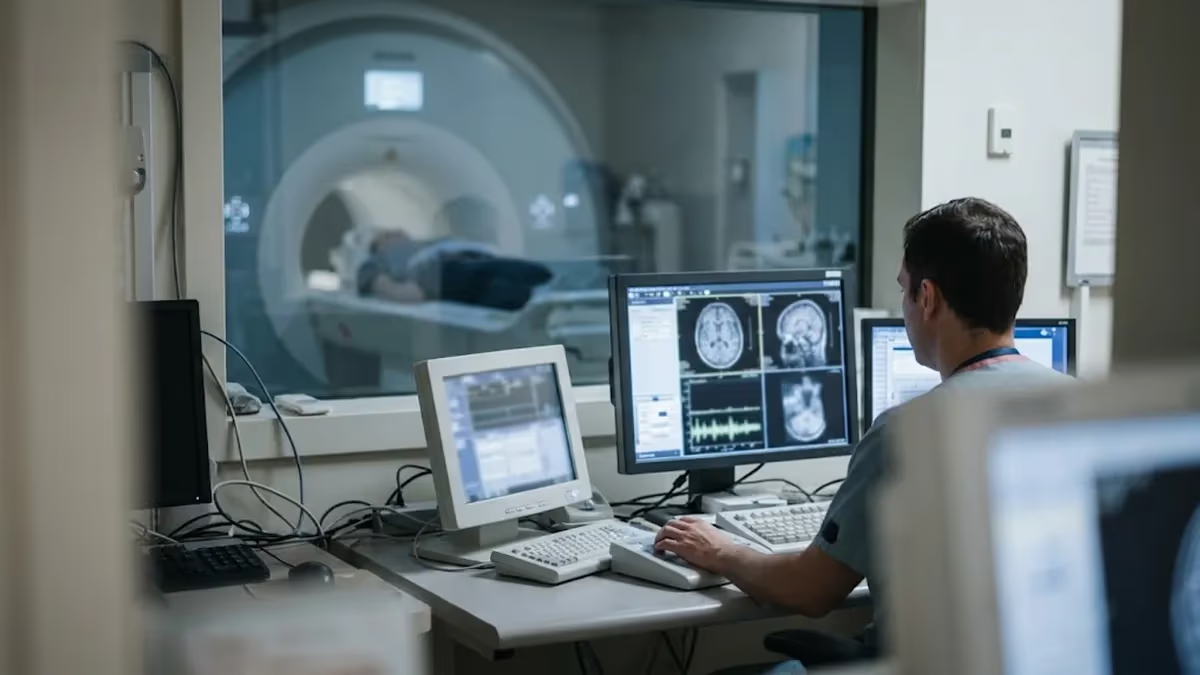
Can an MRI machine rip out a piercing? In almost every real-world case, the answer is no, because most modern body jewelry is made of titanium, niobium, or implant-grade steel that barely responds to a magnetic field. The danger is real but narrower than the rumors suggest. The risk comes from ferromagnetic objects, cheap plated jewelry, and heat buildup in conductive metal. Understanding the difference helps you walk into your scan calm, prepared, and ready to answer every screening question honestly.
An MRI scanner is essentially a very strong magnet. A typical hospital system runs at 1.5 tesla, and many newer units run at 3 tesla, which is roughly 30,000 to 60,000 times stronger than the magnetic field of Earth. That field is always on, even when no scan is running. Anything ferromagnetic that enters the room can be pulled toward the center of the bore with surprising force. This is called the projectile effect, and it is the reason screening rules exist.
Piercings fall into three broad groups. Titanium, niobium, gold, and PTFE or bioplast jewelry are non-magnetic and will not be pulled, though many facilities still ask you to remove them. Surgical stainless steel such as 316L is only weakly magnetic and usually does not move, but it can distort images. Cheap costume jewelry, magnetic retainers, and unmarked alloys are the real concern, since they may contain iron or nickel that responds strongly. You rarely know which group yours belongs to without paperwork.
Even non-magnetic metal can cause trouble. The radiofrequency pulses used during scanning can induce electrical currents in conductive loops, rings, and barbell shafts, producing localized heating. Burns from this mechanism are among the most common metal-related injuries in MRI. A navel ring sitting inside the field of an abdominal exam will absorb far more energy than a toe ring during a head scan, so technologists decide based on both the jewelry and the body part being imaged.
Facilities handle these decisions through a structured screening process, and the best way to learn how yours works is to read about mri safety with metal before you book. Expect a written form, a verbal interview, and often a handheld metal detector check. Scanners are run by technologists trained in the American College of Radiology safety zones, and they can refuse jewelry or implants they cannot verify. Cooperation is the single most useful thing a patient can offer.
Reports of jewelry literally being ripped from skin are extremely rare and almost always involve ferromagnetic items, such as an unverified steel stud or a magnetic closure. More common outcomes are warmth, tingling, a gentle pulling sensation, or a visible image artifact. If you feel anything unusual during a scan, squeeze the call ball immediately. The technologist can stop the sequence within seconds, and a minor warm spot rarely leaves lasting damage when it is reported early.
This guide walks through what screening looks like, which metals matter, how to remove jewelry safely, and what to expect from pelvic studies where genital and navel piercings sit close to the field. We also cover billing basics, including the pelvic MRI CPT code family, and how to find the closest open MRI to my location if you feel claustrophobic or have a body size that does not fit a standard bore.
MRI Metal Safety by the Numbers
How MRI Metal Screening Works Step by Step
Written Screening Form
Interview With the Technologist
Jewelry and Clothing Removal
Metal Detector Check
Scan With a Call Ball
Pelvic imaging raises extra questions about jewelry because genital, navel, and hip-area piercings sit directly inside or beside the scan field. A pelvic study images the uterus, ovaries, prostate, bladder, rectum, and surrounding lymph nodes, so the coil is positioned right over the region where metal might sit. Technologists will ask you to remove every piercing in that area, along with belly chains, waist beads, and any clothing containing zippers, snaps, or metallic fibers before you enter the scanner room.
Billing language often appears on referrals and insurance letters, so it helps to decode it. The pelvic MRI CPT code depends on contrast use. CPT 72195 covers a pelvic MRI without contrast, 72196 covers the study with contrast, and 72197 covers the study without contrast followed by contrast. Magnetic resonance angiography of the pelvis is billed separately as 72198. Your physician chooses the code based on the clinical question, and the imaging center confirms it during scheduling.
Gynecologic orders add one more label. People searching for the mri pelvis w wo gyn cpt are usually looking at 72197, because a gynecologic protocol often compares pre-contrast and post-contrast images to characterize fibroids, adnexal masses, endometriosis implants, or cervical and endometrial cancers. Not every gynecologic question needs contrast. Congenital uterine anomalies and simple fibroid mapping are frequently answered with 72195 alone, which costs less and avoids gadolinium exposure for patients with kidney concerns.
Cost varies widely across the United States. A pelvic MRI at a freestanding imaging center can run a few hundred dollars in cash-pay pricing, while the same study billed through a hospital outpatient department may reach several thousand dollars before insurance adjustments. Most commercial plans require prior authorization for all three pelvic codes. Ask the scheduler for the exact CPT code, the facility fee, and the radiologist's reading fee, then compare quotes from two or three locations before committing.
Pelvic patients also carry devices that matter more than a piercing. Intrauterine devices, hip replacements, pessaries, surgical clips, mesh, and sacral nerve stimulators all need verification. Most copper and hormonal IUDs are labeled MR Conditional and are scanned routinely at 1.5 or 3 tesla, but your technologist should confirm the brand and model. Hip implants are usually titanium or cobalt-chrome and will not move, yet they can create bright or dark image artifacts near the area being studied.
Genital piercings deserve plain talk. Surgical steel barbells, captive bead rings, and Prince Albert jewelry will not typically be torn out of tissue, but they can heat, distort local images, and trigger a technologist's refusal to start. Remove jewelry at home when possible, since an insertion channel can narrow within hours. Insert a sterile glass or PTFE retainer if the piercing is new, and tell the staff what you used so they can verify it is non-metallic.
If you cannot remove a piercing, say so during scheduling rather than at the door. Some centers can use a lower-field open scanner, shift the coil position, or reschedule with a radiologist's approval. Others will decline the exam until the jewelry is out. Calling ahead avoids a wasted trip, a missed appointment fee, and the stress of a rushed decision in the changing room. Bring a photo or receipt that shows the jewelry material whenever you have one.
Pelvic MRI CPT Code and Metal Risk: What to Know Before Your Scan
Ferromagnetic metals are the true danger for pulling. Iron, steel with high iron content, nickel-heavy alloys, and cobalt pieces respond strongly, which is why oxygen cylinders, scissors, and tools are banned from the scan room. A small ferromagnetic stud in thin tissue might twist or tug against skin, and larger pieces can move enough to injure. These cases are rare, but they explain why technologists never accept the claim that jewelry is probably fine.
Non-magnetic metals carry a different risk. Titanium, niobium, gold, and 316L steel generally will not move, but they can heat in the radiofrequency field and cause artifacts that hide anatomy. A long barbell near the scan region is more likely to cause trouble than a tiny stud far from it. Because the risk depends on shape, location, and sequence, the safest policy is removal, followed by a technologist's decision on any item that cannot come out.
Removing Jewelry Before an MRI: Is It Worth It?
- +Eliminates the risk of ferromagnetic jewelry being pulled or twisted
- +Prevents radiofrequency heating and skin burns at the piercing site
- +Reduces image artifacts that can hide anatomy near the jewelry
- +Speeds up screening because the technologist has nothing to verify
- +Avoids a canceled exam and a possible missed-appointment fee
- +Gives you peace of mind so you can stay still and relaxed
- −Fresh piercings can begin to narrow or close within hours
- −Removing tight captive rings or threaded ends can irritate tissue
- −Reinserting jewelry afterward can be uncomfortable or painful
- −Expensive or sentimental pieces can be lost or damaged if mishandled
- −Some people feel anxious or self-conscious without their jewelry
- −You may need a sterile retainer, which adds cost and planning
Before You Go: MRI Piercing Checklist and Closest Open MRI to My Location Tips
- ✓List every piercing, implant, tattoo, and prior surgery before your appointment.
- ✓Photograph your jewelry and note the material if you know it.
- ✓Practice removing tight rings or barbells at home with clean hands.
- ✓Ask your piercer about a sterile PTFE or glass retainer for new piercings.
- ✓Call the facility to confirm its jewelry policy and the CPT code ordered.
- ✓Search for the closest open MRI to my location if you feel claustrophobic.
- ✓Wear clothing without zippers, snaps, metal buttons, or metallic threads.
- ✓Leave phone, keys, wallet, watch, and cards in a locker outside the room.
- ✓Bring implant cards and surgical records to the screening interview.
- ✓Hold the call ball and report any burning or pulling right away.
When in doubt, take it out and tell the technologist
The magnet is always on, so no piece of metal is safe to assume. Removing jewelry costs a few minutes, while a burn or a projectile accident can cost far more. Report every item, even one you think is harmless.
Radiology uses three labels from the ASTM F2503 standard. MR Safe means an item poses no known hazard in any scanner environment, such as a plastic cup. MR Conditional means it is safe under specific conditions, such as a stated field strength and scan time. MR Unsafe means it is hazardous in any MRI environment, such as an iron oxygen cylinder. Most body jewelry has never been tested, so technologists treat it as unknown and ask you to remove it.
Ferromagnetic metals contain iron, nickel, or cobalt and are strongly attracted to the magnet. Paramagnetic metals like titanium and aluminum are very weakly attracted and do not move in practice. Diamagnetic metals like gold, silver, and copper are slightly repelled. Stainless steel varies by grade: the 316L used in many implants is nearly non-magnetic, but cheap, unmarked alloys may contain enough iron to produce a distinct tug against the skin.
Tattoos and permanent makeup are a frequent worry. Some pigments contain iron oxide, which can produce mild tingling or warmth, and a few people report brief swelling. Serious injuries are rare, and most radiology departments scan tattooed patients routinely. Large dark tattoos over the scan region, especially older ones, may warrant a cool compress and a conversation with the technologist. Tell the staff about new tattoos placed within the last few weeks so they can watch the area.
Medical implants follow their own rules. Many newer pacemakers and defibrillators carry MR Conditional labeling, but scanning requires device-specific programming and monitoring by a trained team. Cochlear implants, aneurysm clips, neurostimulators, and insulin pumps need manufacturer documentation. Older cerebral aneurysm clips can be ferromagnetic and dangerous. Always carry your implant card and surgical records, and be ready to give the date, location, and manufacturer so staff can look up the labeling.
Metal fragments in the eye or body deserve special attention. Welders, machinists, and anyone with a history of shrapnel or gunshot injuries may carry slivers they cannot feel. Many facilities screen with orbital X-rays or a quick CT before scanning, because a moving fragment near the optic nerve can cause blindness. Bullets and pellets lodged near vessels or nerves can also shift. Be honest about your work history and any injuries, even those from decades ago.
Everyday items cause surprisingly many incidents. Hairpins, underwire bras, hearing aids, wigs with metal clips, watches, phones, credit cards, and keys must stay outside the scanner room. Transdermal patches with metallic backing, including some nicotine and nitroglycerin patches, can heat and burn skin. Medication patches should be removed and replaced afterward. Magnetic eyelashes, magnetic nail products, and magnetic retainers are especially notorious, since they are designed to respond strongly to magnets.
The reason heating matters is simple physics. Radiofrequency energy induces currents in conductive material, and the specific absorption rate limits how much energy the body absorbs. A coiled wire, long barbell, or looped chain concentrates that current into a small area. Burns usually appear within minutes as a warm spot that grows uncomfortable. Skin contact between limbs, such as crossed legs or touching thighs, can form a conductive loop, which is why technologists place foam pads between body parts.
Oxygen tanks, wheelchairs, IV poles, and tools can become deadly projectiles in the magnetic field. A child died in a 2001 New York accident when an oxygen cylinder was pulled into a scanner. Only staff trained in MRI safety should move equipment near the magnet.
Open MRI systems use a wider, more accessible design with a magnet above and below the patient, or a C-shaped layout with a large opening on the sides. They were developed for patients who feel claustrophobic, for larger bodies, and for children who need a parent nearby. Traditional open units often operate between 0.3 and 1.2 tesla, compared with 1.5 or 3 tesla for closed systems. The magnet is still always on, so metal rules apply just as strictly.
A lower field means a weaker pull, but not a harmless one. A steel wheelchair or oxygen tank can still become a projectile. Facility policies on piercings are often the same at open and closed sites, because heating risk depends on radiofrequency energy and not on magnet strength alone. Patients sometimes assume an open scanner lets them keep jewelry on, which is rarely true. Ask the center directly rather than guessing, and expect the same screening form.
Searching for the closest open MRI to my location works best when you combine a map search with a phone call. Look for terms such as open MRI, wide-bore MRI, or 70 centimeter bore, and check that the site is accredited by the American College of Radiology. Many hospitals now operate wide-bore 1.5 or 3 tesla systems that give the comfort of a larger opening with sharper images than older low-field scanners.
Image quality is the main tradeoff. Low-field open scanners may need longer scan times, which means more time holding still, and they can struggle with small structures such as ovaries, nerve roots, and the prostate gland. For pelvic and gynecologic studies, many radiologists prefer a wide-bore high-field scanner. Ask your referring provider whether an open system is acceptable for your clinical question before you book, because a nondiagnostic scan can mean paying for a repeat.
Insurance can influence your choice. Many plans steer patients toward freestanding imaging centers with lower negotiated rates than hospital departments, and some require a specific in-network facility. When you call, confirm the CPT code, whether prior authorization is on file, and whether the radiologist reading your images is in network. Out-of-network reads can create a surprise bill even when the facility fee is covered. Write down the name of the person you speak with and the date.
Sedation is another reason people look for open scanners. Some centers offer oral anti-anxiety medication prescribed by your physician, and a few hospitals provide monitored sedation. If you take medication, arrange a driver. Many patients find that a wide-bore system, a mirror, headphones, and a calm technologist are enough. Practicing slow breathing and keeping your eyes closed from the start often reduces anxiety more than people expect, and can let you finish in a standard scanner you would have avoided.
Whichever scanner you choose, the metal rules do not change. Remove jewelry, complete the screening form carefully, and disclose every implant, tattoo, and prior surgery. Pelvic MRI sessions often last 30 to 45 minutes, and appointments with contrast can run closer to an hour. Plan for check-in and screening time on top of that. A prepared patient finishes faster, holds stiller, and produces cleaner images that give the radiologist the best chance of a clear, confident report.
Start preparation a few days ahead by listing every piece of metal you wear regularly. Include piercings, dental retainers, hair accessories, and medical devices. Photograph each piece and note the material if you know it. Bring that list to your appointment or share it through the patient portal. A clear inventory lets the technologist make quick decisions, and it protects you from forgetting a small item such as a nipple bar or a cartilage stud.
Practice removing your jewelry at home. Tight captive bead rings, threaded labrets, and flat-back studs can be stubborn, and a rushed attempt in a changing room can irritate tissue. Use clean hands, saline, and a jewelry-opening tool if needed. If a piece is stuck, do not force it; call your piercer, who can remove it professionally. Bring a small case so you do not lose an expensive piece, and store it with your belongings, not in the scan room.
Protect healing piercings carefully. A fresh navel, nipple, or genital piercing can begin to close within hours, so plan the removal time as close to the scan as practical. Ask your piercer about a sterile non-metal retainer made of PTFE or glass, which is typically MR Safe. Check with the imaging facility before you rely on it. After the scan, clean the site, reinsert your original jewelry gently, and watch for redness or swelling over the next day.
Dress for success. Wear clothes without zippers, snaps, metal buttons, or metallic threads, or arrange to change into a gown. Leave your phone, wallet, keys, smartwatch, and cards in a locker. Skip glitter makeup, and remove any medication patches that have metallic backing. Many facilities provide scrubs and lockers. Arrive 15 to 30 minutes early so screening does not feel rushed, since stress makes it far easier to forget something important.
Be your own advocate during screening. Answer every question, even if it seems unrelated. Mention prior surgeries, injuries, dental work, tattoos, pregnancy, and kidney problems if contrast is planned. If you are unsure whether an item is metal, say so. Ask the technologist to explain any step you do not understand. You are allowed to pause the process or decline an exam if you feel unsafe, and a professional team will respect that request.
During the exam, stay still and stay in touch. Keep the call ball or squeeze bulb in your hand and use it for any burning, pulling, or sharp warmth. Mild warmth is normal, but a hot spot that grows is not. Do not wait for the sequence to end. Ear protection is essential because gradient noise can exceed 100 decibels. Breathe slowly, relax your hands, and avoid crossing your arms or legs during the scan.
Afterward, ask when to expect results and how they will be delivered. Radiologists often finish reports within one to two business days for routine studies, then forward findings to your ordering provider. If you experienced warmth, a skin mark, or pain at a jewelry site, report it before leaving so it can be documented. Keep your list of metal items and screening paperwork for future scans, which will go faster the next time you arrive prepared.
MRI Questions and Answers

MRI Center: How to Choose the Right Imaging Facility

Brachial Plexus MRI: Complete Guide to Imaging, Anatomy, Pathology, and Clinical Applications
Chiari Malformation MRI: Complete Patient Guide

MRI Coil: Complete Guide to Types, Functions, and Clinical Applications

MRI Safety and Accidents: Real Cases, Risks, and Screening Failures
How this page was made: written with AI tools and published by Nathan Beja, founder of Practice Test Geeks, who is responsible for its content. Exam facts are checked against the official sources listed below. Not reviewed by a subject-matter expert. Editorial policy
Sources & references
Exam facts on this page (fees, format, dates, passing scores) are checked against these official sources; the date is our last check. Editorial policy
- arrt.org — Passing score, score release, fees, exam information · verified Oct 2026
- assets-us-01.kc-usercontent.com — Renewal, score validity, test delivery, eligibility, exam format, test dates, time limit · verified Oct 2026