How to Do CPR: Step-by-Step Guide for Adults, Children, and Infants 2026 June
Learn how to do CPR correctly — 🔎 compressions, rescue breaths, AED use, and hands-only CPR. Updated AHA guidelines for adults, children, and infants.
Every year, roughly 350,000 Americans suffer cardiac arrest outside a hospital. About 70% of those happen at home — in a living room, a kitchen, a backyard. The person standing in the room is not a paramedic, not an ER doctor. It's a spouse, a coworker, a neighbor. That person — you — has the best shot at saving that life. CPR doubles or triples survival chances when started immediately, yet most bystanders freeze because they're not sure they'll do it right. They worry about hurting the person, or doing it wrong, or not knowing when to stop.
Here's what the data shows: even imperfect CPR is dramatically better than no CPR. Bystander CPR — regardless of training level — roughly doubles the chance of survival compared to waiting for EMS alone. The average EMS response time in the U.S. is 7–10 minutes. Brain death begins within 4–6 minutes of cardiac arrest. That gap is yours to close.
This guide walks you through exactly what to do, step by step, for adults, children, and infants — using current American Heart Association standards. Push hard, push fast, and keep going until help arrives. If you want to understand what does CPR stand for and the physiology behind why it works, that background is useful — but in an emergency, just start compressions. Everything else is refinement.
Current AHA standard (since 2010): CAB sequence — Compressions first, then Airway, then Breathing.
- ~350,000 out-of-hospital cardiac arrests in the U.S. each year; 70% happen at home
- CPR doubles or triples survival rate when started immediately
- Compression rate: 100–120 per minute — hum "Stayin' Alive" to keep pace
- Compression depth: at least 2 inches for adults, 2 inches for children, 1.5 inches for infants
- Standard ratio: 30 compressions to 2 rescue breaths (30:2)
- Hands-only CPR (compressions only) is AHA-approved for adult bystander response
- AED use within 3–5 minutes raises survival to 50–70%
- Good Samaritan laws in all 50 states protect bystanders who perform CPR in good faith
Why the CAB Sequence Replaced ABC
Before 2010, CPR training taught Airway → Breathing → Compressions. Made intuitive sense: clear the airway, give oxygen, then circulate blood. But research accumulated showing a critical problem — rescuers were spending 30 to 90 seconds trying to open airways and give breaths before starting compressions. That delay, even in trained hands, was killing people. The American Heart Association officially switched to CAB in 2010: Compressions first. Always.
The current sequence is CAB: Compressions → Airway → Breathing. Here's why the order matters. At the moment someone goes into cardiac arrest, their blood still carries oxygen — the oxygen from their last few breaths, dissolved in red blood cells. That oxygen can sustain some brain function for approximately 4 to 6 minutes if you circulate it.
Compressions are the mechanical pump that keeps that circulation going. They create enough pressure to push blood to the brain and heart muscle. Every second you spend fidgeting with an airway before the first compression is a second of zero perfusion — and zero perfusion is exactly what you're trying to prevent.
This wasn't just a bureaucratic change. Studies following real cardiac arrest outcomes showed measurably better survival when compressions started within the first 10 seconds of contact. The airway and breaths still matter — they're just not the first priority. Good CPR training drills this into muscle memory — knowing it intellectually is a start, but hands on a manikin is what makes the sequence automatic under stress when your own adrenaline is surging.

Before You Start: 4 Steps in the First 60 Seconds
Don't rush in. Look for traffic, downed power lines, fire, or water. You can't help anyone if you become a second victim. Only enter if the scene is safe.
Tap the person firmly on the shoulder. Shout: "Are you okay? Are you okay?" No response and no normal breathing (gasping doesn't count)? They need CPR.
If alone with an adult: call 911 first, then start CPR. If others are present: point at a specific person — "You, call 911 now" — and send another for the AED. Vague requests get ignored in crowds.
Many public spaces — airports, gyms, schools, malls — have AEDs. Send someone while you start CPR. You don't have to wait for it. Position the person on their back on a firm, flat surface.
Adult CPR — Step by Step
This is the core sequence for anyone approximately 8 years and older, or anyone who looks adult-sized. The entire cycle takes about 23 seconds when done correctly at the right rate.
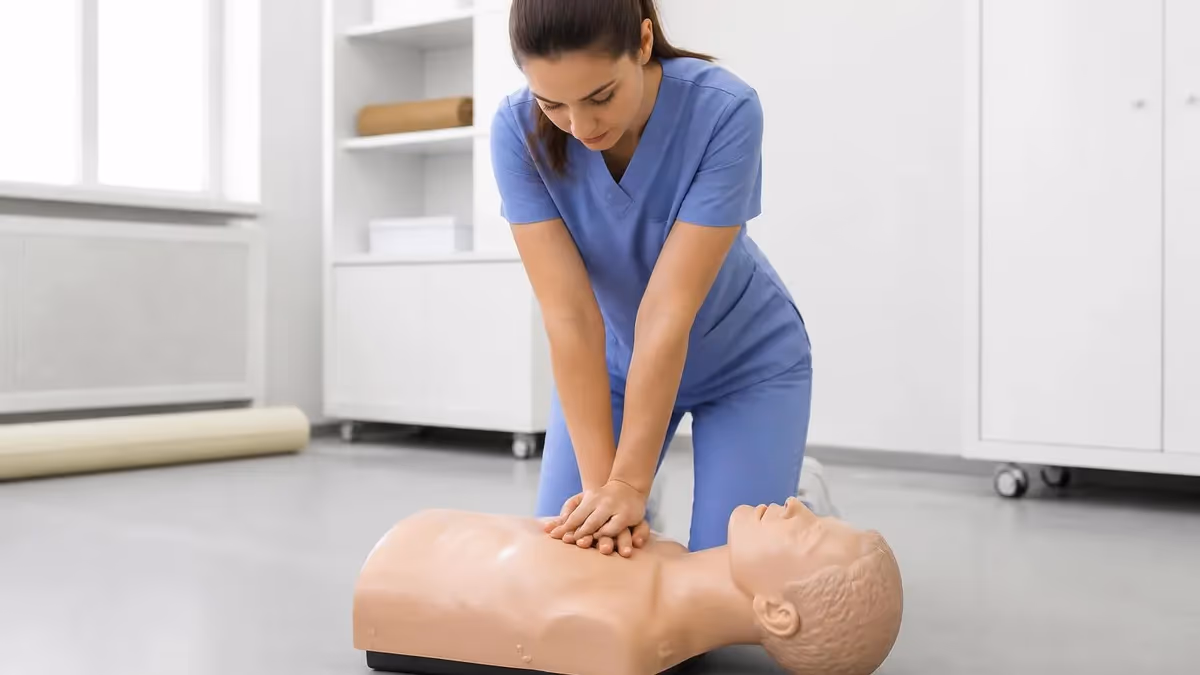
Hand Placement
Find the lower half of the sternum — the breastbone running down the center of the chest. Put the heel of one hand there, not on the ribs, not on the bottom tip of the sternum (the xiphoid process). Place your other hand on top, interlace your fingers, and lift your fingers off the chest. Only the heel of your bottom hand contacts the chest. This concentrates force and reduces rib fractures — though broken ribs during CPR aren't a reason to stop. A broken rib can heal. Death can't be undone.
Compressions: Hard and Fast
Lock your elbows. Position your shoulders directly over your hands. Push straight down — at least 2 inches (5 centimeters). Then let the chest fully recoil before the next compression. Full recoil matters: it creates the negative pressure that draws blood back into the heart. Leaning on the chest between compressions cuts cardiac output by up to 50%.
Rate: 100 to 120 compressions per minute. That's faster than most people expect. The song "Stayin' Alive" by the Bee Gees hits almost exactly 100 BPM — it's not a joke, it's genuinely useful. Do 30 compressions before moving to breaths.
Opening the Airway
After 30 compressions, tilt the head back by placing one hand on the forehead and lifting the chin with two fingers. This extends the neck and pulls the tongue away from the back of the throat. If you suspect spinal injury after a fall or car accident, use a jaw thrust instead — push the jaw forward from both sides without tilting the head.
Rescue Breaths
Pinch the nose shut. Create a complete seal over the mouth. Give one breath over 1 second — slow and steady, not a hard blast. Watch the chest: it should rise visibly. Give 2 rescue breaths, then immediately return to compressions. Don't pause more than 10 seconds total.
The 30:2 ratio — 30 compressions, 2 breaths — repeats continuously without pause until something changes. Learn how to perform CPR with hands-on practice to build real muscle memory from this sequence. Written steps get you started; practice makes them automatic.
CPR by Age Group
- Hand placement: Two hands, heel of bottom hand on lower half of sternum
- Compression depth: At least 2 inches (5 cm)
- Rate: 100–120 compressions per minute
- Ratio: 30 compressions : 2 breaths
- Rescue breaths: Pinch nose, seal over mouth, 1 breath per second
- Hands-only option: Yes — AHA-approved for adult bystander response
- Call 911: Before starting CPR if alone
- AED: Use as soon as available; shockable rhythms common in adults
Hands-Only CPR: When You Skip the Rescue Breaths
Not comfortable giving rescue breaths? Do compression-only CPR. For adult bystander response, hands-only CPR — continuous chest compressions without any mouth-to-mouth — is effective and fully supported by AHA guidelines. Call 911, push hard and fast at 100–120 per minute, don't stop. That's the entire protocol.
The blood already carries enough oxygen to sustain some brain function for several minutes of good compressions. The window is roughly 4–6 minutes from the moment of arrest. After that, oxygen-depleted blood still circulates — compressions still help — but without rescue breaths to replenish oxygen, effectiveness declines over time. That's why rescue breaths extend the useful CPR window. But they're not mandatory for lay rescuers responding to adult cardiac arrest.
For children, infants, drowning victims, and overdose patients — where respiratory failure is often what caused the cardiac arrest in the first place — rescue breaths are significantly more important. The arrest didn't start in the heart; it started in the airway or lungs. Don't skip breaths for these patients if you can safely perform them. Even a single breath between compression cycles helps replenish the oxygen that caused the problem.
One practical note on hesitation: rescue breaths are the single biggest reason bystanders delay starting CPR or don't start at all. If the choice is between doing hands-only CPR right now versus waiting because you're uncertain about breaths — do the compressions. Start immediately. You can always add breaths once you're in the rhythm.
Hands-Only vs. CPR with Rescue Breaths
- +Easier for untrained bystanders — removes hesitation
- +No mouth-to-mouth barrier concern
- +Equally effective for adult cardiac arrest (heart-origin)
- +Continuous compressions — no interruptions for breaths
- +AHA-endorsed for lay bystander adult response
- −Critical for children and infants (respiratory-origin arrests)
- −Extends effective CPR window beyond 4–6 minutes
- −Required technique for trained rescuers and healthcare providers
- −Essential for drowning, drug overdose, or airway obstruction cases
- −Practiced rescuers maintain quality better with natural breath-reset rhythm
Using an AED During CPR
AED stands for automated external defibrillator. It can restart a heart in a shockable rhythm — and about 20–25% of out-of-hospital arrests present with one on first contact. When they do, early defibrillation is the single most impactful intervention available. Survival rates hit 50–70% with AED use within 3–5 minutes of collapse. After 10 minutes without a shock, survival rates drop below 5%.
AEDs are explicitly designed to be used without prior training. The device makes all the critical decisions — it analyzes the heart rhythm, determines whether a shock is needed, and tells you exactly what to do at every step. Your job is to follow the prompts and keep doing CPR in between. Here's the sequence:
- Turn it on. Open the case — most AEDs power on automatically when you open the lid. If not, press the power button.
- Follow the voice prompts. The device talks you through every step in plain language. Listen and follow exactly.
- Attach the pads. The pads have clear diagrams showing placement — upper right chest, lower left side. Bare skin only. Remove or cut away clothing. Dry the chest if wet. Avoid placing pads over visible pacemaker lumps or medication patches (move them at least an inch away).
- Let it analyze. When it says "analyzing," stop touching the person completely. Movement interferes with rhythm detection and can force a re-analysis.
- Deliver the shock if advised. Make sure nobody is touching the patient. Shout "clear!" visually sweep the body, then press the shock button. Resume CPR immediately after — don't check for a pulse first.
- Resume CPR. The AED re-analyzes every 2 minutes. Keep doing CPR between its analysis cycles.
If the AED advises no shock, it didn't detect a shockable rhythm — not that the patient is fine or has recovered. Continue CPR without interruption. The device re-analyzes every 2 minutes and will advise again if the rhythm changes to a shockable one.
Public access AEDs are more common than most people realize — airports, gyms, shopping malls, schools, arenas, and many office buildings have them. Learn where the nearest AED is in the places you spend time regularly. That 30-second mental note could matter enormously one day.

CPR by the Numbers
The Four Most Common CPR Errors
Studies using real-time CPR feedback devices — accelerometers and force sensors embedded in training manikins — consistently capture the same mistakes in trained providers. Not untrained bystanders. Trained nurses, EMTs, even physicians make these errors under pressure. These are hardwired instincts that work against good CPR technique. Recognizing them in advance is the first step to avoiding them when it counts.
Too shallow. Most people instinctively hold back. Pressing 2+ inches into another person's chest feels violent. It isn't — it's necessary. Lock your elbows, position your shoulders directly over your hands, and drop your body weight into each compression. Don't arm-press; use gravity. If you're not exhausted after two minutes of CPR, you're probably not pushing hard enough.
Too slow. Without a tempo reference, people naturally settle into about 70–80 compressions per minute. That's a leisurely pace — and it's not enough. You need 100 at minimum. Count aloud at a brisk clip: "one-and-two-and-three..." Or hum "Stayin' Alive" — the verses run at almost exactly 100 BPM, the chorus slightly faster. It genuinely works.
Leaning on the chest between compressions. The heart refills with blood during the recoil phase — the moment between compressions when the chest rises back to its natural position. If you're resting any weight on the chest between pushes, you're preventing that recoil. No recoil means no refill. No refill means the next compression pushes an empty ventricle. Lift your weight fully between every single compression.
Pausing too long for rescue breaths. Every second without compressions is a second without blood flow. The 10-second rule exists for good reason. Tilt head, give 2 breaths, get back on the chest immediately. Don't linger, don't recheck, don't assess. The rhythm needs to stay: 30 compressions, 2 quick breaths, back to compressions. That cycle.
Rescuer fatigue sets in fast — compression depth drops measurably after about 2 minutes of continuous work. If there's a second rescuer, switch every 2 minutes. The handoff should be smooth and fast: one rescuer gives 30 compressions, calls "switching," the second takes position and starts immediately on "one."
When to Stop CPR
- ✓The person shows obvious signs of life — breathing normally, moving purposefully, coughing
- ✓Trained medical personnel (paramedics, EMTs) arrive and take over
- ✓An AED delivers a shock — resume CPR immediately after, don't pause to check pulse
- ✓You are physically unable to continue and no one else can switch with you
- ✓A physician or medical authority on scene declares the person deceased and directs you to stop
- ✓Do NOT stop to check for a pulse — feeling for a pulse under stress is unreliable even for professionals
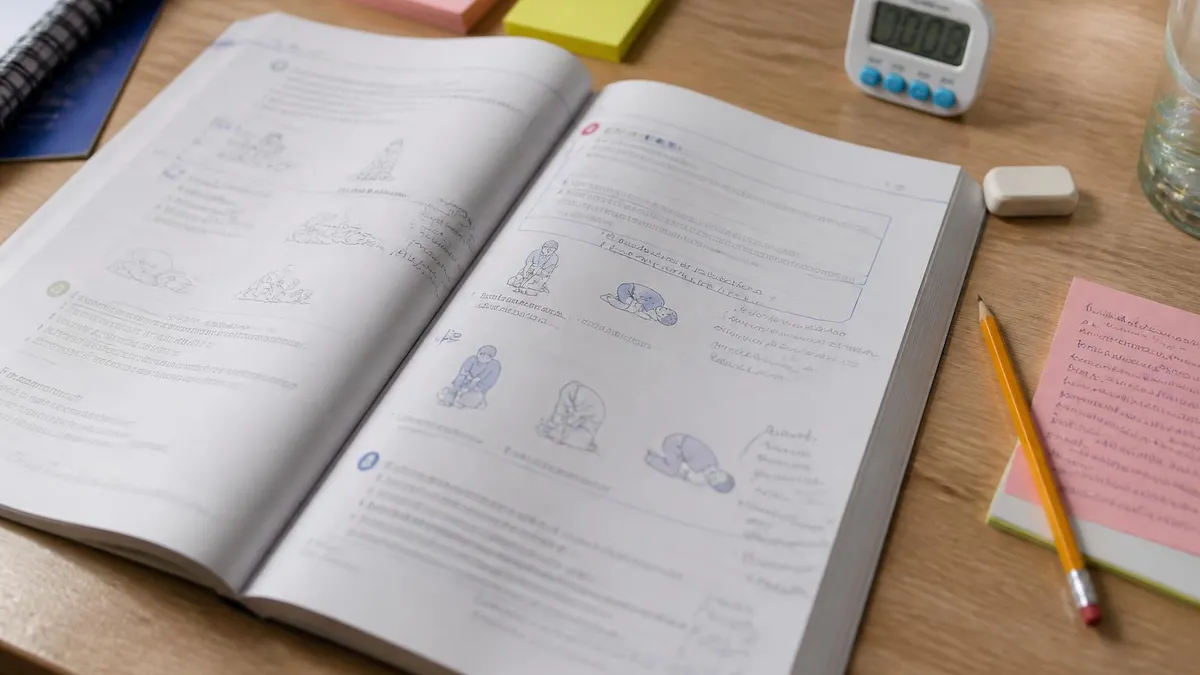
Getting Certified: Why Manikin Practice Matters
Reading about CPR and doing CPR are completely different experiences. The compression depth that feels "too hard" in your imagination feels barely adequate on a manikin. The rate that seems fast enough in your head is often 20 BPM slow when you're actually counting and pushing. Manikin practice reveals these gaps before an emergency does — and a 2-hour class is enough to close most of them.
A basic BLS or Heartsaver CPR/AED certification course covers adult, child, and infant techniques, AED operation, and rescue breathing. You'll receive real-time feedback — either from an instructor or from a feedback device built into the manikin that tells you if you're going too shallow or too slow. That calibration is what reading a guide can't give you. The muscle memory built in those 2 hours has genuine transfer to a real emergency situation, months later, under stress.
Certification from the AHA or Red Cross is valid for 2 years. After that, renewal courses are shorter — typically 1 to 1.5 hours — and focus on skills refresh. Know how long does cpr certification last and plan your renewal before the window closes. CPR skills decay faster than most people expect — studies show that compression quality drops measurably just 3–6 months after training without any practice.
Find red cross cpr classes near me through the Red Cross class locator, or check local hospitals, fire stations, and community centers. Many employers — especially those in healthcare, education, or fitness — cover the cost of certification for their staff. If you're not sure which format to choose, blended courses from the heart association cpr classes combine online learning with an in-person skills session. That's the minimum for building real competence — online-only courses skip the hands-on component entirely.
Cardiac arrest happens without warning. To people who look healthy. At family dinners, at gyms, at school. The gap between survival and death often closes in the 4 to 8 minutes before paramedics arrive. Those minutes belong to whoever is in the room. With training — or even just this guide — that person can be ready to act. You don't have to be perfect. You just have to start.
CPR Questions and Answers
About the Author
Registered Nurse & Healthcare Educator
Johns Hopkins University School of NursingDr. Sarah Mitchell is a board-certified registered nurse with over 15 years of clinical and academic experience. She completed her PhD in Nursing Science at Johns Hopkins University and has taught NCLEX preparation and clinical skills courses for nursing students across the United States. Her research focuses on evidence-based exam preparation strategies for healthcare certification candidates.
Join the Discussion
Connect with other students preparing for this exam. Share tips, ask questions, and get advice from people who have been there.
View discussion (5 replies)