Pelvic MRI: What It Shows, Why You Need One, Cost, Prep 2026 July
⏳ Pelvic MRI complete guide: what it shows, why doctors order it, prep, with vs without contrast, cost ranges, and what to expect during the scan.
If your doctor just ordered a pelvic MRI, you probably have questions. What does it actually show? Will it hurt? How long will you be in the machine? And why couldn't an ultrasound or CT scan answer the same questions for a fraction of the cost? A pelvic MRI is the gold standard for detailed imaging of your pelvic organs, and it's typically ordered when other imaging hasn't given doctors a clear answer.
This guide walks you through everything: what a pelvic MRI shows in women versus men, the most common reasons it's ordered, how to prepare, what to expect on scan day, cost ranges in 2026, and how to read your results. It's written for patients, not radiologists, so you'll get clear answers without the medical jargon.
Pelvic MRI is more accessible than ever. A decade ago, most pelvic scans were done at hospitals with limited weekend hours and long wait lists. Today, freestanding outpatient imaging centers are everywhere, and many offer evening and Saturday slots. Wait times for non-urgent pelvic MRI now average 1 to 2 weeks at most centers, sometimes just a few days at high-volume facilities. If your doctor flags your case as urgent, you can often get scanned within 48 hours.
A pelvic MRI is a detailed scan of your pelvic organs using a strong magnet and radio waves — no radiation involved. It produces sharper soft-tissue images than ultrasound or CT, which is why doctors turn to it for endometriosis, fibroids, prostate cancer staging, and unexplained pelvic pain. Most scans take 30 to 60 minutes, and results come back within 24 to 48 hours.
So what's actually inside the pelvis that an MRI looks at? Quite a lot. The pelvic cavity holds your reproductive organs, bladder, rectum, lymph nodes, blood vessels, and pelvic floor muscles. Each of these can develop conditions that need detailed imaging. A pelvic MRI captures all of them in slice-by-slice cross-sections, letting your radiologist zoom in on the exact tissue your doctor is worried about.
The machine itself is a powerful magnet — usually 1.5 Tesla or 3 Tesla. It works by aligning hydrogen atoms in your body, then measuring how they relax back when radio pulses turn off. Different tissues relax at different rates, and that's how the scanner builds an image.
What makes MRI special is its tissue contrast. Different sequences highlight fluid, fat, muscle, and abnormal tissue in different ways. A fibroid looks different from a healthy uterine wall. A suspicious prostate lesion glows on diffusion-weighted images. An endometriosis implant lights up on T2 sequences. That level of detail just isn't possible with ultrasound or CT for most pelvic problems. If you've had an MRI of the knee or an MRI brain scan before, the experience is similar — just with a different coil and body position.
One thing patients often want to know is whether a 1.5T or 3T magnet matters for them. For most pelvic imaging, 1.5T is plenty. 3T offers higher resolution and is often preferred for prostate MRI or detailed endometriosis mapping. Your facility chooses based on what's available and what your doctor ordered. If you're scheduled at a center that only has 1.5T, don't worry — the vast majority of pelvic pathology is diagnosed accurately at that field strength.

What a Pelvic MRI Shows by Sex
In women, pelvic MRI evaluates the uterus (size, fibroids, adenomyosis, congenital anomalies), ovaries (cysts, masses, suspected cancer), fallopian tubes, endometriosis (including deep infiltrating endometriosis on bowel or bladder), vaginal abnormalities, cervix (cancer staging), and pelvic floor structures. It's the gold standard for mapping fibroids before surgery and for finding hidden endometriosis that doesn't show up on ultrasound.
Doctors don't order a pelvic MRI casually. It's expensive, time-consuming, and usually requires insurance pre-authorization. So when does it actually make sense? The list is longer than you might think, but it boils down to a few main reasons: something on ultrasound or CT was unclear, a known condition needs detailed mapping, or cancer staging is required before treatment.
Endometriosis is one of the biggest drivers of pelvic MRI orders today. It's notoriously hard to diagnose, and many women suffer for years before getting clear answers. Standard ultrasound misses deep infiltrating endometriosis on the bowel, bladder, or pelvic sidewall. Pelvic MRI catches these lesions with 85 to 95 percent sensitivity when read by an experienced radiologist — close to what surgical laparoscopy finds.
For men, prostate cancer screening has gone through a quiet revolution. Multiparametric prostate MRI is now used before biopsy in many cases of elevated PSA. It assigns a PI-RADS score from 1 to 5, where 1 means very low likelihood of clinically significant cancer and 5 means very high likelihood. Research shows that this approach reduces unnecessary biopsies by about 27 percent and catches more aggressive cancers earlier. If your urologist hasn't mentioned MRI before recommending a biopsy, ask why.
Top Reasons Doctors Order a Pelvic MRI
- ✓Endometriosis evaluation, especially deep infiltrating endometriosis
- ✓Uterine fibroid mapping before myomectomy or UFE
- ✓Adenomyosis diagnosis when ultrasound is inconclusive
- ✓Ovarian cyst characterization (benign vs malignant features)
- ✓Prostate cancer detection, staging, or biopsy guidance
- ✓Pelvic mass evaluation of unknown origin
- ✓Chronic pelvic pain workup
- ✓Infertility evaluation when ultrasound doesn't explain findings
- ✓Rectal cancer staging before surgery or chemo
- ✓Cervical cancer staging
- ✓Pelvic floor dysfunction (prolapse, incontinence)
- ✓Mullerian duct anomalies and congenital uterine abnormalities
- ✓Post-surgical evaluation for complications or recurrence
Behind the scenes, your radiologist runs your scan through multiple imaging sequences. Each one is tuned to highlight different tissue properties. You don't need to know the technical details, but understanding the basics helps when you read your report. T2 sequences are the workhorse for most pelvic pathology — fluid lights up bright, making cysts, edema, and tumors stand out clearly.
T1 sequences show anatomy with fat appearing bright. Diffusion-weighted imaging (DWI) is the cancer-hunting sequence: suspicious tissue restricts water movement and lights up against a darker background. Fat-suppressed sequences (STIR or fat-sat T2) hide fat signal so subtle pathology stands out. Your radiologist combines findings across all these sequences before reaching a conclusion — single-sequence reads can mislead.
Pelvic MRI Sequences and What They Show
- Best for: Anatomy and fat-containing structures
- Fat appears: Bright
- Fluid appears: Dark
- Use case: Identifying dermoid cysts, blood products
- Best for: Most pelvic pathology
- Fluid appears: Bright
- Workhorse: Cysts, masses, edema, fibroids
- Use case: Uterus, ovaries, prostate zones
- Best for: Cancer detection
- Shows: Restricted water movement
- Suspicious: Bright on DWI + dark on ADC map
- Use case: Prostate, ovarian, rectal cancers
- Best for: Tumor characterization
- Requires: IV gadolinium contrast
- Shows: Enhancement patterns over time
- Use case: Prostate cancer, endometriosis, infections
One of the first questions you'll get from the scheduler is whether your scan needs contrast. Gadolinium contrast is a clear liquid injected through an IV partway through the scan. It makes blood vessels and certain tissues — especially tumors and inflammation — light up more clearly. Not every pelvic MRI needs it, though, and your ordering doctor decides based on what they're looking for.
If you're being scanned for simple fibroids or a known benign ovarian cyst, you probably won't need contrast. If your doctor suspects cancer, infection, a mass of unknown origin, or wants to look for active endometriosis, contrast is almost always added. The decision affects scan length (45 to 60 minutes with contrast versus 30 to 45 without) and cost (an extra 100 to 300 dollars typically).
Modern gadolinium agents are far safer than older versions. The worry about nephrogenic systemic fibrosis (NSF) that you may have read about is almost entirely tied to older agents and patients with severe kidney disease. Today's macrocyclic agents have essentially eliminated that risk for patients with normal kidney function. Your facility will check your eGFR with a quick blood test before contrast, usually drawn the same day or within the prior 30 days, just to be safe.
With Contrast vs Without Contrast
Used when the scan question can be answered with anatomy and tissue contrast alone. Common scenarios: fibroid mapping, simple ovarian cyst follow-up, basic anatomy review, adenomyosis evaluation, and some endometriosis protocols. Pros: shorter scan, no IV stick, no contrast risk. Cons: may miss subtle tumors or active inflammation. Typical cost is 500 to 2,500 dollars depending on facility and region.
Preparation is usually simpler than people expect. Most pelvic MRI scans don't require fasting, though some protocols ask for a 4-hour fast. You'll be asked about implants, pacemakers, prior surgeries, allergies, kidney function (if contrast is ordered), and pregnancy status. If you have any metal in your body — pacemaker, aneurysm clip, cochlear implant, shrapnel, even an old IUD — bring documentation. Many modern implants are MRI-conditional, meaning they're safe at certain magnet strengths, but the tech needs to verify.
Specialty protocols deserve a quick mention. If your scan is for rectal cancer staging, expect bowel prep the night before — usually a clear-liquid diet and a mild laxative. If it's for deep infiltrating endometriosis, your facility may ask you to do a partial bowel prep or use a vaginal and rectal gel to highlight tissue interfaces. For prostate MRI, no special prep is usually needed, though some centers ask men to empty their bowels and abstain from ejaculation for 72 hours to reduce seminal vesicle motion artifacts.
How to Prepare for Your Pelvic MRI
- ✓Confirm insurance pre-authorization is in place before your appointment
- ✓Eat a light meal 1 to 2 hours before unless told to fast
- ✓Drink water normally — some protocols want a comfortably full bladder
- ✓Avoid lotions, deodorants, or makeup with metallic particles
- ✓Remove all jewelry, watches, piercings, and hairpins before arriving
- ✓Bring a list of any implants, surgeries, and prior MRIs
- ✓Wear comfortable, metal-free clothing (you'll likely change into a gown)
- ✓Tell staff if you're pregnant, claustrophobic, or have kidney disease
- ✓Women: remove tampons before the scan
- ✓Arrange a driver only if oral sedation has been ordered
- ✓Bring earplugs if you're sensitive to noise — facilities provide them too
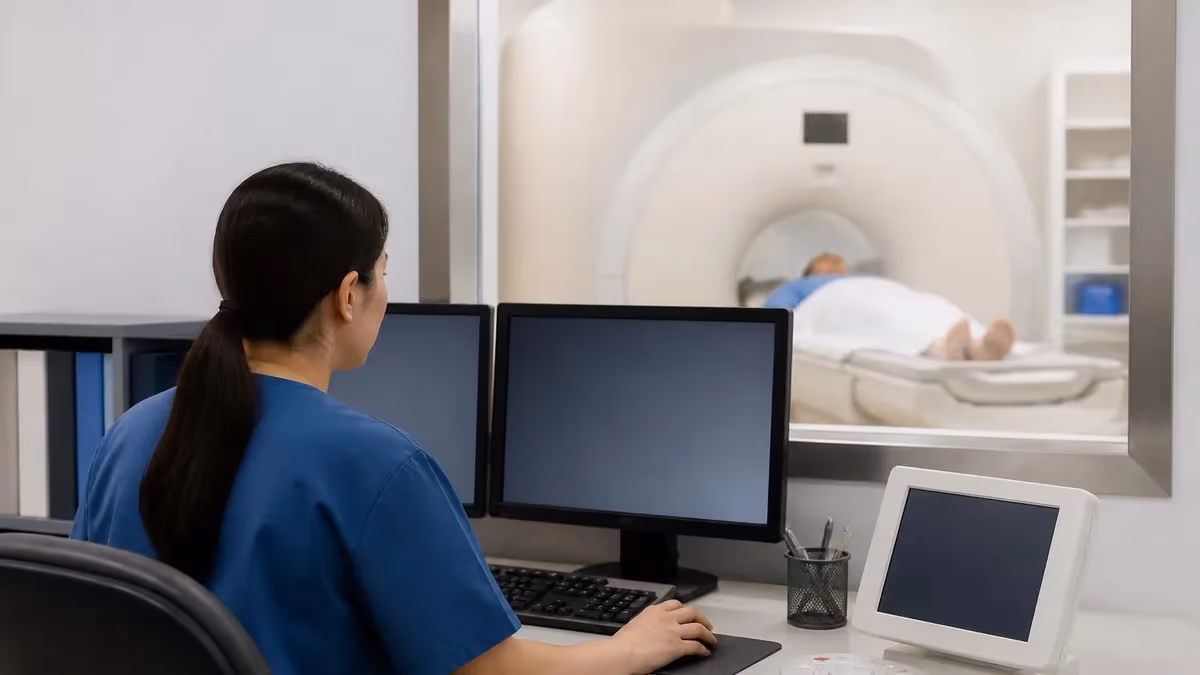
Scan day itself follows a predictable rhythm. You arrive 30 minutes early, check in, sign forms, and answer a safety screening. You'll change into a gown, lock up valuables, and walk into the MRI suite. The tech positions you on a padded table, places a pelvic coil (a flat array that captures the signal) over your hips, gives you earplugs or headphones, and hands you a squeeze ball in case you need to alert them during the scan.
The safety screening is more thorough than most patients expect. You'll go through a multi-page questionnaire asking about every surgery, implant, injury, and exposure that might involve metal. This isn't bureaucratic overkill — even a tiny metal fragment in your eye from welding without goggles years ago can become a serious problem in a 3T magnet. If you've ever worked in metalwork or had shrapnel injuries, your tech may order a quick X-ray of your orbits to clear you for scanning. Honesty in screening keeps you safe.
Step-by-Step: Your Pelvic MRI Appointment
Step 1: Check-In and Forms
Step 2: Change and Secure Belongings
Step 3: IV Placement (If Contrast)
Step 4: Positioning
Step 5: Hearing Protection
Step 6: Glide Into Scanner
Step 7: Multiple Sequences
Step 8: Glucagon or Contrast (If Needed)
Step 9: Final Sequences
Step 10: Done and Discharge
The scan itself is loud. There's no getting around it. MRI scanners use rapidly switching magnetic gradients that produce knocking, buzzing, and tapping sounds that can hit 100 decibels — about as loud as a chainsaw. That's why earplugs and headphones are mandatory. Many facilities now offer music streaming so you can listen to your own playlist. Tell the tech in advance and they'll get it set up.
Staying still is the single most important thing you can do. Movement during a sequence ruins those images, and the tech will have to repeat them, adding minutes to your scan. Most pelvic MRI scans use normal breathing, but you may be asked to hold your breath for 10 to 20 seconds during certain sequences. The tech will coach you through it. If you feel anxious, panicked, or just need a break, squeeze the call ball and they'll pause the scan.
Many patients tell us afterward that the actual experience was easier than they feared. The bore is wider than it looks online — most modern scanners have 70 cm openings, and your head usually stays near the open end during a pelvic scan. You can keep your eyes closed, focus on the music, or chat with the tech between sequences. Time tends to pass faster than expected. A 45-minute scan often feels like 20 once you settle in.
A tip from veteran MRI patients: ask the tech to tell you how long each sequence is before it starts. Knowing you have 3 minutes 40 seconds left rather than wondering when it ends makes a real difference. Most techs happily keep you informed throughout — clear communication is part of their training, and they want a smooth scan as much as you do.

You're not alone — roughly 1 in 10 patients struggles with MRI claustrophobia. Options that help: oral anxiolytic (Ativan or Valium, taken 30 minutes before, requires a driver), open MRI (wider bore, lower field strength, less detailed but tolerable), wide-bore MRI (70 cm openings, available at most modern centers), and music or eye masks. Tell your doctor before scheduling so the right setup is arranged. Don't tough it out — a botched scan helps nobody.
Cost is where pelvic MRI gets complicated. There's no single price. What you pay depends on where you live, where you get scanned, whether you have insurance, and whether contrast is added. In 2026, the typical range for a pelvic MRI in the United States is 500 to 3,500 dollars for the cash price without insurance. Hospital outpatient facilities tend to charge 30 to 60 percent more than freestanding imaging centers for the exact same scan.
Insurance changes the math but not always for the better. A high-deductible plan might leave you paying the full negotiated rate until you hit your deductible. A traditional plan with a copay might cap your out-of-pocket at 50 to 500 dollars. The strange truth is that paying cash at a freestanding imaging center can sometimes cost less than your insured rate at a hospital. Always call ahead and ask for the self-pay price.
For deeper detail on imaging prices, see our MRI scan cost breakdown and the guide to MRI cost with insurance. A few practical tips: ask for an itemized estimate before the scan, check if your facility offers prompt-pay discounts (often 10 to 25 percent), and consider an HSA or FSA if you have one. If you're uninsured, many imaging centers will negotiate, especially for cash up front. Don't be shy about asking — the listed price is rarely the floor.
Pelvic MRI Cost Ranges in 2026
How does pelvic MRI stack up against other imaging options? It depends on the clinical question. Ultrasound is almost always the first imaging test for pelvic symptoms — it's cheap, fast, uses no radiation, and offers real-time dynamic views. CT scans are quicker than MRI and great for emergencies, but they use ionizing radiation and have weaker soft-tissue contrast.
PET/CT is reserved for cancer staging. MRI sits at the top of the soft-tissue detail ladder, which is why it's often ordered after another test has raised questions. For a deeper side-by-side, read our MRI vs CT scan comparison. The general rule: start with the cheapest, fastest, safest test that can answer the question, then escalate to MRI when more detail is needed or when ultrasound and CT leave doctors uncertain.
Pelvic MRI vs Other Imaging Tests
- Cost: $100-$500
- Radiation: None
- Best for: First-line pelvic evaluation
- Limitation: Operator-dependent, less detail
- Cost: $300-$1,500
- Radiation: Yes (moderate)
- Best for: Emergencies, trauma, stones
- Limitation: Weaker soft-tissue contrast
- Cost: $500-$3,500
- Radiation: None
- Best for: Detailed soft-tissue, cancer staging
- Limitation: Long scan, claustrophobia, cost
- Cost: $1,500-$5,000
- Radiation: Yes (higher)
- Best for: Cancer staging and recurrence
- Limitation: Expensive, limited availability
Pros and Cons of Pelvic MRI
- +No ionizing radiation — safe for repeated scans
- +Best-in-class soft-tissue detail for pelvic organs
- +Gold standard for endometriosis, fibroids, and prostate cancer
- +Catches pathology missed by ultrasound or CT
- +Multiparametric prostate MRI reduces unnecessary biopsies by 27%
- +Provides comprehensive cancer staging in a single exam
- −Expensive without insurance — up to $3,500 cash price
- −Long scan time (30 to 60 minutes typical)
- −Loud knocking and buzzing during sequences
- −Claustrophobia is a real challenge for some patients
- −Pre-authorization usually required by insurance
- −Gadolinium contrast carries small risks for kidney disease
- −Many implants and pacemakers may be contraindicated
Once your scan is done, you'll typically wait 24 to 48 hours for your radiologist's report. Some facilities turn it around the same day for urgent cases. The report is sent to your ordering doctor, who will then discuss it with you. You can also request a copy of the report and the images themselves. Most patients are surprised by how technical the report sounds — it's written for doctors, not patients, so don't panic at scary-sounding terms.
A few phrases to know: T2 hyperintense means the area is bright on T2 sequences (usually fluid, cyst, or edema — most common). Diffusion restriction means the tissue is suspicious for malignancy or active inflammation. Stable means unchanged from prior imaging — great news for cancer follow-up. Interval change means something is different from your last scan, which may or may not be concerning. Always discuss findings with your doctor before drawing conclusions.
Reports typically include four sections. Technique lists the sequences performed and whether contrast was used. Comparison notes any prior imaging for reference. Findings describes each organ or region in detail, even when normal. Impression is the bottom-line summary your doctor reads first. If your impression mentions BI-RADS, PI-RADS, or O-RADS scores, those are standardized cancer-risk scales (breast, prostate, and ovarian respectively) that quickly communicate how concerned the radiologist is.
Pelvic MRI isn't always the right first move. If your symptoms point to a likely ovarian cyst, fibroid, or pregnancy concern, transvaginal ultrasound is faster and cheaper. If you're in the ER with acute pelvic pain, CT is usually faster and more available. If you have severe kidney disease and need contrast imaging, your doctor may choose a non-contrast protocol. Talk through options with your ordering doctor — sometimes the best test is the one you can actually get scheduled this week.
Pelvic MRI Questions and Answers
About the Author
Medical Laboratory Scientist & Clinical Certification Expert
Johns Hopkins UniversityDr. Sandra Kim holds a PhD in Clinical Laboratory Science from Johns Hopkins University and is certified as a Medical Technologist (MT) and Medical Laboratory Scientist (MLS) through ASCP. With 16 years of clinical laboratory experience spanning hematology, microbiology, and molecular diagnostics, she prepares candidates for ASCP board exams, MLT, MLS, and specialist certification tests.
Join the Discussion
Connect with other students preparing for this exam. Share tips, ask questions, and get advice from people who have been there.
View discussion (6 replies)