Foot MRI: What It Shows, Procedure, Reading the Report and Cost 2026 July
Foot MRI explained: 💡 what it shows, how the scan works, conditions caught, reading your report, costs, safety, prep and tests it replaces.
What a Foot MRI Actually Sees Inside Your Foot
A foot MRI uses powerful magnets and radio waves to map every layer of tissue in your foot. No radiation, no needles for the basic scan, and no surgical exploration. The scanner builds slice-by-slice images so your radiologist can examine tendons, ligaments, cartilage, nerves, bones, and even small fluid pockets that ordinary X-rays simply cannot show.
Most patients arrive after weeks or months of nagging pain that hasn't resolved with rest, ice, or anti-inflammatories. Maybe a runner felt a pop near the heel. Maybe a dancer noticed clicking in the midfoot. Maybe a desk worker just woke up one morning with a sore arch that refused to settle. X-rays cleared the bones, ultrasound was inconclusive, and now the doctor wants the full picture.
The scan typically covers from the toes back through the heel, including the small tarsal bones and surrounding soft tissue. Some studies focus narrower (a single tendon, for example) while others sweep wider when the source of pain is unclear. Your ordering physician sets the protocol, and the MRI technologist tailors the sequences to match.
If you've never had any imaging before, you can read our broader complete MRI guide first. It walks through how the technology works at the atomic level. For foot-specific concerns, keep reading.
When Doctors Order a Foot MRI
Not every sore foot needs an MRI. Far from it. Most foot pain resolves with conservative care. But certain red flags push providers toward advanced imaging quickly, and a foot MRI is often the test of choice.
The most common triggers? Suspected stress fractures that don't show on X-ray. A stress reaction in the navicular bone or second metatarsal can stay invisible for weeks on plain film, yet MRI lights up the marrow edema days after the injury starts. Athletes, military recruits, and dancers see this scenario constantly.
Plantar fasciitis that refuses standard treatment is another trigger. So is suspected Morton's neuroma between the toes, posterior tibial tendon dysfunction (a leading cause of adult flatfoot), Lisfranc injuries in the midfoot, and any tendon tear that physical exam can't fully characterize.
Tumors, infections, and avascular necrosis also push doctors toward MRI. The scan reveals soft-tissue masses, bone infections, and dying bone tissue earlier than nearly any other modality. Diabetics with non-healing foot ulcers often get an MRI to rule out deep infection reaching the bone.
Red flags that usually trigger imaging
Pain lasting longer than six weeks despite rest. Sudden swelling without a clear cause. Visible deformity. Numbness or tingling that won't stop. Persistent pain at night. Inability to bear weight. Any of these, especially in combination, often means your doctor wants to see inside.
Foot MRI by the Numbers
Quick Take
A foot MRI maps tendons, ligaments, bones, cartilage and nerves without radiation. It is the test of choice when X-rays come back clear but pain refuses to resolve, especially for stress fractures, tendon tears, Lisfranc injuries and Morton's neuroma. Most scans take 30 to 60 minutes and need no special preparation unless contrast is planned.
How the Foot MRI Procedure Actually Goes
You'll arrive 15 to 30 minutes early to fill out a safety questionnaire. The technologist asks about metal implants, pacemakers, prior surgeries, claustrophobia, and allergies. Be honest. Every detail matters because the magnet doesn't care if you forgot about that knee screw from 2014.
Wear loose clothing without metal. If you choose, you change into a gown. Jewelry, watches, hairpins, and even some makeup containing metallic pigments come off. Phones and credit cards stay outside the scanner room. The technologist double-checks pockets because tiny items become projectiles inside the magnet.
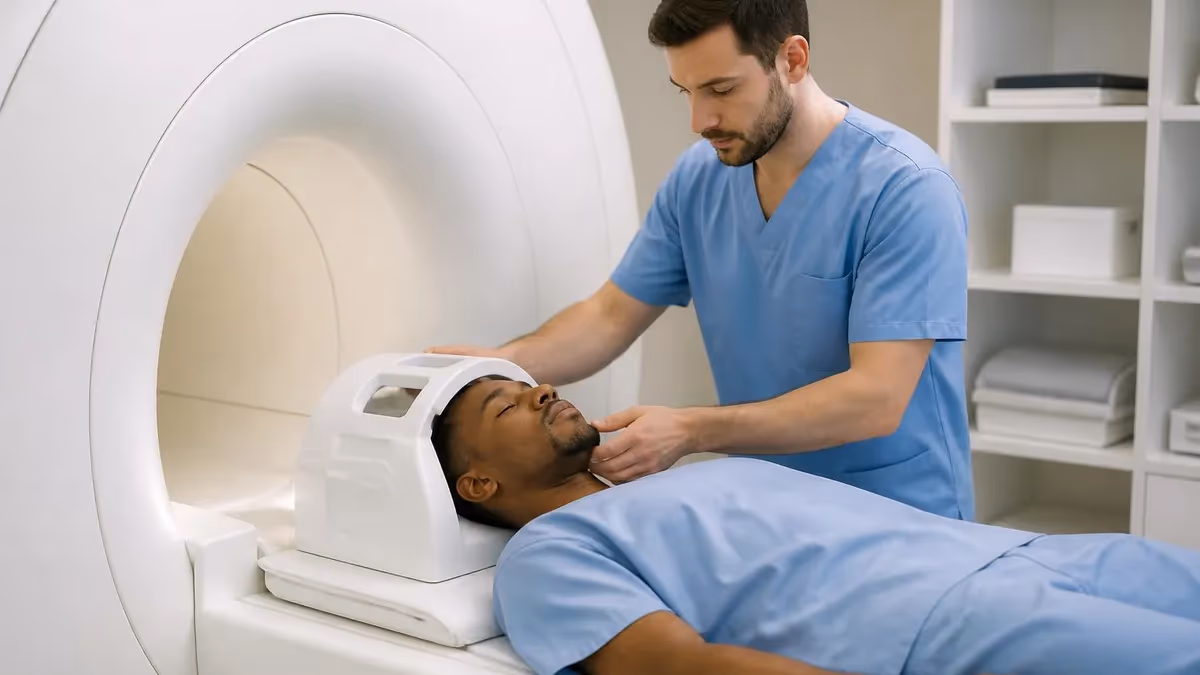
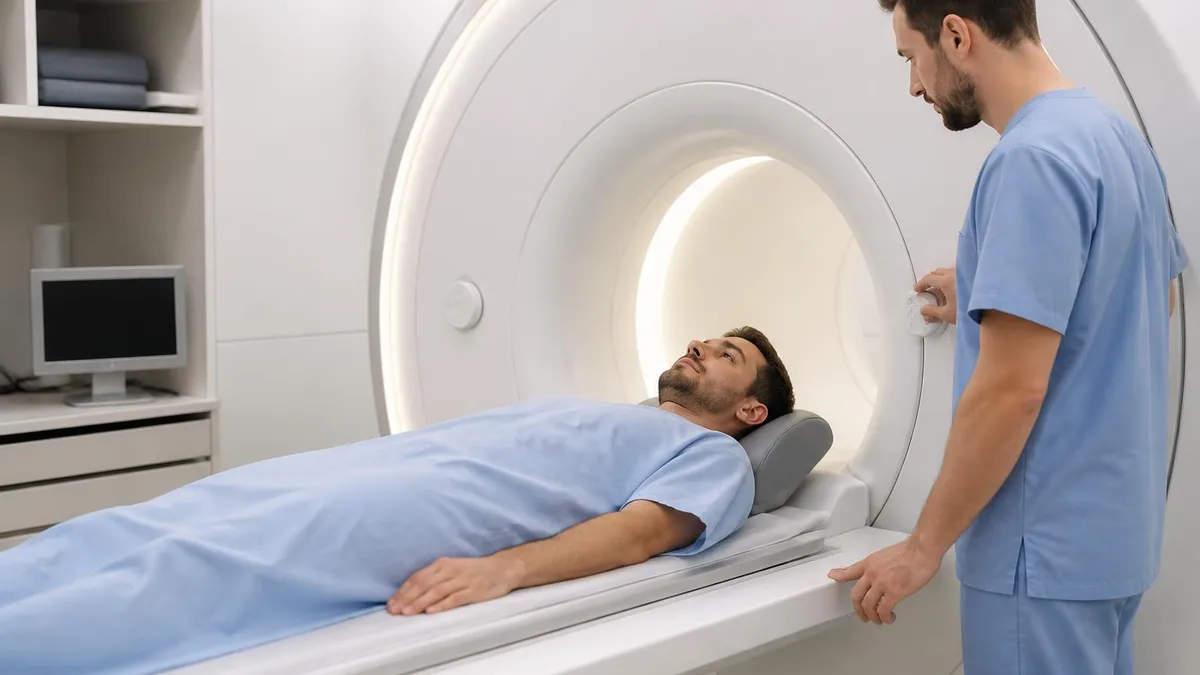
You lie on a padded table, usually feet-first. The foot being scanned slides into a small coil (essentially a specialized antenna) that picks up the signal coming from your tissues. Padding holds your ankle still because motion blurs every image. You'll get headphones with music or earplugs because the machine clangs, buzzes, and thumps during sequences.
Then the table moves into the bore. Most foot scans don't require your head to enter the tunnel at all, which is a relief for people worried about claustrophobia. If you tend to feel anxious in enclosed spaces, mention it ahead of time. Open and wide-bore options exist for nervous patients (read about open MRI here if that's a concern).
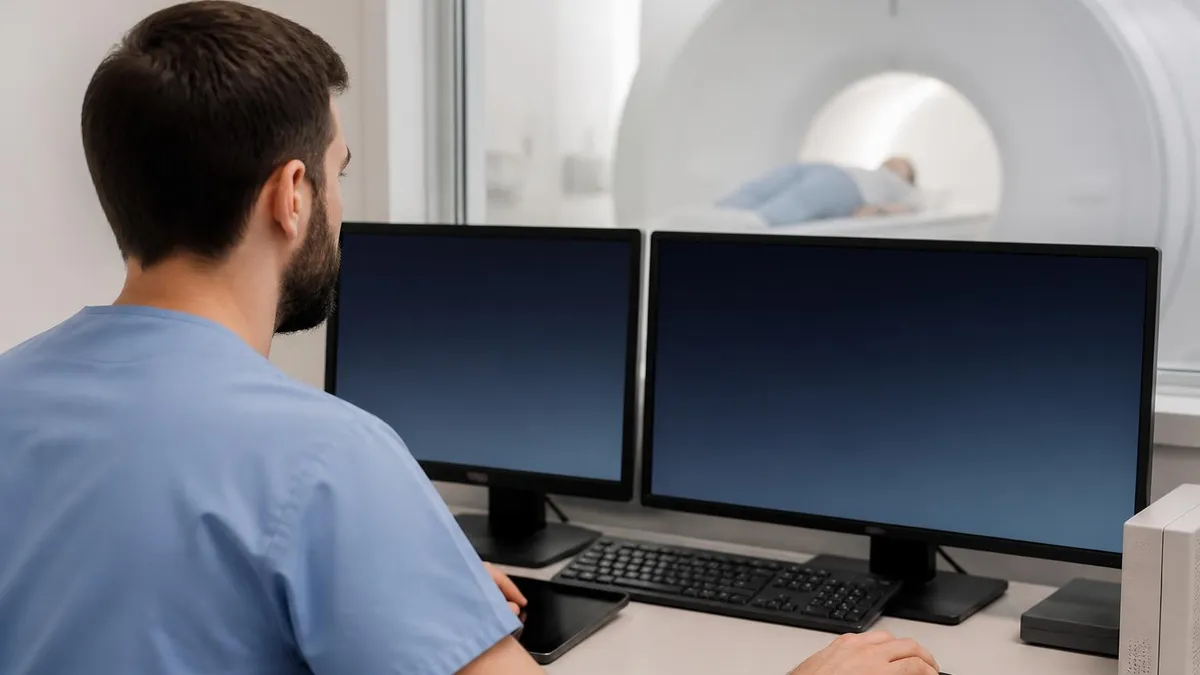
Total scan time runs 30 to 60 minutes depending on whether contrast is used. You hold still. You breathe normally. You don't need to hold your breath because the foot doesn't move with breathing the way the chest does. Some sequences last two minutes, others six. The technologist talks to you between scans through a microphone.
With contrast or without?
Plain non-contrast foot MRI handles most cases beautifully. Stress fractures, tendon tears, ligament damage, and arthritis all show up on standard sequences. Contrast (gadolinium injected through an IV) becomes important when looking for tumors, infections, or detailed soft-tissue masses. If contrast is needed, your kidney function gets checked first via a blood test.
Conditions Foot MRI Catches Best
Bone marrow edema lights up days before X-ray changes appear, perfect for athletes and military recruits with persistent foot pain who need a fast diagnosis.
Achilles, posterior tibial and peroneal tendons all show graded injury detail that guides rehab vs surgery decisions and predicts long-term outcomes.
Midfoot ligament tears that X-rays miss but cause lifelong instability if untreated. MRI provides definitive diagnosis and surgical planning detail.
Thickened nerve tissue between the toes appears clearly, guiding injection placement, conservative care decisions or surgical excision.
Foot MRI Protocol Options
Gadolinium injection through an IV adds detail for suspected infections, tumors and complex inflammatory conditions. Requires kidney function screening and adds 10 to 15 minutes to the appointment. Most foot pain scans do not need contrast.
What Conditions a Foot MRI Catches Best
Here's where MRI shines compared to other tests. The scan picks up problems X-rays, ultrasound, and even CT scans can miss entirely.
Stress fractures and bone marrow edema. Days before a stress fracture is visible on X-ray, the bone marrow around it lights up on MRI fluid-sensitive sequences. Catching this early prevents a full break and gets athletes back faster.
Tendon problems. Posterior tibial, peroneal, Achilles, and flexor tendons all appear in striking detail. Tendinosis, partial tears, full ruptures, dislocations: each has a specific look. A radiologist can grade the severity and predict whether surgery or rehab will work better.
Ligament injuries. Lisfranc tears in the midfoot, deltoid ligament damage at the ankle, and plantar plate tears at the ball of the foot all need MRI for full characterization. Missing a Lisfranc injury early leads to chronic instability and arthritis.
Plantar fasciitis and fascial tears. The plantar fascia thickens with chronic inflammation. MRI measures the thickness, finds heel bone reactive edema, and detects partial or full tears that change the treatment plan.
Morton's neuroma. Thickened nerve tissue between the third and fourth toes shows up clearly. Surgeons rely on MRI to confirm location and size before injection or excision.
Arthritis and cartilage loss. Early cartilage thinning, subchondral cysts, and synovitis appear on MRI well before X-ray changes develop. Useful for tracking rheumatoid arthritis, psoriatic arthritis, and post-traumatic joint degeneration.
Infections and tumors. Osteomyelitis and soft-tissue tumors both have distinctive MRI signatures. Diabetics with foot ulcers benefit enormously here.
Forgotten metal causes most MRI safety incidents. Mention every implant, surgery, piercing, tattoo and medical device, even items you think are unrelated. The technologist double-checks every detail before you enter the scanner room, so honesty saves time and prevents harm.
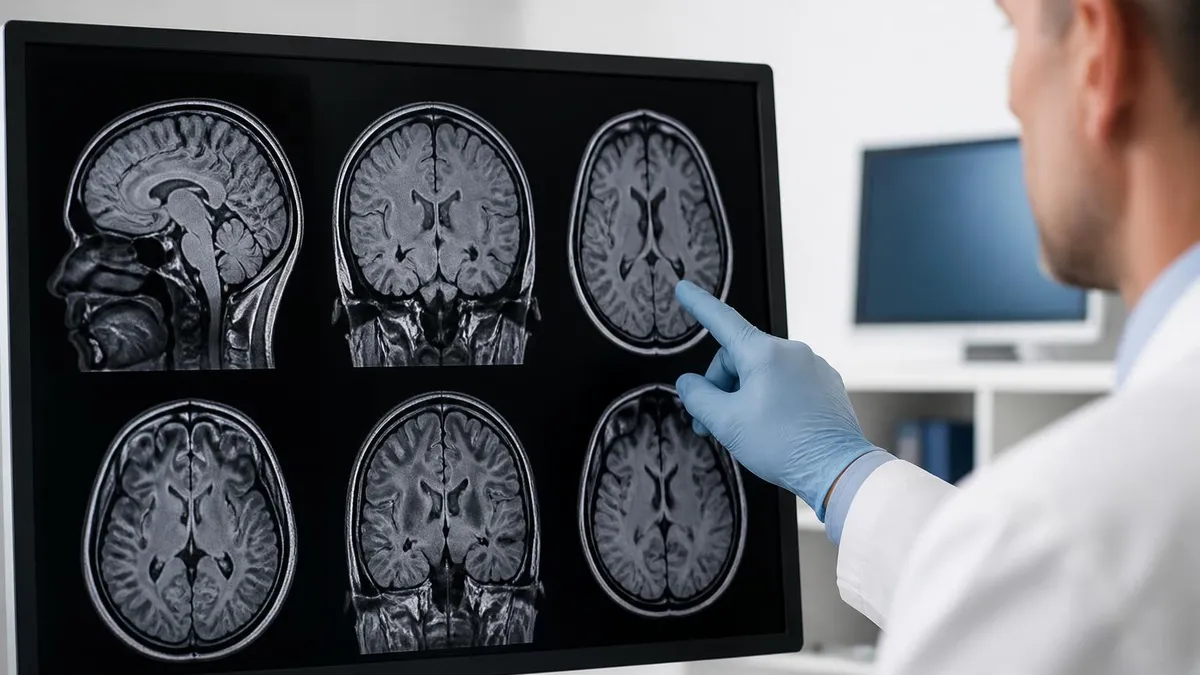
Reading the Foot MRI Report Without a Medical Degree
Your report arrives in three parts: a clinical summary, a list of findings by anatomic region, and an impression at the bottom. Skip to the impression first. That's the radiologist's short answer to the question your doctor asked.
Then work backward through the findings. Look for words like "intact," "normal signal," and "no acute abnormality." Those are good. Watch for "edema," "tear," "rupture," "thickening," "fluid," and "enhancement." Those typically mean something the radiologist wants flagged.
Don't panic at incidental findings. Many feet show small ganglion cysts, accessory bones (extra small bones present in 10% of normal feet), and mild degenerative changes that don't cause symptoms. Your doctor interprets the report alongside your actual pain pattern.
Common confusing terms? "Bone marrow edema" means fluid in the bone, not a tumor. "Tenosynovitis" means fluid around a tendon, often inflammation. "T2 hyperintensity" describes bright spots on certain sequences (usually fluid). "Sclerosis" means denser bone, often a sign of chronic stress.
If your report mentions Achilles or rotator-cuff-adjacent injuries, your provider may compare findings with a rotator cuff MRI or other prior imaging. Connections across body regions matter more than people expect.
Cost, Insurance, and What to Expect Financially
A foot MRI in the United States runs anywhere from $400 at a freestanding imaging center to $3,000+ at a hospital. The variation comes down to facility type, geographic location, contrast use, and your insurance contract.
Outpatient centers almost always beat hospital prices. Hospitals carry higher overhead and pass it along. If you have a high-deductible plan, call ahead. Ask for the cash price (sometimes lower than the negotiated insurance rate), and shop two or three local centers.
Insurance typically requires prior authorization for MRI of the foot. Your doctor's office handles the paperwork, which usually takes a few business days. If approval is denied, your doctor can submit clinical notes documenting failed conservative treatment to justify the scan.
Want broader pricing details across body parts and countries? Check our MRI scan cost guide, which breaks down typical fees by region and scenario.
Preparing Your Foot for the Best Possible Scan
Most foot MRIs need almost zero prep. Eat normally. Drink normally. Take your usual medications unless told otherwise.
If contrast is planned, you may be asked to fast for two to four hours before, and you'll need recent kidney lab work (a blood test for creatinine and eGFR). Severe kidney disease changes how contrast is handled.
Remove nail polish if possible (some pigments contain trace metals that can cause minor artifacts). Skip metallic-thread clothing. Leave valuables at home or hand them to a companion before entering the scanner room.
If you're claustrophobic, ask your doctor about a mild sedative like lorazepam. You'll need someone to drive you home. Some imaging centers offer wider-bore scanners. Our guide on wide bore MRI covers the differences.
Foot MRI Prep Checklist
- ✓Arrive 15 to 30 minutes early to complete the comprehensive safety questionnaire with the technologist
- ✓Wear loose comfortable clothing without metal zippers, snaps, underwires or decorative metallic threads
- ✓Leave jewelry, watches, hairpins, hearing aids and phones outside the scan room in a secure locker
- ✓Remove nail polish if practical because metallic pigments occasionally cause minor imaging artifacts
- ✓List every implant, surgery, piercing, tattoo and medical device on the form even items you assume are irrelevant
- ✓If contrast is planned, confirm recent kidney function lab results showing creatinine and eGFR within accepted ranges
- ✓Mention claustrophobia ahead of time so the team can offer sedation, music or breathing strategies
- ✓Bring prior imaging on disc or USB if previous scans were done at a different facility for direct comparison
- ✓Eat and drink normally before the scan unless contrast requires a short fasting window
- ✓Take routine prescription medications on schedule with a small sip of water as usual
Safety, Risks, and What Can Go Wrong
MRI is exceptionally safe for the right candidates. No ionizing radiation. No cumulative dose worries. You can have ten foot MRIs over a lifetime without radiation accumulating in your body.
The biggest risk? Forgotten metal. Pacemakers, certain aneurysm clips, cochlear implants, neurostimulators, and some older orthopedic hardware are absolute contraindications unless the device is specifically labeled MRI-conditional. Modern pacemakers are often safe with strict protocols. Older ones may not be.
Gadolinium contrast carries a small allergic reaction risk (less than 1 in 10,000 for severe reactions) and a separate concern called nephrogenic systemic fibrosis in patients with advanced kidney disease. The latter is now extremely rare with modern contrast agents and proper screening.
Pregnant patients can have foot MRI without contrast in most cases, though many providers prefer to wait until after the first trimester unless the scan is urgent. Contrast is typically avoided during pregnancy. Our MRI and pregnancy guide goes deeper.
The scanner is loud. Hearing protection is mandatory. The bore can feel tight even when only your foot enters, and some patients feel anxious in the room. Tell the technologist if you feel uncomfortable. Scans can be paused, and you can sit up between sequences if needed.
Foot MRI Strengths and Limitations
- +Zero ionizing radiation, safe for repeat scans over a lifetime
- +Unmatched detail of soft tissue, marrow and ligaments
- +Catches stress fractures days before X-ray changes appear
- +Definitive answer for Lisfranc, plantar plate and tendon injuries
- +No cumulative dose limit across multiple scans
- −Cost ranges $400 to $3,000+ depending on facility
- −Scan takes 30 to 60 minutes of stillness
- −Loud machine noise even with hearing protection
- −Claustrophobia possible inside the bore
- −Forgotten metal implants can be dangerous
Foot MRI vs Other Imaging Tests
X-ray remains the first imaging step for foot pain. Cheap, fast, available everywhere. X-ray catches obvious fractures, dislocations, foreign bodies, and advanced arthritis. It misses early stress fractures, soft-tissue injuries, and most ligament problems.
CT scan delivers fast detail on complex bone fractures (talar dome, calcaneal injuries, Lisfranc complex). CT uses radiation, which matters for young patients and repeat imaging. CT still beats MRI when surgeons need precise bone geometry before reconstruction.
Ultrasound is fast, cheap, and great for tendons and superficial structures. Operator-dependent, though. Two sonographers may read the same Achilles tendon differently. Useful for guided injections.
Bone scan (nuclear medicine) lights up areas of high bone turnover and historically caught stress fractures before MRI was common. MRI has largely replaced bone scan for foot problems because it shows both bone and surrounding soft tissue at the same time.
MRI wins on soft tissue, marrow signal, and overall sensitivity. It loses on speed, cost, and accessibility. For chronic foot pain that hasn't been figured out yet, MRI is usually the right next step.
Practice Your Knowledge: MRI Concepts and Beyond
Imaging concepts can feel overwhelming, especially terms like T1, T2, fat suppression, and STIR sequences. If you're a student, technologist trainee, or curious patient, working through structured practice problems is one of the fastest ways to lock in the material.
Active recall beats passive reading every time. The MRI category on this site contains hundreds of practice questions covering safety, anatomy, pulse sequences, contrast agents, artifacts, and patient positioning. Each question includes a detailed explanation so the reasoning sticks.
Working through quizzes also surfaces gaps you didn't know existed. Maybe you think you know the difference between T1 and T2-weighted images until a question about fat behavior in different sequences trips you up. That's the productive struggle that builds real understanding.
Why practice questions work better than re-reading
Reading a textbook chapter feels productive but rarely sticks. The brain glides over familiar phrases without storing them in long-term memory. Practice questions force retrieval, and retrieval is what builds memory. That's why students who do hundreds of questions outperform classmates who only re-read notes.
If you're studying for the ARRT MRI registry, an ARMRIT exam or a clinical advancement assessment, mix safety, anatomy, sequences and contrast questions in random order. Random interleaving beats studying one topic at a time. The brain has to switch contexts the way it will on the actual exam.
Patients reading this article have a different goal. Understanding the report, not memorizing protocols. Even so, working through a few quiz questions on MRI safety and contrast helps you ask better questions at your appointment, and that conversation often shapes how confident you feel walking into the scanner.
Spaced repetition matters too. Take a quick quiz today, then revisit the same topic three days later, then again next week. Spacing the reviews drives the material into long-term memory far better than cramming the night before an exam or appointment. Even fifteen minutes a day adds up across a month of preparation.
Finally, do not be discouraged by missed questions. Each wrong answer flags an exact gap you can now close. Read the explanation, look up the underlying concept in your textbook, then return to the question pool. Watching your score climb week by week is one of the most motivating parts of structured exam prep.
Recommended MRI Practice Topics
Test your understanding of metal screening, contrast protocols and patient safety procedures used before every scan in a clinical setting.
Recognize tendons, ligaments, bones and soft tissue across different planes and sequences with detailed practice questions and clear explanations.
Drill T1, T2, STIR, fat suppression and gradient echo concepts that appear constantly on registry exams and clinical assessments.
Master gadolinium use, kidney function thresholds, allergy management and the science behind enhanced imaging studies.
MRI Questions and Answers
About the Author
Medical Laboratory Scientist & Clinical Certification Expert
Johns Hopkins UniversityDr. Sandra Kim holds a PhD in Clinical Laboratory Science from Johns Hopkins University and is certified as a Medical Technologist (MT) and Medical Laboratory Scientist (MLS) through ASCP. With 16 years of clinical laboratory experience spanning hematology, microbiology, and molecular diagnostics, she prepares candidates for ASCP board exams, MLT, MLS, and specialist certification tests.
Join the Discussion
Connect with other students preparing for this exam. Share tips, ask questions, and get advice from people who have been there.
View discussion (6 replies)