Cervical MRI Scan Guide: Procedure, Prep, and Results 2026 July
Complete guide to cervical MRI scans. Learn what doctors look for, how to prepare, contrast dye uses, scan duration, and how to read your results. 🏆

A cervical MRI scan looks at the top section of your spine, the seven vertebrae running from the base of your skull down to your shoulders. Doctors order this imaging test when a patient reports neck pain that radiates into the arms, numbness in the fingers, weakness on one side, or headaches that nothing seems to fix. The scan reveals soft tissue detail no X-ray can match: spinal cord, nerve roots, intervertebral discs, ligaments, and any abnormal masses pressing where they shouldn't.
You might be reading this because your physician just handed you a referral, or maybe you're a radiology tech student preparing for boards. Either way, the procedure itself is non-invasive and uses no ionizing radiation. The magnet does all the work, lining up hydrogen atoms in your body's water content and then reading the signals as those atoms relax back to their resting state. A computer translates that data into the cross-sectional slices your radiologist will study.
Wait times for an MRI vary by region and urgency. An emergency department scan happens within hours. An outpatient referral for chronic pain might take two to six weeks depending on insurance approval and scanner availability. Some imaging centers offer evening and weekend slots to cut the queue. Ask the scheduler about open MRI machines if claustrophobia is a concern, though image quality on those units sits slightly below closed-bore systems.
Understanding what you're walking into helps. The cervical spine is one of the most studied regions in clinical radiology because so many things can go wrong there. Whiplash injuries from car accidents. Degenerative changes from decades of poor posture. Sports injuries. Disc disease that crept up silently until one wrong twist sent pain shooting down an arm. The cervical MRI is the diagnostic workhorse that sorts these stories out.
This guide walks through preparation, the scan itself, common findings, what your report means, and what happens next. It speaks to two audiences at once: patients facing their first cervical MRI and the imaging professionals who run these studies every day. Where the technical detail gets dense, skip ahead. Where the patient-facing notes feel oversimplified, they're written that way on purpose to ease anxiety. Read for what you need.
Cervical MRI by the Numbers
Magnet strength matters more than most patients realize. A 1.5 Tesla unit handles routine cervical imaging just fine for the majority of cases. A 3 Tesla scanner produces sharper images with finer resolution, which helps when a radiologist needs to see tiny nerve root impingements or evaluate post-surgical hardware artifacts. Some hospitals now run 7T research scanners, but those rarely show up in clinical practice yet.
The scan duration depends on the protocol your physician orders. A basic cervical spine series without contrast runs about 20 to 30 minutes. Add gadolinium contrast for tumor or infection workup and you're looking at 45 minutes total. Patients who can hold still get faster, cleaner scans. Movement during acquisition forces the tech to repeat sequences, stretching the appointment.
Newer scanners shave time off through parallel imaging and compressed sensing techniques. A scan that used to take 40 minutes now finishes in 25 on a top-tier 3T system. That matters when imaging departments push to fit more patients into the schedule, and it matters even more when you're the one lying in the bore wondering how much longer this can possibly take. Ask the front desk what year their scanner was installed if you're curious about wait time and image quality at a given facility.
Coil technology has improved alongside magnet strength. Modern multi-channel array coils placed around the neck capture much higher signal-to-noise ratios than older designs. Better signal means thinner slices, higher resolution, and shorter scan times. If a facility advertises its scanner as a recent model with current coil technology, that combination delivers the best cervical images available outside research settings. Older 1.5T units with first-generation coils still produce diagnostic studies, but the difference is noticeable when comparing the same patient on different machines.
Why doctors choose MRI over CT for the neck
CT scans show bone beautifully but struggle with the soft tissue that surrounds and protects the spinal cord. MRI sees ligaments, the cord itself, nerve roots, and disc material with remarkable clarity. When the question is whether a herniated disc is pressing on a nerve, or whether multiple sclerosis lesions are present in the cord, MRI is the test that answers it.
Preparation for a cervical MRI is straightforward but important. The technologist will hand you a metal screening form on arrival. You'll list any surgeries, implants, shrapnel, or tattoos. Older tattoo inks contained iron oxide pigments that can heat up inside the magnet. Modern inks rarely cause issues, but mention them anyway so the tech can monitor the area. Cardiac pacemakers, cochlear implants, and certain aneurysm clips remain absolute contraindications unless they're specifically labeled MRI-conditional.
You'll change into a gown and remove jewelry, hair clips, dentures, hearing aids, watches, and credit cards. The magnetic field will erase the strips on cards and pull ferromagnetic objects across the room with surprising force. Stories of oxygen tanks flying into bore openings are not urban legend. Imaging centers have strict zone protocols specifically to prevent these accidents.
If your scan requires contrast, the tech will start a small IV in your hand or arm. Gadolinium-based contrast agents are generally well tolerated, but patients with severe kidney disease face a small risk of nephrogenic systemic fibrosis. A creatinine blood test within the past 30 to 90 days clears most patients. Tell the tech if you've had an allergic reaction to contrast in the past, even a mild one.
Eat normally before the scan unless you've been told otherwise. There is no fasting requirement for a standard cervical MRI. Stay hydrated, especially if you're getting contrast. Take your regular medications. If you take anti-anxiety medication for procedures, time the dose so it peaks right when you're going into the scanner. Bring a driver if you've taken something strong enough to impair you.
Cervical MRI Protocol Sequences
Sagittal T1, sagittal T2, axial T2, and STIR images form the backbone of most cervical protocols. Each sequence highlights different tissue characteristics. T1 weighting shows anatomy clearly with fat appearing bright. T2 weighting makes fluid bright, which is essential for spotting disc pathology, edema, and cord signal abnormalities. STIR sequences suppress fat signal to highlight bone marrow edema and ligamentous injury after trauma.
Added when ruling out tumor, infection, or post-surgical complications. Post-contrast T1 with fat saturation shows enhancement patterns clearly. The contrast highlights regions with broken blood-brain barrier or increased vascularity. Tumors, abscesses, active demyelinating lesions, and granulation tissue around hardware all enhance after gadolinium administration. Contrast adds about 10 to 15 minutes to scan time.
Diffusion-weighted imaging for stroke or abscess, MR angiography for vascular pathology, and CISS or FIESTA for fine cranial nerve detail. Susceptibility-weighted imaging shows micro-hemorrhage. Magnetization transfer techniques can detect subtle white matter changes invisible on conventional sequences. Each specialty sequence answers a specific clinical question and adds time to the protocol.
Flexion and extension views detect dynamic instability. Some centers offer upright MRI for patients whose symptoms only appear when standing. These positional studies are particularly useful for evaluating patients with whiplash injuries, suspected craniocervical instability, or symptoms that change dramatically with posture. The trade-off is longer scan time and slightly reduced image quality compared to supine acquisitions.
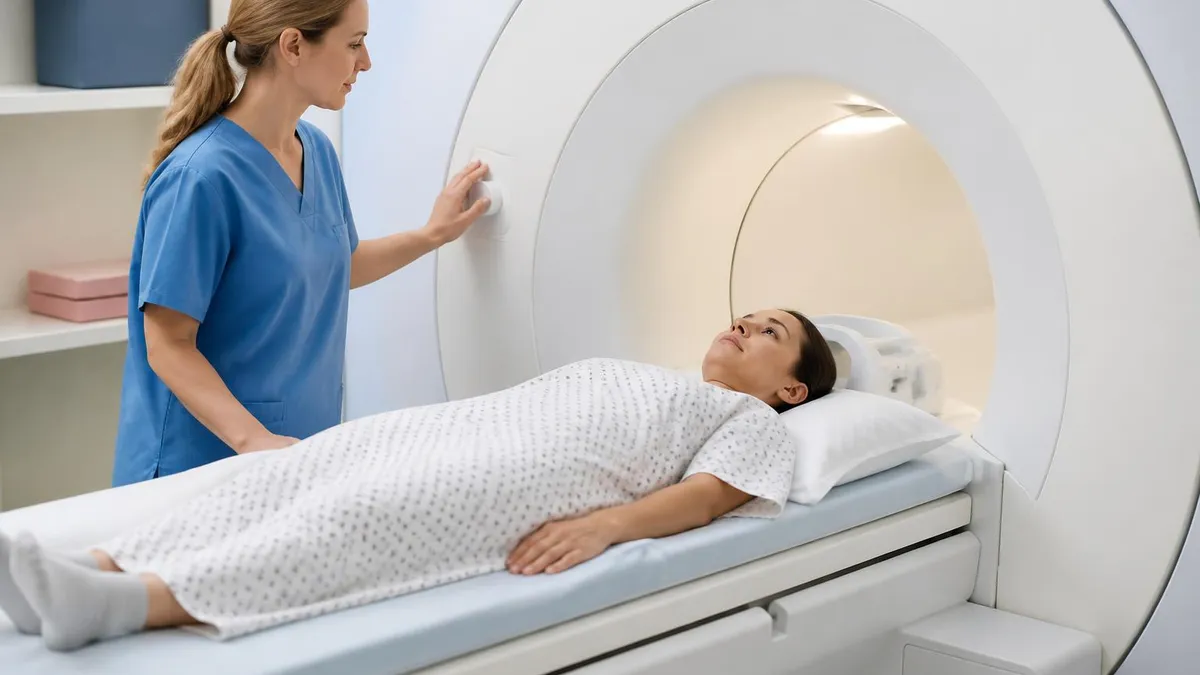
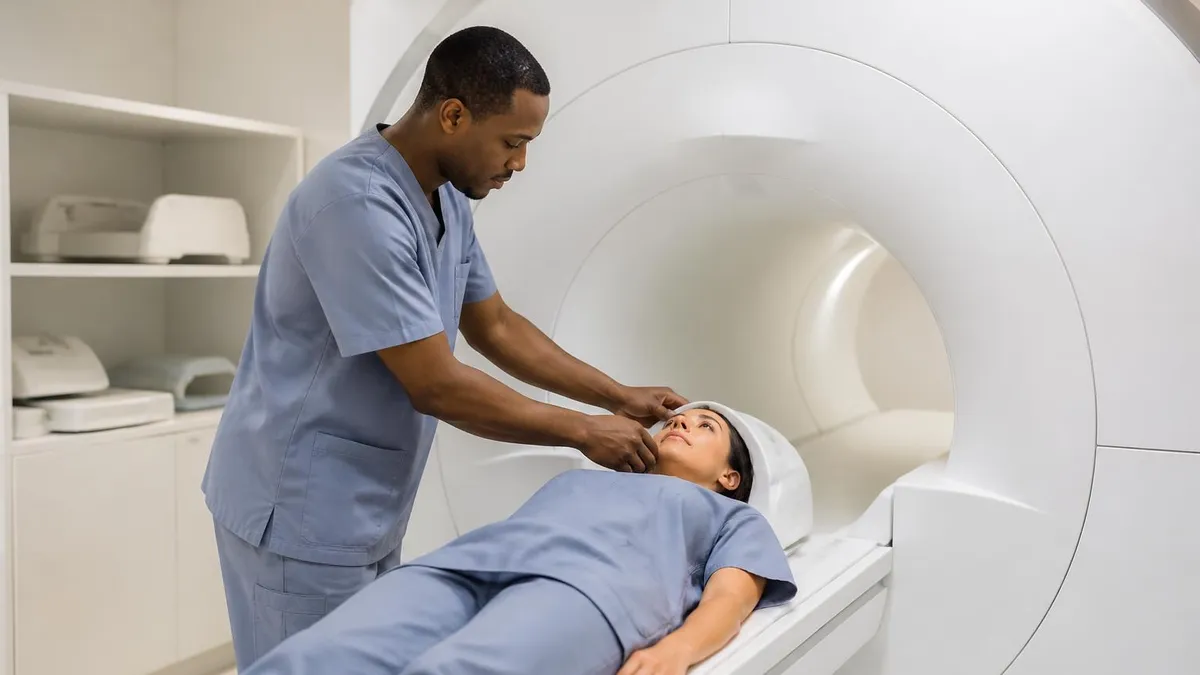
What does the actual scan feel like? You lie face up on a padded table that slides into the bore. A coil device, which looks a bit like a neck brace or a clear plastic helmet, goes around your head and shoulders. This coil is the antenna that picks up signals from your body. You'll be given earplugs or headphones because the gradient coils produce loud knocking and buzzing sounds during acquisition. Music or even a movie streamed through MRI-compatible goggles is now common at many facilities.
You must stay still. The scanner produces images in sequences lasting anywhere from one to seven minutes each. Movement during any single sequence corrupts that batch and the tech has to start it over. Most patients find the experience tolerable if not particularly pleasant. The bore is narrow and dark, the noise is significant, and the temptation to scratch your nose or swallow loudly will spike right when you cannot.
Some practical tricks help. Close your eyes before going in, then keep them shut. Breathe slowly through your nose. If you start feeling anxious, squeeze the panic ball the tech places in your hand. Communication runs through a two-way intercom system, and the tech will check in between sequences. They've seen panic attacks before. They've also seen patients fall asleep, which is the gold standard for image quality. Whatever helps you settle in, do that.
What Cervical MRI Reveals
Disc bulges, herniations, and protrusions show up readily on T2 sagittal images. Bone spurs and uncovertebral hypertrophy narrow the neural foramina where nerve roots exit. Spinal stenosis appears as crowding around the cord with loss of CSF signal. Each finding gets graded by severity. The radiologist typically reports findings level by level from C2-C3 down to C7-T1, noting disc height, hydration, contour, and any associated nerve root or cord compression. Mild findings often correlate poorly with symptoms while severe findings usually do.
Reading your own MRI report can feel overwhelming. Radiologists use precise technical language that sounds alarming even when the findings are routine. A phrase like "multilevel degenerative disc disease with mild to moderate foraminal narrowing at C5-C6" describes what is essentially normal aging in many adults over 40. The clinical significance depends on whether the findings match your symptoms.
The impression section at the bottom of the report summarizes the most important findings. Read this first. Then go back to the body of the report for level-by-level detail. Bring the report to your follow-up appointment along with the actual images on CD or via the imaging center's online portal. Your physician will correlate the radiology findings with your physical exam to determine the next step.
One thing worth knowing: imaging often shows abnormalities that don't cause any symptoms. Asymptomatic adults frequently have disc bulges, mild stenosis, and degenerative changes on cervical MRI. This is why your doctor needs to match the picture to your actual complaints. A bulging disc at C6-C7 might not be the source of your pain even if it looks impressive on screen. The treatment plan should target the level that explains your symptoms, not every gray-zone finding mentioned in the report.
Bowel or bladder dysfunction, progressive weakness in your arms or legs, loss of fine motor control in the hands, balance problems, or numbness in the saddle area all suggest spinal cord compression. These are emergency findings. Do not wait weeks for a routine MRI if any of these are present. Go to the emergency room.
Cost varies wildly. A cervical MRI without contrast at a hospital outpatient department might bill at $2,500 to $5,000. The same scan at a freestanding imaging center often runs $400 to $1,200 cash price. Insurance negotiated rates land somewhere in between. Many high-deductible plans leave patients paying most of the bill out of pocket. Shopping around is genuinely worthwhile.
Ask your insurance for the in-network imaging facilities they prefer. Some plans require prior authorization for advanced imaging, which can delay scheduling by a week or two. Self-pay patients should request the cash price upfront and confirm whether the radiologist read fee is included or billed separately. Surprise bills from out-of-network radiologists reading scans at in-network facilities became less common after the No Surprises Act, but verify anyway.
Independent imaging centers often provide written cash-price quotes the same day you call. Hospital systems can take a few business days to generate an estimate because the billing chain is more complex. If your physician is open to it, request that the order be sent to a specific facility rather than the hospital where they have privileges. The savings can be substantial, and the image quality at modern outpatient centers usually equals what you'd get at the hospital.
Health savings accounts and flexible spending accounts cover MRI costs as qualified medical expenses. Keep the receipts. If you're stuck with a large bill, ask the billing office about hardship discounts or payment plans before assuming the number on the invoice is final. Many facilities settle for substantially less when patients ask politely and explain their situation.
Cervical MRI Preparation Checklist
- ✓Complete the metal screening questionnaire honestly and thoroughly
- ✓Remove all jewelry, watches, hair pins, and metallic clothing accessories
- ✓Leave credit cards, phones, and electronics in a locked cubby
- ✓Confirm recent creatinine lab work if contrast is planned
- ✓Take regular medications unless instructed otherwise
- ✓Eat normally unless your scan requires sedation
- ✓Arrive 15-30 minutes early to complete paperwork and change
- ✓Bring a list of prior surgeries with approximate dates
- ✓Tell the tech about claustrophobia so they can offer mild sedation or open MRI options
Radiology technologists who perform these scans hold ARRT certification with an MRI-specific credential earned through additional coursework and a separate registry examination. The work demands precise patient positioning, sequence selection, and the ability to recognize when a scan needs to be repeated for diagnostic quality. Compensation reflects the specialized training, with experienced MRI techs earning $75,000 to $110,000 in most metropolitan markets.
Patient care matters here. A friendly tech who explains each step, checks in with you between sequences, and helps you settle the head coil comfortably makes the difference between a tolerable experience and one you'd refuse to repeat. If your scan was unpleasant, mention it on the satisfaction survey. Imaging centers track these scores closely.
For students preparing for the MRI registry exam, the cervical spine protocol shows up regularly. Know your coil choices, your default TR and TE values for T1 and T2 sequences, the rationale behind STIR for marrow edema, and the contraindications for gadolinium. Pulse sequence physics, magnetic safety zones, and patient screening fill a meaningful chunk of the registry test. Hands-on rotations during your clinical year will cement what the textbook can only describe.
Beyond the basics, learn troubleshooting. Motion artifact on a T2 sagittal. Wraparound from a phase encoding direction set poorly. Susceptibility artifact from old surgical clips. Knowing how to recognize and correct these in real time separates a competent tech from a great one. Senior techs often build a mental library of fixes that the textbooks barely cover. Find a mentor at your clinical site who will walk you through scan optimization when you're slow on the schedule.
Cervical MRI Pros and Cons
- +No ionizing radiation exposure, safe for repeat imaging
- +Exceptional soft tissue detail for cord, nerves, and discs
- +Can be performed with or without contrast based on clinical question
- +Multi-planar imaging without moving the patient
- +Functional sequences available for dynamic assessment
- +Increasingly available with wide-bore and open configurations
- −Longer scan time than CT, typically 20-45 minutes
- −Contraindicated for many implanted devices and metallic foreign bodies
- −Loud acquisition sounds require hearing protection
- −Claustrophobia limits some patients in closed-bore systems
- −More expensive than X-ray or CT
- −Limited availability in rural areas and longer waits in many regions
After your scan, the technologist confirms image quality before letting you off the table. The radiologist might dictate the report within hours or take a day or two depending on workload. Stat reads happen within an hour for emergency cases. Your referring physician's office usually calls within a week to review results, though many patient portals now post reports as soon as they're signed.
If the scan shows a problem requiring intervention, the conversation that follows depends on the finding. Disc herniation with persistent symptoms might lead to physical therapy, epidural injections, or eventually surgery. Tumor findings trigger oncology referral. Spinal cord lesions prompt neurology workup. The MRI itself is just one piece of the diagnostic puzzle, but it is often the piece that changes the treatment plan.
Conservative management resolves the majority of cervical complaints without surgery. Physical therapy, anti-inflammatory medications, posture correction, and time alone clear up many disc-related problems. Surgical referrals get reserved for progressive neurologic deficits, intractable pain after months of conservative care, or red-flag findings on imaging. A second opinion is reasonable before any spine surgery, and good surgeons welcome it rather than feeling threatened by the request.
Follow-up imaging timing depends on what the first scan showed. A normal study with resolving symptoms rarely needs a repeat. A worrisome finding flagged for surveillance might warrant a follow-up in three or six months. Post-operative scans usually occur at six weeks to three months to assess healing and hardware position. Your surgeon or referring physician will guide the timing rather than ordering scans on a fixed calendar.
MRI Questions and Answers
The bottom line on cervical MRI is that it remains the gold-standard imaging study for soft tissue evaluation of the neck and upper spine. Whether you're a patient nervous about your first scan, a student studying for the MRI registry, or a clinician brushing up on cervical protocols, understanding what the test can and cannot show helps you make better decisions. Routine cases are predictable and well tolerated. Complex cases require thoughtful protocol selection and skilled interpretation.
If you've been told you need this scan, ask questions. Ask why this test and not another. Ask whether contrast is necessary. Ask what your doctor expects to find and what they'll do if the scan is normal. A good physician welcomes these questions because they show an engaged patient. The MRI is a tool. Used wisely, it answers the question that brought you in. Used reflexively, it just generates more findings to chase. The conversation matters as much as the images.
Save your imaging records. Request a copy on CD or digital download after each scan and keep it with your medical history. Years down the road, comparing an old scan to a new one helps your physician spot changes that matter and ignore ones that don't. Imaging is most powerful as a longitudinal record, not a single snapshot. The five minutes it takes to ask for that disc at the front desk pays off years later when your next provider has full context. That's the long game with cervical spine care, and good imaging is the foundation that supports it.
About the Author
Medical Laboratory Scientist & Clinical Certification Expert
Johns Hopkins UniversityDr. Sandra Kim holds a PhD in Clinical Laboratory Science from Johns Hopkins University and is certified as a Medical Technologist (MT) and Medical Laboratory Scientist (MLS) through ASCP. With 16 years of clinical laboratory experience spanning hematology, microbiology, and molecular diagnostics, she prepares candidates for ASCP board exams, MLT, MLS, and specialist certification tests.
Join the Discussion
Connect with other students preparing for this exam. Share tips, ask questions, and get advice from people who have been there.
View discussion (5 replies)