Analog Gauges HVAC: The Complete Guide to Manifold Gauges, Manometers, and Pressure-Reading Tools for Refrigeration Technicians
🧠 Analog gauges HVAC guide: how manifold sets, manometers, and pressure tools work, when to use them, and how to read them accurately in the field.
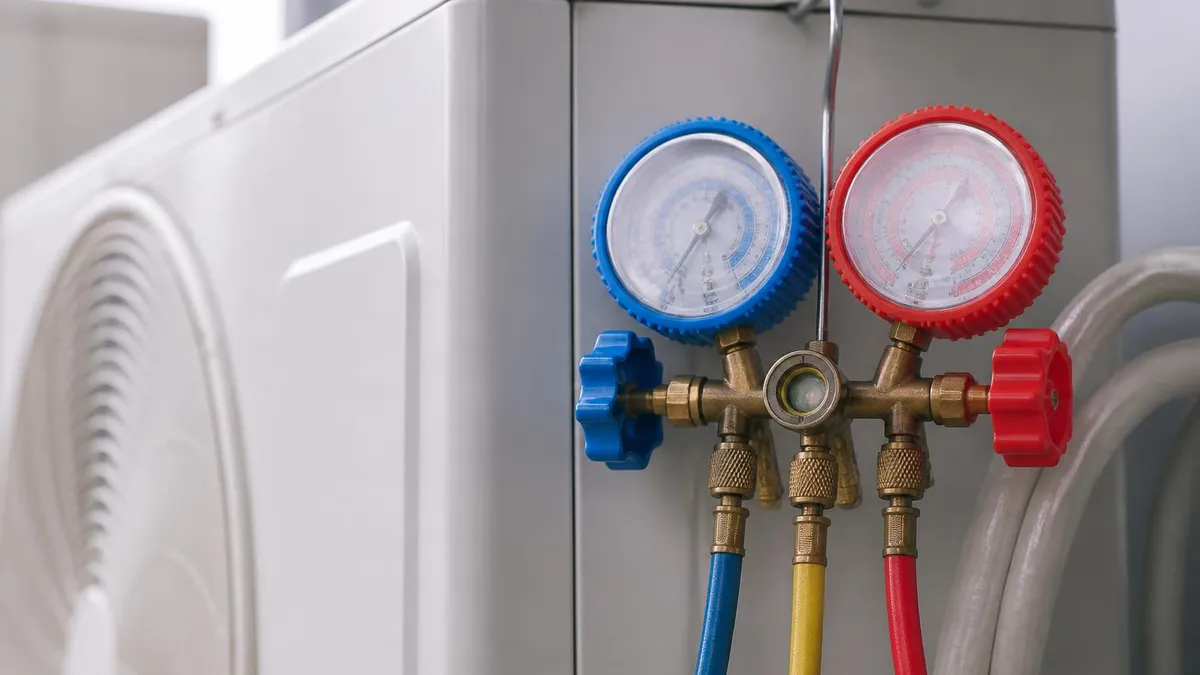
Analog gauges HVAC technicians carry in their service bags remain the most universally recognized diagnostic tool in the trade, even in an era when hvac digital gaugess and Bluetooth probes dominate marketing catalogs. The classic two-port or four-port analog manifold, with its blue low-side and red high-side dials, continues to deliver fast, glanceable pressure readings that experienced technicians can interpret in seconds. For new apprentices and seasoned journeymen alike, understanding how these instruments work is foundational to every refrigerant charge, leak hunt, and superheat calculation performed on a residential or commercial system.
Most analog gauge sets follow the same basic anatomy: a Bourdon tube that flexes under pressure, a calibrated dial face with PSI and refrigerant temperature scales, a manifold body with hand valves, and color-coded hoses rated for the working pressures of modern refrigerants. The blue gauge measures low-side suction pressures, typically from 30 inches of vacuum to 250 PSI, while the red gauge handles high-side discharge pressures up to 500 PSI or more. Many gauge faces include nested temperature scales for R-22, R-410A, R-134a, and increasingly R-454B and R-32.
The reason analog gauges remain relevant comes down to durability, simplicity, and trust. A well-maintained analog manifold survives drops from rooftops, freezing winter mornings, and decades of refrigerant exposure that quickly destroy electronic sensors. Technicians who depend on accurate readings during long, dirty service calls value the fact that an analog gauge never needs charging, never crashes mid-job, and never loses Bluetooth pairing inside a crowded mechanical room. The instrument is mechanical, repairable, and inexpensive to replace.
That said, analog instruments are not perfect. They demand careful calibration, gentle handling, and a working knowledge of pressure-temperature relationships to deliver accurate diagnoses. A bent needle, leaky Schrader depressor, or fogged dial face can produce readings off by 10 PSI or more, which on a tight 410A system means the difference between a normal charge and a compressor-killing overcharge. Technicians who pass certification exams quickly learn that gauge interpretation is a learned skill, not a button-press, and that mastery separates competent installers from skilled diagnosticians.
This guide walks through every major category of analog gauges and pressure-reading tools used in modern HVAC work: manifold gauge sets, single test gauges, manometers, vacuum gauges, micron gauges, draft gauges, and gas pressure gauges. We will cover the physics behind Bourdon tube design, how to read PT charts directly off the dial, when analog beats digital in the field, and how to maintain calibration over years of hard use. Each section is written for working technicians and apprentices preparing for the EPA 608, NATE, and ICE exams.
If you are sourcing or replacing instruments, our HVAC parts and supply overview covers reputable manifold brands, hose ratings, and Schrader core replacements that hvac terms should keep stocked. Pairing the right hardware with the right knowledge is what turns a parts changer into a true diagnostician, and analog gauges are still the cornerstone of that diagnostic chain in 2026.
By the end of this guide, you will be able to identify each gauge in a typical service kit, interpret pressure readings in context with ambient and saturation temperatures, recognize the warning signs of damaged equipment, and decide when analog tools outperform their digital counterparts. Whether you are wiring your first manifold to a heat pump for a startup or troubleshooting a stubborn 30-ton rooftop unit, the principles below apply directly to your work.
Analog HVAC Gauges by the Numbers

Types of Analog HVAC Gauges and Pressure Tools
Two- or four-valve assemblies with blue low-side and red high-side dials, color-coded hoses, and a center service port. The everyday tool for charging, recovering, and diagnosing refrigerant circuits on residential and light commercial systems.
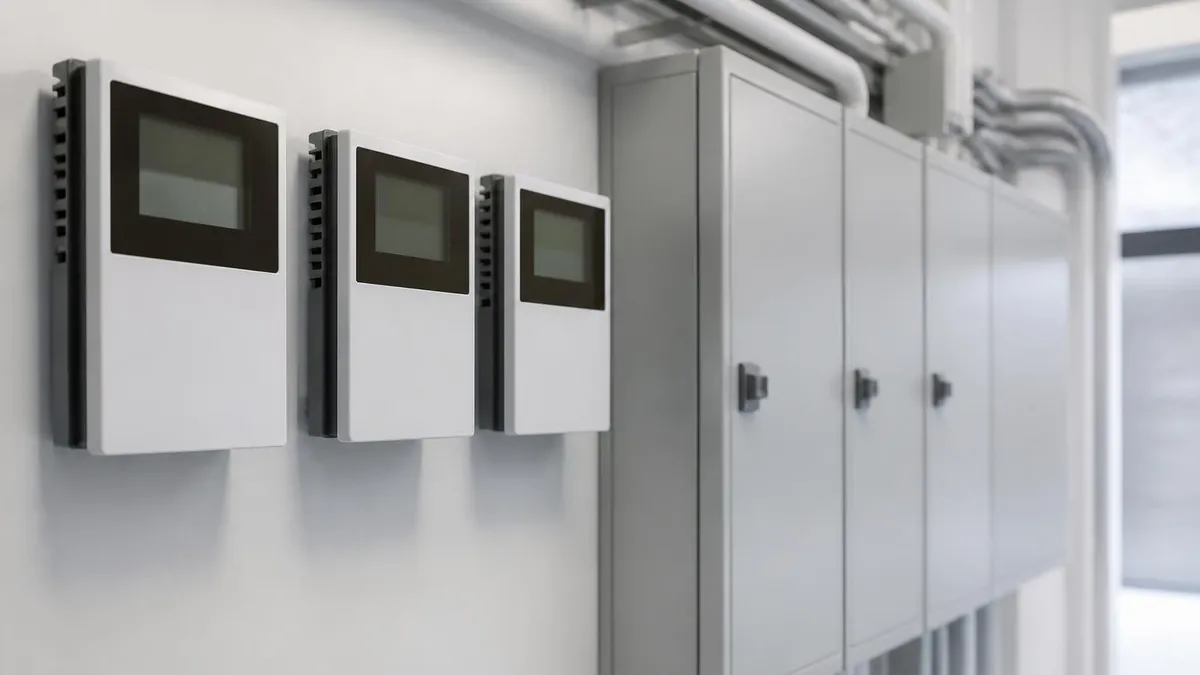
Compact stand-alone gauges used for spot pressure checks, refrigerant cylinder verification, or permanently mounted readings on chillers and rack systems. Often used where a full manifold is impractical or where a dedicated reading is required.
U-tube, inclined, or magnehelic gauges that measure very low pressures and pressure differentials in inches of water column. Essential for setting gas pressure on furnaces, measuring static pressure across ductwork, and verifying combustion airflow.
Specialized instruments that read deep vacuum levels during evacuation. Analog compound gauges show inches of mercury, while electronic micron gauges read down to 50 microns. Both are critical for confirming a moisture-free, leak-free system before charging.
Analog magnehelic and draft gauges used on furnaces, boilers, and exhaust flues. They confirm proper venting, combustion air, and induced draft levels, which are required readings during commissioning and annual safety inspections in most jurisdictions.
The heart of nearly every analog HVAC gauge is the Bourdon tube, a coiled or C-shaped hollow metal tube that flexes outward when internal pressure rises. As the tube straightens microscopically under pressure, a linkage and pinion translate that motion into rotation of the indicator needle on the dial. This elegant 19th-century mechanism is still used because it is mechanically linear, rugged, and easy to manufacture to tight tolerances. Understanding this internal motion helps technicians appreciate why rough handling or freezing slugs of liquid refrigerant can permanently distort a gauge.
Gauge faces are calibrated at the factory for one specific reference condition, typically sea-level atmospheric pressure and a defined ambient temperature. When you crack a fresh manifold out of the box, the needle should rest precisely on zero with both hand valves closed and hoses disconnected. If it sits one or two PSI low or high, most quality manifolds include a small calibration screw on the face that lets you reseat the needle. Never bend a needle or pry the lens. That is the kind of repair that turns a $90 gauge into scrap.
Dial faces on modern refrigeration manifolds include nested concentric temperature scales for the most common refrigerants. When pressure reaches a given PSI on the outer ring, you can read across to the inner scales to see the saturation temperature for that refrigerant at that pressure. This is the foundation of every superheat and subcooling calculation a technician performs. A skilled tech reads the saturation temperature directly off the dial without ever opening a printed PT chart, which is one of the durable advantages analog gauges hold over many electronic alternatives.
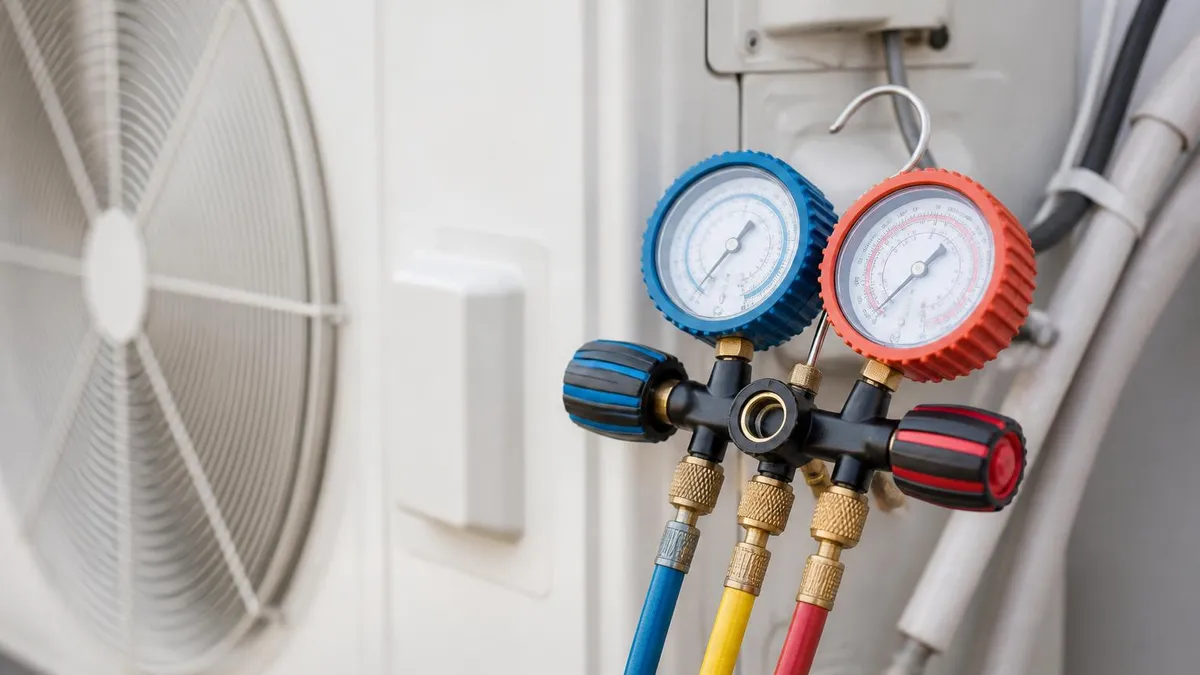
The hose set is just as important as the gauge body. Modern refrigerant hoses are rated for 800 PSI working pressure and 4,000 PSI burst pressure, with low-permeation barrier liners that prevent refrigerant from migrating through the rubber. Each hose includes a self-sealing or ball-valve fitting at one or both ends to minimize refrigerant loss when connecting and disconnecting. Color coding follows the universal convention: blue for low side, red for high side, yellow for the center service port, and sometimes black for vacuum work.
One often-overlooked detail is the Schrader depressor inside the manifold ports and hose ends. A worn or stuck depressor can produce false low readings because it fails to fully open the Schrader valve on the service port. If your low-side pressure looks suspiciously flat, swap to a known-good hose before you condemn the compressor or accumulator. Field troubleshooting this way is faster, cheaper, and far more accurate than guessing your way through a service call on bad data.
Pressure ratings and overload tolerance matter. A residential 410A condenser running hard on a 95-degree day can push high-side pressures past 450 PSI, which is approaching the design ceiling on many older R-22 gauges. Using outdated manifolds on modern high-pressure refrigerants is a real safety hazard. Always confirm your gauge is rated for the system you are servicing, and consider that next-generation refrigerants like R-454B and R-32 demand A2L-compatible tools with appropriate venting and spark mitigation in mind.
Finally, every analog instrument benefits from regular comparison against a known reference. A simple practice is to connect both gauges to a fresh, room-temperature cylinder of the refrigerant you work with most. The gauges should agree with each other and with the printed PT data on the cylinder label. If you need to dig deeper into the systems behind these readings, our broader HVAC solutions guide covers refrigerant circuits and the diagnostics that depend on accurate gauge data.
HVAC Practice Test Questions
Prepare for the HVAC - Heating Ventilation and Air Conditioning exam with our free practice test modules. Each quiz covers key topics to help you pass on your first try.
HVAC Air Conditioning
HVAC Exam Questions covering Air Conditioning. Master HVAC Test concepts for certification prep.
HVAC Code Compliance
Free HVAC Practice Test featuring Code Compliance. Improve your HVAC Exam score with mock test prep.
HVAC Electrical Controls
HVAC Test Prep for Electrical Controls. Practice HVAC Quiz questions and boost your score.
HVAC Energy Efficiency
HVAC Questions and Answers on Energy Efficiency. Free HVAC practice for exam readiness.
HVAC Heating Systems
HVAC Mock Test covering Heating Systems. Online HVAC Test practice with instant feedback.
HVAC Load Calculations
Free HVAC Quiz on HVAC Load Calculations. HVAC Exam prep questions with detailed explanations.
HVAC Tools and Equipment
HVAC Practice Questions for HVAC Tools and Equipment. Build confidence for your HVAC certification exam.
HVAC Refrigeration
HVAC Test Online for Refrigeration. Free practice with instant results and feedback.
HVAC Safety Practices
HVAC Study Material on Safety Practices. Prepare effectively with real exam-style questions.
HVAC System Design
Free HVAC Test covering System Design. Practice and track your HVAC exam readiness.
HVAC Thermodynamics
HVAC Exam Questions covering Thermodynamics. Master HVAC Test concepts for certification prep.
Manifold, Manometer, and Micron Gauges Compared
A refrigerant manifold gauge set is the workhorse tool for refrigeration service. Two- and four-valve brass-bodied manifolds with sight glasses dominate the residential trade, while ball-valve service ports are standard on premium models. The combined assembly lets a technician simultaneously measure low- and high-side pressures, charge or recover refrigerant through the center service hose, and isolate either side with the hand valves.
When selecting a manifold, look for dual-scale dials matched to your most common refrigerants, hoses rated for 800 PSI working pressure, and ball valves on the hose ends to prevent loss during disconnect. Quality brass-bodied manifolds from Yellow Jacket, Ritchie, CPS, and JB Industries deliver decades of service when stored in a padded case and protected from frozen liquid slugs that can blow out the Bourdon tube.

Analog Gauges vs Digital Manifolds in the Field
- +No batteries, no Bluetooth pairing, no firmware updates
- +Survives drops, freezing temps, and decades of hard service
- +Instant glanceable readings without booting or syncing
- +Lower up-front cost — quality sets from $60 to $350
- +Easy to recalibrate and field-repair with basic tools
- +Built-in PT scales for the refrigerants you actually use
- −Lower resolution than digital probes for tight superheat work
- −Requires manual PT chart cross-referencing for newer refrigerants
- −Bourdon tubes can be damaged by liquid slugging or shock
- −No data logging, history, or cloud reporting to clients
- −Requires manual zero-checks and periodic recalibration
- −Older sets may not be rated for higher-pressure A2L refrigerants
Analog Gauge Calibration and Care Checklist
- ✓Verify each gauge reads exactly zero with hoses open to atmosphere
- ✓Adjust the calibration screw on the face if the needle is offset
- ✓Inspect lens for cracks, fogging, or trapped moisture inside the dial
- ✓Replace Schrader depressors in hose ends at the first sign of wear
- ✓Check hoses for cracks, soft spots, or compression damage at the fittings
- ✓Confirm working pressure rating matches the refrigerant being serviced
- ✓Store the manifold in a padded case away from extreme heat and cold
- ✓Bleed hoses of trapped refrigerant before opening to atmosphere
- ✓Compare both gauges against a fresh refrigerant cylinder annually
- ✓Replace gauges immediately if dropped onto a hard surface or slugged with liquid
Always read pressure with the system at steady state
A reading taken thirty seconds after startup means nothing. Let the system stabilize at design conditions for at least ten to fifteen minutes before recording pressures, calculating superheat, or making a charging decision. Premature readings are the number one cause of mis-charged residential systems and unnecessary compressor failures in the field.
Reading a pressure-temperature relationship directly off an analog dial face is one of the defining skills of a competent refrigeration technician. Every saturated refrigerant has a fixed, predictable relationship between its pressure and its temperature as long as both liquid and vapor are present. When you measure the suction pressure on an operating R-410A system at 118 PSI, you can read directly across the dial face to find a saturation temperature of about 40 degrees Fahrenheit, which is the temperature of the refrigerant boiling inside the evaporator at that moment.
From there, superheat is simply the difference between the actual suction line temperature, taken with a pipe-clamp thermometer at the compressor inlet, and that saturation temperature read off the dial. A typical fixed-orifice residential air conditioner runs ten to twenty degrees of superheat under design conditions. A TXV-controlled system targets a more aggressive eight to twelve degrees. Skilled techs perform this entire calculation in their heads, glancing back and forth between the gauge dial and the thermometer clamp without ever opening a chart.
Subcooling is the equivalent calculation on the high side. Read the high-side pressure on the red gauge, cross-reference to the saturation temperature on the dial, then subtract the actual liquid line temperature measured near the condenser outlet. The difference is the degrees of subcooling, which manufacturers specify on the unit data plate, typically eight to twelve degrees. A correctly charged TXV system is best confirmed by hitting that subcooling target on a steady-state high side, not by chasing pressure alone.
The same PT principles apply to leak detection. When a sealed, balanced system sits idle, pressure equalizes and stabilizes at saturation pressure for the ambient temperature. A 75-degree garage holding an R-410A system should read about 220 PSI on both gauges. Anything significantly lower suggests refrigerant loss or air ingress, both of which warrant a leak search before adding charge. This zero-cost diagnostic uses nothing but your analog gauges and a thermometer, and it routinely saves hours of unnecessary recovery and recharging.
Newer refrigerants like R-454B and R-32 are mildly flammable A2L blends and behave very similarly to R-410A in terms of pressure response but with subtle differences in glide and saturation curves. If your gauge face does not include a scale for the refrigerant you are working with, you must use either a printed or app-based PT chart and cross-reference manually. This is one of the few clear advantages digital manifolds hold, since they let you select the refrigerant from a menu and display saturation temperature directly.
Vacuum readings on the low-side compound gauge follow a different scale. Below atmospheric pressure, the needle swings counterclockwise into the inches of mercury region, marked from 0 to 30 inHg. The compound scale is useful for confirming the vacuum pump is pulling down at all and for spot-checking obvious leaks during evacuation. For real precision below 1,000 microns, however, you must switch to a dedicated micron gauge, because the compound scale is essentially useless near the deep vacuum needed for proper system commissioning.
Practiced gauge interpretation transforms a service call from guesswork into engineering. A technician who can glance at a manifold and immediately tell you the saturation temperature, expected superheat, and likely problem area is the technician customers ask for by name and contractors promote into lead-tech roles. The mechanical PT chart printed right on the dial face is one of the most underappreciated educational tools in the HVAC trade.
EPA Section 608 prohibits the knowing release of any refrigerant during service. Always recover refrigerant in hoses to a recovery cylinder before disconnecting, and use proper low-loss fittings to minimize charge loss. Venting to zero a gauge needle is illegal and can carry fines up to $44,539 per day, per violation. Calibrate using ambient pressure with hoses open to clean atmosphere only.
Field diagnostic accuracy depends as much on technique as on tool quality. The best analog manifold in the world will lie to you if you connect it carelessly, leave hoses kinked, or read pressures while the system is still stabilizing. Veteran technicians develop ritualistic habits around gauge use, and those habits are what produce repeatable, defensible diagnoses on every service call. Apprentices who learn proper technique early avoid years of misdiagnosis and parts cannons that frustrate customers and erode trust in your shop.
Start every connection by inspecting the Schrader cores on the service ports. A weeping core will produce a slow loss that mimics a refrigerant leak, and a tight or stuck core will fail to open under hose pressure, giving false low readings. Carry a Schrader core tool and replacement cores in your service kit. Replacement takes seconds with the right tool and prevents the embarrassment of misdiagnosing a perfectly healthy system as undercharged because the gauges could not see real pressure.
Hose management matters more than most apprentices realize. Always purge air from the center hose before charging, since pushing atmospheric air into a refrigerant circuit introduces moisture and non-condensables that degrade performance and accelerate compressor wear. Keep hoses straight where possible, free from sharp bends or pinches at the manifold body. A kinked hose can dampen pressure transmission to the Bourdon tube and produce sluggish, smeared readings that change with every twist of the assembly.
Temperature compensation is another field skill. Gauges are calibrated at room temperature, and extreme heat or cold can shift readings several PSI. On a 110-degree rooftop in Phoenix or a 10-degree call in Minneapolis, give the manifold a few minutes to equalize before trusting the dial. Black gauge bodies left in direct summer sun on a roof can reach surface temperatures of 160 degrees Fahrenheit, which is enough to affect the Bourdon tube's response curve and confuse a tight diagnosis.
Document your readings as you take them. A simple service ticket entry capturing ambient temperature, indoor return temperature, suction pressure, head pressure, superheat, and subcooling gives you a reliable baseline for return visits. This is the kind of professional documentation that separates established contractors from one-off operators. If you want to see how that diagnostic discipline fits into a complete maintenance workflow, review our hvac maintenance service guide on professional maintenance routines and benchmarking.
Recover whenever you can. Every time you disconnect a manifold, the refrigerant trapped in the hoses can either be lost to atmosphere or pushed back into the system using low-loss fittings or a quick connect with a built-in valve. Quality manifold hoses now come standard with ball-valve fittings on both ends, which lets you isolate the hose volume and push it back to the high side or recover it cleanly. This single habit, repeated thousands of times across a career, saves enormous amounts of refrigerant and protects you from EPA enforcement risk.
Finally, never stop learning the math. Pressure readings are inputs, not answers. The answer always lives in the relationship between pressure, temperature, superheat, subcooling, airflow, and load. Technicians who memorize a few target pressures get by. Technicians who internalize the underlying refrigeration cycle and read their gauges in that broader context become the diagnosticians every shop wants on staff and every homeowner requests by name when their system goes down at three in the afternoon during a heat wave.
Practical tips for getting the most out of your analog gauge investment start with how you treat the manifold between calls. Store it horizontally in a padded service case with all hoses connected to their parking ports on the manifold body, never with open Schrader ends that can ingest dust or moisture. Keep the dial face clean and dry, and avoid letting solvents like flux remover or brake cleaner contact the lens, which can fog the polycarbonate cover and make readings difficult under poor lighting in a crawlspace or attic.
Train yourself to read both gauges at once, not sequentially. Skilled diagnostic technicians develop the habit of taking in low-side and high-side readings simultaneously, noting the relationship between them rather than reading one at a time. The ratio between suction and discharge pressure is itself a powerful diagnostic, since a compressor with worn valves or scored cylinders produces a compression ratio that is suspiciously low for its discharge temperature, even when individual pressures look acceptable.
Practice annual calibration as a ritual, not a chore. Schedule one slow day each year, ideally during shoulder season, to bench-check every gauge in your service vehicles. Connect them to a fresh, weighed cylinder of the refrigerant you service most often, compare against the printed PT data on the label, and adjust any gauges that drift beyond plus or minus three PSI. Mark each gauge with the calibration date in permanent marker on the back of the body. This small habit produces enormous gains in customer confidence and diagnostic accuracy.
Pair your analog manifold with the right secondary tools. A high-quality pipe clamp thermometer with a fresh battery is non-negotiable for superheat and subcooling work. A digital micron gauge dedicates the deep vacuum side of the job to a purpose-built instrument while leaving the analog manifold free to perform its strength: fast, rugged pressure observation. A nitrogen regulator with low- and high-side outputs lets you pressure-test new installations without ever coupling the manifold to atmosphere unnecessarily.
Invest in a second backup manifold for your vehicle. The cost of a backup set is small compared to the cost of driving back to the shop mid-call when your primary manifold gets damaged. Backup manifolds also let you isolate problems quickly. If readings look strange on your primary set, swapping in the backup confirms whether the issue is the system or the tool. This kind of redundancy is what professional fleet maintenance programs invest in for a reason.
Use the tools you carry to teach apprentices in the truck. The dial face is itself a teaching surface. Walk a new tech through reading suction pressure, finding saturation on the inner ring, and subtracting from the line temperature to calculate superheat. Do this on three or four calls and the apprentice has internalized the calculation for life. Analog gauges produce better trainees than digital manifolds, because the mechanical relationship between physical pressure and dial position is visible, not hidden behind a screen and a menu.
Above all, treat your gauges with respect. They are diagnostic instruments that translate the invisible behavior of a refrigerant cycle into something a human eye can interpret in real time. A clean, calibrated, accurately read manifold is the single most valuable item in a service van, and the technician who understands and protects that instrument will consistently outperform peers who treat their gauges like disposable hand tools that can be replaced from a big-box shelf next weekend.
HVAC Questions and Answers

HVAC Repair Portland: The Complete 2026 Homeowner's Guide to Furnace, AC, and Heat Pump Service in the Rose City

HVAC Tune Up Service: The Complete Guide to Professional HVAC Maintenance and Why It Pays for Itself
HVAC Solutions: The Complete Guide to Heating, Cooling, and Indoor Air Quality Systems for Homes and Buildings
Certified HVAC Contractors: How to Find, Vet, and Hire the Right Professional for Your Home or Business
HVAC Parts and Supply: The Complete Guide to Sourcing, Identifying, and Buying Heating and Cooling Components in 2026
About the Author
NATE Certified HVAC Technician & Licensing Exam Trainer
Universal Technical InstituteMike Johnson is a NATE-certified HVAC technician and EPA 608 universal-certified refrigerant handler with a Bachelor of Science in HVAC/R Technology. He has 19 years of commercial and residential HVAC installation and service experience and specializes in preparing technicians for NATE certification, EPA 608, A2L refrigerant safety, and state HVAC contractor licensing examinations.