
HVAC Mastic: Complete Guide to Duct Sealant Supplies and Application
HVAC mastic is the gold standard for sealing ductwork. 🏆 Learn types, application steps, drying times, and how it compares to tape and aerosol sealants.
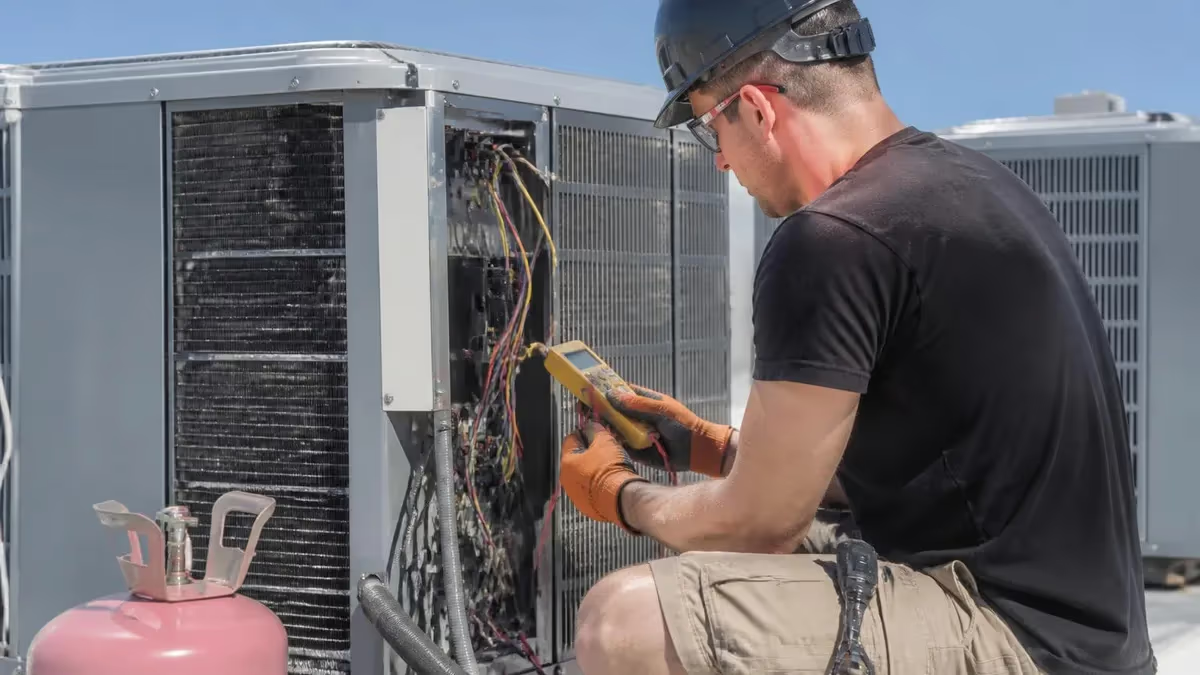
HVAC mastic is a thick, paste-like duct sealant that has become the industry gold standard for sealing seams, joints, and connections in residential and commercial ductwork. Unlike foil tape or aerosol products, mastic forms a permanent, flexible barrier that resists thermal cycling, vibration, and pressure differentials. For HVAC technicians, contractors, and serious DIYers, understanding how mastic works alongside other duct sealing supplies is the difference between a leaky system and one that performs at its rated efficiency for decades.
The Department of Energy estimates that 20 to 30 percent of conditioned air is lost through leaks in typical duct systems, and unsealed joints are the single largest contributor to that waste. Mastic addresses that problem at the source by bridging gaps up to a quarter inch wide while reinforcing the connection mechanically. When applied correctly with fiberglass mesh tape over wider gaps, mastic-sealed ducts routinely pass blower door and Duct Blaster tests that loose foil tape installations fail.
This guide covers everything a buyer or installer needs to know about HVAC mastic and the broader category of duct sealing supplies. We'll walk through the chemistry of water-based versus solvent-based mastics, application methods using brushes, trowels, and gloved hands, drying and curing times, code compliance requirements under UL 181A and 181B, and how mastic stacks up against alternatives like aerosolized AeroSeal and high-temperature silicone.
You'll also find practical advice on coverage rates, shelf life, cleanup, working in cold attics, and selecting the right product for indoor air handlers versus exterior rooftop units. Whether you are sourcing for a single repair job or stocking a service van, the recommendations here are based on manufacturer specifications from Hardcast, RCD, Polymer Adhesives, and other major suppliers used across the trade.
For contractors who handle full duct replacements, mastic is only one piece of a larger supply list that includes sheet metal, flex duct, hangers, and insulation. If you are planning a new run, our guide to HVAC duct installation covers materials selection, sizing calculations, and best practices that pair directly with the sealing techniques described in this article.
Beyond the product specs, we'll address common field mistakes that lead to callbacks, such as applying mastic over dusty surfaces, using the wrong mesh tape width, or skipping the second coat on high-pressure trunk lines. These small errors account for the majority of failed duct leakage tests, and avoiding them is mostly a matter of preparation and patience rather than skill.
By the end of this guide, you will be able to specify the right mastic for any duct material, calculate how much product a typical job requires, and apply it in a way that meets or exceeds the SMACNA, ACCA, and Energy Star duct sealing standards now referenced in most state energy codes.
HVAC Mastic by the Numbers

Types of HVAC Mastic
The most common option for indoor ductwork. Low odor, easy cleanup with water before curing, and meets UL 181A and 181B. Ideal for galvanized sheet metal, fiberboard, and flex duct connections in conditioned spaces.
Used for exterior or below-grade ducts where moisture exposure is a concern. Cures faster, adheres better in cold conditions down to 20°F, but requires solvent cleanup and produces stronger fumes during application.
Contains chopped fiberglass strands mixed into the paste, eliminating the need for separate mesh tape on gaps up to 3/8 inch. Faster installation but slightly more expensive per gallon than standard formulations.
Rated for service up to 500°F, used on flue connections, furnace plenums, and commercial kitchen exhaust. Typically silicone or sodium silicate based rather than acrylic, and not interchangeable with standard duct mastic.
Thinner consistency designed for cartridge guns or airless sprayers. Common on large commercial jobs where speed matters. Coverage rates are lower per gallon but labor savings often offset the higher material use.
Applying HVAC mastic correctly is straightforward, but the prep work determines whether the seal lasts five years or fifty. Start by cleaning every surface that will receive mastic with a dry cloth or a vacuum brush attachment. Dust, oil, and loose galvanizing flakes prevent adhesion, and a contaminated joint will eventually delaminate even if it looks fine on day one. For ducts that have been in service, wiping with denatured alcohol removes nicotine films and cooking residues that water alone leaves behind.
Next, mechanically fasten the joint before sealing. Mastic is a sealant, not a structural adhesive. Sheet metal connections need at least three sheet metal screws per side, snap-lock seams must be fully engaged, and flex duct collars require both an inner draw band and an outer strap over the insulation jacket. If the joint moves when you push on it, mastic will crack at the flex point within a heating season.
For gaps wider than one-eighth inch, embed fiberglass mesh tape into a thin base coat of mastic, then apply a second coat over the tape once it tacks up. The mesh prevents the mastic from sagging into the gap and provides tensile reinforcement that handles the expansion and contraction of metal duct as it heats and cools. Skipping the mesh on a quarter-inch gap is the most common reason mastic seals fail their first duct leakage test.
The mastic itself goes on with a disposable bristle brush, a small trowel, or a gloved hand depending on the joint geometry. Inside corners and round-to-rectangular transitions are easiest with fingers. Long straight seams are faster with a four-inch brush. Aim for a thickness of about one-sixteenth inch, extending at least one inch onto each side of the joint. Thicker is not better; it just takes longer to cure and is more likely to crack.
Pay special attention to penetrations and takeoffs, which leak more than straight seams because they combine three or more surfaces meeting at angles. A typical six-inch round takeoff on a rectangular trunk needs mastic worked into the inside corner of the saddle, around the full perimeter where the collar meets the trunk, and over every screw head. Missing any of these spots leaves a leakage path that ratings won't catch but field tests will.
Allow the first coat to skin over (typically 30 to 60 minutes at room temperature) before handling the duct or pressurizing the system. Full cure takes 24 to 48 hours, and you should not run the system at full design pressure until the mastic has cured completely. Premature pressurization can blow out partially cured beads, especially on the supply side downstream of the air handler. A complete HVAC inspection after curing verifies that the seals held and that no joints were missed.
Cleanup of water-based mastic is simple while the product is wet: warm water and a rag handle drips and tool washing. Once cured, mastic must be scraped or sanded off, so protecting flooring and adjacent finishes with drop cloths during application saves significant time at the end of the job.
HVAC Practice Test Questions
Prepare for the HVAC - Heating Ventilation and Air Conditioning exam with our free practice test modules. Each quiz covers key topics to help you pass on your first try.
HVAC Air Conditioning
HVAC Exam Questions covering Air Conditioning. Master HVAC Test concepts for certification prep.
HVAC Code Compliance
Free HVAC Practice Test featuring Code Compliance. Improve your HVAC Exam score with mock test prep.
HVAC Electrical Controls
HVAC Test Prep for Electrical Controls. Practice HVAC Quiz questions and boost your score.
HVAC Energy Efficiency
HVAC Questions and Answers on Energy Efficiency. Free HVAC practice for exam readiness.
HVAC Heating Systems
HVAC Mock Test covering Heating Systems. Online HVAC Test practice with instant feedback.
HVAC Load Calculations
Free HVAC Quiz on HVAC Load Calculations. HVAC Exam prep questions with detailed explanations.
HVAC Tools and Equipment
HVAC Practice Questions for HVAC Tools and Equipment. Build confidence for your HVAC certification exam.
HVAC Refrigeration
HVAC Test Online for Refrigeration. Free practice with instant results and feedback.
HVAC Safety Practices
HVAC Study Material on Safety Practices. Prepare effectively with real exam-style questions.
HVAC System Design
Free HVAC Test covering System Design. Practice and track your HVAC exam readiness.
HVAC Thermodynamics
HVAC Exam Questions covering Thermodynamics. Master HVAC Test concepts for certification prep.
Mastic vs Tape vs Aerosol Sealants
Mastic is the longest-lasting and most forgiving of the three options. It seals gaps mechanically, adheres to dusty or slightly contaminated surfaces better than tape, and tolerates thermal cycling without becoming brittle. Code officials and Energy Star raters specifically recognize mastic plus mesh as meeting the duct sealing standard in IECC and most state energy codes.
The downside is labor. Brushing mastic onto every seam of a complex duct system can take a full day on a typical 2,000 square foot home, and the curing time means you cannot pressure test immediately. Mastic also stains clothing and is difficult to remove from skin after curing. For new construction, where access is open, mastic remains the default choice for serious sealing work.

Is HVAC Mastic the Right Choice for Your Project?
- +Permanent flexible seal that lasts 25+ years in conditioned spaces
- +Meets UL 181A and 181B and all major energy code requirements
- +Bridges gaps up to 1/4 inch without mesh, more with reinforcement
- +Water-based formulations clean up easily before curing
- +Adheres to dusty or galvanized surfaces better than tape
- +Available in gallon pails, quarts, and cartridges for any job size
- +Low cost per joint compared to aerosol sealing systems
- −Messy application that stains clothing and tools
- −Requires 24 to 48 hours of cure time before pressurization
- −Hard to apply in cold attics below 40°F without solvent-based product
- −Cannot be used on flue or combustion vents (needs high-temp version)
- −Inaccessible joints behind walls require aerosol alternatives
- −Skin contact during application is uncomfortable and hard to wash off
HVAC Mastic Pre-Application Checklist
- ✓Confirm all duct joints are mechanically fastened with screws or draw bands
- ✓Clean every sealing surface with a dry cloth or vacuum to remove dust and debris
- ✓Check ambient temperature is above 40°F for water-based mastic or 20°F for solvent-based
- ✓Have fiberglass mesh tape on hand for any gap wider than 1/8 inch
- ✓Stir the mastic thoroughly before use to redistribute settled solids
- ✓Mask off finished surfaces, flooring, and equipment near work area
- ✓Wear nitrile gloves and safety glasses; mastic is hard to remove from skin
- ✓Apply at 1/16 inch thickness extending at least 1 inch past each side of joint
- ✓Inspect all takeoffs, transitions, and penetrations for missed spots before walking away
- ✓Allow 24 to 48 hours of cure time before running system at full design pressure
Mesh tape transforms mastic performance
Embedding fiberglass mesh tape into a thin base coat of mastic, then applying a second coat over the tape, reduces field leakage rates by up to 60 percent compared to mastic alone on gaps wider than one-eighth inch. The mesh prevents sagging, adds tensile strength, and lets a single application bridge gaps up to three-eighths inch reliably.
HVAC mastic and the related supplies that make up a complete duct sealing kit are governed by overlapping standards from UL, ASTM, SMACNA, and the International Code Council. Understanding which standards apply to your project keeps installations code compliant and ensures the products you specify will actually perform as advertised. The two most cited standards in the field are UL 181A for closure systems on rigid fiber duct and UL 181B for closure systems on flexible duct.
UL 181A-M specifically certifies mastics intended for sealing rigid fiberglass ductboard, while UL 181B-M certifies mastics for flex duct connections. Many premium mastics carry both listings plus UL 723 for surface burning characteristics, which is required when the product is used in plenum spaces above suspended ceilings. Always check the product label for the relevant UL designation before purchase; products without listings cannot be used on code-regulated installations and will fail third-party inspections.
The International Mechanical Code section 603.9 and the International Energy Conservation Code section R403.3.2 both require duct seams and joints to be sealed with listed mastics, gaskets, or tapes. Most state energy codes adopt these requirements directly. In practice, this means rigid metal ducts must be sealed at every transverse joint, longitudinal seam, and penetration, and the work must be verifiable through duct leakage testing where required by the jurisdiction.
Duct leakage testing under ASTM E1554 or the manufacturer-specific Duct Blaster protocol measures cubic feet per minute of leakage at 25 Pascals of pressure. Most modern codes set the limit at 4 CFM per 100 square feet of conditioned floor area for ducts located outside the conditioned envelope, and 8 CFM per 100 square feet for ducts entirely within conditioned space. Mastic-sealed systems routinely hit numbers below 3 CFM, while taped-only systems often fail.
SMACNA's HVAC Duct Construction Standards classify duct sealing into three levels: Seal Class A (all transverse joints, longitudinal seams, and duct wall penetrations), Class B (transverse joints and longitudinal seams only), and Class C (transverse joints only). Most residential systems require Class A sealing for ducts outside conditioned space. Commercial specifications often default to Class A regardless of duct location to maximize fan energy efficiency.
Beyond the product and method, documentation matters. Contractors should record the brand and lot number of the mastic used, photograph completed seals before insulation goes on, and retain duct leakage test results for the building file. This paperwork supports warranty claims, satisfies code officials, and is increasingly required for Energy Star, LEED, and Passive House certifications.
For contractors building a service business around energy-energy efficient hvac work, marketing these compliance practices to homeowners is a legitimate differentiator. Our HVAC SEO guide covers how contractors are using duct sealing and energy work to rank for high-value local searches and win bids against lower-priced competitors.

Standard duct mastic is rated for service up to 200°F and will fail catastrophically on Category I gas appliance vents that reach 400°F or higher. Use only high-temperature silicone or sodium silicate sealants specifically listed for flue applications. Mixing these up creates a carbon monoxide hazard and voids appliance warranties.
Pro technicians who run mastic every week develop habits that separate clean fast work from sloppy slow work. The first is staging materials before opening the pail. A pre-cut stack of mesh tape strips in 12-inch lengths, a clean bristle brush, a damp shop rag, and a roll of contractor paper laid under the work area let you move through 30 joints in an hour rather than fumbling between each one. Time studies on commercial jobs consistently show that prep accounts for 70 percent of installed cost; mastic itself is cheap.
Temperature management matters more than most installers realize. Water-based mastic stops curing below 40°F and can actually freeze in the pail in unheated trucks during winter. Storing pails inside the cab overnight, or using a small heated job box on site, prevents wasted product. In hot attics above 110°F, water-based mastic skins over so fast you can't get a smooth second coat. Working early mornings or running attic fans during application solves that problem.
Selecting the right viscosity for the job geometry saves enormous amounts of frustration. Thick, paste-grade mastic is ideal for vertical surfaces and overhead joints where sag would ruin a thinner product. Pumpable or brush-grade mastic flows into tight inside corners better but runs off vertical seams. Many techs carry both consistencies and switch based on the joint they are addressing rather than fighting one product through every condition.
For service vans, a smart starter kit includes one gallon of water-based brush-grade mastic, one quart of solvent-based for cold-weather emergencies, a 100-yard roll of fiberglass mesh tape, a 100-yard roll of UL 181B-FX foil tape for flex duct quick repairs, and a sleeve of 10.3-ounce cartridges of pumpable mastic for sealing through inspection ports without disassembly. This combination handles 95 percent of field repair situations without specialized ordering.
Documentation discipline pays off on warranty calls. Photographing every sealed joint before insulation covers it, with a date-stamped phone camera, gives you a defense when a homeowner claims the duct system was leaking from day one. Cloud-synced photo storage tied to the work order creates a complete trail that protects the contractor and demonstrates professional standards to repeat customers and referral sources.
Finally, pair mastic work with insulation upgrades whenever the duct system is exposed. A perfectly sealed duct that runs through a 130°F attic still loses significant capacity through conductive heat gain. R-8 duct wrap or rigid duct board jacketing extends the value of the sealing work and is often eligible for utility rebates or federal energy tax credits. Our overview of the HVAC tax credit rules covers which sealing and insulation projects qualify under current Inflation Reduction Act provisions.
The cumulative effect of these small habits is dramatic. Crews that bring mastic discipline to every job consistently produce duct systems that test at half the leakage rate of code minimums, deliver the rated capacity of the equipment they serve, and rarely generate callbacks. That reliability is what turns a sealing material into a competitive advantage rather than just another supply line item.
Putting all of this into practice on a real job starts with a few simple decisions that prevent rework. Before you open the first pail of mastic, walk the duct system end to end and mark every joint, takeoff, and penetration with a piece of blue painter's tape. This forced inventory step routinely uncovers 10 to 20 percent more joints than the installer remembered, and missing those joints is the leading cause of failed duct leakage tests on otherwise solid work.
Buy mastic in the right container size for the job. A single residential retrofit typically uses one to two gallons; a new construction home with full duct sealing uses three to five gallons; a small commercial job can use 10 gallons or more. Buying a five-gallon pail for a half-gallon job is a false economy because the leftover product will skin over and harden within months even with the lid sealed tight. Match the container to the project to avoid waste.
Plan your sequence so you seal from the air handler outward rather than starting at the registers. Sealing the high-pressure trunk lines and plenums first means that when you test, any remaining leaks will be on the lower-pressure branches where they are easier to find and have less performance impact. Sealing inward from registers leaves the worst leaks for last and often produces test results that are within tolerance but still leave money on the table.
Coordinate mastic application with the insulation contractor on new construction. The mastic must fully cure before insulation goes over it; otherwise the insulation can absorb mastic that has not yet set and the seal will be compromised. On a typical schedule, mastic on Monday and Tuesday means insulation on Thursday at the earliest. Pushing this timeline produces invisible failures that show up months later as elevated utility bills the customer cannot explain.
Quality control before walking away from the job costs almost nothing and prevents most callbacks. Pressurize the system to design static pressure for 10 minutes and walk every joint with a smoke pencil or thermal camera. Any joint that shows airflow or temperature differential gets a second coat right then, while the materials and tools are already on site. Coming back for a single missed joint two weeks later costs 10 times what fixing it on the spot would have.
For ductwork that combines metal trunk lines with flex branches, pay attention to the boots and registers where the system terminates inside the building. These connections are notorious leak points and benefit from mastic on the metal-to-drywall interface in addition to the standard collar seal. A finished register that looks tight visually can still leak 5 to 10 CFM if the boot-to-drywall gap was not sealed during rough-in.
Finally, treat mastic as a system component, not just a consumable. The quality of your duct sealing directly determines the efficiency of every piece of equipment connected to that duct system for the life of the building. Specifying premium UL-listed mastics, mesh tape, and the labor to apply them correctly is one of the highest-leverage decisions in any HVAC project, and the payback in energy savings and comfort routinely exceeds 10 times the material cost over the first five years of operation.
HVAC Questions and Answers




About the Author

NATE Certified HVAC Technician & Licensing Exam Trainer
Universal Technical InstituteMike Johnson is a NATE-certified HVAC technician and EPA 608 universal-certified refrigerant handler with a Bachelor of Science in HVAC/R Technology. He has 19 years of commercial and residential HVAC installation and service experience and specializes in preparing technicians for NATE certification, EPA 608, A2L refrigerant safety, and state HVAC contractor licensing examinations.