Subcooling HVAC: The Complete Guide to Measuring, Adjusting, and Diagnosing Refrigerant Charge on Modern Air Conditioning and Heat Pump Systems
💯 Subcooling HVAC explained: measure, adjust, and troubleshoot TXV systems. Target values, tools, formulas, and field tips for accurate refrigerant charge.
Subcooling HVAC measurements sit at the heart of every accurate refrigerant charge on modern air conditioners and heat pumps that use thermostatic expansion valves or electronic expansion valves. When a technician talks about subcooling, they are describing how many degrees Fahrenheit the liquid refrigerant has been cooled below its saturation temperature at the condenser outlet. That single number tells you whether the system has the correct charge, whether the metering device is working, and whether the condenser is rejecting heat the way the manufacturer designed it to.
For most residential split systems built in the last twenty years, the manufacturer prints a target subcooling value on the data plate, usually somewhere between 8 and 14 degrees Fahrenheit. Hitting that target within plus or minus two degrees on a hot summer day is the difference between a system that cools efficiently for fifteen years and one that struggles, ices up, or burns out a compressor within three seasons. Subcooling is not optional knowledge for HVAC professionals.
This guide walks through the physics of subcooling, the exact tools and gauges you need, the step-by-step measurement procedure on R-410A and R-454B systems, and the diagnostic logic that connects subcooling readings to root cause failures. We will also cover the relationship between subcooling and superheat, why TXV systems are charged by subcooling rather than superheat, and how ambient temperature, indoor load, and airflow each shift the numbers you see at the gauges.
Whether you are studying for a certification exam, training a new helper in the field, or troubleshooting a unit that just will not cool the house below 78 degrees on a 95-degree afternoon, mastering subcooling gives you a repeatable, manufacturer-approved framework. You stop guessing. You stop adding refrigerant because the suction line feels warm. You charge by the number, document the result, and move on to the next call with confidence that the system is dialed in correctly.
Before we get into procedures, it helps to understand why the industry shifted toward subcooling charging in the first place. Older capillary tube systems and fixed orifice metering devices were charged by superheat because they had no internal control over refrigerant flow. TXV and EEV systems actively modulate refrigerant flow to maintain a constant evaporator superheat, which means superheat readings tell you almost nothing about charge level. Subcooling becomes the only reliable indicator. For broader context on system design, our HVAC Solutions guide covers how metering devices fit into the larger refrigeration cycle.
The good news is that once you understand the principle, the math is simple, the tools are inexpensive, and the procedure takes about ten minutes per system. The bad news is that small mistakes, like clamping a temperature probe to a dirty pipe or reading pressure on the wrong port, can throw your subcooling number off by five or six degrees and lead you straight into a misdiagnosis. We will cover every one of those pitfalls in the sections ahead.
By the end of this article, you will know exactly what subcooling is, why it matters, how to measure it, what the numbers mean, and how to use them to charge, troubleshoot, and verify performance on any TXV or EEV split system in residential or light commercial service. Let us start with the fundamentals and build up from there.
Subcooling HVAC by the Numbers
How Subcooling Works in the Refrigeration Cycle
Hot discharge gas enters the condenser at saturation temperature, then condenses to liquid as the fans push outdoor air across the coil. The first portion of the coil handles desuperheating and condensation.
After full condensation, additional condenser surface area cools the liquid refrigerant below its saturation temperature. This subcooled liquid is denser, more stable, and prevents flashing in the liquid line.
Subcooled liquid travels to the indoor metering device. Without adequate subcooling, pressure drops in the liquid line cause flash gas, starving the evaporator and dropping capacity dramatically.
The thermostatic expansion valve meters refrigerant based on evaporator superheat. It assumes a pure liquid feed. Subcooling guarantees that pure liquid arrives, allowing the TXV to do its job correctly.
Because the TXV controls superheat, the only place excess or deficient refrigerant accumulates is in the condenser. More charge equals more subcooling. Less charge equals less subcooling. The relationship is direct.
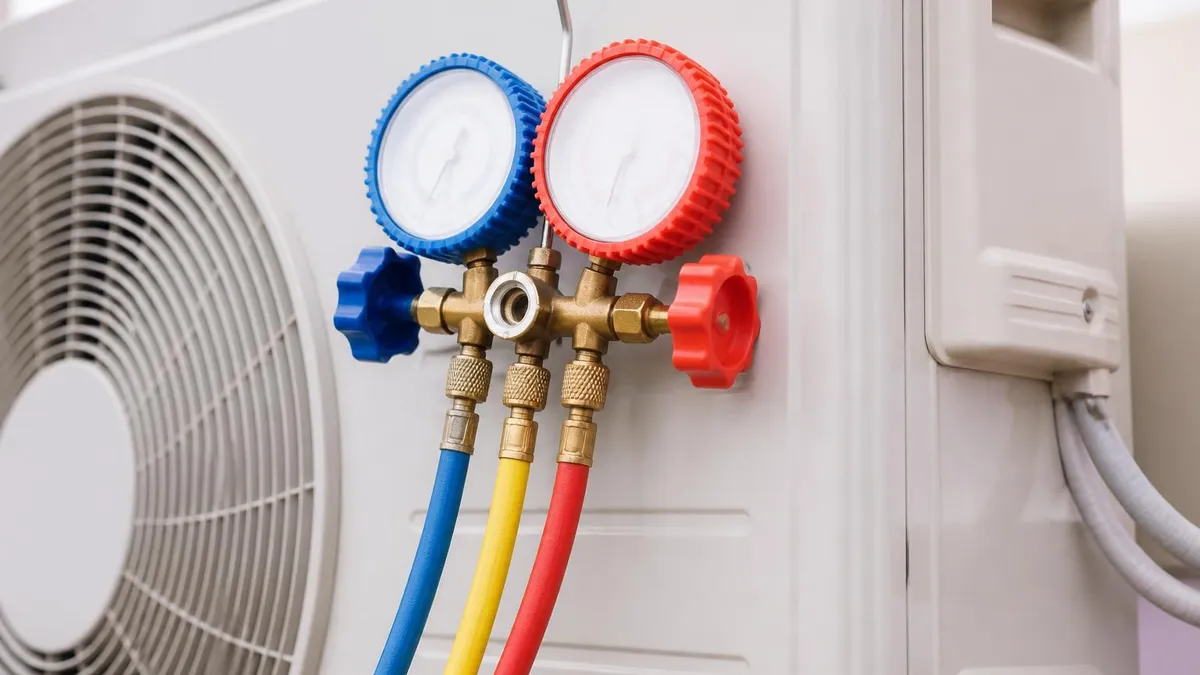
Measuring subcooling correctly starts with understanding the two values you need to combine: the saturation temperature of the refrigerant at the current high side pressure, and the actual temperature of the liquid line leaving the condenser. Subcoolingsubtract the liquid line temperature from the saturation temperature, and the positive difference in degrees Fahrenheit is your subcooling value. The math is straightforward, but every input has to be accurate, and that is where many techs go wrong.
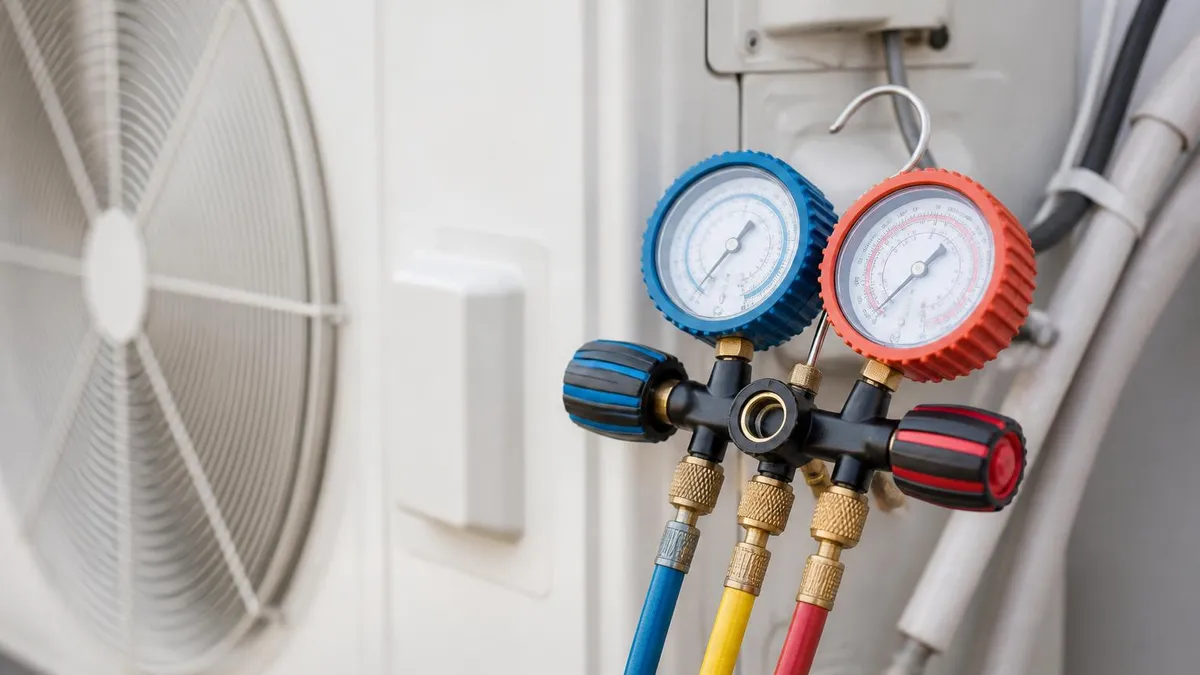
The high side pressure must be read at a port as close to the condenser outlet as possible, typically the liquid service valve on a residential split system. Using the suction port or a port on a remote location introduces errors because pressure drops occur across long line sets. Modern digital manifold gauges automatically convert pressure to saturation temperature using built-in PT charts for R-410A, R-454B, R-32, and legacy refrigerants. Analog gauges have the conversion printed on the dial face.
The liquid line temperature is measured with a clamp-on thermistor or thermocouple probe attached firmly to the copper liquid line, ideally within six inches of the condenser service valve. Insulating the probe with foam tape or putty is critical. Outdoor air blowing across the probe can drag the reading two to four degrees off the true pipe temperature, which translates directly into incorrect subcooling. Always insulate, always wait for the reading to stabilize, and always confirm with a second measurement.
Saturation temperature is not a fixed number. It changes with refrigerant type and pressure. R-410A at 350 psig saturates at about 105 degrees Fahrenheit. R-454B at the same pressure saturates at a slightly different temperature because the pressure-temperature relationship differs. Always verify your gauge or app is set to the correct refrigerant. Mixing up R-22 and R-410A scales is one of the most common rookie mistakes, and it produces subcooling values that look reasonable but are off by ten degrees or more.
System stabilization matters more than people realize. After connecting gauges, allow the system to run for at least fifteen minutes at steady state before recording final numbers. Pressures, temperatures, and flow rates all need time to equalize. Taking readings within the first five minutes of startup gives you transient data that does not reflect the system's true operating condition. This is especially true on humid days when latent load shifts over the first half hour. Our hvac maintenance service covers stabilization timing in more detail.
Ambient conditions also affect what subcooling you should expect. Manufacturer charging charts often list target subcooling at a specific outdoor temperature, like 85 or 95 degrees Fahrenheit. On a 70-degree day, head pressure drops, saturation temperature drops, and subcooling readings shift. Some manufacturers provide correction tables. When in doubt, charge the system at the closest possible match to the design condition, or use weigh-in methods if conditions are too far off the chart.
Finally, document everything. Write down outdoor ambient, indoor return air dry bulb and wet bulb, high side pressure, liquid line temperature, calculated subcooling, suction pressure, suction line temperature, and calculated superheat. A complete data set lets you spot trends, confirm diagnoses, and defend your work if a customer questions the repair later.
HVAC Practice Test Questions
Prepare for the HVAC - Heating Ventilation and Air Conditioning exam with our free practice test modules. Each quiz covers key topics to help you pass on your first try.
HVAC Air Conditioning
HVAC Exam Questions covering Air Conditioning. Master HVAC Test concepts for certification prep.
HVAC Code Compliance
Free HVAC Practice Test featuring Code Compliance. Improve your HVAC Exam score with mock test prep.
HVAC Electrical Controls
HVAC Test Prep for Electrical Controls. Practice HVAC Quiz questions and boost your score.
HVAC Energy Efficiency
HVAC Questions and Answers on Energy Efficiency. Free HVAC practice for exam readiness.
HVAC Heating Systems
HVAC Mock Test covering Heating Systems. Online HVAC Test practice with instant feedback.
HVAC Load Calculations
Free HVAC Quiz on HVAC Load Calculations. HVAC Exam prep questions with detailed explanations.
HVAC Tools and Equipment
HVAC Practice Questions for HVAC Tools and Equipment. Build confidence for your HVAC certification exam.
HVAC Refrigeration
HVAC Test Online for Refrigeration. Free practice with instant results and feedback.
HVAC Safety Practices
HVAC Study Material on Safety Practices. Prepare effectively with real exam-style questions.
HVAC System Design
Free HVAC Test covering System Design. Practice and track your HVAC exam readiness.
HVAC Thermodynamics
HVAC Exam Questions covering Thermodynamics. Master HVAC Test concepts for certification prep.
Subcooling HVAC Measurement Tools and Procedure
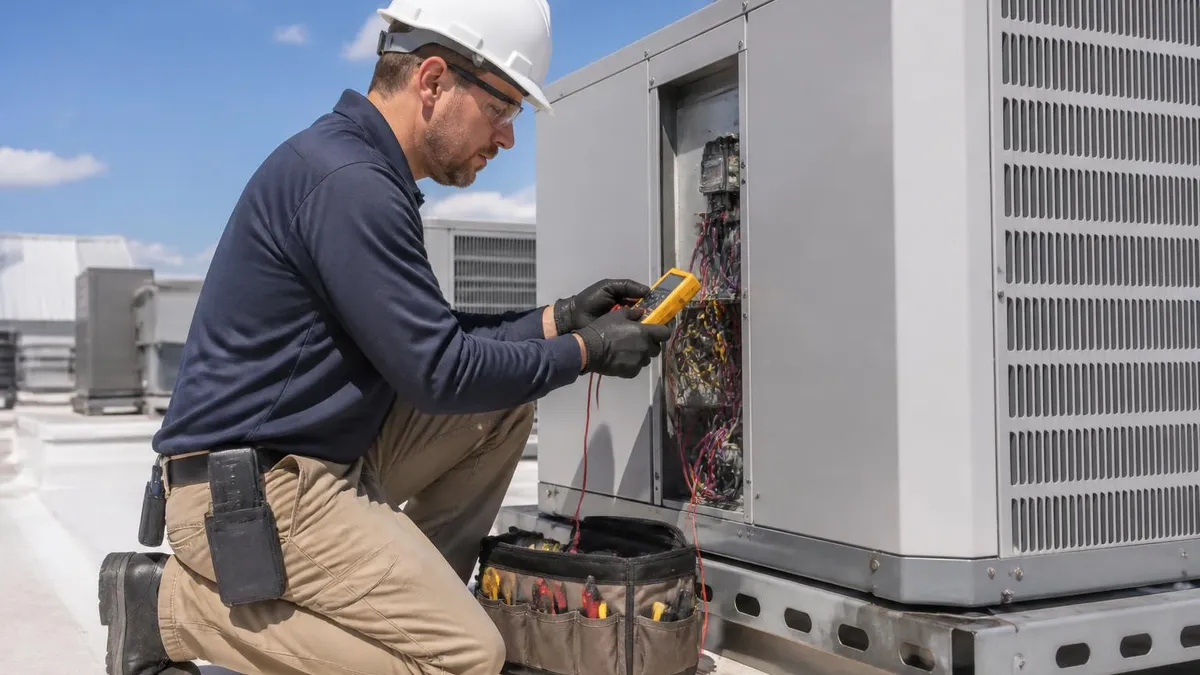
A digital manifold gauge set with built-in refrigerant pressure-temperature conversion is the modern standard. Quality units from Fieldpiece, Testo, and Yellow Jacket cost between $400 and $900 and include wireless probes, Bluetooth connectivity to smartphone apps, and automatic subcooling and superheat calculations. Analog gauges still work but require manual PT chart lookups and introduce more human error during fast-paced service calls.
Beyond the manifold, you need a clamp-on temperature probe rated for the refrigerant lines you will measure, foam pipe insulation tape to shield probes from ambient air, a refrigerant scale for weighed charging, leak detection equipment, recovery machine, and a digital thermometer for return and supply air. Stock R-410A or R-454B based on your service area, plus core removal tools, vacuum pump, and micron gauge for evacuation after any open system repair.
Charging by Subcooling vs Superheat: Which Method Wins?
- +Direct indicator of refrigerant charge level on TXV and EEV systems
- +Less affected by indoor load and humidity changes than superheat
- +Manufacturer-approved method printed on every modern data plate
- +Works reliably across wide ambient temperature ranges
- +Diagnostic value extends beyond charging to compressor and condenser analysis
- +Modern digital tools automate the calculation in real time
- −Requires accurate high side pressure and liquid line temperature
- −Does not work on fixed orifice or capillary tube systems
- −Sensitive to dirty condenser coils that artificially raise readings
- −Cannot diagnose evaporator-side problems by itself
- −Needs corrections when ambient is far from design conditions
- −Requires understanding of PT relationships for the specific refrigerant
Subcooling HVAC Field Checklist
- ✓Confirm refrigerant type on the data plate before connecting gauges
- ✓Inspect and clean the condenser coil if dirty or restricted
- ✓Verify the indoor blower is running at correct CFM for the tonnage
- ✓Connect digital manifold to liquid and suction service valves
- ✓Clamp temperature probe to liquid line within six inches of condenser
- ✓Insulate the probe completely with foam tape to block ambient air
- ✓Run system in cooling mode for at least fifteen minutes to stabilize
- ✓Record outdoor ambient and indoor return air dry bulb temperatures
- ✓Calculate subcooling by subtracting liquid line temp from saturation temp
- ✓Compare result to manufacturer target on data plate or charging chart
- ✓Adjust charge in quarter-pound increments, waiting ten minutes between
- ✓Document final readings and refrigerant added or recovered on the work order
Always insulate your liquid line probe
A bare temperature probe clamped to a copper liquid line can read two to four degrees high on a hot, sunny day because the surrounding ambient air heats the probe directly. That error translates into a subcooling reading that looks lower than reality, which tempts techs to add refrigerant the system does not need. Foam pipe insulation tape costs pennies and eliminates this error entirely. Make it a habit on every service call.
Once you can measure subcooling reliably, the next skill is diagnosis. High subcooling and low subcooling each point to specific root causes, and recognizing the patterns saves hours of troubleshooting. The general rule is simple: high subcooling means refrigerant is backing up in the condenser, while low subcooling means refrigerant is not adequately filling the condenser. From those two starting points, you can branch into a dozen specific diagnoses based on supporting evidence from suction pressure, superheat, and air temperatures.
High subcooling, say 18 to 25 degrees Fahrenheit on a system targeted at 10 degrees, usually indicates overcharge. Excess refrigerant takes up condenser volume that should be used for vapor condensation, leaving more pipe area for subcooling. The symptoms include elevated head pressure, normal to slightly high suction pressure, and reduced cooling capacity because the compressor works harder against the high discharge pressure. Recovery of refrigerant in quarter-pound increments, with stabilization between each adjustment, brings the system back into range.
However, high subcooling can also point to a restricted metering device or partially blocked liquid line filter drier. In that case, the restriction creates a pressure drop that causes refrigerant to back up in the condenser. The telltale difference from overcharge is low suction pressure combined with high subcooling. Overcharge typically shows normal or high suction. A frosted liquid line, particularly just downstream of the filter drier, confirms restriction. Replacing the drier and verifying TXV operation usually resolves it.
Low subcooling, like 2 to 5 degrees on the same 10-degree target system, almost always points to undercharge or a refrigerant leak. The condenser does not have enough liquid to subcool, so the reading drops or even disappears entirely. Supporting symptoms include low head pressure, low suction pressure, high superheat, and warm supply air. Before adding refrigerant, always perform a leak search. Adding refrigerant to a leaky system just delays the inevitable callback and violates EPA refrigerant management rules on systems containing more than fifty pounds.
Zero or negative subcooling, meaning the liquid line is at or above saturation temperature, is a severe undercharge or major leak. The system is delivering two-phase flow into the metering device, capacity collapses, and superheat readings climb above 25 or 30 degrees. Compressor protection should be your first concern. Shut down the unit, isolate the leak, repair it, evacuate to 500 microns, and weigh in a full charge per the data plate. Topping off a near-empty system by gauge readings alone is unreliable.
A non-condensable contamination in the refrigerant circuit also raises subcooling artificially because the non-condensable gases occupy condenser volume and elevate head pressure. The fix is recovery, evacuation, and recharge with virgin refrigerant. This usually happens after sloppy service work where the system was opened to atmosphere without proper evacuation. A micron gauge after evacuation, holding below 500 microns for ten minutes, confirms the system is clean and ready for recharge.
The diagnostic process is iterative. Start with subcooling, then bring in superheat, suction pressure, head pressure, supply and return air temperatures, and amp draw. Each data point either confirms or contradicts your initial hypothesis. Experienced techs build a mental decision tree and check the high-probability causes first based on system age, recent service history, and environmental conditions. The numbers always tell a coherent story when you read them in context.
EPA Section 608 prohibits knowingly venting refrigerant and requires leak repair on systems containing 50 pounds or more of refrigerant when leak rates exceed annual thresholds. Even on smaller residential systems, adding refrigerant to a leaky unit is a temporary fix that wastes the customer's money and harms the environment. Always perform an electronic leak search, bubble test, or nitrogen pressure test before recharging. Document the repair and the verified-tight system before adding refrigerant back.
Charging a system by subcooling is the most accurate field method available for TXV and EEV equipped split systems. The procedure starts with verifying the system is in good mechanical condition. A dirty condenser coil, low airflow at the evaporator, restricted filter drier, or failing condenser fan motor will all distort subcooling readings and lead you to add or remove the wrong amount of refrigerant. Spend the first ten minutes confirming the basics before you touch a gauge port. This pre-check discipline separates professional service from parts-throwing guesswork.
Once the system is mechanically sound, install gauges, clamp insulated probes, and run the unit for fifteen minutes. Read the data plate for the target subcooling value. If the plate shows a range, like 8 to 14 degrees, aim for the middle. If conditions are off design, use the manufacturer charging chart or app to find the correction. Manufacturers like Carrier, Trane, Lennox, Goodman, and Rheem all publish charging guides. Print them or save them to your tablet so you have the right reference for every job.
To add refrigerant, connect a refrigerant cylinder to the manifold and add liquid through the liquid port while the system is running, slowly and in small increments. Most techs add a quarter pound at a time, then wait ten minutes for the system to restabilize before re-measuring. Resist the temptation to dump in a full pound at once. Overshoot is harder to correct than undershoot because removing refrigerant requires recovery equipment and EPA-compliant cylinders. Patience pays off in accuracy. For more on professional service practices, see our hvac contractors.
To remove refrigerant, connect a recovery machine and recovery cylinder. Recover into the cylinder in liquid mode for speed, then switch to vapor for the last bit. Never vent. Weigh the cylinder before and after to document exactly how much you removed. This is both an EPA requirement and a quality control measure. Knowing precisely how much refrigerant the system holds versus its nameplate charge is a powerful diagnostic clue on future service calls.
Verify the final charge across multiple parameters, not just subcooling. The system should hit target subcooling, target superheat at the evaporator, expected suction pressure for the ambient and indoor conditions, and expected supply air temperature drop across the coil, usually 18 to 22 degrees on a properly charged system with correct airflow. If subcooling is right but supply air drop is only 12 degrees, you have an airflow problem masquerading as a charge question. Cross-checking prevents incomplete diagnoses.
Document every reading on the service ticket. Customers appreciate seeing professional measurements, and your shop appreciates having defensible data if a callback or warranty claim arises. A clean ticket with high side pressure, low side pressure, subcooling, superheat, ambient temperature, return air, supply air, and amp draw tells the next technician exactly how the system was performing when you left. It also builds trust by showing the customer you are charging by the numbers, not by feel.
Finally, recognize the limits of subcooling charging. It does not work on fixed orifice systems, which require superheat charging. It does not work on systems with major airflow restrictions, severe coil contamination, or non-condensable contamination. In those cases, fix the underlying problem first, then charge. Subcooling is a precise tool, but only when applied to a system that meets the assumptions behind it. Knowing when to use it and when to step back to evacuation and weigh-in is the mark of a seasoned technician.
Beyond the basic procedure, there are several advanced techniques and field tips that separate good subcooling work from great work. The first is learning to read transient behavior. When you first start a system, subcooling climbs as the condenser fills with refrigerant during pressure stabilization. Watching that curve gives you clues about TXV hunting, condenser fan staging on multi-fan units, and even compressor valve health. A system that takes more than twenty minutes to reach steady subcooling often has an underlying mechanical issue worth investigating.
Second, learn to correlate subcooling with the system's age and refrigerant history. A ten-year-old R-410A system that has had three service visits and two refrigerant additions over its life is statistically likely to have an active leak. Even if subcooling reads in range today, you should perform a leak search and present findings to the customer. Proactive diagnosis builds long-term trust and reduces emergency callbacks during peak season when your schedule is already packed.
Third, document your charging procedure with photos when possible. A photo of the gauge readout, the probe attachment, and the data plate makes warranty claims and customer disputes much easier to resolve. It also creates a training resource for newer techs in your shop. Many service software platforms now integrate photo capture directly into the work order, so the documentation overhead is minimal. The professional reputation it builds is significant. The same documentation discipline applies whenever you order replacement parts, as covered in our hvac parts and supply.
Fourth, understand the relationship between subcooling and seasonal energy efficiency ratings. A system charged five degrees outside its target subcooling can lose 10 to 15 percent of its rated cooling capacity and 5 to 10 percent of its efficiency. Over a cooling season, that translates to hundreds of dollars in unnecessary electricity costs for the homeowner. Customers who understand the connection between accurate charging and their utility bill are far more receptive to paying for proper service and verifying the work.
Fifth, when working on newer refrigerants like R-454B and R-32, recognize that pressure-temperature relationships and target subcooling values differ from R-410A. Always confirm your manifold or app is set to the correct refrigerant. Some newer units have target subcooling values in the 6 to 10 degree range rather than the 8 to 14 range typical of R-410A equipment. Read the data plate first, every time, with no assumptions about what the previous system you worked on looked like.
Sixth, develop a feel for when subcooling readings do not match what you see and feel at the air handler. If subcooling is perfect but the customer reports poor cooling, look hard at airflow, duct leakage, refrigerant contamination, or evaporator coil cleanliness. Subcooling tells you about charge and condenser performance. It does not, by itself, tell you everything about how the system delivers comfort. Combine it with delta-T measurements, static pressure readings, and a careful look at the duct system to get the full picture.
Finally, never stop learning. Refrigerants evolve, equipment evolves, regulations evolve, and the techniques that worked five years ago need refinement today. Stay current with manufacturer training, EPA updates, and industry publications. Subcooling charging is a fundamental skill, but its application in the field keeps changing as the industry shifts toward lower global warming potential refrigerants and more sophisticated controls. The professionals who keep adapting are the ones who build successful, long-running careers.
HVAC Questions and Answers
HVAC Repair Portland: The Complete 2026 Homeowner's Guide to Furnace, AC, and Heat Pump Service in the Rose City
HVAC Tune Up Service: The Complete Guide to Professional HVAC Maintenance and Why It Pays for Itself
HVAC Solutions: The Complete Guide to Heating, Cooling, and Indoor Air Quality Systems for Homes and Buildings
Certified HVAC Contractors: How to Find, Vet, and Hire the Right Professional for Your Home or Business
HVAC Parts and Supply: The Complete Guide to Sourcing, Identifying, and Buying Heating and Cooling Components in 2026
About the Author
NATE Certified HVAC Technician & Licensing Exam Trainer
Universal Technical InstituteMike Johnson is a NATE-certified HVAC technician and EPA 608 universal-certified refrigerant handler with a Bachelor of Science in HVAC/R Technology. He has 19 years of commercial and residential HVAC installation and service experience and specializes in preparing technicians for NATE certification, EPA 608, A2L refrigerant safety, and state HVAC contractor licensing examinations.