HVAC Capacitor Replacement: Cost, Symptoms, and Step-by-Step DIY Guide 2026 July
HVAC capacitor replacement costs $150-$400 pro or $20-$80 DIY. 🎯 Learn symptoms, types, step-by-step replacement, and when to call a pro.
Your AC hums but won't kick on during a summer heatwave. The fan sits dead still. The breaker hasn't tripped. Nine times out of ten, the culprit is a tiny cylinder buried inside your condenser called a capacitor — and it's the single most common failure point in any residential HVAC system. The good news? It's also one of the cheapest parts to replace. A new capacitor runs $10 to $50 at any supply house, yet hiring a technician to swap it typically costs $150 to $400. That gap is why thousands of homeowners learn this repair themselves every year.
A capacitor is basically a battery for your motors. It stores electrical energy and dumps it into the compressor or fan at the exact moment they need to spin up against load. Without that jolt, motors stall. Without steady support during operation, they overheat and burn out. Heat, age, and power surges slowly cook the electrolyte inside, and one day the part simply gives up.
If you're comfortable killing power at a breaker, discharging stored voltage with an insulated screwdriver, and matching a microfarad rating on a label, you can knock this job out in under thirty minutes. If any of that sounds sketchy, hire a pro — it's still cheap compared to a fried compressor. Most service techs will tell you privately that capacitor swaps make up 60-70% of their summer service calls.
The part is small, the labor is fast, and the markup is enormous. Knowing what you're dealing with puts you in a much stronger position whether you DIY or hire it out. The same diagnostic logic also lets you spot when a tech is overselling — if they want to replace the contactor, blower motor, and compressor on top of the capacitor without doing actual amp-draw testing, get a second opinion fast.
HVAC capacitor replacement is the most common AC repair in America. Parts cost $10-$50; professional service runs $150-$400; DIY runs $20-$80. Match the microfarad (uF) rating and voltage exactly. Always cut power at the breaker and discharge stored voltage before touching terminals. Quality brands like GE Genteq and Mars last 5-10 years; cheap generics fail in 1-3.
So what does this part actually do inside your unit? Picture a small metal can — about the size of a soda can, sometimes smaller, sometimes a bit larger — bolted inside the outdoor condenser cabinet. Two or three terminals stick out the top, each tied to a colored wire heading off to the compressor or fan motor. Inside that can sits a sandwich of metal foil and oil-soaked paper or polymer film.
When 240V household current charges the plates, the capacitor banks up energy. The moment your thermostat calls for cooling, the contactor closes, current flows, and the capacitor releases a powerful surge of stored electricity that kicks the motor into motion. Once the motor is spinning, the capacitor either backs off (start type) or keeps providing steady support (run type). It's a small role with massive consequences when the part goes south.
Failure modes are pretty predictable. The dielectric material breaks down from years of heat cycling. The internal pressure builds. The can swells. Sometimes oil leaks from the top. Sometimes the top dome just pops. When that happens, the capacitor can no longer hold a charge, the motor can't start, and you hear that telltale hum coming from the unit.
The compressor sits there drawing locked-rotor amperage — 4-6 times its normal running current — until the internal overload protector trips and shuts it down to prevent burnout. That protection cycles in and out, which is why you sometimes hear AC units that hum, click, hum, click in a slow rhythm.
For a detailed walkthrough of related AC repairs, check our HVAC repair guide which covers the most common service calls and pricing. If your HVAC condenser unit isn't spinning at all, the capacitor is almost always the first suspect. Worth saying out loud: capacitors don't slowly fade and warn you. They typically work fine right up until the moment they don't. That's why annual spring inspections matter — a tech with a clamp meter can spot a weakening capacitor weeks before it dies on a 95-degree afternoon when every HVAC company in town is booked solid.
Three Types of HVAC Capacitors
A start capacitor exists for one job — providing the massive initial torque needed to overcome motor inertia at startup. It's only engaged for a fraction of a second, then a centrifugal switch or potential relay drops it out of the circuit. Capacitance ratings run high, typically 50 to 200+ microfarads (uF). Physically larger than run capacitors, often with a black plastic housing. If your start cap fails, the motor either won't move at all or will draw locked-rotor amps trying.
Common in older single-phase compressors, sump pumps, and any motor that needs hard starting. Failure symptom: you hear a strong hum but nothing turns. Replacement cost: $15-$40 for the part. Hard-start kits (a start cap plus relay) often get added when an aging compressor needs a boost — running about $25-$60 for the kit.
Symptoms of a Failing HVAC Capacitor
- ✓Loud humming from the outdoor unit but no fan or compressor movement (most common sign)
- ✓AC turns on but blows warm air because the condenser fan won't spin
- ✓Unit starts then shuts off after 30-60 seconds (thermal overload tripping)
- ✓Fan blade spinning visibly slow or struggling to reach full RPM
- ✓Capacitor housing visibly bulged, swollen, or domed on top
- ✓Oily residue around the capacitor or pooled at the base
- ✓Burnt plastic smell coming from inside the condenser cabinet
- ✓Circuit breaker trips repeatedly when AC tries to start
- ✓Electric bill spikes without any change in usage patterns
- ✓Visible burn marks, melted plastic, or scorching on the capacitor case
- ✓Clicking sound from the contactor without the motors engaging
- ✓AC running constantly but never reaching set temperature
Cost is the question everyone asks first. Here's the honest breakdown: parts are cheap, labor is expensive, and emergencies cost double. A standard residential dual run capacitor sits in the $15 to $40 range at any HVAC supply house. Premium brands like GE Genteq push toward $50. Generic Amazon specials can be had for $8, though we wouldn't trust them past a single summer.
Commercial units use larger caps that run $30 to $200. Add a $75 to $150 service call fee, $75 to $150 diagnostic charge (often waived if you let them do the repair), and roughly 15-30 minutes of labor at $100-$200 per hour. Total: $150-$400 for a routine daytime appointment.
Emergency pricing is where things get ugly. A Saturday afternoon service call during a heat wave can easily double those numbers. Some companies tack on dispatch fees, after-hours premiums, and "diagnostic guarantees" that essentially mean you're paying $300 before they even open the panel. If your AC is dead and the forecast shows 95 degrees tomorrow, it's tempting to pay anything to make it stop.
That's exactly when DIY pays off most — a $25 part and 30 minutes saves you several hundred dollars and gets cold air flowing the same day. Worth keeping a spare capacitor on the shelf if you live somewhere hot. They don't expire sitting in a garage, and Murphy's Law guarantees yours will die on the worst possible afternoon.
The labor markup deserves a closer look. A tech earns $100-$200 per service hour. Capacitor replacement takes 15-30 minutes once they're at the unit. So the actual labor cost should be $30-$80. Where does the rest come from? Truck roll fees, fuel, insurance, dispatcher salaries, parts inventory carrying costs, and yes, profit margin. None of that is unreasonable for a business. But it does explain why DIY beats hiring out by a wide margin on this specific repair.
Knowing what's a fair price helps you spot rip-offs — anyone quoting $600+ for a routine residential capacitor swap during business hours is gouging you, full stop. Get a second quote before approving any repair over $400 for a residential capacitor. Reputable companies will text photos of the failed part on request and itemize the bill clearly. Vague quotes, pressure to decide on the spot, and refusal to show you the old capacitor are all red flags. You're paying for skilled labor and parts — not magic. A trustworthy tech welcomes questions about pricing and shows their work.
HVAC Capacitor Replacement Cost Breakdown (2026 US Pricing)
Step-by-Step DIY HVAC Capacitor Replacement
Kill the Power
Wait and Verify
Open the Service Panel
Locate the Capacitor
Photograph Everything
Discharge the Capacitor
Disconnect Wires
Remove Old Capacitor
Install New Capacitor
Reconnect Wires
Double-Check Wiring
Reassemble and Restore Power
Verify Operation
Picking the right replacement matters more than most folks realize. The microfarad rating is non-negotiable — a 45/5 uF cap must be replaced with a 45/5 uF cap, period. A few uF off and your compressor runs inefficiently, overheats, or hard-starts every cycle. Voltage rating works differently: a 440V capacitor can safely replace a 370V unit (higher voltage tolerance is always fine), but never go the other direction.
Number of terminals must match — two terminals for single-function caps, three for duals. Physical dimensions matter so the mounting bracket actually fits. Tolerance of ±5% is industry standard and acceptable. When in doubt, snap a photo of the old cap's label and bring it to the supply house.
You'll occasionally hear someone say "close enough" about the uF rating. Don't believe it. A 40/5 uF cap installed in a system that calls for 45/5 uF will start the compressor, sure — but it'll do so under-torqued every single cycle, gradually wearing out the start windings. Within a year or two you're replacing a $1,500 compressor instead of a $25 capacitor.
The label exists for a reason. If you can't find an exact match locally, order online and wait two days rather than guessing. Your future self will thank you. Common dual capacitor ratings you'll encounter include 30/5, 35/5, 40/5, 45/5, 50/5, 55/5, and 60/5 — covering most 1.5 to 5-ton residential units.
Common HVAC Capacitor Problems and What They Mean
- Cause: Extreme ambient heat stresses already-aging dielectric material
- Why so common: Capacitors cycle more often when AC runs continuously
- Solution: Replace immediately; consider whole-house surge protector
- Prevention: Shade outdoor unit, schedule spring HVAC inspection
- Symptom: Capacitor fails within 1-2 years of replacement
- Real cause: Compressor drawing excessive amps or weak fan motor bearings
- What to do: Have technician test compressor and motor amp draw
- Don't ignore: Repeated failures forecast major compressor death soon
- Symptom: Motor runs but inefficiently, trips overload, or overheats
- Cause: Mismatched capacitance — even small variance matters
- Fix: Replace with exact-rated capacitor from OEM spec sheet
- Damage risk: Long-term mismatched cap can burn out compressor windings
- Most common error: Swapping HERM and FAN wires on dual capacitor
- Result: Compressor receives fan-rated capacitance, won't start
- Worst case: Burned compressor windings within minutes
- Prevention: Photograph wiring before disconnecting — always
- Symptom: Generic capacitor fails within 6-18 months
- Cause: Cheap dielectric material, poor manufacturing tolerances
- Better option: GE Genteq, Mars, AmRad — proven brands
- Cost difference: $10 more upfront saves $200+ in repeat service calls
- Diagnosis: Definitive sign of capacitor failure — no testing needed
- Internal cause: Pressure buildup from dielectric breakdown
- Safety: Don't touch — discharge before removing
- Action: Replace immediately; old cap may rupture
DIY HVAC Capacitor Replacement: Pros and Cons
- +Save $100-$300 per replacement compared to professional service
- +Repair completed in 20-45 minutes once you have the part in hand
- +Same-day fix when supply houses are open — no waiting for appointments
- +Builds confidence and knowledge for future HVAC troubleshooting
- +Capacitors are cheap enough to keep a spare on the shelf for emergencies
- +No diagnostic fees, service call charges, or weekend premium pricing
- +Direct control over part quality — buy premium brands like GE Genteq
- +Complete repair without scheduling around technician availability windows
- −Real risk of electrocution if capacitor isn't properly discharged first
- −Wrong wiring can destroy compressor in seconds — expensive mistake
- −May void manufacturer warranty on newer units (always check terms)
- −Wrong uF rating causes inefficient operation and shortens motor life
- −Requires basic electrical knowledge and willingness to work with 240V
- −Bulging capacitors can rupture and spray hot oil during removal
- −Diagnostic uncertainty — capacitor symptoms can mimic other failures
- −No professional guarantee if installed part fails again quickly

When should you call a pro instead of grabbing a screwdriver? The line is mostly about your comfort with electricity. If you've never opened an electrical panel, never used a multimeter, or feel uneasy about 240V circuits, hire someone. If you smell burning, see scorch marks on the contactor, or this is your third capacitor in two years, hire a pro — there's a deeper issue.
Units still under manufacturer warranty almost always require licensed service to keep coverage intact. Commercial systems with three-phase power are pro-only territory. And honestly, if the outdoor unit is in a cramped space or on a roof, paying $200 to avoid hauling tools up a ladder is reasonable.
That said, the technical bar for residential capacitor swaps is genuinely low. If you can change a light fixture, you can change a capacitor — the procedure is actually simpler since you don't have to splice wires. The cost of getting it right is high though, so don't half-do it. Read every step twice, take photos, double-check wire colors against the new cap's terminals, and don't skip the discharge.
Many homeowners do their first capacitor swap with a phone propped on the unit playing a YouTube tutorial. That's totally fine — just make sure the tutorial matches your unit type. Older split systems sometimes use two separate capacitors instead of a dual; gas-pack rooftop units have their own quirks.
Curious about other HVAC service costs? Our breakdown of HVAC installation cost covers full-system pricing, while commercial HVAC installation dives into business-class equipment. One thing that catches people off guard: capacitor replacement is one of the few HVAC repairs where DIY savings are real and substantial. Most other repairs — refrigerant work, ductwork, condensate pump replacement, blower motor swaps — require specialized tools, EPA certification, or experience that makes DIY a wash or worse. Capacitors are the rare exception where a homeowner can genuinely match what a tech does with a $30 part and basic hand tools.
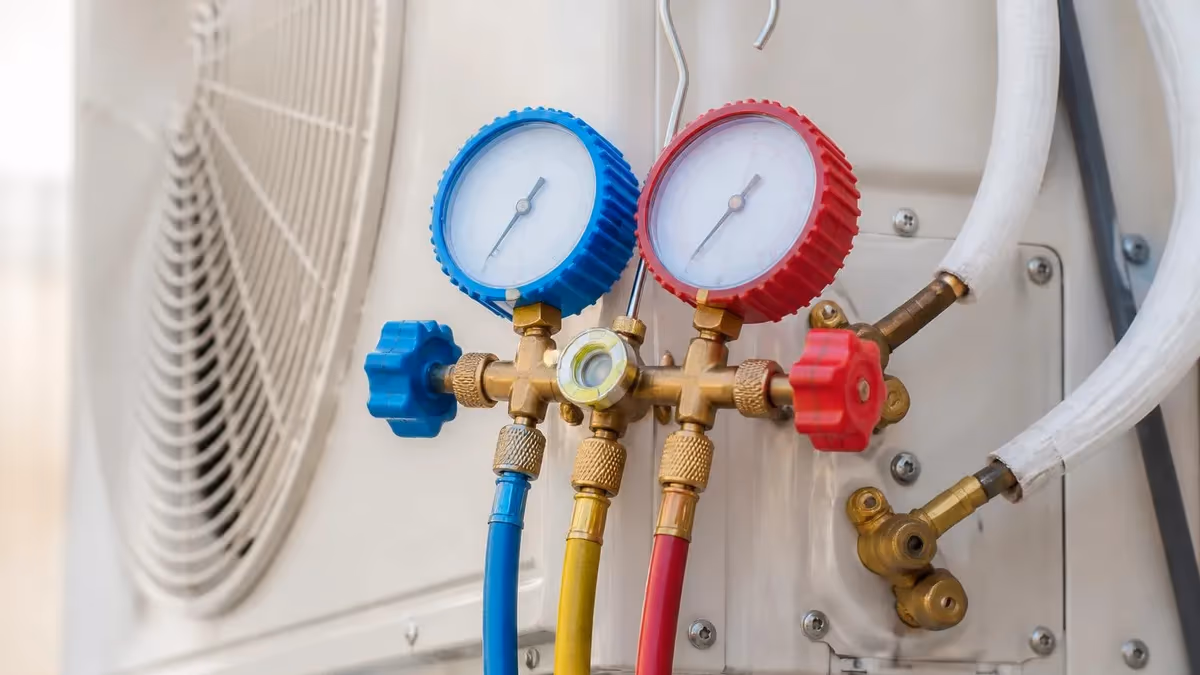
Capacitors store lethal voltage even after power is off. A standard residential dual capacitor at full charge can deliver enough current to stop your heart. Always: (1) kill power at the breaker AND the disconnect at the unit, (2) wait 30 seconds, (3) short across terminals with an insulated screwdriver to discharge, (4) verify dead with a non-contact tester, (5) wear safety glasses in case of rupture. If your capacitor is visibly bulged or leaking oil, it's under pressure and may burst — handle with extra care.
Lifespan is a fair question. A quality capacitor in normal conditions lasts 5 to 10 years. Hot, humid climates like Phoenix, Houston, or Miami push the lower end. Mild coastal regions like Seattle or San Francisco stretch toward the upper end. Power-grid stability matters too — areas with frequent surges, brownouts, or lightning strikes kill capacitors faster.
Oversized AC units that short-cycle constantly burn through caps every 2-3 years because each startup hits the part hard. Cheap brands fail in 1-3 years even in ideal conditions. A whole-house surge protector ($300-$1,000 installed) does more to extend capacitor life than any other single upgrade.
Brand-wise, stick with GE Genteq, Mars, or AmRad for residential work. These are the brands HVAC techs install in their own homes. Avoid no-name eBay specials and ultra-cheap Amazon listings — the dielectric material is often substandard. Home Depot stocks Hercules and Mars; Lowe's carries Hercules; HVAC supply houses (the kind techs visit) carry GE Genteq, OEM Carrier, Trane, and Lennox parts.
Same-day pickup is usually possible at supply houses if you arrive before 4 PM with the old part in hand. Most distributors will let homeowners walk in and buy parts without a contractor account, though some require cash or check. Online options include HVAC.com, SupplyHouse.com, and Grainger for industrial accounts. Amazon Prime can get you a Mars or AmRad capacitor next day for under $25 in most regions.
What about brand-specific OEM caps? Carrier, Trane, Lennox, Goodman, and Rheem all use generic capacitors internally — there's no proprietary technology. The OEM part is usually just a Genteq or Mars unit with a manufacturer-branded sticker, sold at 3-5x the markup. Don't pay extra for OEM packaging unless the warranty terms specifically require it. A $25 Genteq from the supply house works identically to a $90 Carrier-branded part. Pro tip: take the OEM part number to the supply house counter and they'll usually cross-reference it to a generic equivalent on the spot.
For specialty applications you might cross paths with HVAC dampers and zone-control electronics that have their own dedicated capacitors — those follow the same replacement principles, just smaller in physical size. Variable-speed and inverter-driven units handle motor starting electronically and may not have traditional capacitors at all, instead using IGBT-based drives and capacitor banks on the control board. Those are pro-only repairs.
Tools and Supplies for DIY Capacitor Replacement
- ✓Replacement capacitor with matching uF and voltage rating (verified against old unit label)
- ✓Insulated flathead screwdriver for discharging stored voltage safely
- ✓Nut driver set with 5/16, 3/8, and 7/16 sizes for cabinet screws
- ✓Digital multimeter with capacitance (uF) measurement function
- ✓Non-contact voltage tester to verify power is actually dead
- ✓Safety glasses rated ANSI Z87.1 to protect from possible rupture
- ✓Rubber-handled work gloves for extra electrical insulation
- ✓Smartphone or camera to photograph wiring before disconnection
- ✓Needle-nose pliers for removing push-on terminal connectors
- ✓Magnetic parts tray so loose screws don't disappear in grass
- ✓Flashlight or headlamp if working in shaded or low-light condenser area
- ✓Wire labels or masking tape if you want extra wiring reference
Diagnosing whether the capacitor is actually the problem starts with simple checks. First, confirm the thermostat is calling for cooling (set 5 degrees below room temp). Walk to the outdoor unit. If you hear a hum but no fan motion, take a long stick and gently push a fan blade — if the fan then starts spinning on its own, the capacitor is providing partial but insufficient starting torque.
Classic dying-cap symptom. If the unit is silent and the contactor isn't clicking, the issue is upstream (breaker, contactor, control board, or thermostat wiring). If the contactor is clicking but motors aren't engaging, capacitor is the prime suspect. Pull the disconnect and inspect visually before doing any electrical testing.
Visual inspection alone solves about 40% of cases. A bulging top, leaking oil, burn marks, or a slightly tilted housing all confirm failure without needing a multimeter. If the cap looks pristine but the symptoms scream capacitor, then break out the meter. Discharge the cap, disconnect all wires, set your meter to capacitance mode, and probe across each terminal pair. A 45/5 uF capacitor reading 38 uF on the HERM side is dying — replace it now before it strands you on the hottest day of the year. Capacitors that test borderline today fail completely within weeks, almost without exception.
One last diagnostic note: capacitor failure mimics several other AC problems. A bad contactor that won't pull in causes silence instead of humming. A failed compressor draws locked-rotor amps similar to a bad cap but smells burnt within seconds. A dead fan motor with a healthy capacitor will let the compressor run briefly before tripping on high pressure.
If you're unsure, the safest play is amp-draw measurement on each leg of the motor circuit — but that requires a clamp meter and basic understanding of motor electrical behavior. When in doubt, call a tech for diagnosis only ($75-$150) and DIY the actual swap if they confirm capacitor failure.
A final word on preventive replacement: if your AC is 8+ years old and you've never replaced the capacitor, consider proactively swapping it during spring maintenance. The original cap is statistically near the end of its life, and replacing it on a cool Saturday afternoon for $25 beats an emergency call at 7 PM on a 100-degree Tuesday.
Some homeowners and most landlords swap capacitors every 5-7 years as preventive maintenance — a small expense that prevents tenant complaints and emergency callouts. The same logic applies to rental properties, vacation homes, and any AC unit where downtime is particularly costly or inconvenient. It's the cheapest insurance policy in the HVAC world.
HVAC Capacitor Replacement Questions and Answers
About the Author
NATE Certified HVAC Technician & Licensing Exam Trainer
Universal Technical InstituteMike Johnson is a NATE-certified HVAC technician and EPA 608 universal-certified refrigerant handler with a Bachelor of Science in HVAC/R Technology. He has 19 years of commercial and residential HVAC installation and service experience and specializes in preparing technicians for NATE certification, EPA 608, A2L refrigerant safety, and state HVAC contractor licensing examinations.