HVAC Condenser — Components, Problems, Repair vs Replace, and Costs
Complete HVAC condenser guide: how it works, components, common problems, repair vs replace, and 2026 cost ranges for parts and full replacement.
Your HVAC condenser is that humming metal box sitting outside the house, and it's doing more work than almost any other piece of equipment you own. When it quits on a 95-degree afternoon, the inside of your home turns into an oven within hours. Knowing what's inside that box, how it actually works, and what it costs to fix can save you thousands and a lot of sweat.
The condenser handles the messy half of the cooling cycle — dumping heat from your house into the outdoor air. Inside the metal cabinet sits a compressor, a coil, a fan, and a handful of electrical parts. They all need to work together. When one component fails, the whole system limps or stops cold.
Some failures are cheap, fast fixes. Others are write-it-off-and-replace-the-unit territory. The trick is knowing which is which before a contractor walks you toward the most expensive option. A bad capacitor is a $200 fix. A failed compressor on a 12-year-old unit is a full replacement.
This guide walks you through every part of the condenser, the most common problems, repair-versus-replace math, real 2026 costs, and how to keep yours running for 15 years instead of 8. You'll also pick up enough vocabulary to talk straight with any HVAC tech and not get talked into work you don't need. Let's start with what's actually inside the cabinet.
The HVAC condenser is the outdoor unit of a split-system air conditioner or heat pump. It contains the compressor, condenser coil, fan motor, and electrical controls. Its job is to release heat absorbed from your home into the outside air. Most last 12 to 15 years, cost $1,500 to $4,500 for the unit alone, and $2,500 to $7,500 fully installed. The most common failure is a bad capacitor — a $25 part that costs about $200 to replace.
HVAC Condenser at a Glance

Before we dig into parts and prices, it helps to understand the refrigeration cycle in plain English. Refrigerant is a chemical that boils at very low temperatures. Inside your home, it picks up heat at the indoor evaporator coil and turns from liquid to gas as it absorbs that heat.
The compressor in the outdoor unit then squeezes that gas hard. Compressing it raises the temperature dramatically — like 150 to 180°F. The hot pressurized gas flows into the condenser coil, where the outdoor fan blows ambient air across the fins. Heat dumps into the outside air, and the refrigerant cools back into a liquid. The cycle restarts.
Simple in theory, fussy in practice. The whole system depends on precise refrigerant charge, clean coils, working electrical parts, and proper airflow. Lose any one of those and you lose cooling. That's why so many service calls boil down to the same handful of issues we'll cover later.
Heat pumps work the same way but with a clever twist. A reversing valve flips the cycle in winter. The outdoor coil absorbs heat from cold outdoor air — yes, even at 20°F there's heat to grab — and the indoor coil releases it inside. Same hardware, different direction.
If you've got a heat pump, your condenser is doing double duty year-round. That extra workload also means heat pumps tend to wear faster than cooling-only condensers in the same climate. For a deeper look at the equipment options, see our guide to HVAC unit types.
The Cooling Cycle, Step by Step
Step 1 — Thermostat Calls
Step 2 — Contactor Closes
Step 3 — Compressor Pressurizes
Step 4 — Hot Gas Enters Coil
Step 5 — Fan Pulls Air Across Coil
Step 6 — Refrigerant Condenses
Step 7 — Liquid Returns Indoors
Step 8 — Repeat Until Satisfied
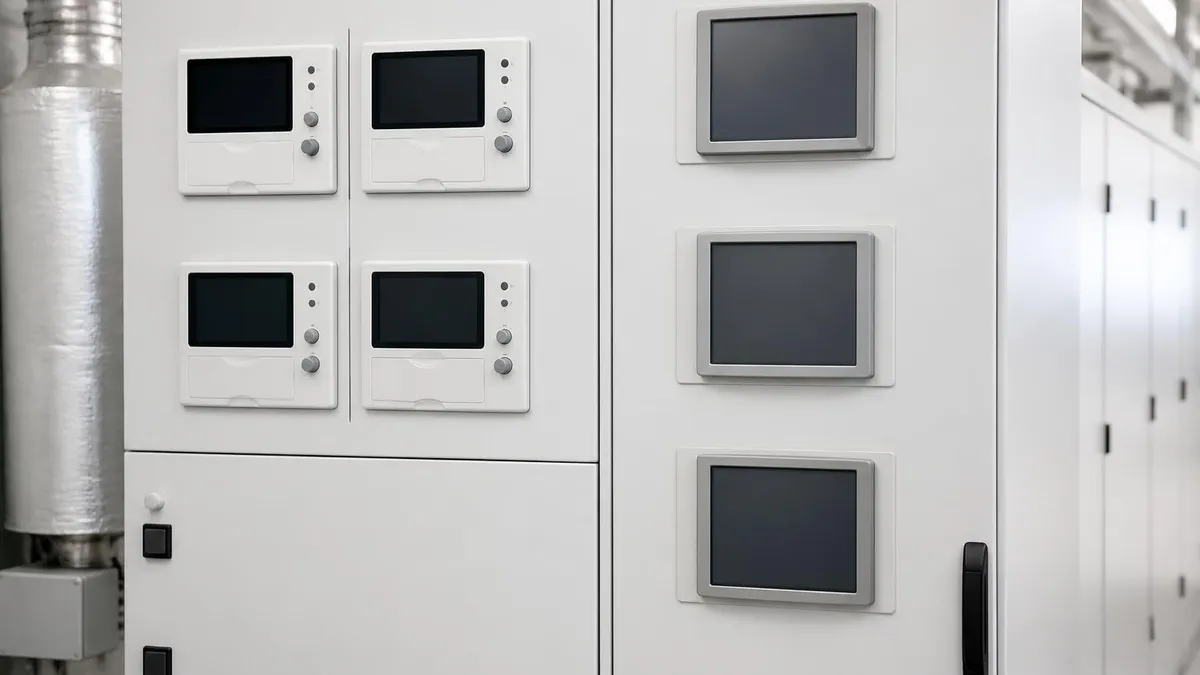
Inside the HVAC Condenser — Main Components
The compressor is the heart of the whole system — a motorized pump that squeezes refrigerant gas from low pressure to high pressure. It's also the most expensive single part inside the condenser, typically running $800 to $2,500 for the part alone, plus several hours of labor to swap it out.
Most modern systems use scroll compressors, which are quieter and more reliable than the older reciprocating designs. Variable-speed compressors are the top tier — they ramp up and down instead of running flat-out, which saves energy and controls humidity better. When a compressor dies, the math usually pushes you toward replacing the entire condenser instead of the part alone, especially if the unit is more than 8 years old.
Sizing your condenser correctly matters more than most homeowners realize. Cooling capacity is measured in tons, where 1 ton equals 12,000 BTU per hour. A 3-ton unit moves 36,000 BTU/hour out of your house. Sizes step up in half-ton increments from 1.5 tons to 5 tons for residential.
Most single-family homes need somewhere between 2 and 4 tons. The only reliable way to know is a Manual J load calculation — a software-based analysis that accounts for your specific home. The old rule of thumb of about 500 square feet per ton is a starting point, not gospel. It's wrong as often as it's right.
Insulation level, window count and orientation, ceiling height, climate zone, shade trees, and even how many people live in the house all change the math. Get this wrong and you'll regret it. An oversized unit short-cycles, never running long enough to pull humidity out of the air, leaving you cold and clammy.
An undersized unit runs constantly and still can't keep up on the hottest days. Neither one lasts as long as a properly sized unit. Both cost more to operate. For new installs, ask any contractor for the Manual J printout — if they refuse or claim they don't need one, find another contractor. That single document tells you whether they actually did the homework.
Replacing in place rarely means installing the same tonnage you had before. Homes get tighter over time as windows are upgraded and insulation is added. The 4-ton unit from 2010 might be a 3-ton job today. Trusting the old size is one of the most common installation mistakes contractors make.
Condenser Sizing Guide by Home Square Footage
- BTU/hr: 18,000–24,000
- Home Size: 600–1,200 sq ft
- Best For: Condos, small homes
- Unit Cost: $1,500–$2,800
- BTU/hr: 30,000–36,000
- Home Size: 1,200–1,800 sq ft
- Best For: Most starter homes
- Unit Cost: $2,000–$3,500
- BTU/hr: 42,000–48,000
- Home Size: 1,800–2,400 sq ft
- Best For: Mid-size family homes
- Unit Cost: $2,500–$4,000
- BTU/hr: 60,000
- Home Size: 2,400–3,200 sq ft
- Best For: Large homes, hot climates
- Unit Cost: $3,000–$4,500
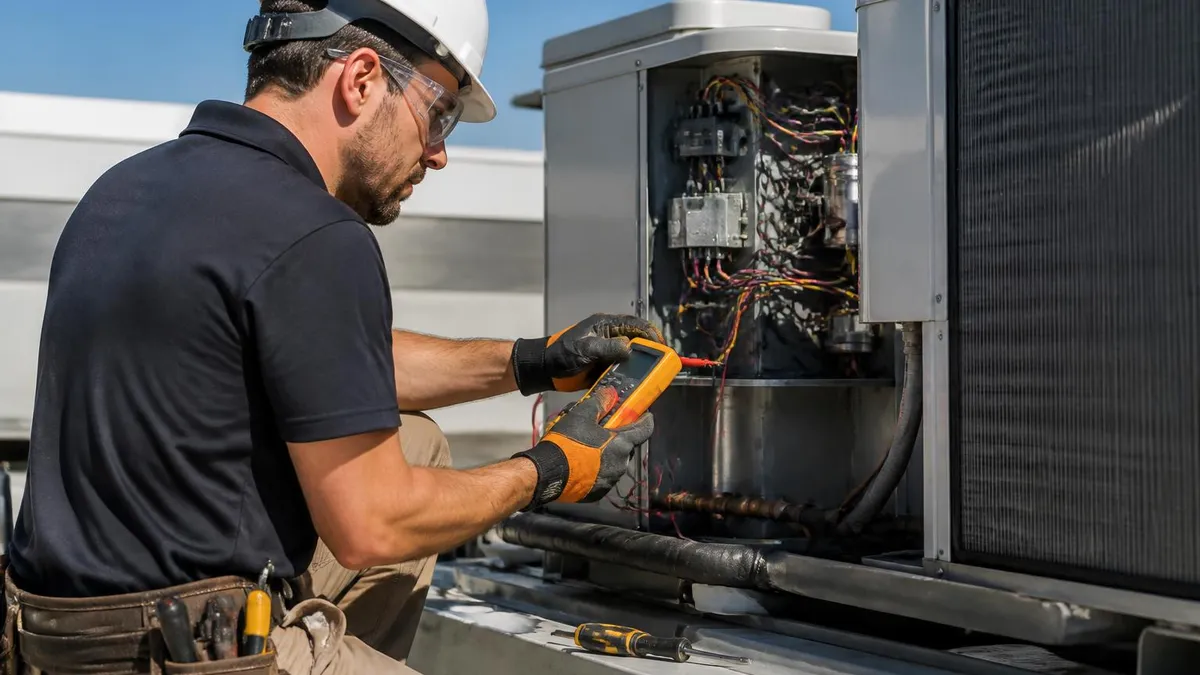
Now let's talk about what actually goes wrong with these units in the real world. After years of watching HVAC service calls, the failure pattern is surprisingly predictable. The same five or six issues account for the vast majority of breakdowns — and most are far cheaper to fix than homeowners fear.
Capacitors are the runaway #1 cause of no-cool calls. They're the small aluminum cans inside the condenser cabinet that store electrical energy to start the compressor and fan. Heat is their enemy, and after 5 to 10 summers in a metal box baking at 130°F, they swell and die. Replacement takes 15 minutes and costs $150 to $400 with the service call.
Contactors are #2 — the heavy-duty electrical switch that lets 240V power into the unit. The contacts pit and burn from arcing every time they close. When they fail, the unit may chatter, hum, or refuse to start at all. Another quick fix in the $150 to $350 range.
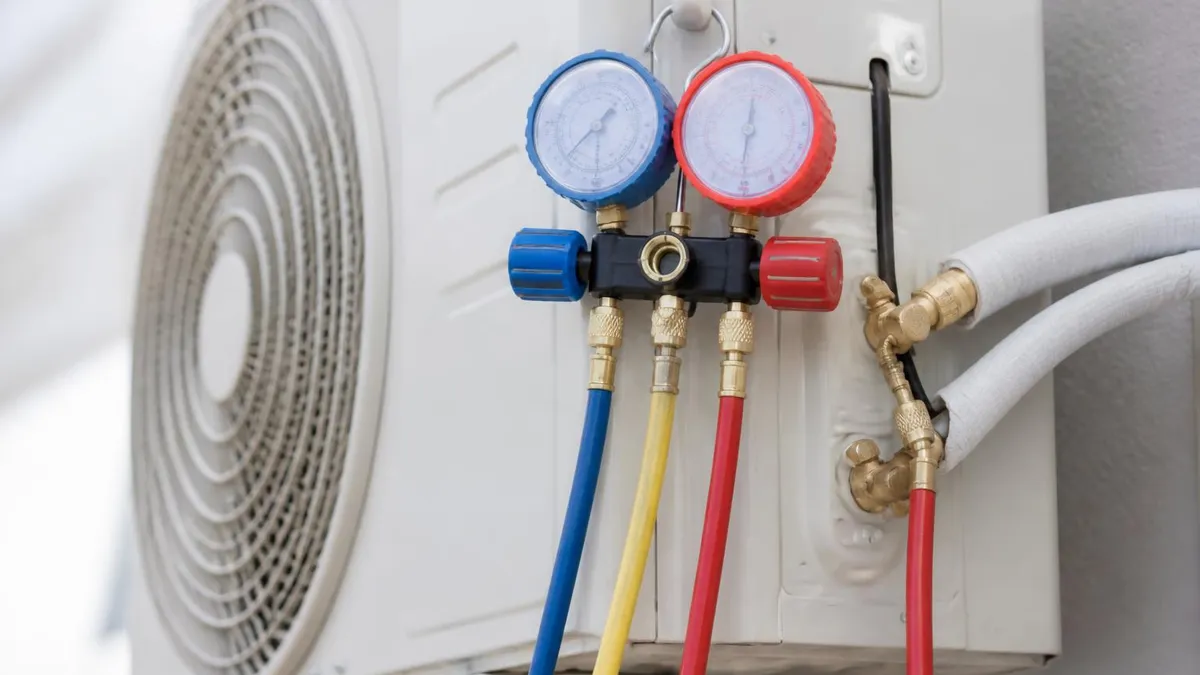
Refrigerant leaks are #3 and the trickiest to diagnose. Refrigerant doesn't get used up over time. If you're low, you've got a leak somewhere. Finding it takes a tech with a leak detector or dye kit, and the repair cost depends on where the leak is. A flare fitting is cheap to fix. A coil leak is expensive.
Fan motor and compressor failures round out the list. Fan motors are mid-range repairs at $300 to $600. Compressors are the big-ticket failure — usually the moment when repair stops making sense and replacement takes over. We'll work through each in detail next.
Common HVAC Condenser Problems
By far the most common condenser failure. The capacitor is a small aluminum can that stores energy to start the compressor and fan motors. After 5–10 years they swell, leak, or just stop holding a charge. You'll hear the unit humming but the fan won't spin and the compressor won't engage.
Diagnosis takes a tech about 5 minutes with a multimeter. The part itself runs $25 to $100. Total job cost is usually $150 to $400 including the trip charge. Don't try this one yourself — capacitors store dangerous voltage even when the power is off, and discharging them wrong can hurt you.
The repair-versus-replace question is where most homeowners get stuck — and where shady contractors push hard for the bigger sale. Here's the honest framework. If your unit is less than 10 years old and the repair quote is under 30% of full replacement cost, repair it. If it's 10 years or older and you're looking at a major repair like a compressor or coil, replace the whole thing.
The new warranty alone is worth the difference. A 10-year parts warranty on a fresh unit beats a 90-day warranty on a refurbished compressor every time. New units are also 30 to 50% more efficient than what you replaced, so you start saving on every electric bill the day it's installed.
There's a useful shortcut called the $5,000 rule. Multiply the repair cost by the age of the unit in years. If the result is over $5,000, replace. A $400 capacitor on a 5-year-old unit equals $2,000 — repair without hesitation. A $1,500 coil on a 14-year-old unit equals $21,000 — replace, no question.
The rule isn't perfect but it captures the diminishing returns of dumping money into old equipment. Every year past age 10 increases the odds another part fails soon. You don't want to spend $1,500 on a coil this summer only to face a $2,500 compressor failure next summer.
One last factor to weigh: refrigerant type. If your old system uses R-22, the repair-replace math gets one-sided fast. R-22 is phased out and now costs $100+ per pound — versus $30 for R-410A. A leak repair plus recharge on an R-22 system can easily run $1,500 to $2,500. That money is better spent toward a new unit that uses current refrigerant and qualifies for tax credits.
Think about resale value too. A new condenser is one of the strongest selling points in a home listing. Buyers and inspectors flag aging HVAC equipment hard, and a 14-year-old unit can shave thousands off your asking price or kill a deal outright during inspection. If you're planning to sell in the next 2 to 3 years, replacing now lets you list with confidence.
Your warranty status matters too. Many manufacturer warranties require annual professional maintenance to stay valid. If you've been skipping tune-ups, the warranty may already be void on your existing unit, which tilts the math toward replacement even harder. Check your paperwork before authorizing any expensive repair on a unit you assumed was still covered.
Repair vs Replace Decision Framework
Repair makes sense when your unit is under 10 years old, the failure is a single small component (capacitor, contactor, fan motor, sensor), and the quoted repair is less than 30% of replacement cost. Don't replace a 4-year-old condenser because the capacitor blew — that's a $200 fix on a unit that should easily run another decade.
Repair also wins when you're cash-strapped and the unit is otherwise working. A $400 fix that buys you another season is a fair trade against a $5,000+ replacement bill you can't afford right now. Just don't do it twice — repeated failures on an aging unit are the system telling you it's time.
Major HVAC Condenser Brands Compared
- Tier: Premium
- Warranty: 10-yr parts
- SEER2 Range: 14.3–26
- Best For: Long-term reliability
- Tier: Premium
- Warranty: 10-yr parts, 12-yr compressor
- SEER2 Range: 14.3–22
- Best For: Build quality
- Tier: Mid–Premium
- Warranty: 10-yr parts
- SEER2 Range: 14.3–25.8
- Best For: Highest efficiency
- Tier: Budget
- Warranty: 10-yr parts
- SEER2 Range: 14.3–24.5
- Best For: Value, lower upfront cost
- Tier: Mid-range
- Warranty: 10-yr parts
- SEER2 Range: 14.3–20.5
- Best For: Balanced value
- Tier: Premium ductless
- Warranty: 10-yr parts
- SEER2 Range: 16–33
- Best For: Mini-splits, additions
DIY HVAC Condenser Maintenance Checklist
- ✓Cut power at the disconnect before doing anything to the unit
- ✓Clear leaves, grass clippings, and debris from inside the cabinet each spring
- ✓Rinse the condenser coil from inside out with a garden hose — gentle stream, never pressure washer
- ✓Trim back shrubs, mulch, and grass to leave 2–3 feet of clearance on all sides
- ✓Replace your indoor air filter every 1–3 months (a dirty filter starves the condenser too)
- ✓Check that the unit sits level on its pad — uneven settling stresses the refrigerant lines
- ✓Listen for new noises like grinding, clicking, or buzzing — early warning of part failures
- ✓Schedule a professional tune-up each spring before peak cooling season ($75–$200)
- ✓Keep the area around the disconnect box clear and accessible for emergency shutoffs
- ✓Take a photo of the model and serial number plate so you have it ready when calling for service
Always cut power at the disconnect box before opening the condenser cabinet. The capacitor stores 240–440 volts even when the power is off and can cause serious injury or death if mishandled. Never touch refrigerant lines without proper training — refrigerant can cause frostbite and respiratory damage. EPA Section 608 certification is legally required to handle refrigerant in the United States. If you're not 100% certain what you're doing, call a licensed pro.
Energy efficiency is where the real long-term savings live. Modern condensers are rated by SEER2 (Seasonal Energy Efficiency Ratio 2), which replaced the old SEER rating in 2023. The new test method is more realistic — it accounts for actual ductwork pressure drops that the old SEER number ignored. Higher number means more cooling per watt.
The 2026 federal minimum is 14.3 SEER2 in the northern U.S. and 14.3 to 15.2 SEER2 in the southern states. Premium units climb to 26 SEER2 with variable-speed compressors and two-stage operation. Most homeowners land in the 15 to 18 SEER2 range, which balances upfront cost against long-term savings.
Stepping up from 14.3 to 18 SEER2 typically cuts cooling bills by 20 to 25%. Going to 20+ SEER2 can drop them by 40%. The catch is upfront cost. A top-tier variable-speed unit runs $5,000+ more than a basic single-stage. That premium needs to make sense for your climate and electric rate.
Run the math on your specific situation. In Phoenix or Houston where the AC runs 8 months a year, the premium pays back in 4 to 6 years and the rest is profit. In Seattle or Boston where you only run it heavy 2 to 3 months, you may never see payback — a basic 14.3 SEER2 unit usually makes more financial sense.
Two-stage and variable-speed compressors also do something the SEER2 number doesn't capture — they pull humidity out of the air much better. In humid climates, that translates to comfort at higher thermostat setpoints. You can run the AC at 76°F and feel as comfortable as a single-stage unit at 72°F. That's real comfort that the spec sheet doesn't show.
Pair any new condenser with a smart thermostat for another 10 to 15% savings. The Nest, Ecobee, and similar models learn your schedule, adjust setpoints when you're away, and report runtime data so you can spot problems early. They cost $130 to $250 installed and pay back in under two years on most homes.
Don't ignore the indoor side either. A new high-efficiency condenser paired with leaky ducts and a clogged filter is wasted money. Have the installer pressure-test your ductwork during the quote — leakage above 15% kills efficiency no matter how high the SEER2 rating climbs. Sealing duct leaks usually adds $500 to $1,500 but recovers 10 to 25% of system efficiency.
Replacing vs Repairing Your HVAC Condenser
- +Fresh 10-year parts warranty resets the clock
- +20–40% lower cooling bills with newer SEER2 ratings
- +Better humidity control with two-stage or variable-speed
- +Compatible with current R-410A or R-454B refrigerant
- +Federal tax credits up to $2,000 on heat pumps via Inflation Reduction Act
- +Quieter operation — modern units run 50–70 dB versus 75+ for older units
- −Upfront cost of $2,500–$7,500 for full installation
- −Disruption — installation takes 6–10 hours and requires power shutoff
- −Permits and inspections may add 1–2 weeks to timeline
- −Repair is much cheaper short-term ($150–$600 for most issues)
- −Newer units have more electronic boards that can fail outside warranty
- −Old indoor air handler may need replacement too for matched system efficiency
Signs Your HVAC Condenser Needs Service Now
- ✓Warm air blowing from indoor vents instead of cold
- ✓Outdoor unit hums but won't start, or trips the breaker repeatedly
- ✓Loud grinding, banging, or clicking noises when running
- ✓Visible ice forming on the copper refrigerant lines outside
- ✓Cooling bills jumped 20%+ with no change in usage habits
- ✓Indoor temperature can't reach the thermostat setpoint on hot days
- ✓Water pooling around the indoor air handler from a frozen evaporator
- ✓Burning or musty smell coming from supply vents
- ✓Unit short-cycles — turns on and off every few minutes
- ✓System more than 12 years old and showing any of the above
When you're shopping for a new condenser or full installation, get at least three written quotes from NATE-certified contractors. Each quote should include a Manual J load calculation, the exact model number being installed, the SEER2 rating, the warranty terms in writing, and a detailed scope of work. Walk away from any contractor who skips the load calc or quotes you over the phone without measuring the house.
Cheap quotes hide cut corners. Watch for skipped permits, oversized equipment that's easier to sell, off-brand condensers paired with name-brand air handlers, and "lifetime" warranties that aren't actually backed by the manufacturer. The lowest bid often becomes the most expensive job within five years. For typical price ranges in your region, see our breakdown of HVAC installation cost by system type and tonnage.
Don't forget rebates and tax credits. The Inflation Reduction Act offers a 30% federal tax credit on heat pump installations, capped at $2,000. State HEEHRA programs add up to $8,000 in rebates for income-qualified households. Many local utilities offer rebates of $200 to $1,500 for high-efficiency units.
Stack all of those incentives and a top-tier heat pump installation can come down to about the same out-of-pocket price as a basic AC condenser. Always confirm current rules with the IRS and your state energy office before signing a contract. Programs change every year and the contractor isn't always up to date on the latest filing requirements.
Installation day usually takes 6 to 10 hours. Pad-mounted units go faster, rooftop replacements take longer. The crew will recover the old refrigerant, disconnect electrical and refrigerant lines, lift off the old unit, set the new one, run a vacuum on the lines, charge with refrigerant, and start it up. A good installer will run a full performance test before they leave — measuring superheat, subcooling, and amp draw to confirm the system is running to spec.
Bottom line: your HVAC condenser is the heart of your cooling system. Annual maintenance, prompt repairs on small failures, and timely replacement when the unit hits 12 to 15 years (or runs phased-out R-22 refrigerant) protect your home, your comfort, and your wallet at the same time. Stay ahead of those decisions instead of reacting to a hot July afternoon and you'll get the longest, cheapest service life out of every dollar you spend on cooling equipment.
HVAC Condenser Questions and Answers
About the Author
Attorney & Bar Exam Preparation Specialist
Yale Law SchoolJames R. Hargrove is a practicing attorney and legal educator with a Juris Doctor from Yale Law School and an LLM in Constitutional Law. With over a decade of experience coaching bar exam candidates across multiple jurisdictions, he specializes in MBE strategy, state-specific essay preparation, and multistate performance test techniques.