
How to Clean HVAC Coils: Step-by-Step Guide for Homeowners and Technicians
Learn how to clean HVAC coils safely and effectively. Step-by-step instructions for evaporator and condenser coils to boost efficiency and extend system life. 💡
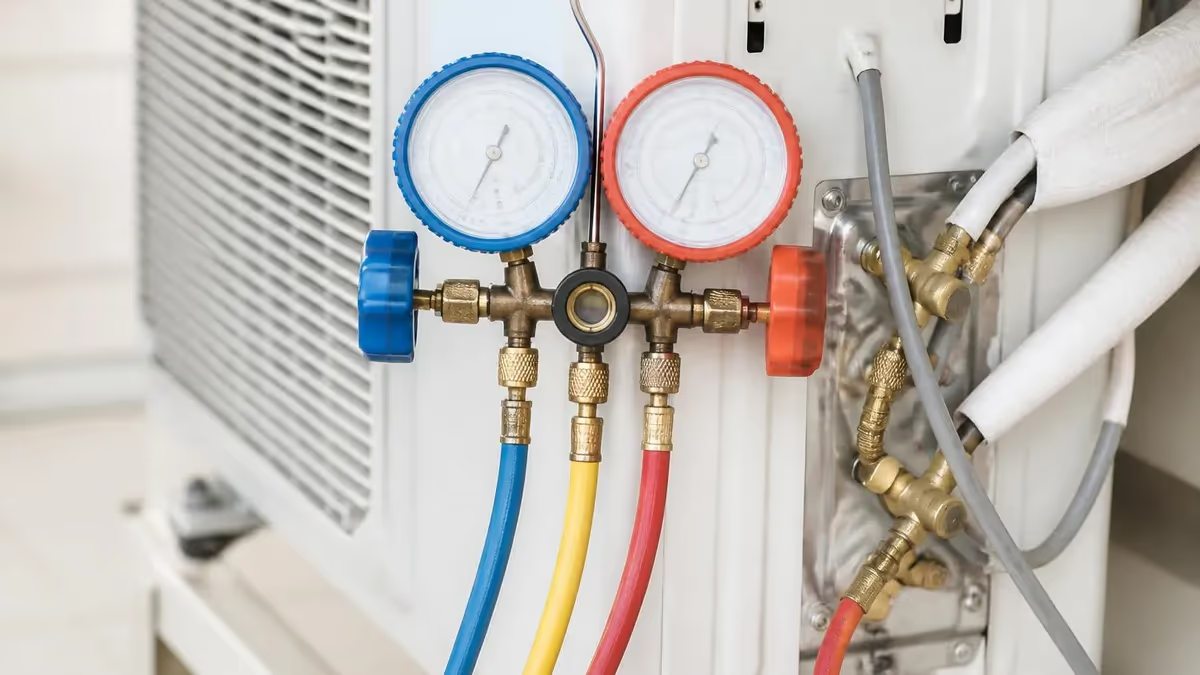
Learning how to clean hvac coils is one of the most impactful maintenance tasks any homeowner or HVAC technician can perform. Dirty coils are responsible for a staggering share of residential HVAC inefficiency, with studies showing that coil fouling can reduce system efficiency by 20 to 40 percent. When evaporator and condenser coils become caked with dust, grime, mold, and debris, the system must work significantly harder to achieve the same level of cooling or heating, driving up energy bills and accelerating mechanical wear across every major component.
HVAC coils function as the heart of heat exchange in your system. The evaporator coil, located inside your air handler or furnace cabinet, absorbs heat from indoor air as warm air blows across the cold refrigerant-filled fins. The condenser coil, housed in the outdoor unit, releases that captured heat into the outside air. Both coils rely on clean, unobstructed fin surfaces to transfer heat efficiently. Even a thin layer of dust on the evaporator coil acts as insulation, dramatically reducing the system's ability to absorb heat and cool your home effectively.
The consequences of neglected coils extend well beyond higher utility bills. When the evaporator coil becomes too dirty, it can freeze over completely, blocking airflow and potentially flooding your home with condensate water as ice melts. A dirty condenser coil causes the compressor to overheat and run at elevated pressures, shortening its lifespan by years. Compressor replacement is one of the most expensive HVAC repairs, often costing $1,200 to $2,800 or more, making routine coil cleaning a genuinely worthwhile preventive investment by comparison.
Most homeowners should plan to clean condenser coils at least once per year, typically in spring before cooling season begins. Evaporator coils typically need professional attention every one to three years, though homes with pets, heavy dust, or poor filtration may require more frequent service. Technicians servicing commercial systems or homes in dusty climates may clean coils every six months. Establishing a consistent cleaning schedule is far more cost-effective than emergency repairs caused by compressor failure, refrigerant leaks from stressed components, or water damage from a frozen and flooded evaporator.
This guide covers both evaporator and condenser coil cleaning in detail, walking through the tools you need, safety precautions to observe, cleaning products to choose, and the precise steps professional technicians follow on every service call. Whether you are a homeowner tackling the outdoor condenser unit yourself or an HVAC student preparing for EPA certification and field work, understanding the full cleaning process will help you protect expensive equipment, deliver better service to clients, and pass the hands-on portions of any HVAC licensure exam with confidence.
Beyond the mechanical benefits, clean coils also support healthier indoor air quality. Evaporator coils that remain damp and dirty become ideal breeding grounds for mold, mildew, and bacteria, which then circulate through your ductwork and into living spaces. Regular cleaning removes these biological contaminants before they become a health hazard, particularly important for households with allergy sufferers, asthma patients, or young children. The combination of energy savings, equipment protection, and air quality improvement makes coil cleaning one of the highest-return maintenance activities available to any building owner or facilities manager.
HVAC Coil Cleaning by the Numbers
How to Clean HVAC Coils: Step-by-Step Process
Gather Tools and Safety Equipment
Remove Access Panels and Inspect
Apply Coil Cleaner Product
Rinse and Flush Coils
Straighten Bent Fins
Reassemble and Test System
Cleaning evaporator coils requires extra care compared to condenser coil work because these components are located inside the system where access is limited and moisture management is critical. The evaporator coil sits inside the air handler cabinet or inside a dedicated coil box mounted above the furnace, and it operates in a continuously damp environment because it condenses moisture out of the air as part of the cooling process. This combination of moisture, organic particles from the air, and darkness creates the ideal environment for microbial growth if cleaning is not performed regularly.
Before beginning any evaporator coil cleaning, shut off the system at the thermostat and locate the electrical disconnect near the air handler, switching it to the off position. Attempting to clean coils with power active is dangerous and can cause serious injury from electrical shock or contact with moving blower components. Once power is confirmed off, remove the access panel from the air handler — this typically involves unscrewing four to eight sheet metal screws. Some systems have multiple panels, requiring you to remove both the blower access door and a separate coil access door above it.
With the coil exposed, inspect it carefully using a flashlight. A lightly soiled coil will show a thin coating of dust on the outer fin surfaces. A heavily soiled coil may have a thick mat of debris, visible mold growth, or even ice formation if the system has been running recently.
If you see mold, use a coil cleaner with an EPA-registered antimicrobial component to address biological contamination. If you see active ice, turn the system fan on without cooling for 30 to 60 minutes to thaw before cleaning — never attempt to chip or scrape ice from coil fins, as this almost always causes damage.
Apply foaming evaporator coil cleaner by spraying evenly from top to bottom across the full coil face. Work in sections for larger coils, ensuring complete coverage of all fin surfaces. Most residential no-rinse formulas are designed to break down dirt, oil, and biological matter that then drains away with normal condensate water into the drain pan below. Allow the product to work for the full dwell time specified on the label, typically 5 to 15 minutes, before moving to the next step. Rushing this stage reduces cleaning effectiveness and may leave active mold or bacteria on the surface.
After the dwell period, check the condensate drain pan below the coil. If it contains standing water, black slime, or debris, clean it out with a wet-dry vacuum and flush the drain line with a cup of diluted bleach solution or a condensate drain treatment tablet.
Blocked condensate drains are among the most common causes of water damage in homes with central air conditioning, and a coil cleaning session is the perfect time to address them. Many technicians install a float switch in the drain pan if one is not already present — this safety device shuts down the system before overflow occurs.
Once cleaning is complete, use a fin comb to straighten any bent fins on the evaporator coil face. Fin combs are inexpensive tools available at HVAC supply houses and many hardware stores, and they come in different tooth spacings to match different coil designs. Gently running the comb through bent fin sections restores proper airflow across the entire coil surface. Finally, replace the access panels, restore power, and run the system through a complete cooling cycle. Check that cold air is flowing from supply registers and that condensate is draining normally within the first 15 minutes of operation.
HVAC Practice Test Questions
Prepare for the HVAC - Heating Ventilation and Air Conditioning exam with our free practice test modules. Each quiz covers key topics to help you pass on your first try.
HVAC Air Conditioning
HVAC Exam Questions covering Air Conditioning. Master HVAC Test concepts for certification prep.
HVAC Code Compliance
Free HVAC Practice Test featuring Code Compliance. Improve your HVAC Exam score with mock test prep.
HVAC Electrical Controls
HVAC Test Prep for Electrical Controls. Practice HVAC Quiz questions and boost your score.
HVAC Energy Efficiency
HVAC Questions and Answers on Energy Efficiency. Free HVAC practice for exam readiness.
HVAC Heating Systems
HVAC Mock Test covering Heating Systems. Online HVAC Test practice with instant feedback.
HVAC Load Calculations
Free HVAC Quiz on HVAC Load Calculations. HVAC Exam prep questions with detailed explanations.
HVAC Tools and Equipment
HVAC Practice Questions for HVAC Tools and Equipment. Build confidence for your HVAC certification exam.
HVAC Refrigeration
HVAC Test Online for Refrigeration. Free practice with instant results and feedback.
HVAC Safety Practices
HVAC Study Material on Safety Practices. Prepare effectively with real exam-style questions.
HVAC System Design
Free HVAC Test covering System Design. Practice and track your HVAC exam readiness.
HVAC Thermodynamics
HVAC Exam Questions covering Thermodynamics. Master HVAC Test concepts for certification prep.
Coil Cleaning Methods: Which Approach Is Right for Your System?
Foaming coil cleaners are the most widely used option for both evaporator and condenser coils. These alkaline or acid-based formulas are applied by spray can or pump sprayer and expand into foam on contact with the coil surface, penetrating deep between fin rows to lift dirt, grease, and biological contamination. No-rinse foaming cleaners designed for evaporator coils are particularly convenient because the cleaned debris simply drains away with normal condensate water, making them ideal for interior applications where rinsing with a hose is impractical.
When selecting a foaming cleaner, pay attention to the pH of the formula. Alkaline cleaners work well on greasy commercial coils and condenser coils with hydrocarbon buildup. Mildly acidic cleaners are more effective on mineral scale and oxidation that builds up on evaporator coils in areas with hard water. Always read the label for materials compatibility — some aggressive formulas can damage copper tubing or certain aluminum alloys if left on too long. Industrial-strength coil cleaners used by professionals often require a two-bucket rinse procedure and personal protective equipment including face shields and chemical-resistant gloves.
DIY vs. Professional HVAC Coil Cleaning: Pros and Cons
- +DIY condenser cleaning saves $75–$150 per service call for straightforward outdoor unit maintenance
- +Self-service empowers homeowners to maintain systems on their own schedule without waiting for appointments
- +Annual cleaning prevents $1,200+ compressor failures caused by overheating from dirty condenser coils
- +Routine cleaning extends overall system lifespan by 5 to 10 years according to ACCA guidelines
- +Cleaning sessions reveal emerging problems like refrigerant leaks, bent fins, and electrical issues early
- +Professional coil cleaning includes refrigerant charge verification, which ensures optimal system efficiency
- −Evaporator coil cleaning is difficult for non-professionals due to access limitations and moisture management risks
- −Incorrect cleaning technique can bend fragile aluminum fins, permanently reducing heat transfer efficiency
- −Using the wrong chemical cleaner can corrode copper refrigerant tubing, causing refrigerant leaks
- −DIY cleaners miss drain pan treatment and condensate line flushing that professionals include in full service
- −Homeowners cannot legally handle refrigerant, so any refrigerant-related issues discovered require a licensed technician
- −Without pressure gauges, homeowners cannot verify that the refrigerant charge is correct after cleaning
HVAC Coil Cleaning Checklist: Before, During, and After Service
- ✓Turn off the system at the thermostat and disconnect switch before opening any access panels.
- ✓Gather all tools: coil cleaner, fin comb, soft brush, gloves, safety glasses, and a flashlight.
- ✓Inspect coil fins for visible damage, bent sections, mold growth, or ice before applying any cleaner.
- ✓Apply coil cleaner evenly across all fin surfaces and allow full dwell time per product label instructions.
- ✓Clean the condensate drain pan with a wet-dry vacuum and flush the drain line with bleach solution.
- ✓Rinse condenser coils from inside out using a garden hose at low to moderate pressure.
- ✓Straighten any bent fins using a fin comb matched to the coil's fin-per-inch specification.
- ✓Check refrigerant lines for signs of oily residue that may indicate a refrigerant leak.
- ✓Replace all access panels securely and restore power at the disconnect and thermostat.
- ✓Run the system for a full cycle and verify condensate is draining and supply air temperatures are normal.
Check Your Temperature Split to Verify Clean Coils Are Working
After cleaning evaporator coils, measure the temperature difference between the return air entering the air handler and the supply air leaving it. A properly functioning system with clean coils should show a temperature split of 16 to 22 degrees Fahrenheit. A split below 14 degrees after cleaning often indicates low refrigerant charge, restricted airflow, or coil damage requiring professional diagnosis.
Condenser coil cleaning presents its own set of challenges and considerations that differ significantly from indoor evaporator work. The outdoor condenser unit is exposed to everything the environment can throw at it — cottonwood seeds, lawn clippings, pet hair, insects, airborne dust, and the residue from nearby landscaping or agricultural activity. In coastal areas, salt air accelerates corrosion of fin surfaces. In areas with heavy tree coverage, mold, algae, and organic debris pack into fin rows and create a dense mat that severely restricts the airflow the condenser fan needs to reject heat into the outdoor air.
The first step in any condenser cleaning is to physically clear the area around the unit. Maintain a minimum two-foot clearance on all sides and never store items against the cabinet. Overgrown shrubs, fences placed too close, or boxes stacked against the unit all impede airflow through the condenser coil.
Before removing the top panel to access the coil interior, shut off power at the dedicated disconnect box located on the wall near the condenser — this is separate from the main panel breaker and is required by code to be within sight of the equipment for safety during service calls.
After removing the top panel and setting it safely aside, inspect the condenser fan blade for debris and the fan motor for signs of bearing wear or oil leaks. Many technicians apply a few drops of non-detergent electric motor oil to motor oil ports during annual cleaning visits if the motor is not sealed-bearing type.
Next, use a coil cleaning solution formulated for condenser coils — these are typically sold in concentrated form and diluted with water in a pump sprayer. Apply generously to the inner surface of the coil, working systematically around the entire circumference of the cabinet, then allow the product to penetrate for five to ten minutes.
Rinsing condenser coils correctly is critical to avoiding damage. Position your garden hose nozzle inside the unit, pointing outward through the coil fins, and work in slow sweeping passes from top to bottom. This inside-out technique forces debris out through the fin pack rather than driving it deeper inward where it becomes nearly impossible to remove.
After rinsing, step back and examine the coil from outside the cabinet — clean fins should allow you to see light through the fin pack, indicating unobstructed airflow. Any sections that remain dark or impenetrable may require a second application of cleaner and another rinse cycle.
In regions where hard water is common, mineral scale can accumulate on condenser coil fins over multiple seasons, creating a chalky white coating that standard alkaline cleaners cannot remove effectively. For mineral scale, use a mildly acidic coil cleaner — citric acid-based formulas are gentle enough for residential use while still dissolving calcium and magnesium deposits effectively. Always neutralize acidic cleaners with a clean water rinse and check the material compatibility with your specific coil's aluminum alloy and any galvanized steel components in the cabinet before applying. Some manufacturers specify only pH-neutral cleaners for warranty compliance.
After cleaning is complete and before replacing the top panel, take the opportunity to inspect the electrical compartment on the condenser unit. Check the capacitor for bulging or leaking, inspect the contactor for pitting or burned contacts, and look for any signs of rodent nesting or insulation damage on low-voltage control wiring.
These components are accessible during the same service visit and catching a failing capacitor during a cleaning call costs far less than an emergency repair call when the system stops running on the hottest day of summer. Replacing a dual run capacitor typically costs $20 to $40 in parts, while an emergency service call on a weekend may cost $150 or more just for the diagnostic visit.

Standard pressure washers operating above 1,200 PSI will permanently bend and crush the delicate aluminum fins on both evaporator and condenser coils. Bent fins cannot be fully straightened and will permanently reduce heat transfer efficiency. Always use a garden hose with a gentle spray nozzle or a pump sprayer — never a pressure washer — for coil rinsing to avoid costly damage that may require coil replacement.
Establishing a proactive coil maintenance schedule is the single most effective strategy for protecting your HVAC investment over the long term. Industry professionals and equipment manufacturers consistently emphasize that preventive maintenance costs a fraction of reactive repair work, and nowhere is this truer than with heat exchanger coils. The American Society of Heating, Refrigerating and Air-Conditioning Engineers (ASHRAE) recommends annual coil inspection and cleaning as part of standard building maintenance protocols, and most residential equipment warranties require documented maintenance to remain valid through the warranty period.
For homeowners managing a single-family residence with a standard split system, the practical maintenance schedule looks like this: clean the condenser coil every spring before starting the cooling season, typically in April or May in most US climate zones.
Replace the air filter every one to three months depending on filter type and indoor air quality conditions — homes with pets or allergies benefit from monthly filter changes with MERV 11 or higher filters. Have a licensed HVAC technician perform a complete system tune-up including evaporator coil inspection every two to three years, or annually if the system is older than ten years or shows efficiency decline.
Commercial building operators and property managers face more demanding maintenance requirements because commercial systems run longer hours, handle higher air volumes, and operate in environments with more contaminants. Restaurant HVAC systems serving commercial kitchens must have evaporator coils cleaned every three to six months because cooking grease aerosolizes into the return air stream and coats coil fins rapidly. Hospitals, cleanrooms, and laboratory facilities may clean coils monthly. Industrial manufacturing facilities with metal grinding, wood dust, or chemical vapors in the air require customized maintenance intervals established through direct monitoring of pressure drop across the coil rather than calendar-based schedules alone.
Monitoring system performance between cleaning intervals provides valuable early warning of developing coil fouling. A simple technique is to note the supply and return air temperatures at each service call and compare them over time. A declining temperature split that cannot be explained by changing outdoor conditions suggests evaporator coil fouling or low refrigerant charge. On the condenser side, an increasing discharge pressure or rising refrigerant liquid line temperature at a given outdoor ambient temperature signals condenser coil fouling. Many modern smart thermostats and connected HVAC systems can track these trends automatically, alerting homeowners and technicians before inefficiency becomes severe.
Ultraviolet germicidal irradiation (UVGI) systems installed near the evaporator coil are an increasingly popular preventive strategy that reduces biological fouling between physical cleaning intervals. UV-C light at 254 nanometers wavelength kills mold, bacteria, and viruses on coil surfaces continuously during system operation.
Research published in the Journal of Occupational and Environmental Hygiene demonstrated that HVAC UV systems can maintain coil cleanliness for substantially longer periods, reducing cleaning frequency and maintaining cooling capacity closer to factory-rated performance over multi-year periods. Installation costs typically range from $150 to $500 for residential systems and represent a strong value proposition for systems in humid climates or homes with allergy-sensitive occupants.
Coil coating products represent another professional strategy for extending cleaning intervals and protecting fin surfaces from corrosion. Hydrophilic coatings improve moisture drainage from evaporator coils, reducing the standing water that promotes microbial growth. Antimicrobial coatings bonded to fin surfaces inhibit mold and bacterial colonization for multiple seasons. Corrosion-resistant coatings are particularly valuable in coastal or industrial environments where saltwater or chemical exposure would otherwise degrade aluminum fins within just a few years of service. While these coatings add cost to a service call, they deliver measurable long-term benefits for systems in challenging environments where uncoated coils deteriorate rapidly.
For HVAC students and technicians preparing for state licensing exams, coil cleaning knowledge extends well beyond the physical task into the theoretical understanding of heat transfer, refrigeration cycles, and psychrometrics that exam boards test heavily.
Understanding why dirty coils cause high head pressure requires understanding the refrigeration cycle — the condenser must reject exactly as much heat as the evaporator absorbs plus the heat of compression added by the compressor. When dirty fins prevent adequate heat rejection, condensing temperature rises, head pressure increases, compression ratio climbs, and the compressor works harder against higher discharge pressure, consuming more energy and wearing faster.
The relationship between coil condition and refrigerant charge is particularly important for exam preparation. A dirty evaporator coil causes symptoms that closely mimic a low refrigerant charge — both conditions result in low suction pressure, reduced cooling capacity, and potential icing on the evaporator. A technician who adds refrigerant to a system with a dirty evaporator coil is compounding the problem: after cleaning the coil, suction pressure will rise and the system will now be overcharged, leading to high discharge pressure and potentially liquid refrigerant slugging the compressor. Experienced technicians always inspect and clean coils before making refrigerant charge adjustments.
EPA Section 608 certification, required for any technician who purchases or handles refrigerants, tests knowledge of refrigerant handling, leak detection, and recovery requirements that connect directly to coil maintenance. When inspecting coils, technicians must identify refrigerant leaks responsibly — the Clean Air Act prohibits venting refrigerants and imposes substantial fines for non-compliance. Recognizing the oily residue that indicates a refrigerant leak at a coil joint, documenting the finding, and following proper recovery procedures before opening the system are all knowledge areas covered on Section 608 exams and directly applicable to real-world coil service work.
North American Technician Excellence (NATE) certification exams in the air conditioning and heat pump categories test coil maintenance knowledge extensively across multiple competency areas. Exam candidates should understand fin-and-tube coil construction, the difference between enhanced and smooth-tube heat exchangers, how fouling factor affects overall heat transfer coefficient calculations, and what pressure drop specifications mean for system airflow performance. These are not abstract theoretical concepts — they are the practical underpinnings of decisions technicians make every day when evaluating whether a coil needs cleaning, replacement, or simply better filtration upstream to prevent rapid re-soiling.
The business case for thorough coil cleaning knowledge also extends to career advancement for HVAC professionals. Technicians who can articulate the energy savings implications of clean coils, quantify efficiency degradation for commercial clients, and recommend appropriate cleaning schedules based on application type become trusted advisors rather than just service workers.
Commercial accounts that represent hundreds of thousands of dollars in annual maintenance contracts are won and retained by technicians who demonstrate this depth of knowledge. Learning to measure system performance before and after a coil cleaning and presenting the data to facility managers in terms of kWh savings and projected ROI is a skill that separates top-earning HVAC professionals from average technicians.
Finally, keeping accurate service records for every coil cleaning call is both a professional best practice and a practical necessity. Document the date of service, the cleaning products used, any coil damage or defects noted, measurements taken before and after cleaning, and any recommendations made to the customer.
These records protect you legally if warranty disputes arise, provide baseline data for future performance comparisons, and demonstrate the value of your service to clients who might otherwise question whether maintenance visits are worth the cost. Systematic documentation habits developed early in an HVAC career compound into a professional reputation for thoroughness and reliability that drives referrals and repeat business for years to come.
HVAC Questions and Answers
HVAC Sales: The Complete Guide to Selling Heating and Cooling Systems, Building Customer Trust, and Closing More Deals
HVAC Air Duct Sealing: The Complete Homeowner and Contractor Guide to Sealing Ductwork for Efficiency, Comfort, and Indoor Air Quality
HVAC Solutions: The Complete Guide to Heating, Cooling, and Indoor Air Quality Systems for Homes and Buildings

Commercial HVAC Repair: Systems, Costs, and Service Strategies
HVAC Schooling: Complete Training Guide, Program Requirements, and Career Pathways
About the Author

NATE Certified HVAC Technician & Licensing Exam Trainer
Universal Technical InstituteMike Johnson is a NATE-certified HVAC technician and EPA 608 universal-certified refrigerant handler with a Bachelor of Science in HVAC/R Technology. He has 19 years of commercial and residential HVAC installation and service experience and specializes in preparing technicians for NATE certification, EPA 608, A2L refrigerant safety, and state HVAC contractor licensing examinations.