
Hazard Perception Pass: The Complete UK Guide to Scoring 44+ and Passing First Time
Master the hazard perception pass mark, scoring system, and expert tips to hit 44/75 first time. Full UK DVSA guide 2026 October. 🎯

Achieving a hazard perception pass requires scoring at least 44 out of 75 in the second part of the DVSA theory test, and understanding exactly how those marks are awarded can make the difference between walking out with a pass certificate and having to rebook an expensive resit. The hazard perception section tests your ability to spot developing road situations before they force a driver to take action — and the DVSA is looking for early, confident responses rather than frantic clicking when danger has already arrived.
Thousands of learner drivers sit the theory test every week across the UK, and while the multiple-choice section trips up those who have not revised enough, the hazard perception element catches out candidates who simply do not understand the scoring rules. Unlike a written exam where you either know the answer or you do not, hazard perception rewards genuine anticipation and punishes guessing. If you click too many times in a short window, the software flags your response as erratic and awards you zero for that clip — a brutal penalty that can sink an otherwise solid attempt.
The good news is that the hazard perception test is entirely learnable. The DVSA publishes clear guidance on how it works, and candidates who practise with high-quality video clips consistently outperform those who walk in unprepared. This guide covers every aspect of the test in detail: the scoring system, the types of hazards you will encounter, how to avoid the most common mistakes, and the best practice strategies used by candidates who pass first time. Whether you are sitting your car theory test, motorcycle test, or preparing a pupil for theirs, the principles here apply equally.
Understanding the structure of hazard perception is the first step. You will watch fourteen video clips filmed from the driver's perspective on real UK roads. Thirteen of those clips contain one developing hazard, and one clip contains two — giving a total of fifteen scorable hazards across the entire test.
Each hazard is worth up to five marks, and your score for any given hazard depends entirely on how early you click after the hazard begins to develop. The sooner your click lands within the scoring window, the higher your marks. Click in the first segment and you earn five points; click slightly later and you may earn four, three, two, or one — but miss the window entirely or trigger the cheating filter and you receive nothing.
Many learners make the mistake of confusing a potential hazard with a developing hazard. Potential hazards are situations that might require a change of speed or direction — a parked car, a pedestrian on the pavement, a junction ahead. Developing hazards are situations that actually do require action from the driver. The test scores only developing hazards, so clicking on every potential hazard you see will not improve your score, but it will increase the risk of triggering the pattern-detection algorithm that penalises rapid repeated clicking.
Preparation quality matters enormously. Candidates who use official DVSA practice clips or reputable third-party platforms that simulate real test conditions perform significantly better than those who simply watch YouTube videos passively. Active practice — where you click in real time and receive instant feedback on whether your response fell inside the scoring window — builds the split-second recognition skills the test demands. This guide will show you exactly how to structure that practice and what to focus on in the weeks before your test date.
One final point before we dive into the detail: the hazard perception test is sat on the same day as your multiple-choice section, with a short break in between. You must pass both parts on the same attempt — a pass on the multiple-choice alone is not enough. This means your preparation needs to cover both elements, though this guide focuses specifically on helping you hit that hazard perception pass mark of 44 and make every video clip count.
Hazard Perception Test by the Numbers
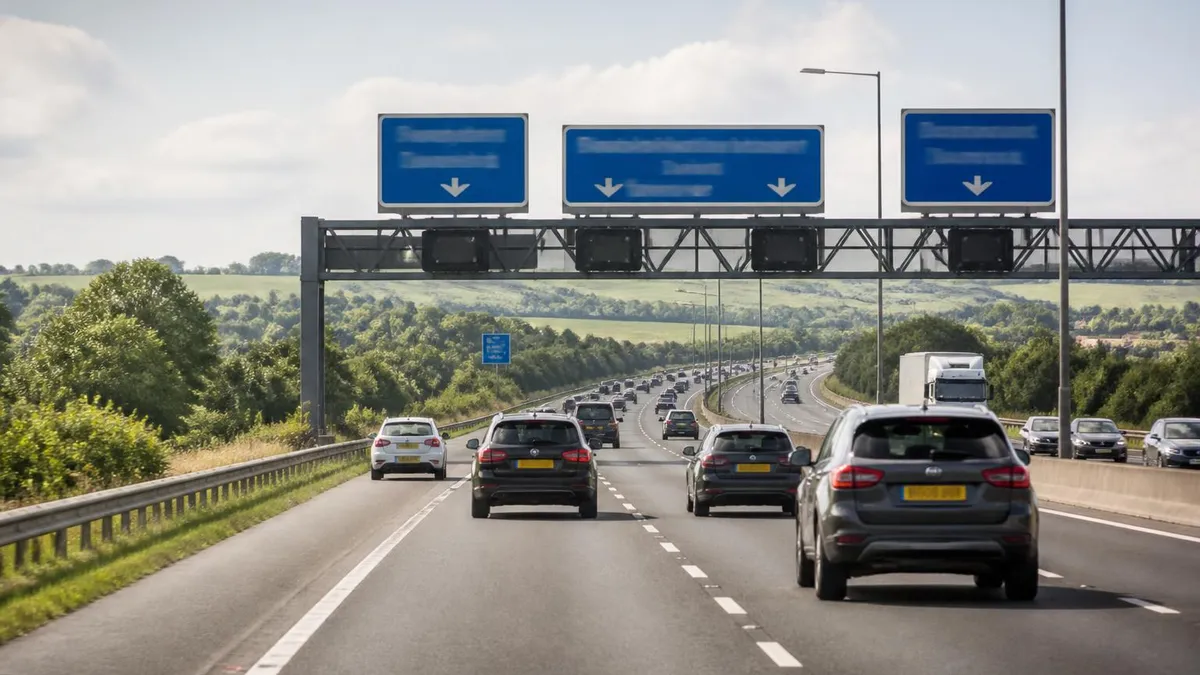
Hazard Perception Test Format Explained
| Section | Questions | Time | Weight | Notes |
|---|---|---|---|---|
| Standard Hazard Clips | 13 | ~17 min | 87% | One developing hazard per clip, max 5 points each |
| Twin Hazard Clip | 2 | ~3 min | 13% | One clip with two scorable hazards |
| Total | 15 | 20 minutes (approx) | 100% |
Spotting a developing hazard early is the single most important skill you can build before your theory test. A developing hazard is any road situation that is actively changing in a way that will require you — as the driver — to slow down, steer around it, or stop altogether. The critical word is developing: the hazard must be in motion, escalating, or unfolding as you watch. Static objects like parked cars or road signs do not score on their own unless a person or vehicle begins to interact with them in a way that creates a genuine risk.
The most common developing hazards in the clips are pedestrians stepping into the road, cyclists moving into the path of the car, vehicles emerging from side roads or driveways, and animals appearing without warning. In each case, there is a brief moment where the situation transitions from potential to developing — and that transition is your cue to click. Watch the edges of the frame, especially junctions, driveways, gaps between parked cars, and pavements where pedestrians are walking close to the kerb. These are the areas where hazards most frequently develop.
Speed of recognition improves dramatically with practice, but it also improves with understanding of context. A ball rolling into the road almost always precedes a child running after it. A pedestrian looking over their shoulder at traffic is considering crossing. A vehicle parked at a slight angle to the kerb may be preparing to pull out.
These contextual cues — learned through experience and practice — are what separate candidates who score 60 or 70 from those who scrape through at 44. Training your eye to read context rather than simply reacting to obvious danger is the hallmark of a high scorer.
One of the most effective techniques is to mentally narrate what you see as the clip plays. Experienced driving instructors recommend a running commentary: "parked van on the left, cyclist ahead, junction approaching on the right, pedestrian on the pavement near the kerb." This verbal processing forces your brain to actively engage with the scene rather than passively watching it, and it dramatically reduces the chance of missing a developing hazard that builds gradually over several seconds. Even if you only do this internally during the actual test, the habit formed during practice carries over.
Eye scanning patterns also matter. In real driving, you are taught to scan ahead, check mirrors, and glance at the sides — a disciplined pattern that covers the road systematically. During hazard perception clips, apply the same logic. Do not fix your gaze in the centre of the screen. Sweep left and right, pay attention to far-ahead features that are getting closer, and watch the behaviour of any road user visible in the frame. A cyclist wobbling slightly may be about to fall or swerve. A pedestrian quickening their pace may be about to cross without looking.
It is also worth understanding what the clips deliberately do not show: the clips are designed so that the developing hazard is never completely obvious from the very first frame. There is always a build-up period — a few seconds where the scene looks normal before the hazard begins to develop. This build-up is intentional and is actually your best friend, because it gives you time to anticipate and click early rather than react late. Learning to read this build-up during practice is more valuable than simply knowing the pass mark or memorising what the answers look like.
Finally, remember that each clip plays continuously and cannot be paused or rewound during the real test. This means your attention must be fully committed from the first second of every clip. Do not assume the hazard will appear in the second half — some clips feature hazards that develop within the first ten seconds of footage.
Staying alert from the moment the clip begins is a discipline that takes practice to maintain across all fourteen clips, especially after a long multiple-choice section. Building that mental stamina in your preparation sessions is just as important as learning to recognise hazard types.
Hazard Perception Practice Strategies
The DVSA sells an official hazard perception practice package through its website, and it remains the gold standard for test preparation. The official clips use the same filming style, resolution, and hazard types as the real test, which means your brain is training on material that closely mirrors what you will see on test day. Many candidates underestimate how much the visual style of the clips matters — unofficial clips filmed on different cameras or in different countries can create misleading expectations about timing and scene composition.
When using official resources, treat every practice session as a mock test rather than a casual browse. Set aside the full twenty minutes, watch all fourteen clips without interruption, and only review your scores after completing the full set. This mirrors real test conditions and builds the sustained concentration you will need on the day. Use the feedback from each session to identify which hazard types you are consistently clicking too late on, then focus additional practice on those specific scenarios before your next full mock run.

Hazard Perception Test: Advantages and Challenges
- +Scoring system rewards genuine anticipation, not guessing — real skill is measured
- +Fourteen clips give multiple opportunities to recover from a low score on one clip
- +Official practice material closely mirrors real test clips in style and format
- +Pass mark of 44 out of 75 gives meaningful headroom above the minimum
- +Skills learned translate directly into safer real-world driving habits
- +Third-party platforms offer hundreds of practice clips for comprehensive preparation
- −Rapid clicking within a short window triggers the cheating detection algorithm and scores zero
- −Clips cannot be paused or rewound during the real test, demanding sustained focus
- −The test is sat on the same day as the multiple-choice section, increasing pressure
- −Failing either part means resitting the entire theory test and paying the full fee again
- −Overconfident candidates often skip hazard perception practice and fail unexpectedly
- −Some hazards develop very quickly, leaving a narrow window that is easy to miss
Pros and Cons at a Glance
| Pros | Cons |
|---|---|
| Scoring system rewards genuine anticipation, not guessing — real skill is measured | Rapid clicking within a short window triggers the cheating detection algorithm and scores zero |
| Fourteen clips give multiple opportunities to recover from a low score on one clip | Clips cannot be paused or rewound during the real test, demanding sustained focus |
| Official practice material closely mirrors real test clips in style and format | The test is sat on the same day as the multiple-choice section, increasing pressure |
| Skills learned translate directly into safer real-world driving habits | Failing either part means resitting the entire theory test and paying the full fee again |
| Third-party platforms offer hundreds of practice clips for comprehensive preparation | Overconfident candidates often skip hazard perception practice and fail unexpectedly |
Hazard Perception Pass Day Checklist
- ✓Complete at least three full mock hazard perception sessions in the week before your test
- ✓Review your lowest-scoring clips and identify the specific hazard types you missed
- ✓Confirm your test centre location and allow extra travel time on test day
- ✓Bring a valid UK photo ID — passport or photocard driving licence — to the test centre
- ✓Watch the DVSA tutorial video at the test centre before the hazard perception section begins
- ✓Click once clearly as soon as you identify a developing hazard — avoid rapid repeated clicking
- ✓Keep your eyes scanning the full frame rather than focusing on the centre of the screen
- ✓Maintain concentration from the very first second of each clip — some hazards develop early
- ✓Remember that one clip contains two developing hazards and be ready to click twice
- ✓Stay calm after a clip where you are unsure — reset your focus before the next clip starts
The Single Most Important Rule in Hazard Perception
Clicking once — clearly and early — when you identify a developing hazard is the strategy that earns maximum points. Candidates who click multiple times in quick succession risk triggering the pattern-detection algorithm that scores the entire clip as zero. A single confident click that lands in the earliest scoring segment earns five points; frantic clicking earns nothing. Practise single-click precision during every training session so it becomes automatic on test day.
One of the most damaging mistakes candidates make in the hazard perception test is misunderstanding what triggers the cheating-detection algorithm. The DVSA's software monitors your clicking pattern throughout each clip, and if it detects a rhythmic or repetitive pattern of clicks — such as clicking every two seconds regardless of what is happening on screen — it will award zero for that clip and flag your attempt. This zero cannot be appealed after the test, which means a single clip affected by the algorithm can drop your total score below the pass mark even if you performed well everywhere else.
The practical implication is simple but counterintuitive: clicking less is often better than clicking more. Many anxious candidates click two or three times each time they think they see a potential hazard, reasoning that at least one click will land inside the scoring window. In reality, this approach creates exactly the pattern the algorithm is designed to catch.
The correct strategy is to watch the clip attentively, make a single decisive click the moment you identify the hazard developing, and then refrain from clicking again unless you genuinely see a second developing hazard — which only occurs in the one twin-hazard clip.
Another common error is clicking too late because the candidate waited for the hazard to become completely obvious before responding. In real driving, you would not wait until a child had already run into the road before braking — you would see the ball rolling and anticipate what comes next. The scoring system rewards exactly this anticipatory mindset.
If you find yourself consistently receiving low scores like one or two points rather than four or five, the most likely cause is that you are clicking in response to the hazard rather than in anticipation of it. Adjusting your click timing earlier by just one or two seconds can increase your score on each hazard by three or four points.
Failing to watch the full clip from the very beginning is another costly mistake. Some candidates mentally switch off during the early seconds of a clip because nothing appears to be happening yet. This is dangerous because the scoring window for some hazards opens within the first ten seconds of footage — and if you have not been watching attentively from the start, you may already have missed your best opportunity for maximum points before you have even registered that a hazard is developing. Treat every second of every clip as potentially critical, even if the opening frames look unremarkable.
Test anxiety also plays a significant role in poor hazard perception performance. Candidates who are nervous about the test tend to over-click — clicking at everything that moves in an attempt to ensure they do not miss any hazard. This anxiety-driven over-clicking is one of the most common reasons for triggering the pattern-detection algorithm. Managing your mental state before and during the test is therefore a legitimate part of preparation. Techniques such as deep breathing between clips, focusing on the task rather than the outcome, and reminding yourself of the single-click rule can all help maintain composure throughout the session.
Some candidates also misunderstand the scoring window itself. The window is not a fixed time after the hazard appears — it is a period that begins when the hazard starts to develop and ends when the situation is fully resolved. The scoring is divided into five equal segments within this window, with the highest points awarded for clicking earliest.
Crucially, the scoring window varies in length from hazard to hazard: some situations develop slowly over several seconds, while others escalate very quickly. This variability means that a strategy of waiting a consistent number of seconds before clicking will not work reliably — you need to respond to what you actually see rather than following a predetermined timing rule.
Finally, do not underestimate the cognitive fatigue factor. By the time you reach the hazard perception section, you will have already sat through fifty multiple-choice questions — a mentally demanding task that can leave you feeling drained even if you found the questions relatively straightforward. Building endurance into your practice routine is therefore important.
When practising at home, always complete a full mock multiple-choice section before moving on to hazard perception clips, so that your brain is accustomed to performing the hazard task in a fatigued state. This simple adjustment makes a meaningful difference to how well your training translates to real test conditions.
The DVSA hazard perception software automatically detects rhythmic or repetitive clicking patterns and awards zero for any clip where this pattern is detected. This penalty cannot be reversed after the test. Never click more than twice per clip, and always ensure your clicks are responding to something you have genuinely identified rather than clicking defensively to cover all bases. A single confident click is worth far more than multiple uncertain ones.
Once you have achieved a hazard perception pass and hold your full theory test certificate, the certificate is valid for two years from the date of passing. During this two-year window, you must pass your practical driving test — if you do not, your theory test certificate expires and you will need to sit the full theory test again before booking another practical. This deadline applies even if you have been actively taking driving lessons throughout the period, so it is worth keeping track of your expiry date and scheduling your practical test with enough time to resit if necessary.
The skills you have developed for the hazard perception test do not expire along with the certificate — in fact, they become more valuable once you are a qualified driver on real roads. The DVSA designed the hazard perception assessment specifically to reduce collisions among newly qualified drivers, who are statistically at highest risk in their first year of independent driving.
Research consistently shows that drivers who developed strong hazard anticipation skills before passing their test have fewer incidents in their early years on the road. Your preparation for this test is an investment in your long-term safety, not just a box to tick.
If you failed the hazard perception section of a previous theory test attempt, it is important to understand that you cannot resit only that section — you must book and pay for the full theory test again, which costs £23 for car and motorcycle candidates. You must also wait at least three working days between attempts.
Use this waiting period productively: analyse which types of hazards you scored poorly on, adjust your practice strategy, and complete at least five full mock sessions before resitting. Many candidates who fail once go on to pass comfortably on their second attempt because the failure experience clarifies exactly what they need to work on.
The pass mark has remained consistent at 44 out of 75 for car and motorcycle theory tests for a number of years, but it is always worth confirming the current requirements on the official DVSA website before your test, particularly if you are sitting the test for a vocational licence category such as LGV or PCV.
These categories have different pass marks and different numbers of hazard perception clips, reflecting the higher professional standard expected of commercial vehicle drivers. If you are preparing for a vocational theory test, make sure your practice materials are specifically designed for that category rather than the standard car test.
Candidates who pass their hazard perception test with a high score — 60 or above — often find that their practical driving lessons progress more quickly afterwards. Driving instructors frequently report that pupils who have genuinely engaged with hazard perception preparation arrive at their first practical lesson with much better road awareness than those who simply memorised answers for the multiple-choice section.
The ability to read developing situations on real roads, anticipate what other road users might do, and respond proportionately before a situation becomes dangerous is precisely what driving instructors are trying to develop over the course of practical lessons — and a serious approach to hazard perception preparation gives you a significant head start.
For parents supporting a teenager through the theory test process, the hazard perception section is worth explaining carefully before the test date. Many young people underestimate its difficulty because it looks like a video game at first glance. Taking the time to sit through some practice clips together, discussing what you both see developing in each scene, and talking about real-world driving situations you encounter as a passenger can all reinforce the analytical habits the test requires. This kind of informal coaching from an experienced driver can be surprisingly effective even if you are not a qualified driving instructor yourself.
Whatever your circumstances — first-time candidate, resit candidate, or supporting someone else through the process — the key message is that preparation and understanding are what deliver a hazard perception pass. The test is not designed to trick you or create arbitrary difficulty; it is designed to ensure that new drivers can read real roads safely. Approach it with that mindset, practise consistently with quality materials, and the pass mark of 44 is well within reach for the vast majority of candidates who put in the work.
Building a structured revision timetable in the four to six weeks before your theory test date is the most reliable way to ensure you are adequately prepared for both sections. For hazard perception specifically, aim to complete at least two full mock sessions per week in the first three weeks, increasing to daily sessions in the final week before your test. Each session should include a review phase where you analyse your scores by hazard type and adjust your click timing based on the feedback. Random practice without structured review tends to reinforce existing habits rather than improving them.
In the early stages of practice, it is normal to score below the pass mark — this is valuable information, not a cause for concern. Most candidates start somewhere between 30 and 40 out of 75 and reach the pass mark after ten to fifteen focused sessions.
If you are scoring above 50 consistently in practice, you are in an excellent position and your main task before the test is to maintain that standard rather than introducing new strategies that might disrupt your timing. Consistency in the final week is more important than trying to squeeze out extra points through experimentation.
Pay particular attention to rural road clips during your practice sessions. Many learners are most familiar with urban driving environments and find rural hazards — such as animals in the road, concealed junctions on country lanes, and agricultural vehicles pulling out from field entrances — harder to anticipate. The real test clips include a mix of urban and rural scenarios, and candidates who practise only on urban clips can find themselves unprepared for the different visual cues and hazard timing on country roads. Ensure your practice material includes a good balance of both environments.
Night-time and adverse weather clips also feature in the real test and require slightly different scanning strategies. In low visibility, the range of your effective forward vision is reduced, which means hazards appear with less advance warning than in daytime conditions.
During practice on these clips, resist the temptation to wait for the hazard to become clearly visible before clicking — the scoring window in dark or wet conditions is just as demanding as in full daylight, and the reduced visibility makes early clicking even more important. Trusting your anticipation skills rather than waiting for visual confirmation is the key to scoring well on these clips.
After each practice session, take a moment to note which clips you scored maximum points on and what mental process you used to achieve that. Identifying your own successful strategies — whether that is a particular scanning pattern, a specific contextual cue you recognised, or a type of road environment where your timing is naturally sharp — allows you to replicate those approaches deliberately rather than relying on them happening by accident. This metacognitive approach to practice is what separates candidates who improve rapidly from those who plateau at a consistent level without breaking through to higher scores.
If you are using a mobile device for practice, be aware that the click timing on a touchscreen may feel slightly different from the mouse click used at the test centre. Some candidates find that touchscreen tapping introduces a slight delay, or that the tap gesture itself is marginally slower than a mouse click.
If possible, complete at least some practice sessions using a mouse and laptop or desktop computer so that your click timing is calibrated to the equipment you will actually use during the real test. Most test centres use desktop computers with a standard mouse, so this is worth factoring into your preparation.
On the morning of your test, avoid cramming additional hazard perception clips. Your timing and anticipation skills are built over weeks of practice and will not improve significantly in the final few hours before the test — but anxiety can increase if you start second-guessing your responses during last-minute practice.
Instead, spend the morning reviewing the key rules: click once and early, stay alert from the first second of each clip, remember that one clip has two hazards, and maintain calm steady attention throughout. Arriving at the test centre in good time, having eaten a proper meal and slept well the night before, will do more for your score than any additional practice clips in the final hours.
Sample DVSA UK Driving Theory Practice Questions
Try these questions from our free DVSA UK Driving Theory practice tests. The correct answer and an explanation follow each question.
What is the main hazard of driving through a ford or flood water?
- A. Your brakes may become less effective afterwards
- B. The water may damage your exhaust pipe
- C. Other vehicles may splash water onto your windscreen
- D. Your sat-nav may stop working
Answer: A. Your brakes may become less effective afterwards
After driving through water, your brakes may be wet and less effective. You should test your brakes gently after passing through water and dry them out by applying light pressure while driving slowly.
What hazard should you be particularly aware of at a junction near a school during term time?
- A. Heavy goods vehicles delivering supplies
- B. Parked cars reducing visibility and children crossing unexpectedly
- C. Road works near the school entrance
- D. Cyclists using the bus lane
Answer: B. Parked cars reducing visibility and children crossing unexpectedly
Near schools during term time, parked cars from parents dropping off or collecting children can severely restrict visibility. Children may also dash across the road unexpectedly, especially at the start and end of the school day.
You are driving past a parked ice cream van on a residential street. What is the main hazard you should be anticipating?
- A. The van's refrigeration unit may be leaking.
- B. Children running out into the road from behind the van.
- C. The driver suddenly pulling out without indicating.
- D. Litter being dropped from the van's serving window.
Answer: B. Children running out into the road from behind the van.
Ice cream vans attract children, who may be excited and less aware of road safety. They can run into the road unexpectedly, often from behind the van where they are hidden from your view. You must reduce your speed significantly and be prepared to stop.
At a crash scene, a vehicle is on fire with a casualty inside. What should you do first?
- A. Try to remove the casualty immediately
- B. Call the emergency services
- C. Attempt to put the fire out yourself
- D. Wait for other motorists to help
Answer: B. Call the emergency services
You should call the emergency services immediately so trained professionals can deal with both the fire and the casualty safely.
DVSA Questions and Answers
UK Theory Test Pass Mark: Car, Bike, LGV, PCV & ADI Scores

Free Theory Test App: The Complete UK Guide to Choosing, Using and Passing With Mobile Practice in 2026

Cancelling Driving Test: The Complete UK Guide to Refunds, Rebooking and Avoiding Lost Fees in 2026
Theory Test Certificate: Complete UK Guide to Passing and Using Your DVSA Pass Letter in 2026
How To Pass Theory Test: Free DVSA Practice & Pass First Time (2026)
About the Author

Licensed Driving Instructor & DMV Test Specialist
Penn State UniversityRobert J. Williams graduated from Penn State University with a degree in Transportation Management and has spent 20 years as a certified driving instructor and DMV examiner consultant. He has personally coached thousands of applicants through written knowledge tests, skills assessments, and commercial driver licensing programs across more than 30 states.