CDL Air Brake Test: Study Guide, State Rules, and How to Pass First Try
❓ CDL air brake test guide: pre-trip inspection steps, leak rate limits, low-air warning checks, applied/static leak tests, plus state-specific variations.
The CDL air brake test is the practical knowledge gate between you and being legal to drive any commercial vehicle equipped with air brakes. If you don't pass it, your CDL gets an L-restriction stamped on it — meaning you can only drive trucks with hydraulic brakes, which excludes most over-the-road tractors, most heavy-duty straight trucks, and basically every job that pays well in trucking. So the test matters, even though it's only one section of the broader CDL knowledge and skills exam.
The good news: the test is teachable. The information is finite, the questions follow predictable patterns from state to state, and the practical inspection steps (which you also demonstrate on the road test) line up cleanly with the written knowledge. If you study the material systematically and practice the pre-trip inspection procedure, first-attempt pass rates are well over 80%.
The bad news: people who try to wing it from general truck-driving experience get tripped up consistently. The exam isn't testing whether you can drive — it's testing whether you understand the specific systems and the specific failure modes that the FMCSA regulations care about.
Things like leak rate limits (1 psi per minute static for a single vehicle, 2 psi per minute for combinations), the exact PSI at which the low-air warning must activate (between 55 and 75 psi on most rigs), and the order of the in-cab inspection steps are tested directly. Driving experience without textbook study gets you maybe 60% of the answers right — and the test typically requires 80% or higher to pass, depending on state.
The test has a knowledge component (multiple-choice questions, typically 25-30 questions per state) and a practical/skills component that you demonstrate during the road test. This guide focuses primarily on the knowledge test since that's where people fail more often, but the practical steps are baked in throughout — they're the same material. The two-part structure exists because the FMCSA wants drivers who both know the theory and can execute the inspection procedure in real-world conditions.
State-by-state variations matter more for this test than for most other CDL endorsements. The federal CDL standards set the baseline, but each state's DMV adds its own question pool, test format, and sometimes specific procedural requirements. Pennsylvania's CDL air brakes test reads slightly different from Ohio's Class A air brake test from South Carolina's air brakes test, even though the underlying physics and safety concepts are identical. We'll cover the state variations toward the end of this guide; the first sections cover the federal standard content that applies everywhere.

CDL Air Brake Test — Key Facts
- Question count: 25-30 multiple choice (varies by state)
- Passing score: 80% in most states (some require 85%)
- Time limit: Generally no strict time limit; typical completion in 25-40 minutes
- Fee: $5-$25 depending on state (usually combined with broader CDL knowledge test fees)
- Retake policy: Most states allow retake same day or next business day; some require 7-day wait after 3 failures
- What happens if you fail: You get a CDL with an L-restriction (no air brakes) — can drive only hydraulic-brake commercial vehicles
- Practical demonstration: Pre-trip inspection of air brakes is part of CDL skills test (separate from knowledge test)
Understanding what is the cdl air brake test specifically tests starts with the system itself. Air brakes work fundamentally differently from hydraulic brakes — they use compressed air rather than incompressible fluid to apply braking force. The system has three subsystems that you need to know: the service brake (which you apply with the foot pedal during normal driving), the parking brake (which uses spring force to hold the vehicle when air pressure drops below a threshold), and the emergency brake (which is part of the parking brake system and activates automatically if air pressure drops too low during operation).
The system requires air pressure to release the brakes. This is critical to understand because it's exactly opposite to hydraulic brakes. On a hydraulic system, fluid pressure applies the brakes; on an air system, air pressure holds back powerful springs that would otherwise lock the brakes. Lose air pressure on a hydraulic system → no brakes. Lose air pressure on an air-brake system → the brakes lock automatically because the springs win. This fail-safe design is one of the reasons air brakes are required on heavy commercial vehicles — the failure mode is "stuck on," not "don't work."
The cdl air brake system components you need to identify by name and function include: the air compressor (driven by the engine, pumps air into the storage tanks), the governor (regulates compressor cut-in and cut-out pressures, typically 100-125 psi), the air storage tanks (hold the compressed air supply), and the air dryer (removes moisture from the air to prevent freezing and corrosion).
The remaining major components: the safety valve (vents pressure if it exceeds about 150 psi to prevent tank damage), the foot valve (the brake pedal that applies service brakes), the brake chambers (where air pressure converts to mechanical braking force at each wheel), the slack adjusters (transmit force from brake chambers to brakes; require periodic adjustment), and the parking/emergency brake circuit (separate from service brake).
Each of these components has typical test questions associated with it. What does the air dryer do? Removes moisture. What's the safety valve pressure? About 150 psi. What's the governor's job? Regulates compressor on/off cycles. Memorizing the components and their functions covers a significant chunk of the question pool.
The leak rate test is the part everyone studies because it's the most numerically specific. With the engine off and full air pressure, a single vehicle's leak rate cannot exceed 2 psi in one minute (some sources cite 3 psi). For a combination vehicle (tractor with trailer), the leak rate cannot exceed 3 psi in one minute.
With the service brake applied and pressure full, the leak rate test allows 3 psi per minute for a single vehicle and 4 psi for a combination. Remember the pattern: applied test allows 1 psi more than the static test, and combinations allow 1 psi more than singles. So the four numbers are 2, 3, 3, 4. Test questions probe these limits directly.
CDL Air Brake Test Section Breakdown
Air compressor, governor, storage tanks, air dryer, safety valve, foot valve, brake chambers, slack adjusters, parking circuit. Identify each by name and function.
Governor cut-in (100 psi typical), cut-out (125 psi), safety valve (150 psi), low-air warning (55-75 psi activation), automatic spring brake application (around 20-40 psi).
Static (engine off, brakes released): 2 psi/min single, 3 psi/min combination. Applied (brakes pressed): 3 psi/min single, 4 psi/min combination. Memorize the pattern 2-3-3-4.
Specific 7-step procedure including governor test, leak test, low-air warning test, spring brake activation test, parking brake holding test, service brake function check.
Brake lag (~0.5 sec delay before brakes apply), brake fade from overheating, proper use of engine brake/jake brake, downgrade braking technique (snub vs. dragging).
Glad-hand connections, emergency line vs. service line, trailer air supply valve, hose colors and patterns, tractor protection valve.
How to test air brakes for cdl pre-trip is one of the most-asked questions, and the answer is the 7-step procedure that nearly every state uses (sometimes called the 7-step air brake check or the CDL air brake inspection). The order matters and the test expects you to know the sequence.
Step 1: Build air pressure to at least 100 psi and observe the governor cut-out (compressor should stop adding air around 125 psi). Step 2: With engine running and full pressure, observe the air pressure gauge — pressure should hold steady (this is the basic system check). Step 3: Apply the service brake fully and check leak rate. Step 4: Release the service brake. Step 5: Test the low-air warning by fanning the brakes (rapid applications) until pressure drops; the warning should activate before pressure falls below 55 psi (most rigs activate between 55-75 psi).
Step 6: Continue fanning brakes until the spring brake (parking brake) automatically applies; this should occur at approximately 20-40 psi depending on the vehicle. Step 7: Build air pressure back to full, release the parking brake, and test that the vehicle moves and stops properly with the service brake (verifying that brake release is working correctly). Each step has its own specific PSI numbers and the test will probe them.
Common mistakes on the pre-trip inspection during the practical test: forgetting to chock the wheels before starting (or claiming the parking brake is enough — examiners want to see chocks), pumping the brake pedal rather than holding steady pressure during the leak rate test, not waiting the full minute for the leak rate observation, and not articulating what you're testing for at each step. Examiners want to hear you say "I'm now testing the low-air warning device" before you start fanning the brakes — they're not just watching the procedure, they're listening for whether you understand what you're checking.
The slack adjuster check is another area that catches drivers. Manual slack adjusters need to be adjusted when the stroke (distance the pushrod travels when the brake is applied) exceeds the maximum allowed for that specific brake chamber type (typically 2 inches for the most common Type 30 chambers). Automatic slack adjusters self-adjust but can fail; the test expects you to know that even with automatics, you need to verify proper stroke during inspection. If any slack adjuster on the vehicle is out of adjustment, the vehicle is out of service per FMCSA regulations. Knowing this rule is testable.
Key Pressure and Rate Numbers to Memorize

State variations on the cdl air brake test follow the federal CDL framework but each state DMV adds its own twists. cdl air brake test rules in California require a slightly more detailed pre-trip inspection demonstration than the federal minimum, and the California DMV's written test pool is known for having more questions on specific PSI numbers than other states. The California DMV air brake test is administered separately from the standard CDL general knowledge test — it's a distinct section you have to pass.
Pennsylvania CDL air brakes test (PA) uses the standard FMCSA framework but PennDOT's test pool emphasizes the in-cab inspection sequence more heavily than some other states. The Pennsylvania cdl air brake test includes questions on the specific order of pre-trip steps that you must follow during the road test demonstration. Pennsylvania doesn't significantly diverge from federal standards but the test format has a state-specific feel that PA drivers often comment on after taking it.
NYS CDL air brakes test format follows New York DMV standards. The NYS test includes some scenario-based questions about commercial driving conditions specific to New York — questions about driving in city traffic, weather conditions common in NY, and bridge weight restrictions that affect commercial driving statewide.
Ohio Class A CDL air brake test is part of Ohio's standard Class A endorsement testing. Ohio BMV's test pool focuses heavily on the differences between hydraulic and air brake systems, perhaps because Ohio has more candidates transitioning from non-CDL driving than some other states. The Ohio cdl air brake test follows the federal pass score of 80%.
South Carolina cdl air brake test follows the federal standard. The sc cdl air brake test (also sometimes called the sc dmv cdl air brake test in state materials) emphasizes truck inspection procedures. South Carolina's questions on combination vehicle brakes are notably specific — questions about tractor-trailer air systems show up more frequently than in some other states.
Oklahoma CDL air brake test follows the FMCSA framework. The oklahoma cdl air brake test is administered through Oklahoma DPS and uses the standard 25-30 question multiple-choice format. The state's emphasis is on practical inspection knowledge — questions you'd actually need to know to safely inspect a brake system before driving.
If you take the CDL knowledge test but fail (or skip) the air brakes section, your CDL gets issued with an "L" restriction code. This restriction prohibits you from operating any commercial vehicle equipped with air brakes — including air-over-hydraulic systems on some trucks. In practice, this excludes most Class A and B trucks used in over-the-road trucking, most heavy-duty straight trucks, most buses, and most jobs that require a CDL. An L-restricted CDL limits you to hydraulic-only commercial vehicles, which is a much smaller and lower-paying job market. The L-restriction is removable by passing the air brakes section at a later date — you don't have to start over with the whole CDL — but until you do, the restriction stays on your license.
Common mistakes that cause first-time failures on the written test: confusing the leak rate numbers (especially the static vs. applied distinction), forgetting the safety valve pressure (~150 psi), not knowing the difference between the service brake circuit and the emergency/parking brake circuit, misidentifying when the low-air warning activates (it's 55-75 psi range, not exactly 60 psi), and missing questions about the air dryer's specific function (moisture removal, not air filtering for particulates).
The questions on stopping distance and brake fade are also worth specific study. Stopping distance for a heavy commercial vehicle is significantly longer than for passenger cars — and the test asks you to estimate it under various conditions. Brake fade from overheating, especially on long downgrades, is a frequent question.
The correct technique on a long downgrade is the "snub braking" approach — apply brakes firmly to reduce speed by about 5 mph below desired speed, release brakes to let them cool, then re-apply when speed builds back up. Dragging the brakes (light continuous application) is wrong and the test will probe this — dragging causes heat buildup and brake fade.
The engine brake (sometimes called Jake brake or compression brake) reduces wear on the service brakes during downhill driving by using the engine itself to slow the vehicle. The test asks about proper use of engine brakes versus service brakes in different scenarios.
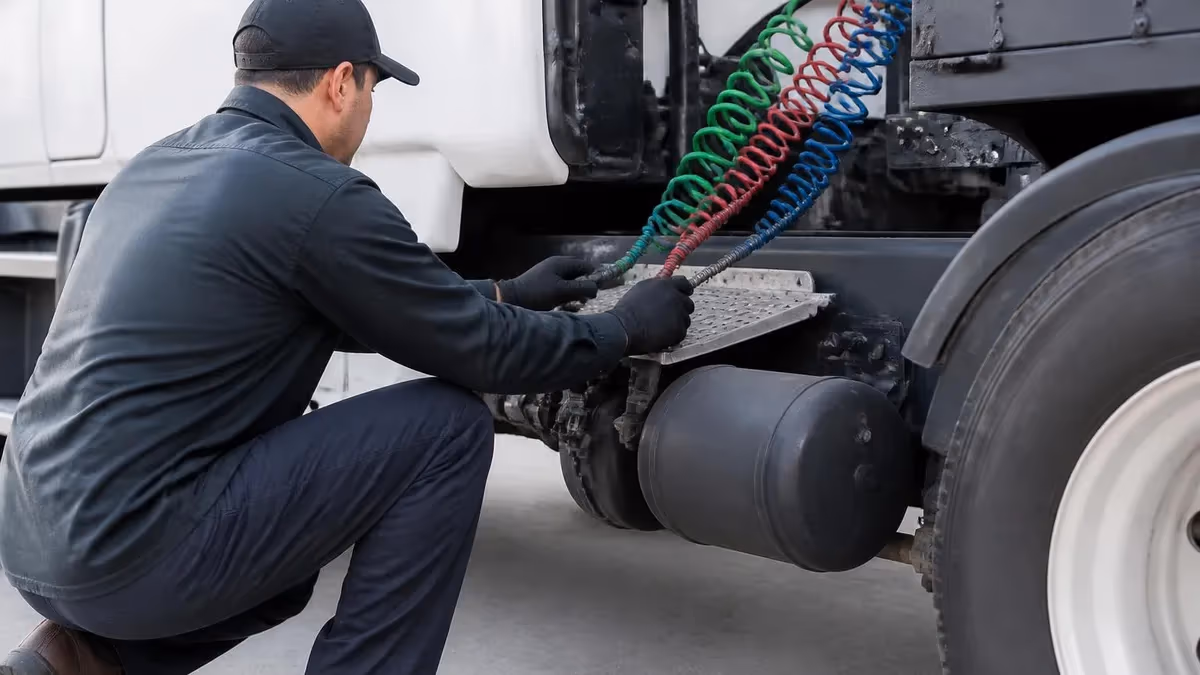
The relationship between tractor and trailer air systems gets tested too. The trailer's air comes through the tractor via two glad-hand connections — the service line (blue) and the emergency line (red). The emergency line keeps the trailer's parking brakes released; if the emergency line is cut or disconnected, the trailer's spring brakes automatically apply. The tractor protection valve disconnects the trailer air supply when the tractor's reservoir pressure drops too low, preventing the trailer from being unable to brake. Knowing which color glad-hand is which and what happens when they're disconnected is testable.
The way the test phrases questions matters. Many questions are worded to test whether you understand the principle, not just memorize a number.
For example: "If air pressure drops below 60 psi in a vehicle, what happens?" The answer requires knowing both that the low-air warning activates between 55-75 psi (so the warning is on) and that the spring brakes typically apply at 20-40 psi (so the parking brakes haven't yet activated automatically). Multiple-choice questions are often written so that wrong answers reflect partial knowledge — knowing one number but not the other gives you a wrong but plausible answer. Studying the relationships between numbers, not just the numbers themselves, makes a real difference.
Air Brake Test Topics in Depth
- Chock the wheels and start with engine off, parking brakes released
- Build air pressure to at least 100 psi with engine running
- Observe governor cut-out at ~125 psi (compressor stops)
- Test air pressure gauge for steady reading at full pressure
- Apply service brake fully and observe leak rate over 1 minute (≤3 psi single, ≤4 psi combo)
- Release service brake; check release working
- Fan brakes until low-air warning activates (55-75 psi)
- Continue fanning until parking brake automatically applies (~20-40 psi)
- Build pressure back to full; release parking brake
- Test service brake at low speed to verify normal operation
CDL Air Brake Test Prep Plan
Get the CDL Manual
Memorize Key Numbers
Learn the 7-Step Pre-Trip
Take Practice Tests
Understand Concepts, Not Just Facts
Schedule the Test Strategically

Passing the knowledge test is necessary but not sufficient. You also have to demonstrate the air brake pre-trip inspection during the CDL skills test — the road test segment. Examiners want to see you perform the 7-step inspection while explaining what you're testing at each step. Common skills-test failures: not articulating what you're checking, performing steps out of order, missing the leak rate observation, and not engaging the parking brake holding test. The written and practical components test the same material but the practical demands fluency in execution, not just recall. Many test-takers pass the written easily and then fail the skills portion because they didn't rehearse the verbal walk-through.
For drivers preparing for the test in specific states, the state DMV's online manual is the primary authoritative source. The federal CDL standards apply nationwide, but each state's specific test pool and procedural requirements vary slightly. South Dakota CDL air brakes test, Arizona CDL air brakes test, and Arkansas CDL air brake test all follow the same federal framework but use their state-specific question pools and may have slight differences in inspection emphasis.
For the cdl air brake test colorado, the Colorado DMV uses standard CDL framework. CDL air brake test Kansas, CDL air brake test Kentucky (ky), CDL air brake test Massachusetts (ma), CDL air brake test Maryland (md) — all follow the federal framework with state-specific question pools.
The bottom line for state variations: the underlying material is identical because federal law sets the framework. The differences are in question wording, inspection procedure emphasis, and minor format choices. Studying the federal-standard material thoroughly prepares you for any state's test.
One practical tip that applies regardless of state: when you go to take the test, bring valid government-issued ID, your CLP (Commercial Learner's Permit) if you have one, any required medical certificates, and the testing fee in the form your state accepts (some take cash only, some require card payment, some have specific check requirements). Check the DMV website ahead of time. Showing up unprepared with documentation is the most common reason for test appointment delays. The actual test takes 25-40 minutes; the registration, ID check, and payment can take longer than the test itself.
If you fail the air brake section, most states allow a retake within a few days. Some states impose a 7-day wait after three failures. The retake fee is typically the same as the initial fee. Use the time between attempts to review the specific topics where you missed questions — most states won't tell you exactly which questions you missed, but they'll tell you the topic areas. Patterns of failure usually cluster in 2-3 specific areas (often leak rates and pre-trip sequence), and focused review of those areas typically resolves the gap.
Quick Reference for Test Day
Static single: 2 psi/min. Static combo: 3 psi/min. Applied single: 3 psi/min. Applied combo: 4 psi/min. Pattern: 2-3-3-4.
Governor cut-in 100, cut-out 125, safety valve 150, low-air warning 55-75, spring brake 20-40.
Service line: blue. Emergency line: red. Mixing them up means brakes don't work right.
Chock, build pressure, observe governor, leak rate (apply), release, low-air warning, spring brake activation. Then rebuild and test service brake.
Same circuit. Applies automatically below 20-40 psi. Held open by air pressure. Fail-safe design.
Snub braking: firm application to reduce 5 mph below target, release to cool, reapply when speed builds. Never drag brakes.
CDL Pros and Cons
- +Structured CDL guides organize content in exam-aligned order
- +Combining guides with practice questions builds test fluency
- +Focused plans let you prioritize weak areas
- +Free and low-cost resources make prep accessible at any budget
- +Spaced repetition improves long-term retention
- −No single guide covers everything — most candidates need 2–3 resources
- −Guides can become outdated when exam content changes
- −Self-study requires discipline without external accountability
- −Coverage breadth can create false confidence
- −Real prep time is typically 30–50% longer than guides estimate
AIR Questions and Answers
The CDL air brake test rewards systematic study. Almost everyone who fails it the first time did so by trying to rely on general truck-driving experience without specifically studying the FMCSA framework material — and almost everyone who passes the first time did so by working through the state DMV manual section systematically and taking practice tests until the question patterns became familiar. The material isn't conceptually difficult; it's specific and detailed.
If you're starting from zero on this material, plan on roughly 10-15 hours of focused study over a week or two. That's enough time to read the relevant CDL manual section twice, take 5-10 practice tests, and develop fluency with the specific numbers and procedures. Studying more than that has diminishing returns; studying less risks failure. Most importantly, don't skip the practical pre-trip walk-through — practice saying the steps out loud while imagining yourself doing them. The road test examiner wants to see and hear competence simultaneously, and the verbal fluency takes deliberate practice to develop.
About the Author
Educational Psychologist & Academic Test Preparation Expert
Columbia University Teachers CollegeDr. Lisa Patel holds a Doctorate in Education from Columbia University Teachers College and has spent 17 years researching standardized test design and academic assessment. She has developed preparation programs for SAT, ACT, GRE, LSAT, UCAT, and numerous professional licensing exams, helping students of all backgrounds achieve their target scores.