Air Brake Endorsement: Complete Study Guide and Certification Prep for 2026 July
Master the air brake endorsement with our complete study guide. 🆕 Pass the CDL air brake test first try with practice questions, system diagrams, and
The air brake endorsement is the single most important credential a commercial driver can add to a Class A or Class B CDL, because without it you cannot legally operate any truck, bus, or trailer equipped with a full air brake system. Every state requires the endorsement, every employer demands it, and every roadside inspector will check for it during a Level 1 inspection. Understanding how the system works is not optional — it is the foundation of safe heavy-vehicle operation on American highways.
Earning this endorsement requires passing a written knowledge exam covering compressed air systems, dual circuits, spring brakes, slack adjusters, and emergency procedures. You will also complete a skills test in a vehicle equipped with air brakes, demonstrating proper pre-trip inspection, in-cab checks, and stopping techniques. Most states use the FMCSA model curriculum, so the content is similar nationwide, though scoring thresholds vary between 80 and 85 percent.
This guide walks you through everything the examiner expects you to know. We cover system components, leakage rates, governor cut-in and cut-out pressures, low-air warnings, spring brake activation thresholds, and the exact sequence of the seven-step air brake check. You will also see common test traps, real exam questions, and study schedules that match how DMV and third-party examiners actually grade the test.
Whether you are pursuing your first CDL or upgrading from a restricted license, the path is the same: study the official state CDL manual, take repeated practice tests, perform hands-on inspections, and rehearse the verbal pre-trip aloud. Drivers who follow this approach pass on the first attempt at rates above 70 percent, compared to roughly 45 percent for those who only skim the manual once.
The endorsement opens doors. Most over-the-road, regional, vocational, and transit positions list air brake certification as a non-negotiable requirement. Pay typically runs $3,000 to $8,000 per year higher than non-endorsed driving positions because the equipment is heavier and the liability exposure is greater. Adding this credential is the fastest way to expand your employability without changing your CDL class.
You should plan for two to four weeks of focused study if you have never worked around air systems. Drivers from diesel mechanic, military vehicle, or agricultural backgrounds often need less. Either way, treat the air brake section as its own discipline — not as a chapter to skim. The concepts are highly testable, the diagrams are detailed, and the consequences of failing to understand low-air alerts on the road are severe.
By the end of this guide you will know exactly what the written test asks, how the practical test is graded, which components to point to and name during inspection, and how to think clearly under pressure when a warning buzzer sounds at highway speed.
Air Brake Endorsement by the Numbers

Four-Week Air Brake Endorsement Study Schedule
- ▸Read CDL manual air brake section twice
- ▸Memorize the air compressor, governor, reservoirs, and foot valve diagram
- ▸Watch component identification videos
- ▸Take a baseline practice test to find weak areas
- ▸Memorize cut-in (100 psi) and cut-out (125 psi) pressures
- ▸Learn 60 psi low-air warning trigger point
- ▸Study spring brake activation between 20-45 psi
- ▸Take 3 practice quizzes scoring 80%+
- ▸Practice verbal pre-trip aloud daily
- ▸Perform hands-on inspection if vehicle available
- ▸Memorize leakage rates: 3 psi single, 4 psi combo per minute
- ▸Time your applied-pressure leak test
- ▸Complete 5 full-length practice tests
- ▸Review every missed question with manual
- ▸Schedule DMV appointment
- ▸Drive to test site early to inspect rental vehicle
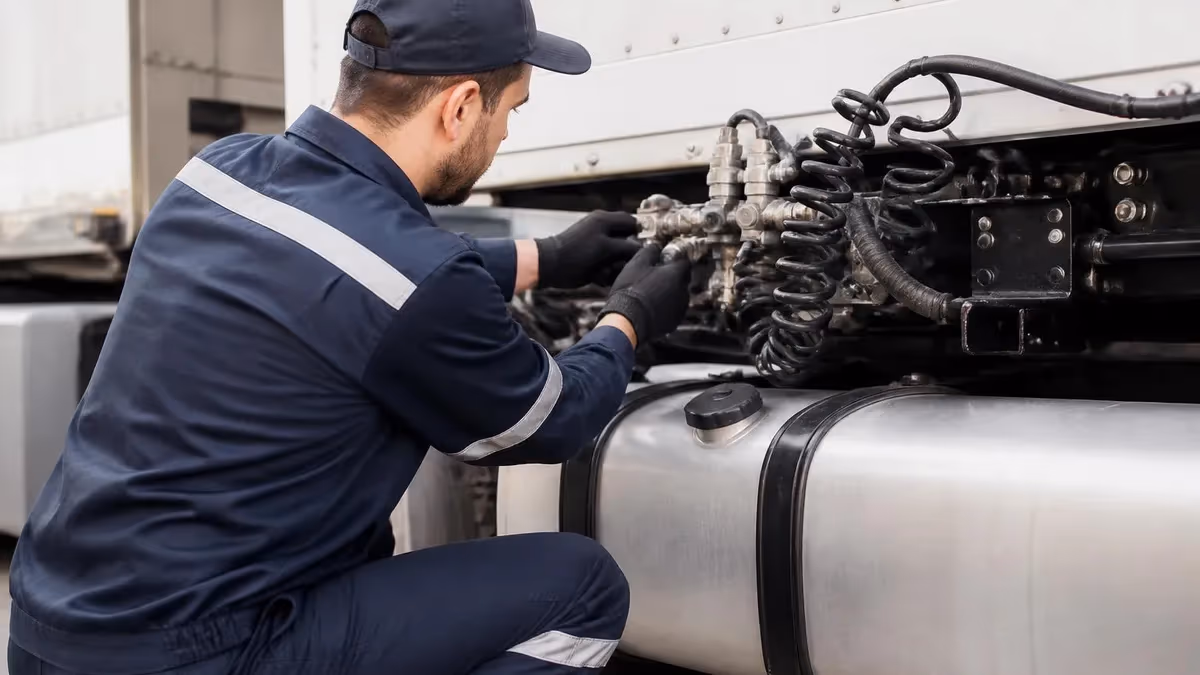
An air brake system uses compressed air instead of hydraulic fluid to apply stopping force at each wheel. The engine-driven compressor pumps air into storage reservoirs, the governor controls when the compressor loads and unloads, and the foot valve (treadle) modulates how much pressure reaches the brake chambers when you press the pedal. Understanding this flow is essential before you take the cdl air brake test, because nearly half of the written questions reference these core components by name.
The compressor typically runs continuously while the engine is on, but the governor cycles it between loaded and unloaded states. Cut-in pressure is usually 100 psi — the point where the governor tells the compressor to start building. Cut-out pressure sits near 125 psi, where the governor unloads the compressor to prevent over-pressurization. These numbers appear on the written exam almost every time, so commit them to memory before test day.
Once compressed, air travels through a one-way check valve into the supply reservoir, then splits into primary and secondary reservoirs. This dual-circuit design is a federal safety requirement: if one circuit fails, the other still provides braking. The primary circuit usually controls the drive axle brakes, while the secondary controls steering axle and trailer brakes. A failure in either circuit triggers a dashboard warning and reduces stopping power, but never eliminates it entirely.
When you press the brake pedal, the treadle valve releases metered air from the reservoirs through service lines to each brake chamber. The chamber is a metal can containing a rubber diaphragm and a pushrod. Incoming air pushes the diaphragm, the pushrod extends, and a slack adjuster converts that linear motion into rotational force on the S-cam. The S-cam then spreads the brake shoes against the drum, creating friction that slows the wheel.
Slack adjusters are one of the most heavily tested items because they wear out and must be checked at every pre-trip. Pushrod travel beyond legal limits — typically 1 inch on standard chambers — is an out-of-service violation and a common reason DOT inspectors put trucks on the side of the road. Automatic slack adjusters are now standard, but they still require manual verification, and never assume they are self-correcting beyond manufacturer specifications.
Spring brakes are the system's failsafe. Heavy coil springs inside the rear brake chambers apply mechanical force when air pressure drops below roughly 20 to 45 psi. This is why a parked truck with no air still has functional parking brakes — the springs hold the shoes against the drums until pressurized air pushes them back. Releasing the yellow parking brake knob in the cab allows air to compress those springs and free the wheels for movement.
Air dryers and alcohol evaporators remove moisture from the system before it reaches the reservoirs. Moisture is the enemy of air brakes — it freezes in winter, corrodes metal lines, and degrades rubber seals. In extreme cold, some operators add air brake antifreeze (typically methanol-based) to the system through an alcohol evaporator. Modern trucks rely on heated air dryers instead, but knowing both methods exists is testable knowledge for the endorsement exam.
Air Brake Practice Test Questions
Prepare for the Air Brake Test exam with our free practice test modules. Each quiz covers key topics to help you pass on your first try.
Air Brake Adjustment & Testing
Air Brake Exam Questions covering Adjustment & Testing. Master Air Brake Test concepts for certification prep.
Air Brake Air Pressure Regulation & Control
Free Air Brake Practice Test featuring Air Pressure Regulation & Control. Improve your Air Brake Exam score with mock test prep.
Air Brake Emergency Procedures & Safety Pr...
Air Brake Mock Exam on Emergency Procedures & Safety Protocols. Air Brake Study Guide questions to pass on your first try.
Air Brake Legal Requirements & Compliance
Air Brake Test Prep for Legal Requirements & Compliance. Practice Air Brake Quiz questions and boost your score.
Air Brake Pre-trip Inspection Procedures
Air Brake Questions and Answers on Pre-trip Inspection Procedures. Free Air Brake practice for exam readiness.
Air Brakes Basic
Air Brake Mock Test covering Air Brakes Basic. Online Air Brake Test practice with instant feedback.
Air Brakes (Reading)
Free Air Brake Quiz on Air Brakes (Reading). Air Brake Exam prep questions with detailed explanations.
Air Brake System Components & Functions
Air Brake Practice Questions for System Components & Functions. Build confidence for your Air Brake certification exam.
Air Brake Test Adjustment & Testing
Air Brake Test Online for Test Adjustment & Testing. Free practice with instant results and feedback.
Air Brake Test Air Brake Driving Technique...
Air Brake Study Material on Test Air Brake Driving Techniques & Vehicle Control. Prepare effectively with real exam-style questions.
Air Brake Test Air Brake Maintenance & Tro...
Free Air Brake Test covering Test Air Brake Maintenance & Troubleshooting. Practice and track your Air Brake exam readiness.
Air Brake Test Air Pressure Regulation & C...
Air Brake Exam Questions covering Test Air Pressure Regulation & Control. Master Air Brake Test concepts for certification prep.
Air Brake Test Emergency Procedures & Safe...
Free Air Brake Practice Test featuring Test Emergency Procedures & Safety Protocols. Improve your Air Brake Exam score with mock test prep.
Air Brake Test Legal Requirements & Compli...
Air Brake Mock Exam on Test Legal Requirements & Compliance. Air Brake Study Guide questions to pass on your first try.
Air Brake Test Pre-trip Inspection Procedures
Air Brake Test Prep for Test Pre-trip Inspection Procedures. Practice Air Brake Quiz questions and boost your score.
Air Brake Test System Components & Functions
Air Brake Questions and Answers on Test System Components & Functions. Free Air Brake practice for exam readiness.
Air Brake MCQ
Air Brake Mock Test covering MCQ. Online Air Brake Test practice with instant feedback.
CDL Air Brake Test: Sections, Format, and Scoring
The written air brake test typically contains 25 multiple-choice questions, though some states use as few as 20 or as many as 30. You must answer at least 80 percent correctly to pass, meaning no more than 5 wrong answers on a standard 25-question exam. Questions cover system components, pressure ranges, dual-circuit design, warning devices, spring brake operation, and pre-trip inspection procedures.
Most states allow you to take the written test on the same day as your general CDL knowledge exam. You will take it on a touchscreen kiosk at the DMV or testing center. Failing twice in some jurisdictions triggers a mandatory waiting period of 7 to 14 days before retesting, so prepare thoroughly before sitting down. Practice tests scoring 85 percent or higher predict first-attempt success rates above 80 percent.

Should You Pursue the Air Brake Endorsement?
- +Required for nearly every full-time CDL job nationwide
- +Average pay increase of $3,000 to $8,000 per year
- +Opens access to vocational, transit, and over-the-road work
- +Endorsement transfers between states with your CDL
- +No additional federal fee in most jurisdictions
- +Stronger understanding of vehicle safety systems
- +Eliminates the L restriction on your license
- −Requires 20 to 40 hours of focused study
- −Skills test demands access to an air-equipped vehicle
- −Mistakes during pre-trip can fail you instantly
- −Some states charge $5 to $25 for the endorsement
- −Annual medical certification still required
- −Steeper liability exposure with heavier equipment
- −Retest waiting periods after multiple failures
Seven-Step Air Brake Pre-Trip Inspection Checklist
- ✓Step 1: Set parking brakes, chock wheels, and release service brakes to verify free movement.
- ✓Step 2: Build air pressure to governor cut-out (around 125 psi) and confirm compressor stops loading.
- ✓Step 3: Fan brakes by pumping pedal to verify governor cut-in at approximately 100 psi.
- ✓Step 4: Test air pressure leakage with engine off — no more than 3 psi/min single, 4 psi/min combo.
- ✓Step 5: Test applied-pressure leakage by pressing brake — no more than 4 psi/min single, 6 psi/min combo.
- ✓Step 6: Verify low-air warning light and buzzer activate before pressure drops below 60 psi.
- ✓Step 7: Continue fanning until spring brakes activate (yellow knob pops out) between 20-45 psi.
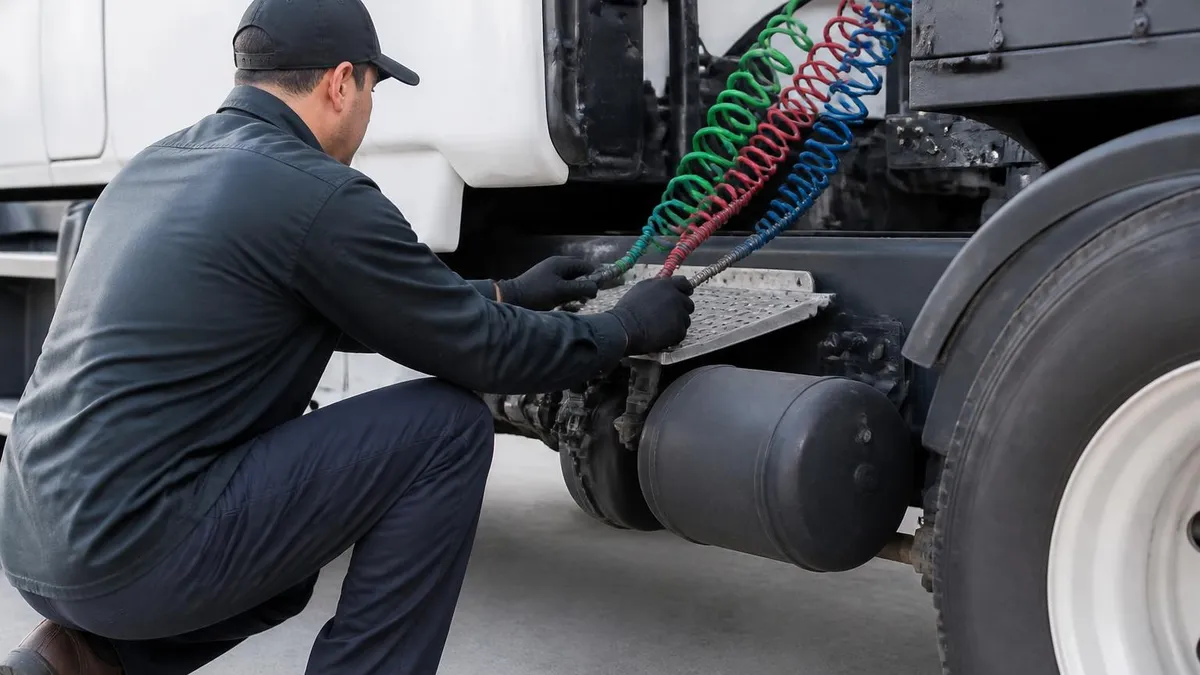
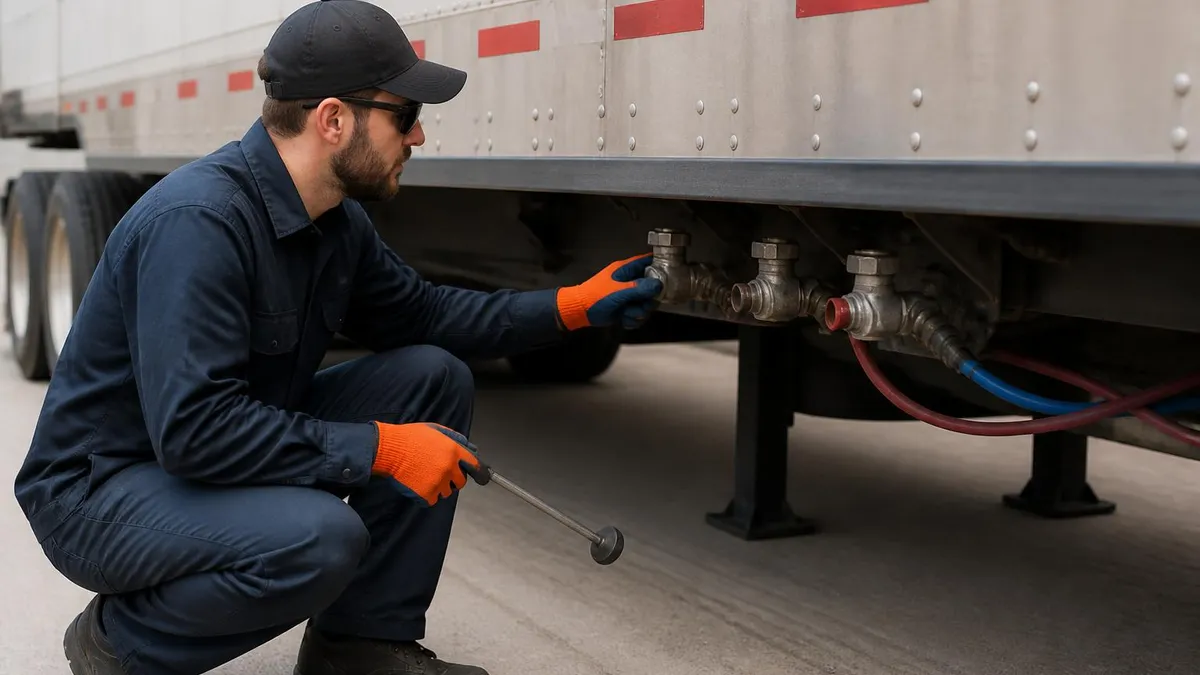
- ✓Visually inspect all air lines, glad-hands, and connections for cracks or leaks before each trip.
- ✓Check pushrod travel on each slack adjuster — should not exceed 1 inch on standard chambers.
- ✓Drain all air reservoirs daily to remove accumulated moisture and oil contamination.

The Four Pressure Thresholds Every Examiner Asks About
Cut-in: 100 psi. Cut-out: 125 psi. Low-air warning: must activate at or before 60 psi. Spring brakes apply automatically: between 20 and 45 psi. These four numbers appear on roughly 30 percent of written exam questions. Drivers who can recite them instantly pass at significantly higher rates than those who guess.
Emergency procedures separate competent CDL holders from drivers who panic when something goes wrong. The most common emergency on the road is gradual air loss, signaled first by a warning light and buzzer at 60 psi, then by spring brake activation if pressure continues falling. Knowing exactly what to do when you hear that buzzer at 65 mph is the single most important survival skill the air brake test is designed to measure.
When the low-air warning sounds, your first action is to safely exit the roadway and stop. Do not continue driving in hopes the pressure will recover — once the warning has triggered, you have only seconds to minutes before spring brakes apply automatically. Spring brake application at highway speed is violent, uncontrollable, and frequently leads to jackknifes, rollovers, and total loss of steering. Pull over the moment the warning sounds.
Brake fade is another tested emergency. When you ride the brakes down a long grade, friction heat causes the drums to expand away from the shoes, reducing stopping power. The correct technique is to descend at a low gear that allows the engine to do most of the slowing, then apply the brakes hard enough to slow 5 mph below your target speed, release, and repeat. This is called the snub-and-release method, and it appears on the written exam.
Hydraulic brake fade does not occur in air systems, but heat fade absolutely does. On grades exceeding 6 percent, professional drivers downshift before entering the descent and use engine retarders, jake brakes, or transmission retarders to control speed. Service brakes are reserved for additional speed control, never as the primary descent method. Examiners test this concept verbally during road exams in mountainous regions.
If your trailer breaks away or the tractor protection valve fails, the trailer's emergency brakes apply automatically through the emergency air line. This is the system working as designed — it prevents a runaway trailer from continuing down the road without brakes. Drivers should pull over immediately, inspect for damage, and reseat the glad-hands or call for roadside repair. Never attempt to drive a tractor with a disconnected trailer emergency line.
Total air loss is rare but catastrophic. If both circuits fail simultaneously, spring brakes apply and the vehicle stops, often abruptly. The correct response is to keep the wheel steady, avoid sudden steering inputs, and let the springs do their work. Trying to coast off the road typically makes things worse because you have no brakes to modulate the stop. Once stopped, set the parking brake, exit the vehicle, and call for assistance.
Runaway truck ramps exist on most major mountain descents precisely because brake failure remains a real risk. Knowing the location of every ramp on your route before you start the descent is professional practice. The written exam may ask you to identify when to use a ramp — the answer is always before you have lost complete control, not after.
Continuing to drive after the low-air warning activates is a Federal Motor Carrier Safety Regulation violation and a primary cause of catastrophic CDL accidents. The buzzer means you have seconds to pull over before spring brakes apply at full force, which can cause immediate loss of control at highway speed.
Test day strategy matters as much as content knowledge for many candidates. Arrive at the DMV at least 30 minutes early so you can review your notes one last time, use the restroom, and settle nerves before sitting at the kiosk. The air brake written exam typically takes 20 to 40 minutes, and there is no time pressure — slow down, read every question twice, and eliminate obviously wrong answers before selecting your response.
Common test traps include questions that swap cut-in and cut-out values, questions that ask about leakage rates per minute versus per check period, and questions that confuse the parking brake yellow knob with the trailer air supply red knob. Read the entire question before looking at answers. Examiners specifically write distractors that look correct at a glance but fail under careful reading.
For the skills test, dress in work-appropriate clothing — boots, long pants, and a shirt with sleeves. Bring a flashlight, gloves, and tire-pressure gauge if your testing center allows them. Many examiners will ask you to demonstrate components both visually and verbally, meaning you point to the air compressor and say the word "compressor" aloud while explaining its function. Silent inspections fail.
Practice the verbal pre-trip aloud at home, in your driveway, or with a study partner who can correct you. Recording yourself on your phone is one of the highest-leverage study techniques because it forces you to hear gaps and hesitations. Drivers who can recite the entire seven-step check from memory in under five minutes routinely pass on the first attempt.
If your test vehicle is a rental, arrive an hour early to inspect it thoroughly. Walk around it twice, pump the brakes, check the air gauge, drain the reservoirs, and verify the parking brake holds. The examiner is grading your competence, not the rental company's maintenance — if you point to a cracked air line and call it a defect, you have just demonstrated mastery, not failed inspection.
Hydration and food matter more than candidates realize. Test sessions can last three to four hours including waiting time, written exam, pre-trip, and road test. Eat a real meal beforehand, bring water, and avoid heavy caffeine that will make you jittery during the skills portion. Steady hands and a calm voice during pre-trip narration project competence and reduce examiner scrutiny.
Finally, if you fail any portion, request a detailed score report. Most states will tell you which sections you missed and by how many points. Use that report to focus your retake study rather than starting over from scratch. Drivers who fail once and study targeted weak areas pass on the second attempt at rates above 85 percent.
Practical preparation goes beyond the exam itself. Drivers who walk into their first job already familiar with air brake quirks reduce on-the-job risk and accelerate their path to independent runs. The week before your scheduled test, perform a full pre-trip on any air-equipped vehicle you can access — borrow time from an employer, school, or friend who owns a commercial truck. Hands-on familiarity transforms textbook knowledge into reflexive competence.
Keep a small pocket reference card with the four critical pressure numbers and the seven-step check sequence. Many veteran drivers still carry one years into their career. The card is not a crutch — it is a professional habit that prevents memory lapses during high-stress moments like roadside inspections or post-accident interviews. Laminate it and store it in your wallet or visor.
Plan to drain reservoirs every day of your first month behind the wheel. Moisture accumulation is the leading cause of frozen air lines in winter and corrosion-related failures year-round. Pulling the petcock for thirty seconds at each reservoir is one of the cheapest forms of preventive maintenance available, and it builds the muscle memory that distinguishes professional operators from casual drivers.
Learn to listen to your truck. Healthy air systems make predictable sounds — the compressor cycles roughly every few minutes, the governor clicks distinctly between loaded and unloaded states, and air dryers purge with a sharp burst every cycle. Anything outside that pattern deserves immediate investigation. Hissing during stops, slow build-up after starts, or extended compressor cycling all point to leaks that should be fixed before they become emergencies.
Build relationships with the mechanics at your terminal or shop. They know the failure patterns specific to your fleet's trucks, the brand-specific quirks of various compressor models, and the seasonal issues that crop up in your operating region. A two-minute conversation about what to watch for can prevent a six-hour roadside breakdown. Treat shop staff as partners, not adversaries.
Track your own pre-trip findings in a small notebook for the first six months. Note what defects you caught, what you missed, and what the mechanic found. This feedback loop accelerates your eye for problems faster than any classroom training. Drivers who keep these journals routinely score in the top tier of company safety rankings within their first year.
Finally, treat the endorsement as the start of your education, not the end. The air brake system is one of dozens of complex assemblies on a modern commercial vehicle, and ongoing learning separates safe career drivers from those who plateau. Subscribe to industry publications, watch maintenance videos from major component manufacturers, and attend any free training your employer offers. The first endorsement is just the foundation.
Air Brake Questions and Answers

About the Author
Educational Psychologist & Academic Test Preparation Expert
Columbia University Teachers CollegeDr. Lisa Patel holds a Doctorate in Education from Columbia University Teachers College and has spent 17 years researching standardized test design and academic assessment. She has developed preparation programs for SAT, ACT, GRE, LSAT, UCAT, and numerous professional licensing exams, helping students of all backgrounds achieve their target scores.