MRI Spine Scan Guide: Procedure, Preparation & What to Expect
MRI spine guide for patients and techs. What the scan shows, prep, contrast, claustrophobia tips, scan time, and how to read your report.
An MRI spine exam pulls back the curtain on the bones, discs, nerves, and soft tissues running from the base of your skull down to your tailbone. Doctors order it when back pain refuses to budge, when leg numbness creeps in, or when injury raises the question of a herniated disc or a pinched nerve. If you are a patient walking into the imaging suite, the procedure can feel intimidating. The tunnel is narrow. The machine is loud. Nobody really explains what is happening on the other side of the glass.
This guide fixes that. You will learn what an MRI spine scan actually shows, how to prepare, what happens during those 30 to 60 minutes, and how to read the report your doctor hands back. If you are a student preparing for the MRI registry exam, you will also find the protocol breakdowns, coil selections, and safety checks you need to know cold.
What an MRI Spine Scan Actually Shows
The spine is a stack of 33 vertebrae cushioned by 23 intervertebral discs, threaded with a spinal cord that carries every signal between your brain and your limbs. MRI is the only imaging method that shows all of this in one go: bone marrow, disc hydration, nerve roots, ligaments, the cord itself, and any abnormal fluid or mass pressing on them. X-rays cannot do that. CT scans miss the soft tissue detail. Ultrasound cannot penetrate bone.
Radiologists divide the spine into four regions for imaging: cervical (neck, C1-C7), thoracic (mid-back, T1-T12), lumbar (low back, L1-L5), and sacral (S1-S5 plus coccyx). Most orders target one region. A full spine MRI covers all of it but takes roughly 90 minutes and is reserved for conditions like multiple sclerosis screening, metastatic disease workup, or unexplained neurological symptoms.
What pops up on the images? Disc bulges and herniations show as dark protrusions pressing into the spinal canal. Nerve root compression appears where a disc or bone spur narrows the foramen. Spinal stenosis shows up as a tight, hourglass-shaped canal squeezing the cord. Tumors light up with contrast. Infections like discitis or epidural abscess show fluid where it should not be. Fractures hidden by osteoporosis appear as bright marrow edema on STIR sequences.
MRI Spine by the Numbers
How to Prepare for Your MRI Spine
Preparation starts the moment you book the appointment. The technologist will ask a long screening question list, and there is a reason for every item. Metal implants, pacemakers, cochlear devices, aneurysm clips, deep brain stimulators, and even some tattoo inks can interact dangerously with a 1.5 or 3 Tesla magnet. Tell them about every surgery you have ever had. Old shrapnel from a childhood injury? They need to know.
If your scan uses contrast (gadolinium), you may need a kidney function test first. Patients with reduced kidney function (eGFR under 30) face a small risk of nephrogenic systemic fibrosis. Modern macrocyclic agents like gadobutrol have nearly eliminated that risk, but the radiology team still screens carefully. Pregnant patients usually skip contrast unless absolutely necessary.
The night before, sleep normally. There is no fasting requirement for a routine spine MRI without contrast. If sedation is planned, you will be told to stop eating six hours before. Wear loose, comfortable clothes without metal zippers, snaps, or underwire. Many imaging centers provide scrubs. Leave your watch, jewelry, hairpins, and wallet in the locker. Even credit cards can demagnetize.
Eat a light meal beforehand. An empty stomach mixed with anxiety inside a noisy tube is a recipe for nausea. If you suffer from claustrophobia, ask your doctor about a mild oral sedative such as lorazepam. Some centers offer wide-bore or open MRI scanners, though image quality drops slightly on open systems. Stand-up MRI exists for selected indications but is not always covered by insurance.
Spine Regions Covered by MRI
Neck pain, radiculopathy into the arms, cord compression, post-whiplash injury, multiple sclerosis lesions in the upper cord.
Mid-back pain, herniated thoracic discs (rare but serious), cord tumors, metastatic disease, syringomyelia.
Low back pain, sciatica, disc herniation, spinal stenosis, cauda equina syndrome, spondylolisthesis.
Sacroiliitis, sacral stress fractures, Tarlov cysts, coccyx pain, sacral chordoma screening.
What Happens During the Scan
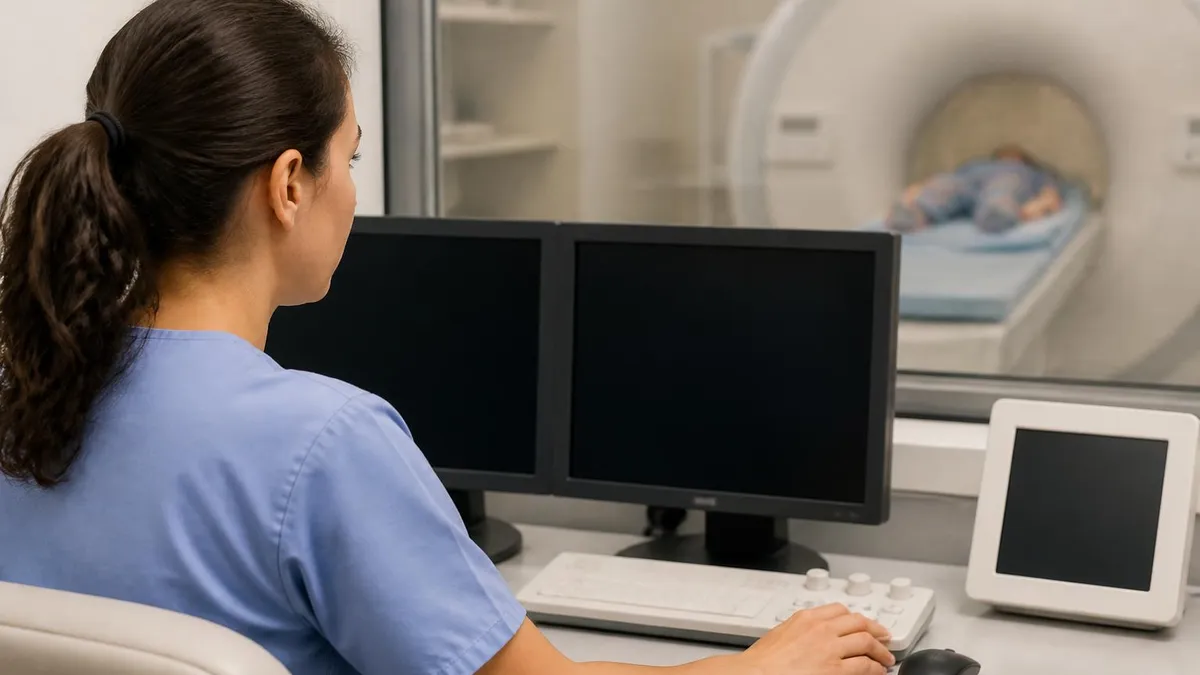
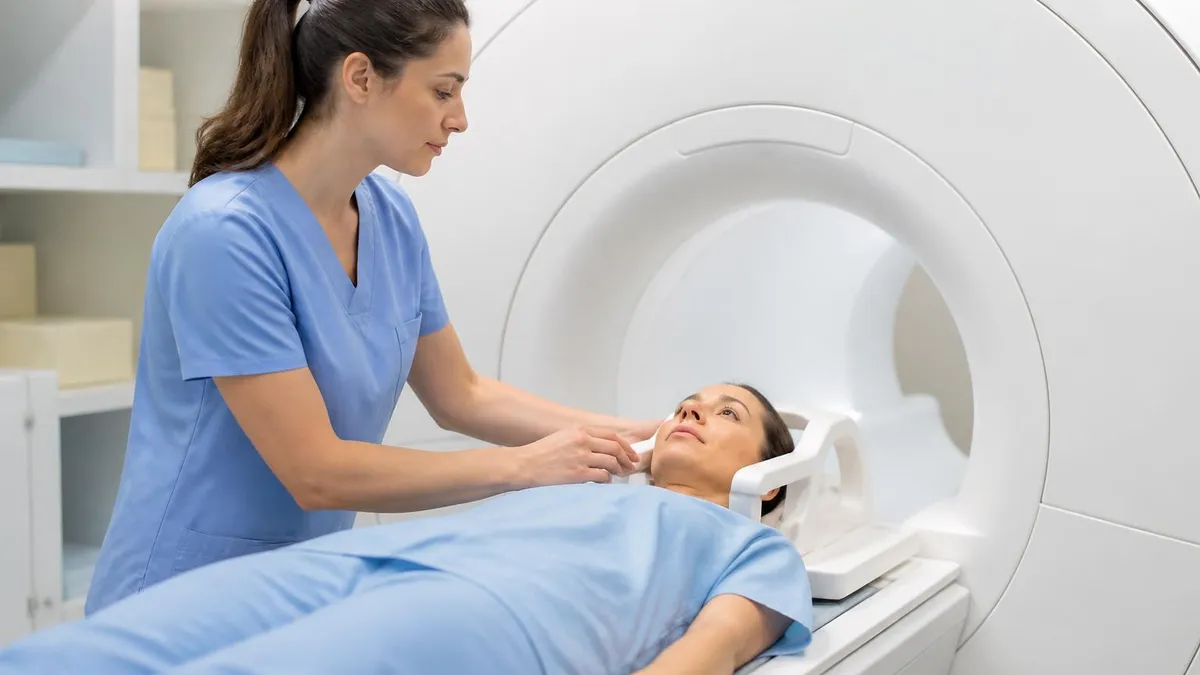
You arrive, change into a gown, and meet the technologist. They walk you through the screening one more time. If contrast is ordered, an IV goes into your arm. Then you lie down on a padded table, head first or feet first depending on which region they are scanning. A coil — the antenna that picks up the MRI signal — is placed around or under your spine. For cervical scans, it cradles your neck. For lumbar work, it lies under your low back.
The table slides into the bore. You will feel close. The magnet bore is typically 60 to 70 centimeters wide. Your face may be inches from the top. Most people find it tolerable once they realize they can breathe normally and the staff is right there on the intercom.
Then the noise starts. MRI machines are loud, sometimes 100 decibels or more, because the gradient coils rapidly switch on and off. You will get earplugs, headphones, or both. Some centers pipe in music. Each pulse sequence sounds different: a steady knocking, a high-pitched whine, or a rhythmic buzz. Each one lasts two to seven minutes.
Your only job is to stay still. Movement blurs the images and forces a repeat sequence. Breathe slowly. If you need to swallow or shift, wait until between sequences when the noise stops. The technologist will check in regularly. You hold a squeeze ball; one press brings them running. If contrast is given, it usually goes in about halfway through. You may feel a cool sensation up your arm.
Claustrophobia Tip
Close your eyes before you go into the bore and keep them closed. Without visual cues, the brain stops registering how tight the space is. Combine this with slow nasal breathing and most patients finish the scan calmly. Wide-bore 3T scanners with 70cm openings also help, and many imaging centers will hand out an oral sedative if you ask in advance.
Reading Your MRI Spine Report
A radiologist usually finalizes your report within 24 to 48 hours. Some emergency department scans are read in minutes. The report walks region by region. Vertebral body alignment first. Then disc heights, signal, and any bulges or herniations. Then the spinal canal, neural foramina, cord signal, and finally the paraspinal soft tissues.
You will see words like desiccation (loss of disc water content), annular fissure (small tear in the disc ring), protrusion (mild bulge), extrusion (larger herniation past the disc edge), and sequestration (a free fragment of disc material). None of these terms automatically mean surgery. Many findings are normal age-related changes that have nothing to do with your symptoms.
Stenosis is graded mild, moderate, or severe. Foraminal narrowing follows the same scale. Cord signal changes (myelomalacia) suggest chronic cord injury and matter a lot more than a routine disc bulge. If you see the word incidental, the radiologist is telling your doctor to ignore that finding unless symptoms match.
Bring the report to a clinician who knows the rest of your story. The image is one data point. Your pain pattern, neurological exam, age, occupation, and prior treatments determine what comes next. Studies consistently show that 30 to 40 percent of people with no back pain at all have disc bulges on MRI. The image does not equal the diagnosis.
Common MRI Spine Sequences
Shows anatomy crisply. Fat appears bright, fluid appears dark. Used to assess marrow, fat planes, and post-contrast enhancement when comparing pre and post images. The radiologist usually scrolls T1 first to orient.
Who Orders an MRI Spine and Why
Primary care physicians, orthopedic surgeons, neurologists, neurosurgeons, pain management specialists, and emergency medicine physicians all order spine MRIs. The triggers vary. Six weeks of back pain that has not responded to physical therapy. New leg weakness or foot drop. Loss of bladder or bowel control — a red flag for cauda equina syndrome, a surgical emergency. Suspected spinal tumor in a patient with known cancer. Worsening neurological exam.
If you are studying for the MRI procedures exam, know the appropriate use criteria. Routine low back pain under six weeks rarely warrants imaging. Red flags like fever, unexplained weight loss, recent trauma, IV drug use, or progressive neurological deficit move the patient straight to MRI. Insurance pre-authorization often hinges on documenting failed conservative care.
Workflow matters too. A patient arriving from the ER with new paralysis goes to the magnet immediately. An outpatient lumbar MRI may wait days or weeks. Scanners are scheduled tightly, and protocols vary by indication. A pre-op surgical planning study uses different sequences than a screening exam for multiple sclerosis.
Cost, Insurance, and Where to Get One
In the United States, an MRI spine ranges from roughly $400 at independent imaging centers to over $3,000 at hospital outpatient departments. Hospitals charge more because of facility fees. Imaging centers that contract with insurers often beat hospital prices by 50 to 70 percent for the same scan on the same scanner brand. Use a price transparency tool before you go.
Most insurance plans cover medically necessary MRI spine scans after pre-authorization. Your referring doctor submits clinical notes proving conservative care was tried. High-deductible plans may leave you with a hefty out-of-pocket bill. Always confirm coverage before booking.
Pacemakers, certain old aneurysm clips, cochlear implants, and some neurostimulators are absolute contraindications. Recent eye injury with possible metal fragments? You need orbital X-rays first. Pregnancy in the first trimester is a relative contraindication unless the scan is clinically urgent. Always disclose every implant — even old ones you barely remember.
Day-of-Scan Checklist
- ✓Arrive 15 to 30 minutes early to complete the safety screening form thoroughly with the technologist.
- ✓Wear metal-free clothing; many imaging centers provide cotton gowns or scrubs to change into.
- ✓Remove jewelry, watches, hairpins, hearing aids, dentures with metal, and any wearable monitors.
- ✓Bring a complete list of current medications, allergies, and prior surgeries to share at intake.
- ✓Bring contact info for your referring physician so the radiology report routes correctly.
- ✓Tell the tech about any tattoos, body piercings, dental implants, or other implanted devices.
- ✓Use the restroom before the scan begins; you cannot move comfortably once positioning is complete.
- ✓Eat a light meal beforehand unless sedation or specific prep instructions were ordered by your provider.

For Technologists: Protocol and Coil Selection
If you are sitting at the console rather than on the table, the workflow looks very different. You build a protocol around the clinical question, not the body part. Suspected disc herniation gets sagittal and axial T2, sagittal T1, and a STIR sequence at minimum. Suspected infection or tumor adds T1 fat-saturated post-contrast in both planes. Multiple sclerosis screening needs sagittal STIR or T2 with axial proton density through suspicious lesions.
Coil choice drives image quality. The standard spine array coil consists of multiple receive elements running the length of the back. Activate only the elements covering the imaged region. Too many active elements adds noise without adding signal. For cervical spine, a dedicated head and neck coil paired with the upper spine elements gives the best SNR. For lumbar work in larger patients, you may need a body matrix coil layered on top to fill in coverage.
Patient positioning is half the battle. Supine with arms at the sides. Pad the knees with a bolster for lumbar comfort. Pad the head and neck so the cervical lordosis is preserved. A poorly positioned patient produces curved sagittal images that take extra reformatting time. If the patient cannot lie flat, prone or lateral decubitus positioning may save the exam at the cost of some artifact.
Slice planning matters. Sagittal slices should cover from one neural foramen across to the other, angled along the long axis of the cord. Axial slices through the lumbar spine should be angled parallel to each disc, not stacked perpendicular to the table. Stacks parallel to discs let the radiologist measure foraminal narrowing and central canal area accurately. Free-form stacks invented to save time end up costing more time in recalls.
Common Findings and What They Mean
Disc desiccation is the most common abnormality reported. It simply means the disc has lost some water content, showing darker on T2 images. Almost everyone over 30 has some desiccation. By itself it explains nothing about pain. The body adapts.
Modic changes describe vertebral endplate signal alterations next to degenerative discs. Type 1 (bright on T2, dark on T1) suggests active inflammation and correlates with pain. Type 2 (bright on both) shows fatty replacement and chronic remodeling. Type 3 (dark on both) reflects sclerosis. Knowing the type helps target therapy.
Schmorl nodes are small herniations of disc material into the vertebral body endplate. Usually incidental. Hemangiomas in vertebral bodies look like bright fatty lesions and are also typically incidental. Tarlov cysts at the sacral nerve roots are fluid-filled outpouchings; most are asymptomatic, but large ones can press on roots and cause pain.
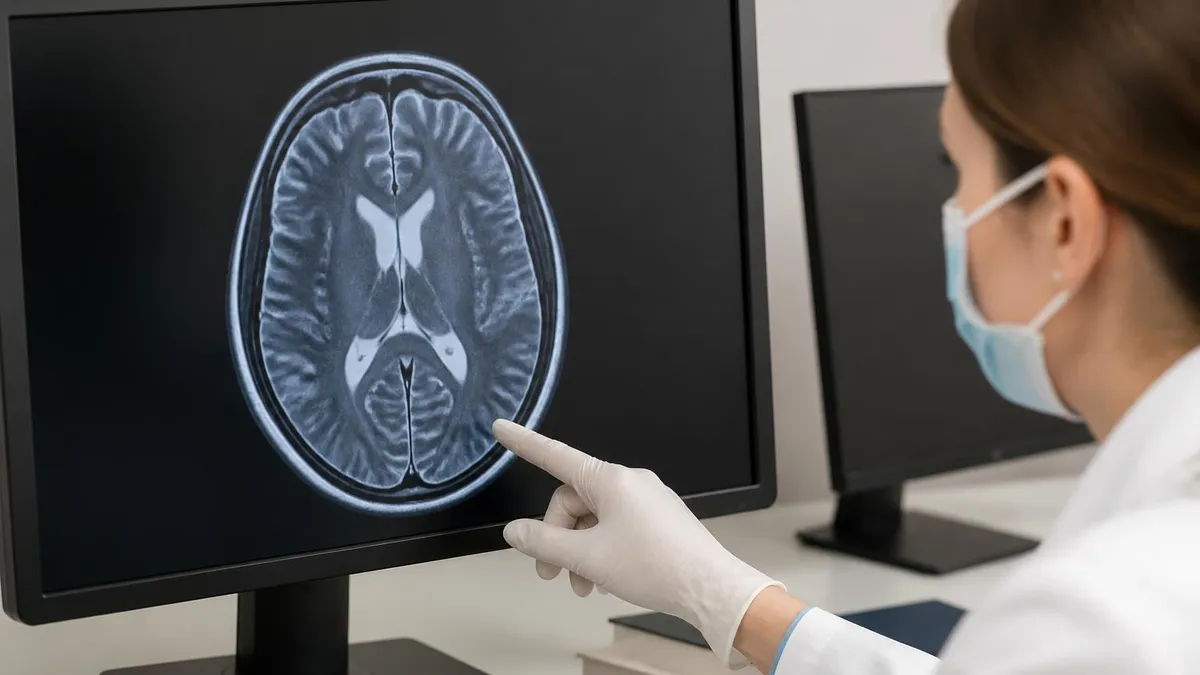
Cord findings are different. A high T2 signal inside the spinal cord (myelomalacia) usually means chronic compression or prior cord injury. New cord lesions in a young adult raise concern for demyelinating disease and trigger a brain MRI. Cord enhancement on post-contrast images is rarely normal and demands urgent neurology consult.
Artifacts: The Pitfalls That Ruin Good Studies
Even a perfectly indicated scan with the right protocol can be wrecked by artifact. The technologist who recognizes patterns early saves everyone time and saves the patient a repeat trip. Motion artifact is the most common offender — ghosting along the phase-encode direction whenever a patient shifts. Quick fixes include single-shot fast spin echo or BLADE/PROPELLER motion-correction sequences.
CSF pulsation creates dark flow voids in the canal that can be mistaken for cord lesions. Susceptibility artifact around spinal hardware demands fast spin echo with high bandwidth, or a dedicated metal artifact reduction protocol. Recognize them, correct them, and your radiologist will thank you.
After the Scan: Treatment and Follow-Up
Once the report is in hand, your physician matches findings to symptoms. Mild disc bulges with matching radicular pain often respond to physical therapy, anti-inflammatories, and time. Six to twelve weeks of conservative care resolves most lumbar disc symptoms without surgery. Epidural steroid injections offer targeted relief for persistent nerve root inflammation.
Surgery enters the conversation when conservative care fails, when neurological deficit progresses, or when red flag findings demand it. Microdiscectomy for focal disc herniation has decades of evidence behind it. Spinal fusion for instability is more controversial and reserved for clear cases of mechanical instability or recurrent disc disease. A second opinion is always reasonable before major spine surgery. Follow-up MRI is rarely needed for routine degenerative disease — re-scan only if symptoms worsen significantly, if new neurological deficit appears, or to monitor known tumors and infections.
Whether you are a patient walking into the suite for the first time or a tech building protocols at the console, an MRI spine exam rewards preparation. Understand what the scan shows, ask thoughtful questions, and read the report alongside someone who knows your clinical story. That is how imaging becomes useful information rather than a source of anxiety.
Common MRI Artifacts and Fixes
Ghosting along the phase-encode direction. Coach slow breathing or switch to single-shot fast spin echo for restless patients.
Dark flow voids on T2 sequences mimic intradural lesions. Saturation bands above and below the field of view reduce them.
Signal dropout around metal hardware after spinal fusion. Use fast spin echo with high bandwidth or dedicated MARS protocols.
Tissue from outside the field of view folds into the image. Increase phase oversampling or expand the field of view.
MRI Questions and Answers
About the Author
Medical Laboratory Scientist & Clinical Certification Expert
Johns Hopkins UniversityDr. Sandra Kim holds a PhD in Clinical Laboratory Science from Johns Hopkins University and is certified as a Medical Technologist (MT) and Medical Laboratory Scientist (MLS) through ASCP. With 16 years of clinical laboratory experience spanning hematology, microbiology, and molecular diagnostics, she prepares candidates for ASCP board exams, MLT, MLS, and specialist certification tests.