MRI Shoulder: Indications, What It Shows, Preparation, Procedure, and Results Interpretation
MRI shoulder guide: 🟢 what it shows, common indications, preparation, the procedure itself, contrast use, results timing, and how to interpret findings.
An MRI of the shoulder is one of the most commonly ordered orthopedic imaging studies in the U.S. It evaluates rotator cuff tears, labral injuries, biceps tendon issues, impingement, arthritis, and many other conditions. Unlike X-rays (which show only bone) or ultrasound (which gives a limited view), MRI provides detailed images of all shoulder tissues — bones, cartilage, ligaments, tendons, muscles, and blood vessels — without radiation.
What MRI shoulder shows. Rotator cuff tendons (supraspinatus, infraspinatus, teres minor, subscapularis) — assessment for partial or full thickness tears. Labrum (glenoid rim cartilage) — tears (SLAP, Bankart). Biceps tendon — long head tear, dislocation. Joint cartilage — wear, defects, arthritis. Bone marrow — bruising, edema, lesions, occult fractures. Subacromial bursa — bursitis, swelling. AC joint — arthritis, separation. Glenohumeral joint — capsule, ligaments, effusion.
When MRI is ordered. Persistent shoulder pain not responding to conservative treatment. Suspected rotator cuff tear. Shoulder instability or repeated dislocations. Sports injuries requiring detailed evaluation. Pre-surgical planning. Failed prior treatment. Concern about deeper structures not seen on X-ray.
What it doesn't show well. Subtle bone fractures (CT or X-ray often better). Active inflammation processes (may need ultrasound for some). Foreign bodies (X-ray or CT). Most blood flow issues (Doppler ultrasound or CT angiography).
This guide covers indications, preparation, the procedure, contrast considerations, results interpretation, and what to do after your MRI. It's for patients undergoing or considering shoulder MRI and healthcare providers explaining the process.
What to Know
- Duration: 30-60 minutes typical
- Coil: Dedicated shoulder coil placed around joint
- Position: Supine, arm at side or slightly externally rotated
- Contrast: Used in ~30% of cases (labral or chronic issues)
- Magnet strength: 1.5T standard; 3T provides higher detail
- Cost: $300-3,000 depending on insurance and location
- Results: 1-7 days typically
- Indications: Pain, weakness, instability, sports injury, pre-surgery
- Common findings: Rotator cuff tear, labral tear, arthritis, biceps tear
- Alternative imaging: Ultrasound, CT, X-ray (each has different strengths)
Common conditions evaluated with shoulder MRI. The most frequent reasons for ordering.
Rotator cuff tear. Most common reason. The rotator cuff is four muscles/tendons (supraspinatus, infraspinatus, teres minor, subscapularis) that stabilize the shoulder. Tears classified as: partial-thickness (involves only part of tendon), full-thickness (complete tear through tendon), retracted (torn tendon pulled away from attachment). MRI shows tear size, location, retraction amount, atrophy of muscle, and associated findings. Determines surgical vs conservative management.
Labral tear. The labrum is fibrocartilage rim attached to the glenoid (socket). Two main types of labral tears: SLAP (Superior Labrum Anterior to Posterior) — tear of upper labrum often in throwers; Bankart — tear of lower labrum from anterior dislocation. Both significant; surgical repair common. MR arthrogram (with contrast injected into joint) is often used to better visualize labral tears.
Biceps tendon issues. Long head of biceps tendon runs through bicipital groove and inserts on labrum. Can rupture (snap-back/popeye sign) or dislocate from groove. MRI shows tear location, retraction, associated labral injury.
Impingement/bursitis. Inflammation in subacromial space from rotator cuff irritation or bursa swelling. Often associated with rotator cuff issues. MRI shows fluid in bursa, tendon signal change indicating tendinosis.
Acromioclavicular (AC) joint disease. Arthritis, separations, dislocations. MRI evaluates joint surfaces, ligaments, joint capsule.
Glenohumeral arthritis. Cartilage wear, bone spurs, joint effusion. MRI evaluates cartilage thickness, osteophytes, bone marrow edema.
Adhesive capsulitis (frozen shoulder). Joint capsule thickening, contracture. MRI helps confirm diagnosis when clinical exam suggests it.
Avascular necrosis (AVN). Bone death from blood supply loss. MRI is gold standard for early diagnosis. Various causes including steroid use, alcohol, trauma.
Tumors. Rare but important to detect. Soft tissue masses, bone tumors. MRI excellent for characterizing and staging.
Infection. Septic arthritis, osteomyelitis. MRI shows joint fluid, bone marrow edema, abscesses.
Post-surgical complications. Re-tear of repaired rotator cuff, hardware issues, infection. MRI is challenging post-surgery due to metal artifact; specialized protocols help.
Common Conditions
Most common reason. Partial or full-thickness; size, retraction.
SLAP or Bankart. Often needs arthrogram (with contrast).
Rupture or dislocation. Often associated with other injuries.
Subacromial space inflammation, bursitis, tendinosis.
Glenohumeral or AC joint. Cartilage wear, bone spurs.
Capsular thickening and contracture. Adhesive capsulitis.
Before your MRI shoulder. Preparation and what to expect.
Scheduling. Your doctor orders the MRI. The imaging center schedules it. Allow 1-7 days for scheduling depending on urgency. Provide insurance information; expect prior authorization in some cases (1-2 days additional).
Medications. Continue all regular medications. No special restrictions unless on metallic implants (see below). If concerned about anxiety in scanner, your doctor may prescribe a mild sedative — discuss in advance.
Food and drink. No restrictions for non-contrast scans. For contrast MRI, may have light food only 1-2 hours before scan.
Clothing. Wear comfortable clothes without metal (zippers, snaps, buckles, underwire bras). Many centers provide gowns. Remove jewelry, watch, glasses, hair clips, dentures with metal parts, hearing aids.
Metal screening. The biggest pre-MRI concern. Many implants are MRI-safe; some are not. Critical to disclose: cardiac pacemaker, ICD (defibrillator). Cochlear implant. Aneurysm clips. Some prosthetic heart valves. Insulin pump or other implanted infusion pumps. Magnetic dental implants. Body piercings (often need removal). Tattoos (generally OK, but may briefly heat). Metallic fragments from work or military service (especially in eye — requires X-ray screening first).
What's usually safe. Most modern joint replacements (hip, knee, shoulder). Most surgical clips, plates, screws. IUDs (most types). Most dental fillings and crowns.
Contrast considerations. If contrast will be used: discuss any prior contrast reactions; verify renal function (GFR); pregnancy considerations.
Anxiety and claustrophobia. The MRI tunnel can be challenging. Open MRI machines available (less powerful magnet, longer scan time). Talk to imaging center about sedation options (oral diazepam common). Bring a music or audio book — many systems pipe in sound.
Arrival. Arrive 30-45 minutes early. Complete paperwork. Metal screening with technologist. Provided gown or scrub. Securely store belongings.
Pre-MRI Checklist
Complete medical history form. Disclose: all implants (pacemaker, ICD, cochlear, aneurysm clips, joint replacements, plates/screws), pregnancy status, prior contrast reactions, kidney disease, claustrophobia, prior MRIs and where (for comparison).
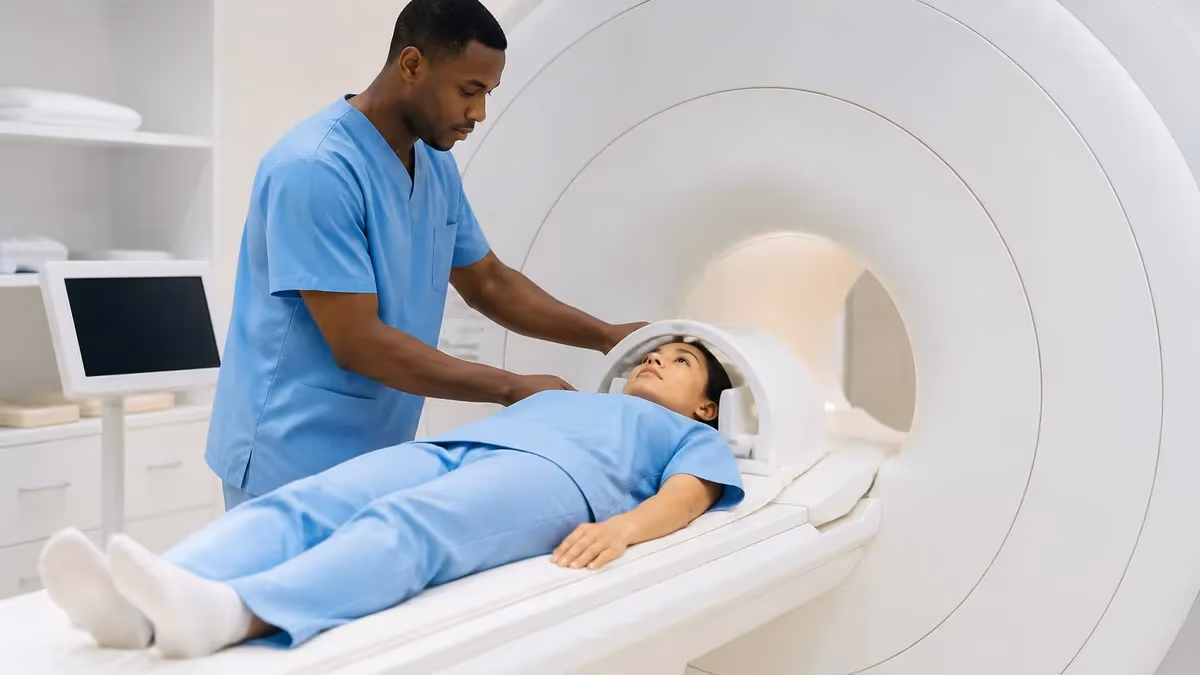
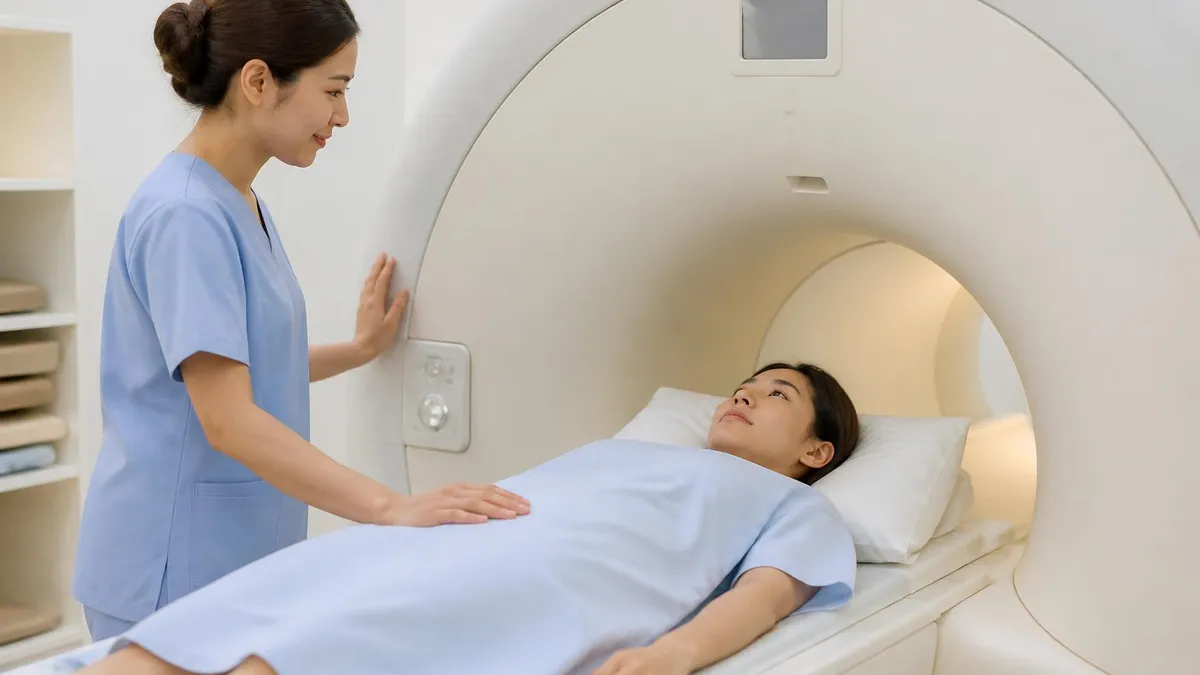
The MRI procedure itself. What happens during the 30-60 minute scan.
Step 1: Final preparation. Empty bladder. Remove all remaining metal. Technologist confirms metal screening. Position you on the MRI table.
Step 2: Positioning. Lie supine (on back). Arm placed at side or slightly externally rotated for optimal imaging. Shoulder coil (sensitive antenna) wrapped around your shoulder. The coil is essential for high-quality images.
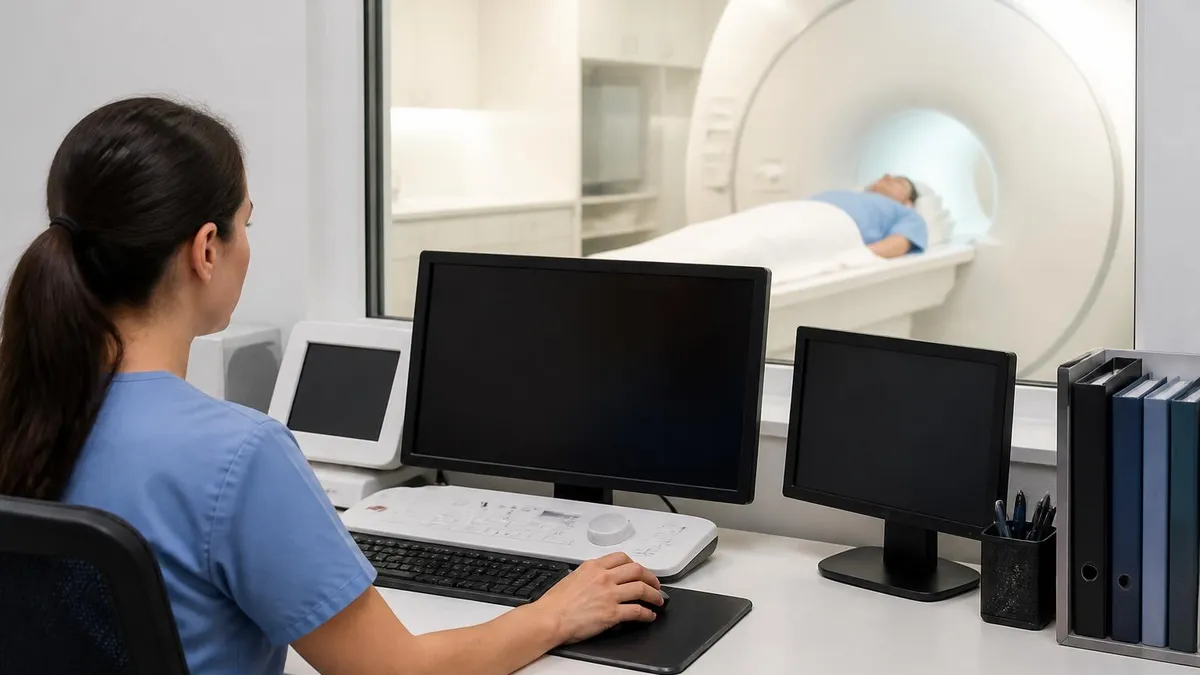
Step 3: Table moves into magnet. The table slides into the scanner tunnel. Your head and torso are typically inside the tunnel. The scanner is open at both ends.
Step 4: Headphones and call button. Hearing protection (foam plugs and headphones) — MRI is LOUD (90-120 dB). Many systems play music. Call button to alert staff if needed.
Step 5: Multiple sequences. The MRI captures images using several different 'pulse sequences' that show different aspects of tissue: T1-weighted (anatomy, fat). T2-weighted (fluid, edema). Proton density (cartilage, ligaments). STIR (fat suppression, edema-sensitive). Fast spin echo. Each sequence takes 3-10 minutes. The scanner makes loud noises (clicking, banging, buzzing) that change with each sequence.
Step 6: Stay still. Movement degrades image quality. Try to remain as still as possible. Breath can affect images of upper body. Most sequences allow normal breathing; some require holding still.
Step 7: Contrast if needed. If contrast is used: technologist places IV. Contrast administered partway through scan. Additional sequences post-contrast. Adds ~15-20 minutes to total time.
Step 8: Procedure ends. Table slides out. Technologist helps you up. Procedure complete. Most people walk out feeling fine.
What might feel uncomfortable. Lying still for extended period. Loud noises (mitigated by headphones). Some patients feel claustrophobic. Slight warming sensation possible. Tingling sensations occasionally.
When to call staff. Discomfort or pain. Need to change position. Feeling claustrophobic. Need a break. Anything concerning.
Procedure Stats
Contrast considerations for shoulder MRI. When to use, how it changes the scan.
Standard contrast IV gadolinium. Used for: assessing inflammation, suspected infection, post-surgical evaluation, tumors. Adds ~15-20 min to scan time. Safe in most patients. Rare reactions (less than 1% mild).
MR Arthrogram. Contrast injected directly into joint by a radiologist (usually under fluoroscopy) before MRI. Used for: suspected labral tears (SLAP, Bankart). Helpful for distinguishing post-surgical labrum from new tears. Pain typically minimal during injection. Adds 15-20 minutes for injection plus regular scan time.
When contrast is not needed. Most rotator cuff evaluations. Many cases of arthritis. Initial impingement evaluation. Stable post-injury follow-up.
When contrast is essential. Suspected labral tear with persistent symptoms (MR arthrogram). Suspected tumor or infection. Detailed evaluation of cartilage damage. Investigating subtle pathology.
Renal function check. Kidney function (eGFR) should be checked within 30-90 days of contrast administration. Patients with eGFR less than 30 are at risk for nephrogenic systemic fibrosis (now rare with macrocyclic agents). Patients with eGFR 30-60: macrocyclic agents preferred.
Allergy considerations. Prior gadolinium reaction increases risk. Pre-medication may be used if essential. Discuss with radiologist if you have prior reactions.
Pregnancy. Avoid contrast if possible. Discuss risk-benefit with radiologist if essential.
Cost. Adds $100-500 to scan cost. Most insurance covers when medically indicated.
Contrast Decision
Tumors, infection, post-surgical, inflammation. ~30% of shoulder MRIs.
Labral tears (SLAP, Bankart). Inject contrast into joint first.
Most rotator cuff, arthritis, initial impingement evaluation.
Check eGFR within 90 days. Macrocyclic agents in moderate disease.
Prior reaction: discuss alternatives or pre-medication.
Generally avoided. Discuss benefit vs risk if essential.
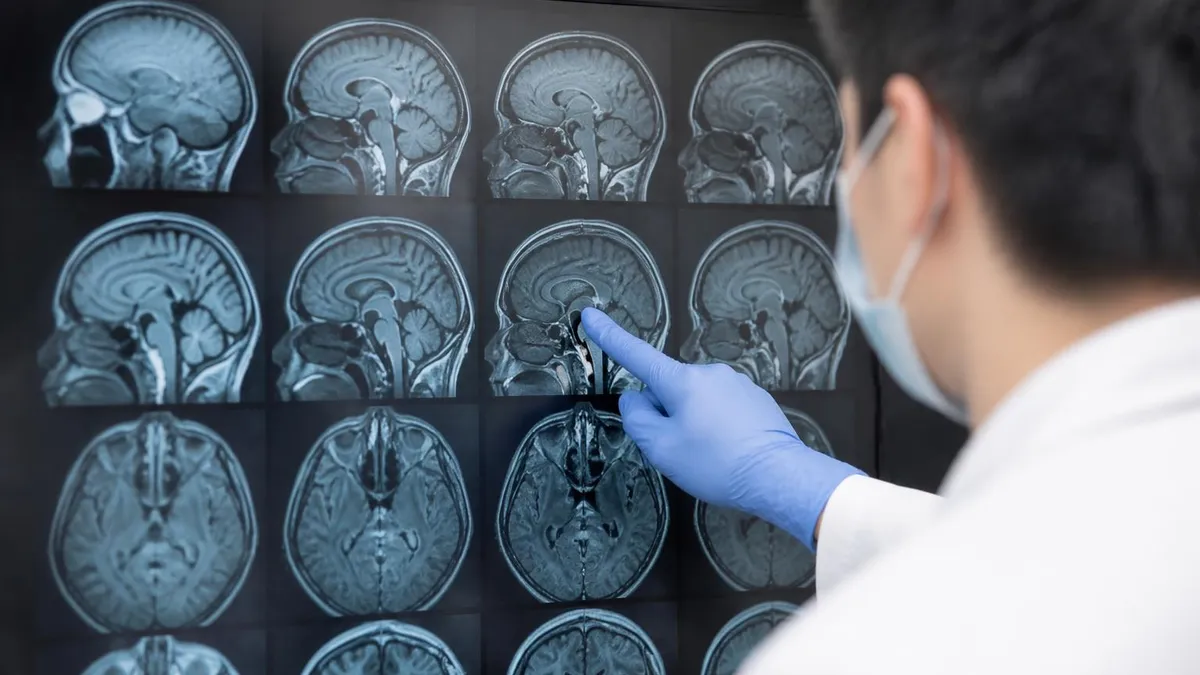
Understanding your MRI shoulder results.
Report structure. Reports typically include: Clinical history (why scan was ordered). Technique (sequences performed, contrast used). Comparison (prior imaging if available). Findings (organ by organ description). Impression (summary and recommendations).
Common findings in shoulder MRI reports. Rotator cuff: 'No tear' (good), 'Tendinosis' (degenerative changes, not torn), 'Partial-thickness tear' (some tendon damaged), 'Full-thickness tear' (complete tear). Size in centimeters often noted. Retraction (how far torn end pulled away).
Labral findings. 'Intact labrum' (normal). 'Labral tear' or 'labral fraying' (with location like superior, anterior, posterior, inferior). 'SLAP lesion' (Superior Labrum Anterior to Posterior). 'Bankart lesion' (anterior-inferior labrum tear).
Biceps tendon. 'Intact biceps' (normal). 'Biceps tendinosis' (degenerative). 'Partial tear' or 'full thickness tear.' 'Subluxation' (out of normal groove). 'Dislocation' (completely out).
Cartilage. 'Intact cartilage' (normal). 'Chondral defect' (cartilage damage). 'Grade I-IV' chondral lesions (mild to severe). 'Joint effusion' (fluid). 'Osteoarthritis' (wear, bone spurs).
Bone marrow. 'Normal marrow' (no edema). 'Bone marrow edema' (often from injury or stress). 'Bone marrow lesions' or 'cysts' (varied causes). 'Avascular necrosis' (bone death — significant).
Other terms. 'Tendinosis' (chronic tendon degeneration, not torn). 'Tenosynovitis' (inflammation around tendon). 'Bursitis' (inflammation of bursa). 'Synovitis' (joint lining inflammation).
How to interpret findings. Most findings need clinical context. Many positive findings on MRI don't cause symptoms (incidental findings). Combine with symptoms, exam, and prior treatments. Don't make decisions on imaging alone.
Common 'incidental findings' that often don't matter. Small labral signal changes without acute tear. Mild degenerative changes. Subacromial bursa with small fluid. Asymptomatic AC joint arthritis. Minor cartilage signal changes.
Findings that usually need treatment. Full-thickness rotator cuff tears (especially in younger patients). Significant labral tears in active people. Bone marrow lesions with progressive symptoms. Tumors of any kind.
Report Findings
'No tear' = normal. 'Tendinosis' = chronic degenerative, not torn. 'Partial-thickness tear' = some tendon damaged. 'Full-thickness tear' = complete tear with sizing in cm. 'Retraction' notes how far torn end pulled away.
What happens after the MRI.
Immediately post-scan. No restrictions if no contrast. Resume normal activities. Drive home (unless sedated). Most patients have no after-effects.
After contrast administration. Drink extra fluids (water 1-2 liters) over 24 hours to help kidneys clear contrast. Most people have no symptoms. Watch for delayed reactions (rare).
If sedated. Have someone drive you home. Avoid important decisions until sedation wears off (4-6 hours typical for oral sedatives, longer for IV).
Results timing. Radiologist typically reports within 1-3 business days. Your doctor reviews and contacts you typically 3-10 days post-scan. Some hospitals release reports to patient portal in 24-72 hours.
Follow-up appointment. Schedule before leaving imaging center if possible. Most doctors want to discuss results in person or by call. Bring questions.
Treatment decisions based on results. Conservative treatment (PT, anti-inflammatories, injections) often first-line. Surgical referral for significant tears, instability, failed conservative care. Many shoulder problems resolve with conservative care; surgery is often optional.
If results are unexpected. Ask for clarification. Discuss whether further testing helps. Consider second opinion (orthopedic surgeon, sports medicine specialist). Understand what each finding means for your specific situation.
Common next steps by diagnosis. Rotator cuff tendinosis: physical therapy, anti-inflammatories, possibly cortisone injection. Small partial tear: PT, anti-inflammatories. Full-thickness tear: orthopedic referral, possible surgery vs continued conservative if older/lower demand. Labral tear: orthopedic referral, likely arthroscopic repair if active. Arthritis: PT, lifestyle modification, possibly steroid injection, surgery if severe.
Insurance considerations. Cost of MRI varies widely. With insurance: $50-1,500 typically. Without insurance: $300-3,000+. Negotiated rates with imaging centers can lower costs. Some centers offer cash discounts.
When to seek immediate care. New severe pain, weakness, numbness. Signs of infection (fever, redness, warmth at joint). Loss of arm/hand function. Don't wait for follow-up if symptoms worsen significantly.
1. Full-thickness rotator cuff tear. Especially in younger or active patients. Usually needs orthopedic evaluation.
2. Large labral tear with instability. Likely needs surgical repair for active patients.
3. AVN (avascular necrosis). Bone death requires immediate ortho evaluation. Can progress.
4. Tumor. Any mass requires further evaluation by oncology or orthopedic oncologist.
5. Infection signs. Joint fluid with marrow edema may indicate septic arthritis. Urgent care needed.
6. Progressive weakness. Neurological deficit. Needs neurological consultation alongside orthopedic.
7. Failed conservative care. If you've done PT for 6+ months and still significant symptoms despite imaging findings, consider surgical consultation.
Alternative imaging options for the shoulder.
X-ray. Best for: bony fractures, dislocation confirmation, AC joint arthritis. Limited for: soft tissues (tendons, ligaments, labrum). Cost: $25-300. Radiation exposure: low.
Ultrasound. Best for: rotator cuff tendons (especially full-thickness tears), bursa, biceps tendon, dynamic assessment during movement. Limited for: labrum, joint cartilage, deep structures. Cost: $100-700. No radiation. Operator-dependent (quality varies).
CT scan. Best for: complex fracture details, post-traumatic, pre-surgical planning of bony procedures. Limited for: soft tissue evaluation. Cost: $300-3,000. Radiation exposure: higher than X-ray.
CT arthrogram. CT with contrast injected into joint. Better than CT for labrum. Used when MR is contraindicated (pacemaker, severe claustrophobia). Cost: $500-1,500.
MR arthrogram. Standard MRI with contrast injected into joint first. Gold standard for labral tears. Cost: $500-2,500. Same risks as standard MRI plus injection.
Choosing the right test. Initial evaluation of shoulder pain: X-ray often first. If rotator cuff suspected: ultrasound or MRI. If labrum suspected: MR arthrogram preferred. If fracture suspected: X-ray then CT. If multiple structures involved: MRI usually best comprehensive view.
When MRI is preferred. Multiple structures need evaluation. Pre-surgical planning. Complex or chronic conditions. Suspected tumor or AVN. Detailed soft tissue assessment.
When MRI is not the best choice. Acute fracture (X-ray, CT). Foreign body (X-ray). Contraindicated implants (CT, ultrasound). Severe claustrophobia (open MRI or alternative). Limited insurance coverage.
Imaging Options
Best for bone, fractures, dislocations. Quick, cheap, ubiquitous.
Best for tendons, dynamic. No radiation. Operator-dependent.
Best for complex bone detail. Higher radiation. Useful pre-surgical.
Best for labrum. Contrast injected into joint. Most thorough.
Best comprehensive view. All soft tissues. No radiation.
Often X-ray first, then MRI. Sometimes US for rotator cuff first.
Cost and insurance considerations for shoulder MRI.
Out-of-pocket costs. Without insurance: $400-3,500 typical range. With insurance: $50-1,500 depending on plan. High-deductible plans may have full cost. Imaging centers often offer cash discounts (10-30% off).
Insurance coverage. Most plans cover medically necessary MRI when ordered by a physician. Common requirements: prior authorization (1-2 day process typically), trial of conservative care (PT, anti-inflammatories) before MRI, specific clinical findings.
Prior authorization tips. Your doctor's office handles this. Allow 1-7 days. Common reasons for denial: not enough documented conservative care, vague clinical indication. Strong indications (sports injury, persistent pain despite treatment) usually approved.
Lower-cost options. Imaging centers vs hospitals: imaging centers often 30-50% cheaper. Network status: in-network always cheaper. Comparison shop: ask 3-5 imaging centers for prices. Some centers post prices online. Hospital outpatient imaging: usually middle ground.
Self-pay options. Imaging centers often offer cash discount for self-pay. Some bundle reading fee with scan fee. Negotiate — ask if you can get a lower rate. Pay upfront vs payment plan options.
HSA/FSA eligibility. MRI costs are HSA/FSA eligible. Reduces effective cost. Get receipt and store for tax records.
Reading fee separation. Some centers separate scan fee and reading (radiologist) fee. Make sure all costs disclosed before scheduling. May affect bottom-line cost.
Workers compensation. If shoulder injury is work-related, workers comp may cover. Process: file claim with employer; workers comp insurance approves treatment; coordinate with imaging center for billing.
Cost transparency. Hospital and imaging center pricing varies widely. Same scan can cost $400 at one facility, $1,800 at another. Always ask for price before scheduling.
MRI Pros and Cons
- +MRI has a publicly available content blueprint — you know exactly what to prepare for
- +Multiple preparation pathways accommodate different schedules and budgets
- +Clear score reporting shows specific strengths and weaknesses
- +Study communities share current insights from recent test-takers
- +Retake policies allow recovery from a difficult first attempt
- −Tested content scope requires substantial preparation time
- −No single resource covers everything optimally
- −Exam-day performance can differ from practice test performance
- −Registration, prep, and retake costs accumulate significantly
- −Content changes between versions can make older materials less reliable
MRI Questions and Answers
Final thoughts. MRI of the shoulder is one of the most useful diagnostic tools in orthopedics. It reveals tears, inflammation, arthritis, and many other conditions that affect 1 in 3 adults over 50.
If your doctor recommends shoulder MRI, understand the purpose. Are they suspecting rotator cuff tear? Labral injury? Arthritis? Different conditions call for different protocols. Discuss specifically what the doctor is looking for.
Prepare thoroughly. Disclose all implants. Address claustrophobia in advance. Verify insurance coverage. Comparison shop on cost if self-paying. The scan itself is straightforward, but preparation makes the difference between smooth and stressful.
Understand the results in context. Many findings are 'incidental' — present on imaging but not causing symptoms. Significant findings (full tears, large labral injuries, bone marrow lesions) need clinical correlation. Treatment decisions should reflect both imaging and your symptoms.
Treatment options abound. Conservative care (PT, anti-inflammatories, injections) helps most shoulder problems. Surgery is one option for select cases. Don't rush to surgery based on imaging alone — many MRI 'positive' findings respond to conservative care.
The shoulder is complex. Understanding what your MRI mri mrcp cpt code the report means, and what treatment options exist empowers you to participate in your own care. Ask questions. Get second opinions if uncertain. Use imaging as one input among many in choosing the path forward for your shoulder health and overall quality of life.
About the Author
Medical Laboratory Scientist & Clinical Certification Expert
Johns Hopkins UniversityDr. Sandra Kim holds a PhD in Clinical Laboratory Science from Johns Hopkins University and is certified as a Medical Technologist (MT) and Medical Laboratory Scientist (MLS) through ASCP. With 16 years of clinical laboratory experience spanning hematology, microbiology, and molecular diagnostics, she prepares candidates for ASCP board exams, MLT, MLS, and specialist certification tests.
Join the Discussion
Connect with other students preparing for this exam. Share tips, ask questions, and get advice from people who have been there.
View discussion (6 replies)