MRI Arthrogram: Complete Guide to Joint Imaging
Everything you need to know about an mri arthrogram: how the procedure works, recovery, costs, and what your results mean for surgery.
An MRI arthrogram is a specialized imaging study that pairs magnetic resonance imaging with an injected contrast agent to give radiologists a crystal-clear view of joint anatomy. If your shoulder slips out of place during a workout or your hip clicks every time you climb stairs, your orthopedist may order this combined test rather than a standard MRI. The reason is simple. The injected fluid expands the joint capsule and outlines tiny structures that would otherwise blend into the background — torn labrums, frayed cartilage, hidden loose bodies.
Most patients arrive nervous. They have heard the words "needle in the joint" and pictured something far more painful than it really is. The truth? The procedure usually takes under an hour, the discomfort fades quickly, and the diagnostic payoff is substantial. We will walk through every step, from the moment you check in to the day your surgeon reviews the report.
You will learn what makes an arthrogram different from a plain MRI, why radiologists love the technique for shoulders and hips, what to expect during the injection, and how to read your post-scan instructions without spiraling into a Google panic. By the end, you should feel confident enough to schedule the exam, ask sharp questions, and maybe even ace a few practice questions if you are studying MRI as part of an ARRT-MR prep course.
MRI Arthrogram At A Glance
Why Doctors Order an MRI Arthrogram
A standard MRI captures soft tissue beautifully, but the joint capsule is collapsed in its natural state. Cartilage edges touch, ligaments fold against bone, and a small tear can hide in plain sight. By injecting diluted contrast directly into the joint, the radiologist pressurizes the capsule. Suddenly every recess opens up like a balloon, and the contrast fluid traces tears, flaps, and loose fragments with high accuracy.
Shoulders are the most common target. Athletes with suspected SLAP tears, throwing injuries, or recurrent dislocations almost always end up in the arthrogram suite. Hips come next, particularly for younger adults with femoroacetabular impingement (FAI) or labral pathology. Wrists, elbows, and ankles round out the list.
Your referring physician will weigh several factors before ordering one. Is your standard MRI ambiguous? Do you have persistent mechanical symptoms despite a clean conventional scan? Is the surgeon planning arthroscopy and needs a roadmap? When the answer to those questions is yes, the arthrogram becomes the next logical step.
Direct vs Indirect Arthrography
There are two flavors of the test. Direct arthrography means contrast is injected straight into the joint under fluoroscopic or ultrasound guidance, then you head to the MRI scanner. Indirect arthrography skips the joint injection — contrast goes into a vein, circulates, and slowly diffuses into the joint over about 20 minutes.
Direct is the gold standard for surgical planning. Indirect is gentler and used when patients refuse a joint puncture or anticoagulation makes it risky.
Capsule Distention Is Everything
The diagnostic power of an arthrogram comes from physically pushing the joint capsule outward with fluid. Without that distention, MRI signal cannot reliably separate intact tissue from a partial tear. Even the strongest 3T magnet will miss subtle labral pathology if the joint is collapsed. This is why direct injection — uncomfortable as it sounds — outperforms indirect techniques for surgical decision-making in most clinical scenarios.
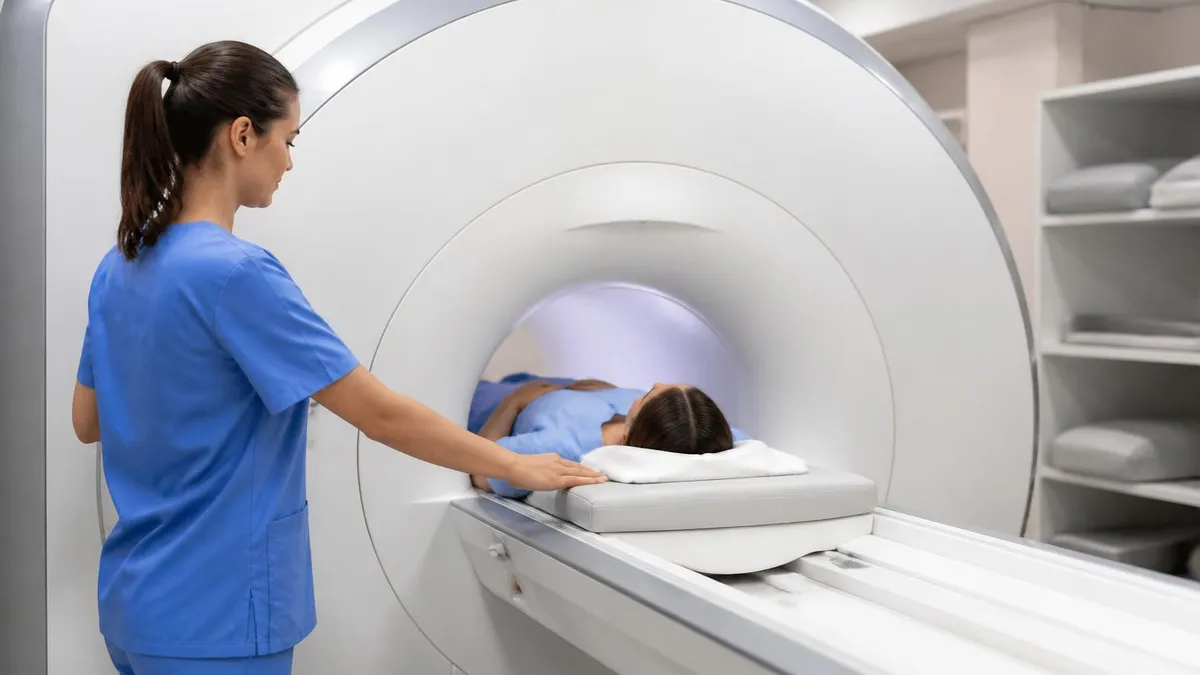
How the Procedure Actually Works
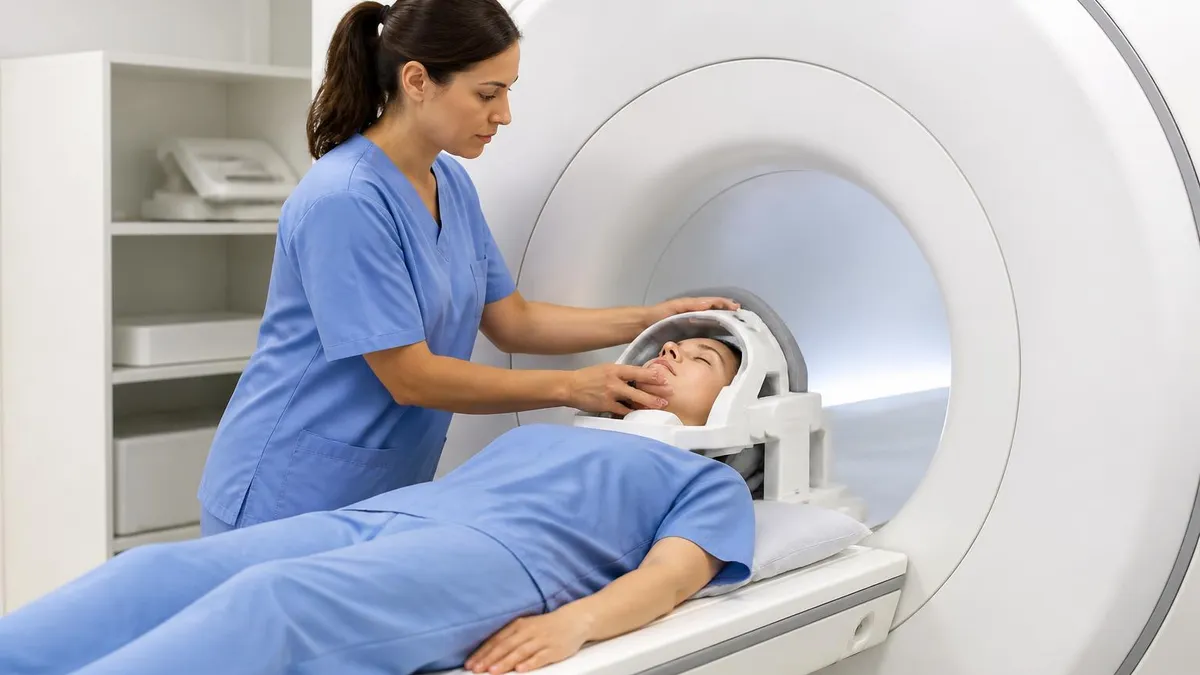
Let us walk through a typical shoulder arthrogram from start to finish. You arrive about 30 minutes early, change into a gown, and confirm you have followed any pre-exam instructions. A radiologist or musculoskeletal specialist greets you, reviews your history, and explains the consent form. This is the moment to mention any prior reactions to iodinated or gadolinium contrast, kidney disease, or blood thinners.
You move to the fluoroscopy room first. The technologist positions you on the table, cleans a small area of skin with antiseptic, and drapes the joint. A thin needle is advanced under live X-ray guidance until the tip sits inside the joint capsule. You may feel pressure or a brief sting from the local anesthetic — most patients describe it as less painful than a dental injection.
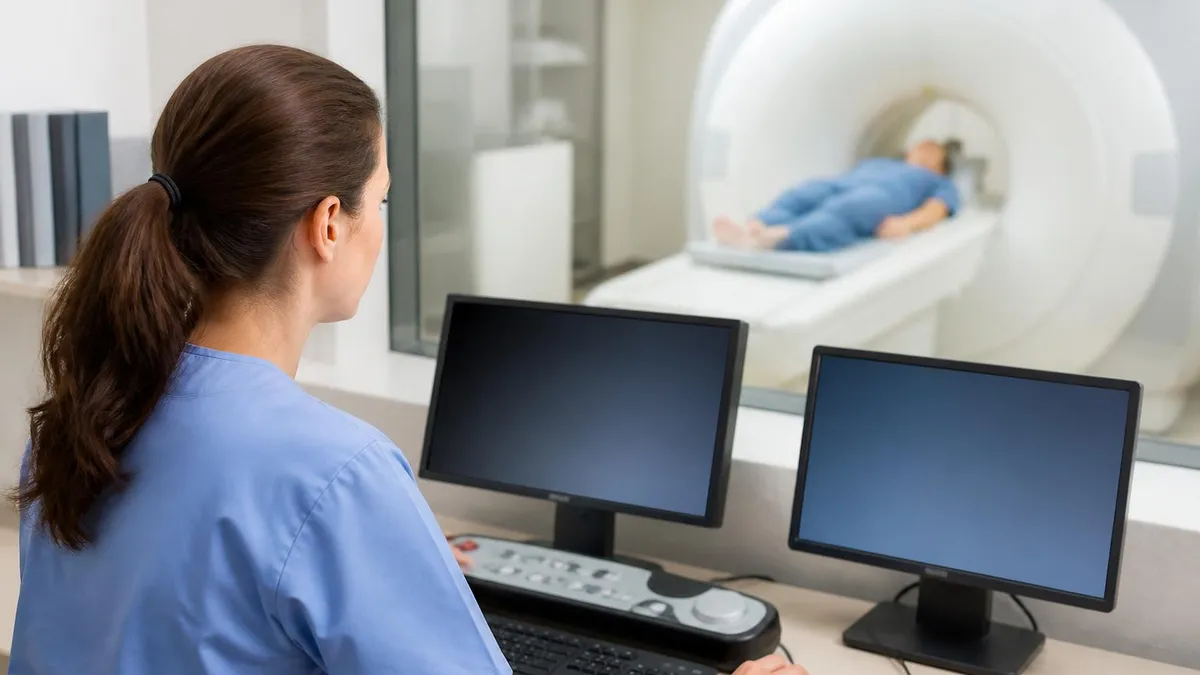
The radiologist confirms placement by injecting a tiny test dose of iodinated contrast, then follows it with a mixture of saline, gadolinium, and sometimes a touch of anesthetic. Now you walk (or are wheeled) to the MRI room. The scanner takes a sequence of high-resolution images, typically lasting 20 to 30 minutes.
The joint is still pressurized from the injection, which is why timing matters. Radiologists try to keep the gap between injection and scan under 30 minutes for optimal distention. After that window, the contrast begins to absorb and capsule pressure drops.
What You Feel During the Scan
Nothing painful, just the usual MRI experience. Loud knocking, mechanical hums, and the urge to stay perfectly still. Many facilities offer headphones with music. If you are claustrophobic, mention it before scheduling — some sites use wide-bore or open MRI systems, and oral sedation is available with a driver lined up to take you home.
The Four Phases of an MRI Arthrogram
Consent review, IV access if needed, gown change, and screening for contrast allergies or kidney function concerns. Roughly 15-20 minutes. Staff verify your identity, check kidney function lab values if recent results are not on file, and confirm that you understand benefits, risks, and alternatives.
Local anesthetic, needle placement under X-ray guidance, and slow injection of gadolinium-saline mixture into the joint capsule. Takes about 10-15 minutes. The radiologist confirms intra-articular placement with a small test dose of iodinated contrast before injecting the full gadolinium mixture under sterile conditions.
Multi-plane sequences capture distended joint anatomy. T1 fat-saturated images highlight contrast, T2 sequences look for edema. 20-30 minutes scan time. Sequences include coronal, sagittal, axial, and oblique planes optimized for the joint being studied. Patient positioning is critical for image quality.
Brief observation, written aftercare instructions, and discharge. Most patients drive themselves home unless they received sedation. You receive printed aftercare instructions, an ice pack if requested, and contact information for the imaging center in case complications develop within the next 48 hours.
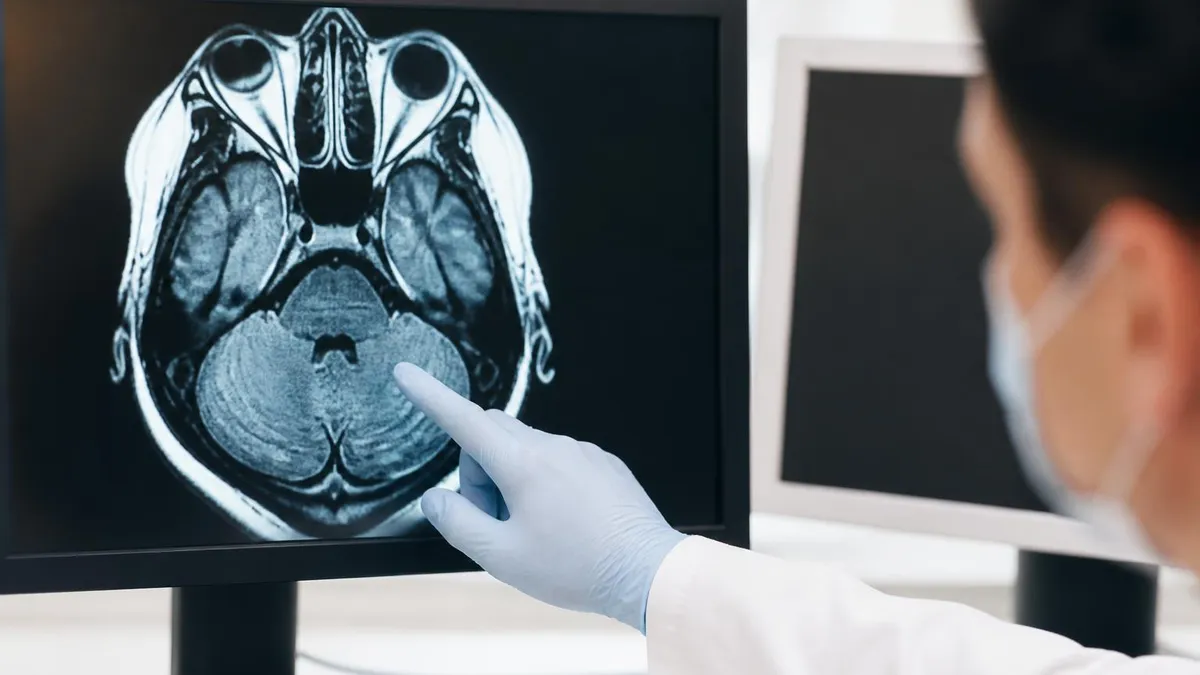
Reading Your Arthrogram Report
Reports follow a structured format. Expect sections covering technique, findings by anatomic region, and an impression. The technique paragraph confirms the joint scanned, contrast used, and sequences obtained. Findings are typically organized by tissue type — labrum, rotator cuff, capsule, cartilage, bones, surrounding muscles.
For shoulders, pay attention to mentions of the labrum (especially SLAP lesions or Bankart tears), the rotator cuff tendons (supraspinatus most often), and the long head of the biceps. For hips, the report focuses on the acetabular labrum, the chondral surfaces, and any signs of FAI such as a cam or pincer deformity. Wrists emphasize the triangular fibrocartilage complex (TFCC) and intrinsic ligaments.
The impression at the end summarizes the clinically relevant findings and is what your surgeon will quote in the operative plan. If you do not understand a term, ask. Radiologists usually welcome a quick clarifying call from patients.
Common Pathologies Detected by Joint
SLAP tears (superior labrum anterior posterior), Bankart lesions, Hill-Sachs deformities, partial-thickness rotator cuff tears, biceps tendon pathology, and adhesive capsulitis. Arthrography is the imaging study of choice for recurrent instability evaluation in throwing athletes and overhead workers. Additional findings often include subscapularis tendon tears, posterior labral cysts, and paralabral ganglia that compress nearby neurovascular structures. The contrast leaking outside the capsule frequently signals a full-thickness rotator cuff tear.
Preparing for Your Exam
Most centers ask you to arrive 30 minutes early. Wear comfortable clothing without metal — no underwire bras, zippers near the joint being scanned, or jewelry. You can usually eat and drink normally before the exam, but check with your imaging center because some facilities prefer light meals to reduce nausea risk from the contrast.
Bring a list of medications, especially blood thinners like warfarin, apixaban, or clopidogrel. The radiologist may not stop them for a routine joint injection, but they need to know. Mention any history of allergic reactions to gadolinium or local anesthetics.
If you have severely impaired kidney function (typically an eGFR under 30), the team will discuss whether to use an alternative contrast agent or skip gadolinium altogether. Arrange a ride home if you expect to receive sedation or if the joint will be heavily anesthetized.
What to Tell the Technologist
Mention every implant, pacemaker, surgical clip, or piercing. Tattoos with metallic ink can warm slightly during scanning but rarely cause problems. If you are pregnant or might be, say so before any contrast is injected — gadolinium is generally avoided in pregnancy unless the diagnostic benefit clearly outweighs the theoretical risk to the fetus.
Severe gadolinium reactions are rare but real. If during or shortly after the injection you experience difficulty breathing, throat tightness, widespread hives, dizziness, or chest pain, alert staff at once. Mild reactions like a metallic taste, brief warmth, or a small headache usually resolve without intervention. Patients with kidney disease (eGFR under 30 mL/min/1.73m²) face increased risk of nephrogenic systemic fibrosis with certain gadolinium agents — always confirm renal function before the scan.
Recovery and Aftercare
The hours following an arthrogram are usually uneventful. You may feel a mild ache or pressure at the joint as the injected fluid is absorbed by your body. Most people are back to office work the next day. Avoid heavy lifting or intense exercise for 24 to 48 hours to let the joint settle.
Ice for 15 to 20 minutes a few times during the first day helps with discomfort. Over-the-counter acetaminophen is generally fine. NSAIDs like ibuprofen are also acceptable unless your physician has told you otherwise.
Watch the injection site for any growing redness, warmth, swelling, or fever above 100.4°F — these are early warning signs of infection (rare, about 1 in 10,000 injections) and warrant an immediate call to your doctor.
Results typically come back within one to three business days. Many imaging centers now release the radiologist's report directly to a patient portal. Read it, but resist the urge to diagnose yourself — the report is written for your surgeon, who will integrate the findings with your exam and history.
Pre-Arthrogram Checklist
- ✓Confirm any contrast allergies or kidney issues with your physician
- ✓List all current medications, especially blood thinners like warfarin or apixaban
- ✓Remove all metal jewelry, piercings, and clothing with zippers near the joint
- ✓Arrange a ride home if oral sedation is planned ahead of time
- ✓Bring prior imaging studies on disc or thumb drive if from another facility
- ✓Ask about facility-specific fasting or hydration instructions in advance
- ✓Verify insurance pre-authorization is complete to avoid denial
- ✓Plan for 60-90 minutes total time on-site for the entire visit
Comparing MRI Arthrogram to Other Imaging Choices
Patients often wonder whether they really need a contrast-enhanced scan or if a plain MRI will do. The honest answer is that it depends on what the surgeon is hunting for. A standard MRI is faster, cheaper, needle-free, and excellent for cuff tears, edema, or fractures. It falls short when the question is "Is the labrum torn?" or "Is there a loose body trapped in the recess?"
Ultrasound is another tool in the arsenal. It excels at dynamic shoulder evaluation, real-time tendon tracking, and guiding injections. But ultrasound cannot see deep into the joint or evaluate bone and cartilage as comprehensively as MRI.
CT arthrography is occasionally used when patients cannot have an MRI — for example, those with non-MRI-compatible pacemakers. It offers superb bony detail but exposes you to ionizing radiation. Plain X-rays remain the cheapest first step. They confirm bone alignment, joint space narrowing, and obvious fractures, but soft tissue is essentially invisible.
Most orthopedic workups follow a logical staircase: X-ray, then MRI, then arthrogram if the MRI is ambiguous or surgery is being planned. Skipping steps is rare unless your symptoms scream a specific diagnosis from the first visit.
Costs, Insurance, and Scheduling
An MRI arthrogram in the United States typically runs between $1,000 and $3,500 depending on geographic region, the joint scanned, facility type, and whether you use an in-network outpatient imaging center versus a hospital outpatient department. Hospital pricing tends to be significantly higher than freestanding centers.
Most insurance plans cover the exam when it is ordered for an established clinical indication, but you will usually need pre-authorization, especially with managed care plans. Before you schedule, call your insurance and confirm two things — that the test is covered for your specific diagnosis code and that the imaging center is in-network.
A 10-minute phone call can save you a five-figure surprise bill. If you are paying out of pocket, freestanding imaging centers often quote cash prices well below the sticker price, sometimes by 50% or more. Always ask for the self-pay rate.
Scheduling depends on facility volume. In urban areas you may get in within a week. Rural locations sometimes have two to four week waits. The injection room and the MRI room must be coordinated, which is why arthrogram slots are sometimes more limited than standard MRI slots.
What Imaging Technologists Need to Know
If you are training to be an MRI tech or studying for the ARRT-MR registry, arthrograms are a core competency. You should know the standard contrast dilution (typically 0.1 mL of gadolinium in 20 mL of saline for a final concentration around 2 mmol/L), recommended scan timing (within 30 minutes of injection), and the imaging protocols specific to each joint.
Test prep resources frequently include arthrogram safety, sequence selection, and patient screening questions. Mastering this content earns you points on registry exams and confidence in the clinical environment.
MRI Questions and Answers
Final Takeaways
An MRI arthrogram is one of the most informative musculoskeletal studies available. It pairs the soft-tissue strengths of MRI with the joint-expanding power of intra-articular contrast, and the result is a level of anatomic detail that surgeons rely on for planning everything from a labral repair to a complete reconstruction.
For shoulders, hips, wrists, and other small joints with subtle pathology, the technique often makes the difference between a clear diagnosis and another month of uncertainty. If your physician has recommended one, take a deep breath. The procedure is shorter and less painful than its reputation suggests.
Prepare by sorting out your medications, allergies, and transport. Ask about cash pricing if you are uninsured. Read your report carefully but trust your surgeon to put the pieces together. And if you are studying for an imaging board exam, remember that arthrograms test your knowledge of contrast pharmacology, sequence selection, joint anatomy, and patient safety all at once — a high-yield topic worth mastering.
Whether you are a patient, a student, or a curious reader, understanding the why and how of an MRI arthrogram empowers better conversations with your care team. Knowledge does not replace the clinician, but it sharpens every question you ask. Save this guide, bookmark the practice tests linked above, and walk into your appointment ready.
Special Populations and Considerations
Children and adolescents present unique considerations for arthrogram exams. Pediatric patients may require sedation to remain still through both the injection and the imaging sequences. Many children's hospitals coordinate child life specialists who explain each step in age-appropriate language and use distraction techniques to make the experience easier. Parents are usually allowed in the fluoroscopy suite during the injection and may sit nearby during scanning if MRI safety screening clears them.
Older adults sometimes require additional pre-procedure workup. Anticoagulation needs to be reviewed carefully because the joint injection involves a needle puncture. Most facilities allow the test to proceed on standard doses of aspirin or clopidogrel but may pause warfarin or direct oral anticoagulants for 24 to 48 hours after a discussion with the prescribing physician.
Athletes returning to play after an arthrogram often want to know when they can resume training. The injection itself usually allows return to light activity within 24 to 48 hours. The bigger question is what the imaging revealed and how the surgeon plans to manage it. Sport-specific return depends on the diagnosis, not the test itself.
Post-operative patients sometimes undergo arthrograms to evaluate suspected re-tears or complications. Hardware near the joint can create local signal distortion, but modern metal artifact reduction sequences (MARS) and careful protocol selection allow excellent diagnostic imaging in most cases. Ask your surgeon if a metal artifact protocol is needed before booking the appointment.
About the Author
Attorney & Bar Exam Preparation Specialist
Yale Law SchoolJames R. Hargrove is a practicing attorney and legal educator with a Juris Doctor from Yale Law School and an LLM in Constitutional Law. With over a decade of experience coaching bar exam candidates across multiple jurisdictions, he specializes in MBE strategy, state-specific essay preparation, and multistate performance test techniques.