Residential HVAC Installation: The Complete Homeowner's Guide to Sizing, Selecting, and Installing a New Heating and Cooling System
Residential HVAC installation guide covering sizing, equipment selection, 🔎 costs, permits, ductwork, and what to expect during a professional install.

Residential HVAC installation is one of the largest mechanical investments a homeowner will ever make, often ranging from $7,000 for a basic furnace swap to north of $25,000 for a full system replacement that includes ductwork, a heat pump, and a smart thermostat. Because the equipment will run for fifteen to twenty years and account for roughly half of your home's annual energy bill, the decisions made during installation have far longer consequences than the price tag suggests. Getting it right starts with understanding what actually happens during a professional install.
Most homeowners come to this project because something has finally failed. A twenty-year-old furnace cracks a heat exchanger, the condenser stops blowing cold air mid-July, or a home inspection report flags an end-of-life system before closing. In those moments, the temptation is to call the first contractor who answers the phone and accept whatever quote they hand over. That approach leaves money on the table and often results in an undersized, oversized, or improperly commissioned system that underperforms from day one.
The good news is that residential HVAC installation follows a predictable sequence: load calculation, equipment selection, duct evaluation, permit pulling, removal of the old unit, installation of the new system, refrigerant charging, electrical hookup, commissioning, and final inspection. Each step has industry standards behind it, including Manual J for sizing, Manual D for ducts, and Manual S for equipment selection. When a contractor skips these calculations, it is the single biggest red flag a homeowner can spot before signing anything.
This guide walks through the entire process the way a seasoned project manager would explain it to a friend. You will learn how to read a load report, what AFUE and SEER2 ratings really mean for your climate, when a heat pump beats a gas furnace, how to evaluate quotes line by line, and what questions to ask before the crew shows up in the driveway. We will also cover permits, rebates, financing, and the warranty fine print that separates a ten-year worry-free install from an annual repair headache.
The HVAC industry has changed quickly in the last few years. New refrigerant regulations phased out R-410A in favor of A2L blends like R-454B and R-32 starting in 2025. The Inflation Reduction Act unlocked thousands of dollars in heat pump tax credits and state rebates for qualifying households. SEER2 testing protocols replaced the old SEER rating in 2023, making efficiency numbers slightly lower but more accurate. Any contractor who is not fluent in these changes is working from an outdated playbook.
Whether you are replacing a single-stage furnace, going all-electric with a cold-climate heat pump, or adding ductless mini-splits to a finished attic, the fundamentals are the same. Right-size the equipment, fix the duct problems before they get buried behind drywall, and verify that the installer follows manufacturer specifications during startup. If you want to compare options before reading further, the broader HVAC Solutions guide offers a system-level overview. Otherwise, settle in — the rest of this article gives you the install playbook in detail.
Residential HVAC Installation by the Numbers
The Residential HVAC Installation Process
Home Evaluation and Load Calc
Equipment Selection and Quote
Permits and Scheduling
Removal and Installation
Charging and Commissioning
Inspection and Walkthrough
Sizing is the single most important decision in residential HVAC installation, and it is the one most contractors get wrong. Industry studies from the Department of Energy and ACCA have repeatedly shown that more than forty percent of installed systems are oversized by at least half a ton, which sounds harmless until you realize what oversizing actually does to comfort, humidity, equipment life, and energy bills. An oversized air conditioner short-cycles, cooling the air quickly but never running long enough to wring humidity out of it, leaving the house cold and clammy.
The correct way to size a system is a Manual J load calculation, a room-by-room analysis published by the Air Conditioning Contractors of America. Manual J accounts for square footage, ceiling height, window area and orientation, insulation R-values in walls, attic, and floor, air infiltration measured in air changes per hour, internal heat gains from people and appliances, and the local design temperatures from ASHRAE climate data. A proper Manual J takes one to two hours of inputs and produces a heating load in BTU per hour and a cooling load in BTU per hour.
Rules of thumb like "five hundred square feet per ton" are dangerously imprecise because two houses with identical floor plans can have wildly different loads depending on insulation, window package, and orientation. A tight, well-insulated 2,000 square foot home in Atlanta might need only 2.5 tons of cooling, while a leaky 1960s ranch of the same size could need 4 tons. If a contractor walks the house for ten minutes and then quotes a four-ton unit, that is a rule-of-thumb estimate dressed up as engineering and you should ask for the actual Manual J printout.
Manual S comes next and it is just as important. Once you know the load, Manual S tells you how to select equipment whose rated capacity at your specific design conditions matches that load within roughly fifteen percent. AHRI capacity tables vary by outdoor temperature, indoor wet bulb, and airflow, so a "three ton" unit rated at standard conditions may actually deliver 2.6 tons in your climate. Skipping Manual S is how contractors end up installing oversized equipment even when their load calc was accurate.
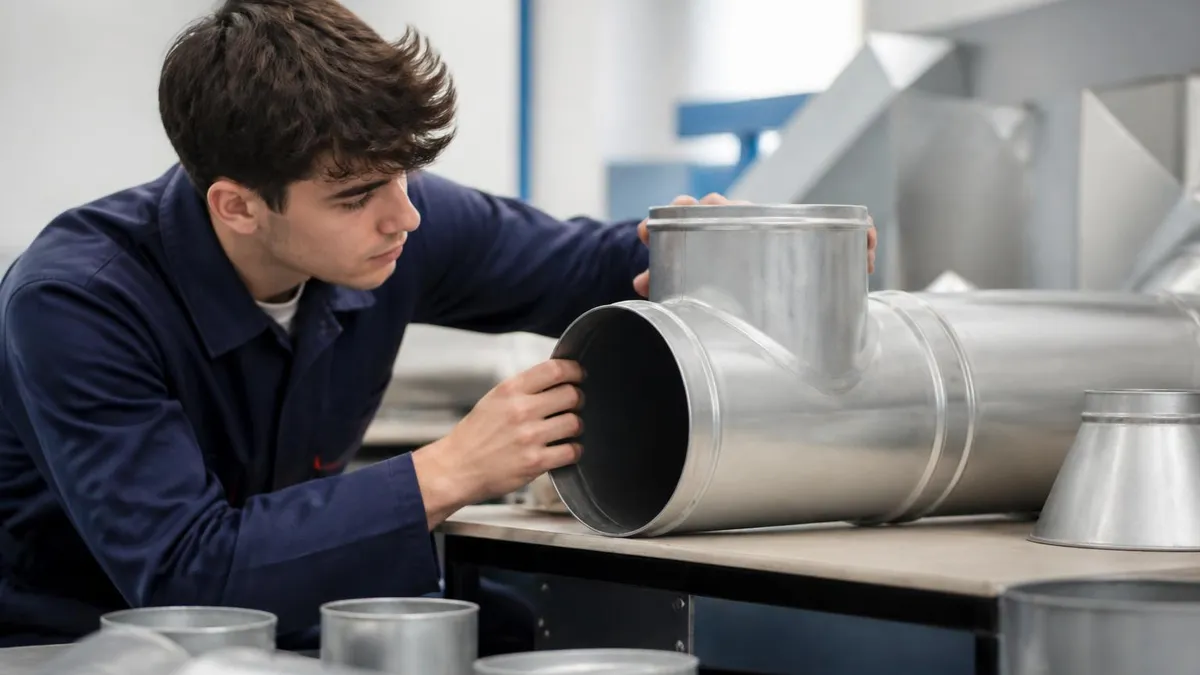
Manual D rounds out the trio and applies whenever ductwork is part of the project. Manual D sizes the supply trunks, branches, returns, and registers based on the equipment's airflow requirement and acceptable static pressure. Most existing ducts in older homes are undersized for modern higher-efficiency equipment that needs more airflow, which is why retrofit installs frequently require duct modifications. Ignoring this leads to noisy vents, hot and cold rooms, and premature blower failure.
Beyond the calculations, sizing should match how you actually live in the house. If you have finished a basement, added a sunroom, replaced windows, or blown additional attic insulation, the original load is no longer accurate. A two-stage or variable-capacity system can hedge against load uncertainty by modulating output, running longer at lower capacity to maintain temperature and remove humidity. For a deeper dive on professional service after install, see hvac maintenance service. The right sizing decision protects every other investment you make in the system.
HVAC Practice Test Questions
Prepare for the HVAC - Heating Ventilation and Air Conditioning exam with our free practice test modules. Each quiz covers key topics to help you pass on your first try.
HVAC Air Conditioning
HVAC Exam Questions covering Air Conditioning. Master HVAC Test concepts for certification prep.
HVAC Code Compliance
Free HVAC Practice Test featuring Code Compliance. Improve your HVAC Exam score with mock test prep.
HVAC Electrical Controls
HVAC Test Prep for Electrical Controls. Practice HVAC Quiz questions and boost your score.
HVAC Energy Efficiency
HVAC Questions and Answers on Energy Efficiency. Free HVAC practice for exam readiness.
HVAC Heating Systems
HVAC Mock Test covering Heating Systems. Online HVAC Test practice with instant feedback.
HVAC Load Calculations
Free HVAC Quiz on HVAC Load Calculations. HVAC Exam prep questions with detailed explanations.
HVAC Tools and Equipment
HVAC Practice Questions for HVAC Tools and Equipment. Build confidence for your HVAC certification exam.
HVAC Refrigeration
HVAC Test Online for Refrigeration. Free practice with instant results and feedback.
HVAC Safety Practices
HVAC Study Material on Safety Practices. Prepare effectively with real exam-style questions.
HVAC System Design
Free HVAC Test covering System Design. Practice and track your HVAC exam readiness.
HVAC Thermodynamics
HVAC Exam Questions covering Thermodynamics. Master HVAC Test concepts for certification prep.
Residential HVAC Equipment Types and Options
The traditional split system pairs a natural gas or propane furnace in the basement or closet with an outdoor condenser and indoor evaporator coil. Modern condensing furnaces hit AFUE ratings of 95 to 98 percent, meaning nearly every BTU of fuel becomes useful heat. They are still the lowest installed cost option in cold climates with cheap natural gas and remain the workhorse of new residential HVAC installation across the Midwest and Northeast.
Pair the furnace with a SEER2 15 to 18 air conditioner and you have a balanced system that handles deep cold and humid summer alike. The downside is two pieces of equipment to maintain, dependence on fossil fuel, and no path to the heat pump tax credits available under the Inflation Reduction Act. Most installs in this category run $9,000 to $15,000 depending on capacity, efficiency tier, and ductwork condition.
Replacing Your Residential HVAC: Pros and Cons of a Full Install
- +Lower monthly energy bills with modern high-efficiency equipment, often 20 to 40 percent less than 15-year-old systems
- +Manufacturer warranties of 10 years on parts and lifetime on heat exchangers when installed by certified dealers
- +Federal tax credits up to $2,000 plus state and utility rebates that can total $5,000 to $10,000
- +Better humidity control and quieter operation from variable-speed blowers and two-stage or modulating compressors
- +Smart thermostat integration, mobile app control, and air quality accessories that were not available a decade ago
- +Increased home resale value, with appraisers giving credit for newer mechanical systems on home valuation reports
- −High upfront cost between $10,000 and $25,000 depending on equipment tier and ductwork modifications required
- −Disruption to the home for one to three days, including possible electrical panel upgrades for heat pump installs
- −New refrigerants like R-454B require updated technician training, and not every local contractor is current
- −Permit and inspection fees add several hundred dollars and can extend the project timeline by one to three weeks
- −Variable-speed and communicating systems require specific compatible thermostats, limiting future flexibility
- −Improper installation by a low-bid contractor can negate efficiency gains and shorten equipment life dramatically
Pre-Installation Checklist for Residential HVAC
- ✓Get at least three written quotes from licensed and insured contractors with verified manufacturer certifications
- ✓Request a copy of the Manual J load calculation and Manual S equipment selection in writing before signing
- ✓Verify each contractor pulls a mechanical permit and includes inspection fees in the quoted price
- ✓Confirm refrigerant type, AFUE or SEER2 ratings, model numbers, and serial numbers on the final invoice
- ✓Ask about line set replacement versus reuse, especially if upgrading from R-22 or R-410A to R-454B equipment
- ✓Check whether your electrical panel has capacity for a heat pump or new condenser amperage draw
- ✓Inspect existing ductwork for leaks, undersized returns, and verify static pressure measurements with a manometer
- ✓Confirm warranty registration requirements, including timelines, online registration, and dealer responsibilities
- ✓Schedule the install during shoulder season (April-May or October-November) for better pricing and availability
- ✓Apply for federal tax credits, state rebates, and utility incentives before equipment is purchased when required
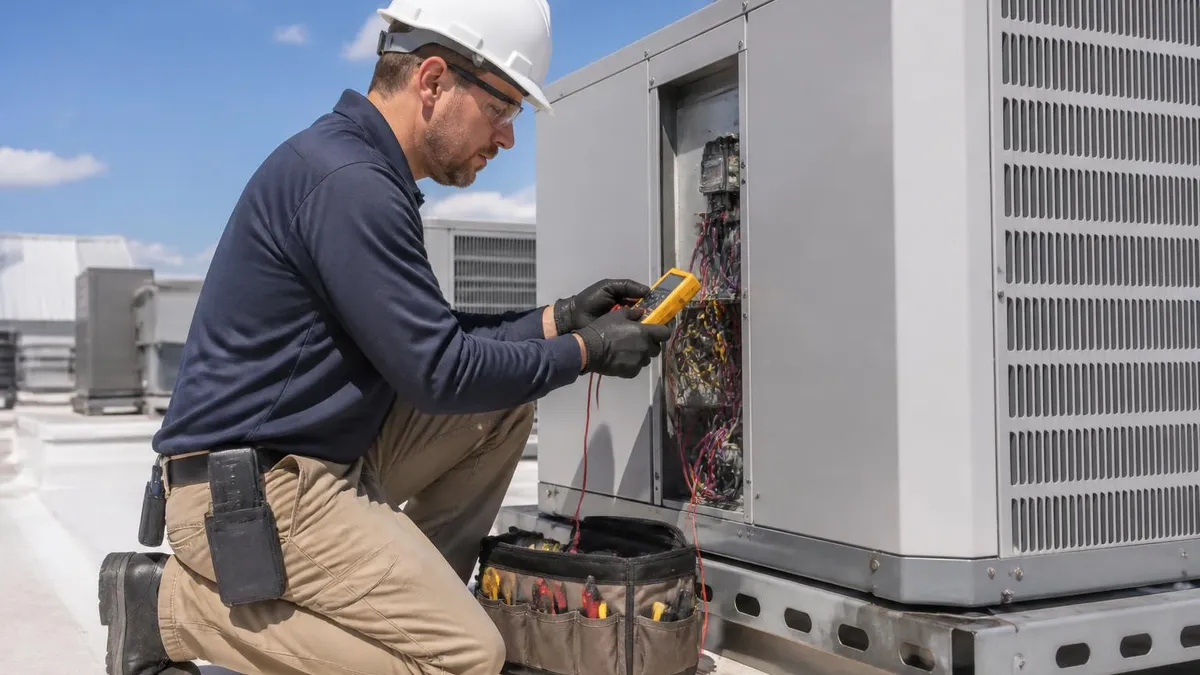
Verified startup readings separate good installs from costly mistakes
A 2023 field study by the Building Performance Institute found that systems with documented commissioning readings — static pressure, temperature split, refrigerant subcooling, and airflow CFM — operated 18 percent more efficiently and lasted 40 percent longer than uncommissioned installs. Demand a written startup report signed by the technician before final payment.
Residential HVAC installation costs vary widely by region, equipment tier, and the condition of your existing infrastructure, but national 2026 data gives clear benchmarks. A basic 80 percent AFUE gas furnace replacement runs $4,500 to $7,500 installed. A high-efficiency 96 percent AFUE furnace paired with a SEER2 16 air conditioner falls between $11,000 and $16,000. A cold-climate variable-speed heat pump system with new air handler ranges from $14,000 to $24,000 before any tax credits or rebates are applied.
Ductwork adds significant variability. If your existing ducts are properly sized and sealed, you may need no modifications and labor stays at the lower end. If returns are undersized, supplies run through unconditioned attics without insulation, or the trunk line cannot deliver the airflow the new equipment requires, expect $1,500 to $6,000 in additional sheet metal work. Aeroseal duct sealing technology can add $2,000 to $3,500 but recovers up to 30 percent of leaked airflow without replacing the duct system itself.
The Inflation Reduction Act fundamentally changed the math on residential HVAC installation through two programs. The Energy Efficient Home Improvement Credit, also called 25C, provides up to $2,000 in tax credits for heat pumps meeting specific CEE tiers. The High-Efficiency Electric Home Rebate Act, or HEER, provides point-of-sale rebates up to $8,000 for qualifying households based on income, administered through state energy offices. Eligibility, application timing, and stacking rules vary by state and require careful planning.
State and utility rebates layer on top. Many electric utilities offer $500 to $2,000 for high-efficiency heat pump installs, and gas utilities offer similar amounts for high-AFUE furnaces. Some states like Massachusetts, New York, and California have additional climate program rebates that bring total incentives above $10,000 for income-qualified households. The Database of State Incentives for Renewables and Efficiency, known as DSIRE, is the most reliable source for current programs.
Financing has become a standard part of residential HVAC installation. Most major manufacturers — Carrier, Trane, Lennox, Daikin, Bosch — offer promotional financing through dealers, including zero percent for 24 to 60 months for qualified buyers. Property Assessed Clean Energy (PACE) financing is available in some states, allowing you to repay the cost through your property tax bill over twenty years. Home equity loans and HELOCs remain the cheapest financing option for large projects because the interest may be tax-deductible.
Before signing any financing agreement, calculate the total cost of credit and compare against paying cash with a deferred rebate. A 0 percent for 60 months offer with a $1,500 dealer fee built into the equipment price is often more expensive than a cash discount of $1,000 plus a 7 percent home equity loan. Always ask the contractor to break out the cash price separately from the financed price so you can evaluate the true cost of financing. Understanding the local contractor market also helps; the HVAC Companies Portland guide illustrates how to vet bids in a competitive metro.
As of January 1, 2025, new residential air conditioning and heat pump equipment manufactured in the United States must use lower-GWP refrigerants like R-454B or R-32. Existing R-410A equipment can still be serviced, but pricing on R-410A refrigerant has climbed sharply. If your install quote includes R-410A equipment, verify the manufacture date and confirm the dealer's warranty position before signing.
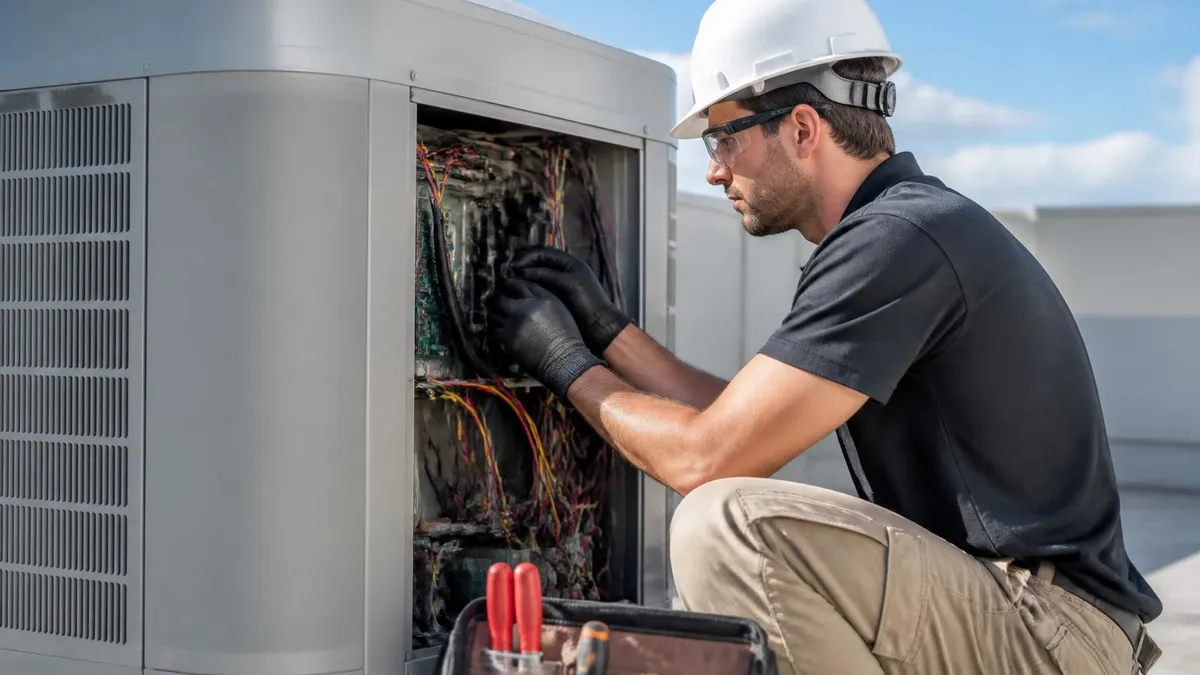
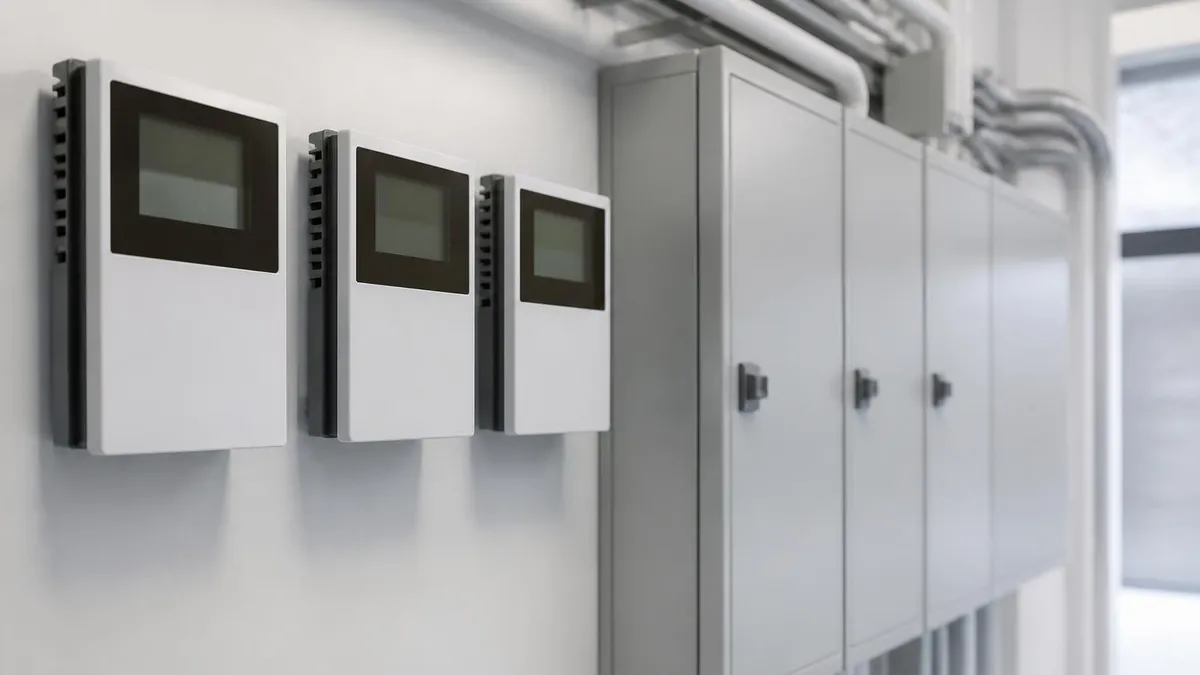
Install day itself follows a predictable rhythm, and knowing what to expect helps you keep contractors accountable. The crew typically arrives between 7 and 9 a.m. with a two or three-person team consisting of a lead technician, an apprentice, and sometimes a sheet metal fabricator if duct modifications are scheduled. They will lay drop cloths from the door to the equipment location, set up containment around the work zone, and bring in tools, the new equipment, and recovery cylinders for the refrigerant in your old system.
The first task is shutdown and safe removal of the existing system. Technicians recover refrigerant per EPA Section 608 rules into a DOT-approved cylinder, drain condensate, disconnect electrical at the disconnect and at the air handler, and physically remove the furnace, coil, and condenser. Federal law requires recovered refrigerant to be either reclaimed or returned to a certified facility — never vented. If a crew tries to shortcut this step, stop the job immediately.
Setting the new equipment comes next. Indoor units are leveled on isolation pads, condensate lines are sloped a quarter inch per foot toward the drain with a properly trapped pee trap, and the evaporator coil is matched to the condenser per AHRI certified pairings. Outdoor units sit on a composite pad with at least two feet of service clearance on the access side and roughly two feet of clearance around the rest of the cabinet for adequate airflow into the coil.
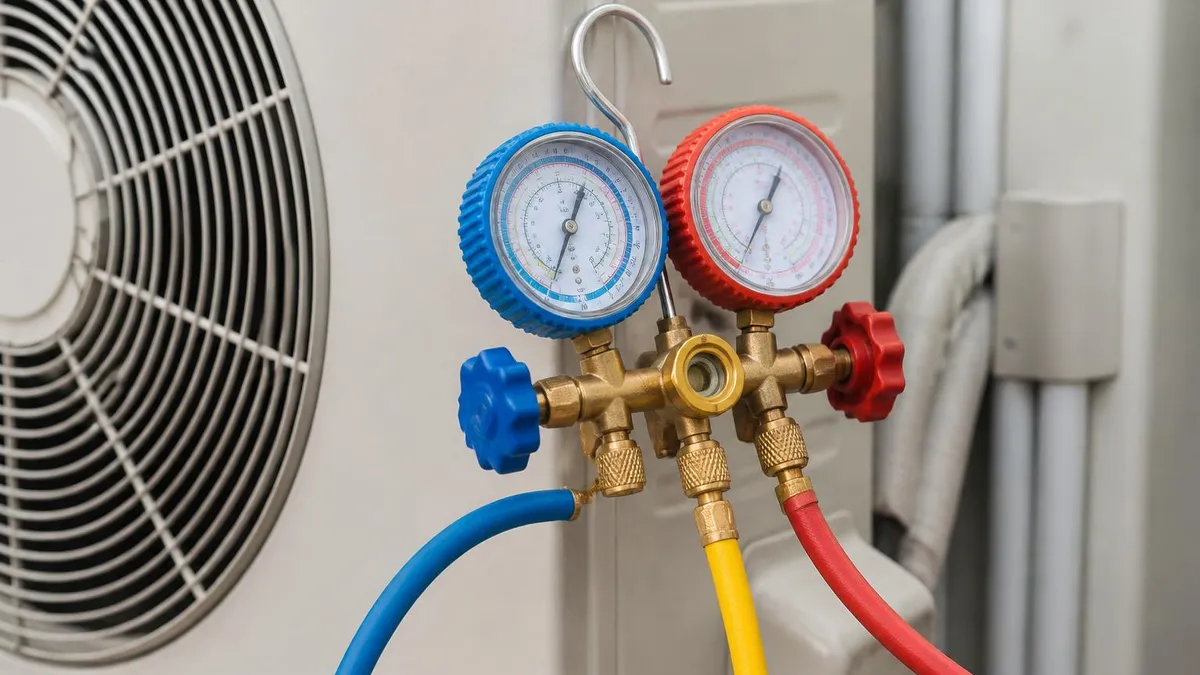
Line set work is the most technical part of the install. Copper refrigerant lines are either brazed with nitrogen flowing through them at low pressure to prevent oxidation, or connected with mechanical flare fittings on smaller systems. The lines are then pressure tested with nitrogen to roughly 500 psi, leak checked, and pulled into a deep vacuum below 500 microns using a two-stage vacuum pump. Charging follows by weight per manufacturer specification, then trimmed by subcooling measurements at steady state.
Electrical and controls finish the mechanical portion. The disconnect, whip, breaker, and thermostat wires are landed per manufacturer wiring diagrams, with particular attention to the staging conductors for two-stage and variable-speed systems. Modern communicating systems use proprietary digital protocols between the thermostat, air handler, and outdoor unit, so the thermostat must match the equipment ecosystem. The technician then powers up the system, configures the thermostat, and runs the system through heating and cooling cycles to verify all components communicate.
Commissioning is the final and most important step. A qualified technician measures total external static pressure with a manometer, verifies temperature split across the coil, checks refrigerant charge using subcooling for fixed-orifice or TXV systems, measures supply and return airflow in CFM, and records all values on a startup form.
The system is registered with the manufacturer for warranty within thirty days of install, the permit inspection is scheduled, and you receive a complete document package. If anything feels off during the first month, call the installer back under the workmanship warranty rather than calling for a third-party hvac repair portland service.
Choosing the right contractor is more important than choosing the right equipment, because even premium equipment underperforms when installed poorly. Start with NATE-certified technicians, manufacturer factory authorization (Carrier Factory Authorized Dealer, Trane Comfort Specialist, Lennox Premier Dealer, Daikin Comfort Pro), and state mechanical contractor licensing. Verify general liability and workers compensation insurance directly with the carrier, not just through a certificate the contractor hands you, since fraudulent certificates of insurance are unfortunately common.
Read the proposal line by line before signing. Reputable proposals list specific model numbers and serial numbers for indoor and outdoor units, AFUE and SEER2 ratings, warranty terms (parts, labor, and heat exchanger), brand and model of thermostat, type and gauge of refrigerant line set, condensate pump if required, electrical disconnect, permit fees, and disposal of old equipment. Vague proposals that say "new high-efficiency system installed" without model numbers are designed to allow substitutions that benefit the contractor, not the homeowner.
Ask explicitly about who performs the work. Many large HVAC companies subcontract installation to third parties at a fixed labor rate, which creates incentives for crews to finish quickly rather than commission carefully. Owner-operated and mid-size companies with W-2 employees typically deliver more consistent quality. Ask for the names and certifications of the actual installers, not just the salesperson, and request before-and-after photos from comparable installs they completed in the last six months.
Negotiate on the right things. The price of equipment from major manufacturers is roughly the same across all dealers in a metro because of wholesaler pricing, so there is not much room on the equipment line. Where you can negotiate is on labor add-ons, optional accessories (UV lights, media filters, surge protectors that have low installed cost but high quoted prices), extended labor warranties, and financing terms. A 10-year parts and 10-year labor warranty bundle is one of the most valuable concessions to negotiate.
Plan for the long term by setting up a maintenance agreement before you need one. Most dealers offer an annual or biannual maintenance plan in the $200 to $400 range that includes a spring AC tune-up, a fall furnace inspection, priority scheduling, and discounts on repairs. Maintaining the system properly is the difference between a system that lasts 12 years and one that lasts 20. It also keeps the warranty valid, since most manufacturers require documented annual maintenance to honor part claims.
Finally, document everything for the future. Keep the proposal, the load calculation, the startup commissioning sheet, the permit and inspection report, the warranty registration confirmation, and any rebate or tax credit paperwork in a single folder, ideally a digital one backed up to cloud storage. When you sell the house in fifteen years, this paperwork raises buyer confidence and can add real dollars to the appraisal. For commercial property owners following a parallel process, the commercial hvac contractors near me guide covers vendor vetting on a larger scale.
HVAC Questions and Answers

HVAC Companies Portland: The Complete Guide to Finding, Vetting, and Hiring the Best Heating and Cooling Contractors in the Rose City
HVAC Repair Portland: The Complete 2026 Homeowner's Guide to Furnace, AC, and Heat Pump Service in the Rose City

Commercial HVAC Contractors Near Me: How to Find, Vet, and Hire the Right Local Pro for Your Building

HVAC Tune Up Service: The Complete Guide to Professional HVAC Maintenance and Why It Pays for Itself
HVAC Solutions: The Complete Guide to Heating, Cooling, and Indoor Air Quality Systems for Homes and Buildings
About the Author
NATE Certified HVAC Technician & Licensing Exam Trainer
Universal Technical InstituteMike Johnson is a NATE-certified HVAC technician and EPA 608 universal-certified refrigerant handler with a Bachelor of Science in HVAC/R Technology. He has 19 years of commercial and residential HVAC installation and service experience and specializes in preparing technicians for NATE certification, EPA 608, A2L refrigerant safety, and state HVAC contractor licensing examinations.