Anatomy and Physiology Lab: The Complete Guide to Skills, Techniques, and Exam Success
Master your anatomy and physiology lab with expert tips on dissection, microscopy, and practical exams. 🧠 Complete guide for students.

The anatomy and physiology lab is where classroom theory transforms into hands-on understanding of the human body. Whether you are a nursing student, pre-med hopeful, or allied health professional in training, the lab portion of your A&P course is often the most challenging and most rewarding component. Unlike lecture, where you passively absorb information from slides and textbooks, the lab demands active engagement — handling specimens, operating microscopes, measuring physiological responses, and interpreting real biological data in real time.
Most anatomy and physiology lab courses in the United States run alongside a co-requisite lecture section, meeting once or twice per week in sessions that typically last two to three hours. During that time, students rotate through stations covering everything from histology slides to skeletal identification, from cardiovascular measurements to urinalysis dipstick interpretation. The breadth of material covered in a single semester is enormous, and students who underestimate the lab workload often find themselves scrambling before practical exams.
What makes the lab uniquely difficult is that memorization alone will not save you. You can know every bone marking on a diagram and still freeze when faced with an unlabeled articulated skeleton under timed conditions. You can recite the layers of the epidermis from memory and still struggle to identify the stratum granulosum on a prepared slide under 40x magnification. Practical skills require repeated physical practice, not just reading — and that distinction matters enormously for your final grade.
Lab practical exams are typically worth 25 to 40 percent of your overall course grade, making them impossible to ignore. These exams usually involve rotating through 20 to 40 numbered stations, spending 60 to 90 seconds at each one before a timer signals you to move on. Stations may ask you to identify a structure on a model, name a tissue type on a slide, interpret a graph of lung volumes, or describe the function of a labeled organ. The time pressure is intense, and there is rarely a second chance to reconsider your answer.
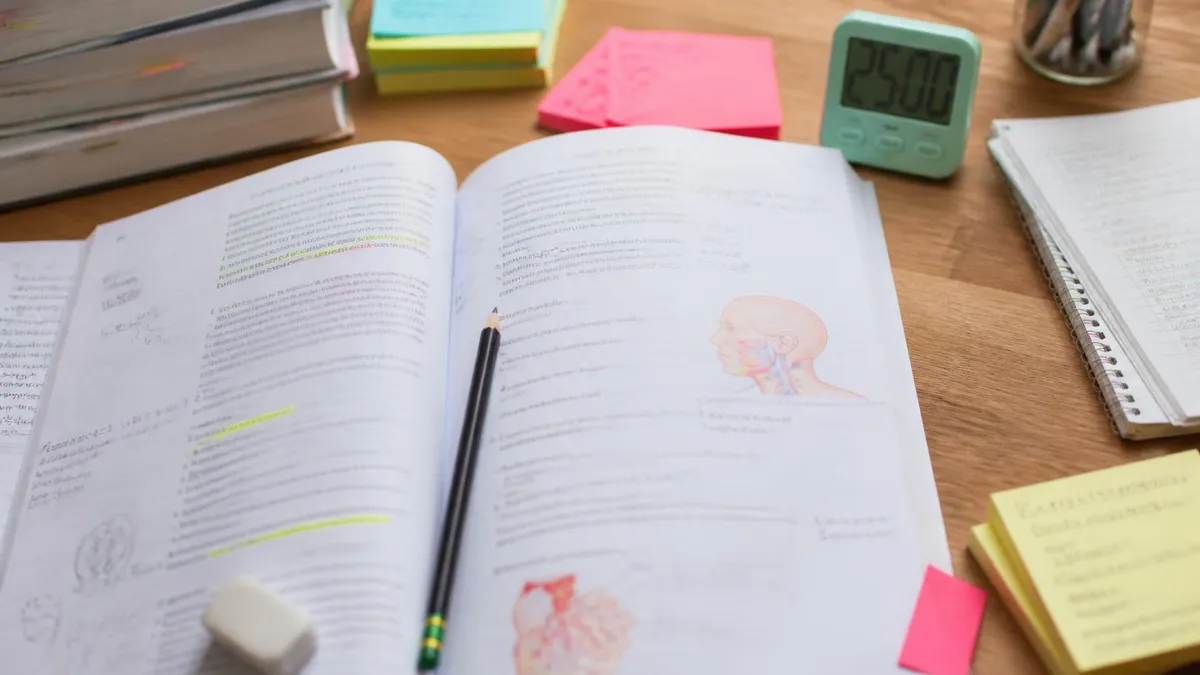
Success in the A&P lab requires a strategic combination of pre-lab preparation, active participation during sessions, and consistent post-lab review. Students who arrive having already read the lab manual and previewed the relevant atlas images consistently outperform those who open the book for the first time at the bench. Pre-lab quizzes, which many instructors administer at the start of each session, reward this preparation directly — and the points add up over a semester.
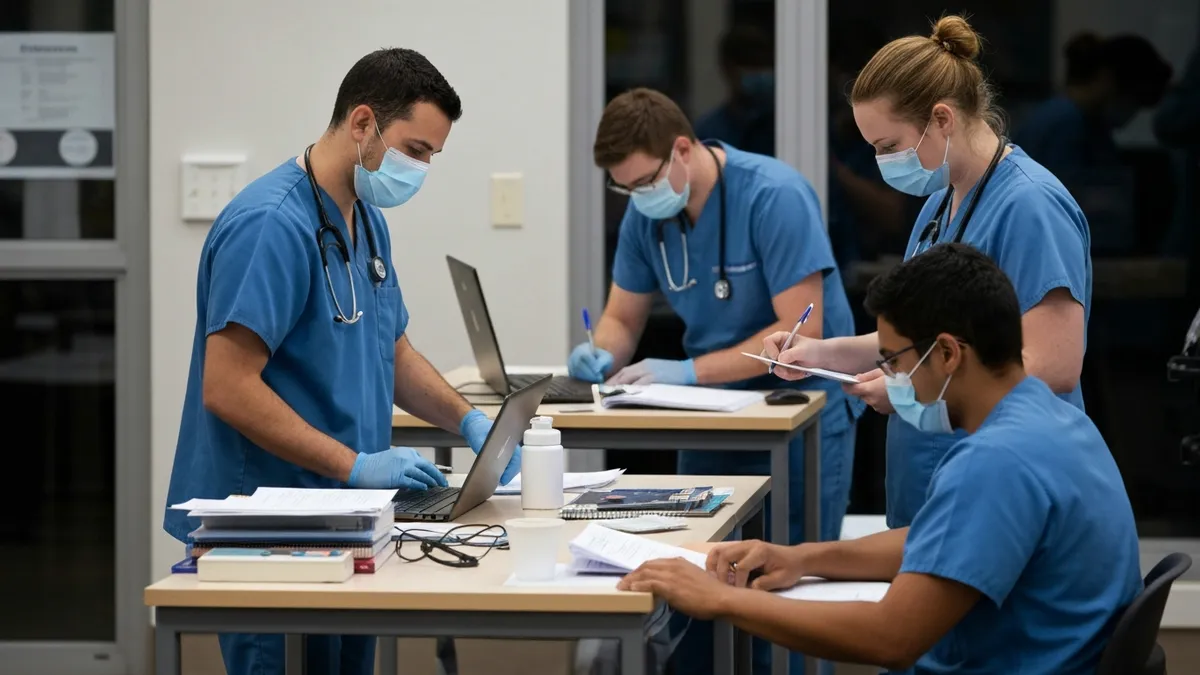
Beyond grades, lab skills have direct professional relevance. Nurses use physical assessment techniques developed in A&P lab every single shift. Radiologic technologists rely on their anatomical spatial reasoning when positioning patients and interpreting images. Physical therapists must understand joint mechanics and muscle origins to design effective rehabilitation programs. The habits of precise observation, methodical procedure, and accurate documentation that you build in the lab follow you directly into clinical practice.
This guide covers everything you need to excel in your anatomy and physiology lab — from the core skills and equipment you will encounter to proven study strategies for acing practicals. Whether you are just starting your first semester or preparing for a retake, the information here will help you build confidence, reduce anxiety, and walk into every lab session ready to succeed.
Anatomy and Physiology Lab by the Numbers
Core Lab Skills You Must Master
Proper use of compound light microscopes is foundational to A&P lab. You must master focusing at multiple magnifications (4x, 10x, 40x), adjusting the iris diaphragm for contrast, preparing wet mount slides, and identifying tissue types on prepared histology slides with accuracy and speed.
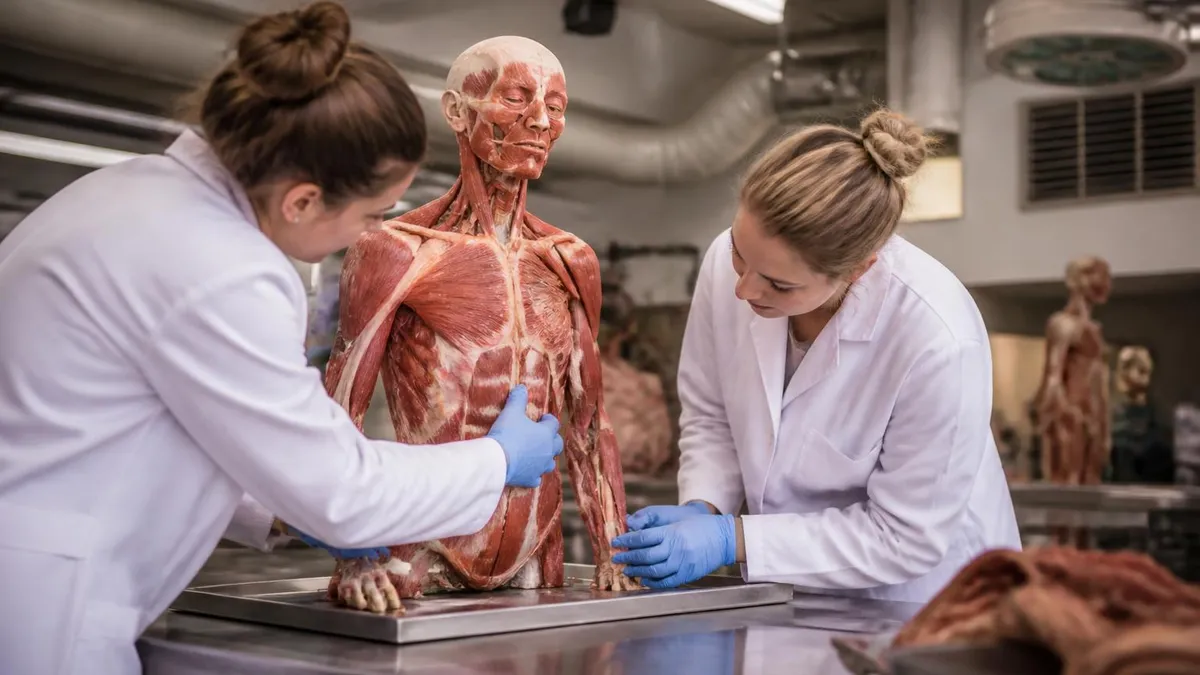
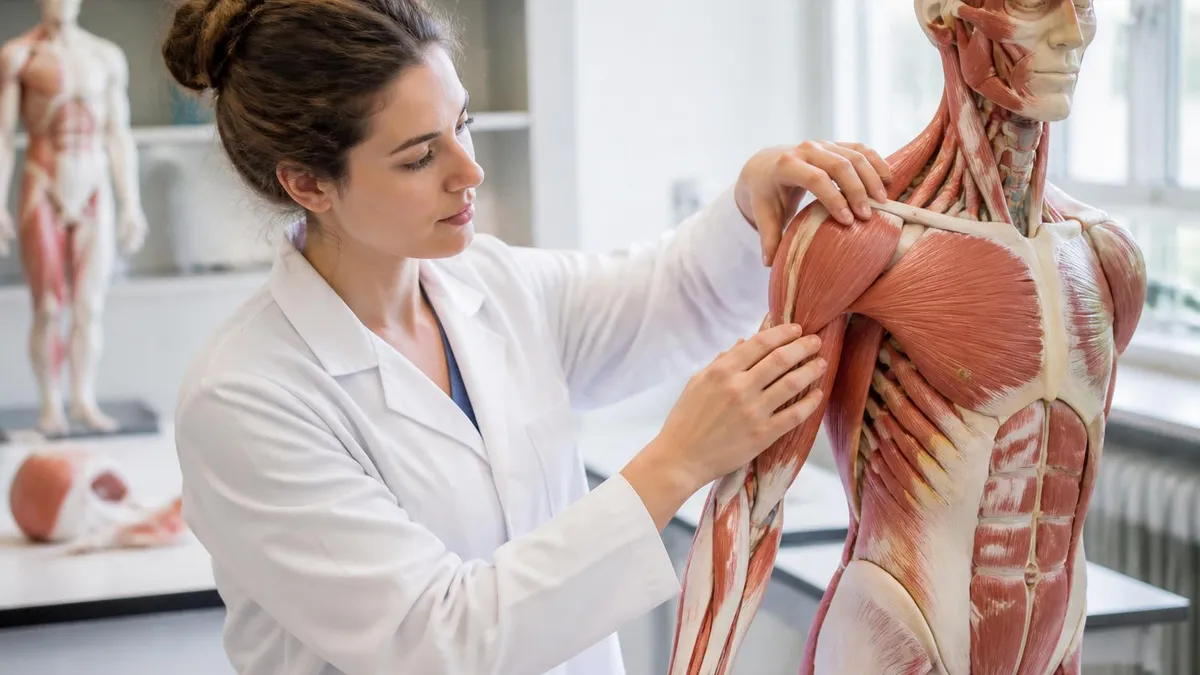
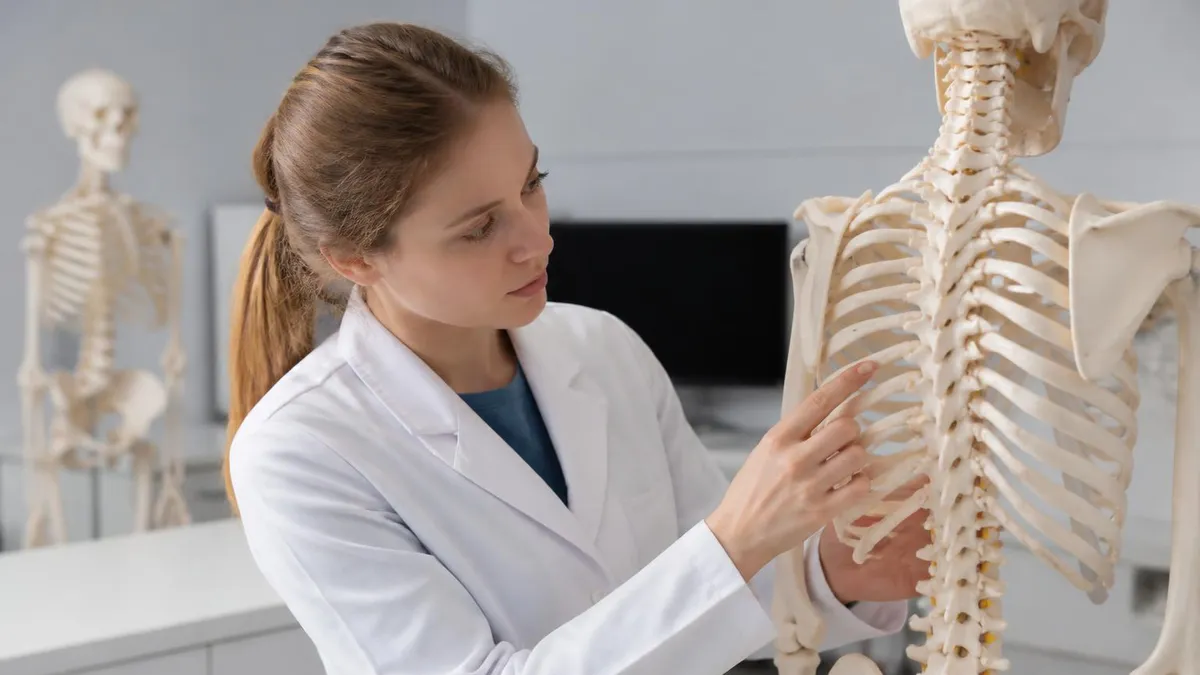
Lab courses use plastic models of the brain, heart, kidney, eye, and ear to test structural knowledge. Students must identify specific regions, lobes, chambers, and associated vessels by name — often under timed practical exam conditions with numbered pins marking specific structures.
Identifying bones by name, locating specific bone markings (processes, foramina, fossa), and identifying muscles by their origin, insertion, and action are core lab competencies. Both articulated skeletons and disarticulated bones are used, and practical exams may use either format.
Labs frequently include hands-on measurement activities such as blood pressure recording with a sphygmomanometer, measuring lung volumes with a spirometer, testing reflexes with a reflex hammer, electrocardiogram interpretation, and conducting urinalysis using dipstick reagent strips.
Many A&P labs include dissection of preserved specimens such as the cat, fetal pig, sheep brain, sheep heart, and cow eye. Proper use of dissection instruments, safe chemical handling, and ability to identify structures within real specimens are expected skills by semester's end.
Studying effectively for anatomy and physiology lab practicals demands a fundamentally different approach than studying for written lecture exams. The most important principle is simple: you must practice identifying structures visually and tactilely, not just reading their names. Flashcards that show diagrams of bones or histology images are far more effective than text-only cards listing definitions. Apps like Visible Body and Complete Anatomy allow you to rotate three-dimensional models on your phone, which closely approximates the experience of handling a physical specimen or model in lab.
Create a dedicated lab study schedule that mirrors the timing of your actual lab sessions. If your lab meets on Tuesdays, study lab material on Sundays and Mondays so the material is fresh when you arrive. After each lab session, spend at least 30 minutes reviewing the structures covered that day while they are still in working memory. This post-lab consolidation window is one of the most underutilized study opportunities in A&P — students who use it consistently see measurable improvements in practical exam performance.
Use the concept of spaced repetition to review histology slides and anatomical structures across multiple sessions rather than cramming the night before a practical. Research consistently shows that spreading review across multiple shorter sessions produces stronger long-term retention than a single lengthy session. Free tools like Anki support spaced repetition with image-based cards, and many A&P instructors post slide images to course management platforms that you can import directly into a deck.
Form study groups specifically for lab practical preparation, not just for lecture exams. Quiz each other using physical models borrowed from the lab outside of scheduled hours — many community colleges and universities allow open lab access during designated hours. Take turns playing the role of examiner, calling out station numbers and timing each other. This simulation of the actual practical format reduces anxiety and exposes gaps in knowledge while there is still time to address them before the real exam.
Pay close attention to the exact terminology your instructor uses. Different textbooks and instructors may use slightly different names for the same structure — for example, the hypogastric region versus the pubic region, or the antebrachium versus the forearm. When your instructor consistently uses a specific term, that is almost certainly the term they expect on the practical. Write down every name they use during lab sessions and flag any discrepancies between your textbook and their preferred terminology early in the semester.
Prioritize the structures your instructor specifically tells you to know. Most A&P lab instructors distribute a practical exam list — a numbered inventory of every structure that may appear on the test. If yours does, treat this list as sacred. Every item on the list deserves equal attention during your study sessions, and nothing that is not on the list should consume time that could go toward mastering listed structures. Some students waste hours studying structures that will never appear on their specific exam while neglecting ones that will definitely be tested.
For physiological measurement labs — blood pressure, lung volumes, EKG, and similar activities — understand not just how to perform the procedure but what the data means. Practical exams sometimes present a graph or data table and ask you to interpret it rather than identify a physical structure. Knowing that a forced vital capacity of 3.2 liters in a 22-year-old male indicates potential restrictive lung disease, for instance, requires conceptual understanding, not just procedural recall. This interpretive layer distinguishes high-performing students in the lab component of A&P courses.
Major Anatomy and Physiology Lab Topics by Body System
The skeletal system lab unit covers all 206 bones of the adult human skeleton, with particular emphasis on bone markings such as condyles, epicondyles, tubercles, foramina, and fossae. Students must identify individual bones both on articulated skeletons and as disarticulated specimens, which is significantly more challenging. Common high-yield bones include the femur, tibia, fibula, humerus, radius, ulna, vertebral column with all regions, and the bones of the skull including the ethmoid, sphenoid, and temporal.
The muscular system lab builds on skeletal knowledge by requiring students to identify individual muscles by name on cadaveric models or preserved cat specimens. Each muscle must be associated with its origin bone, insertion bone, and primary action. High-frequency practical exam muscles include the quadriceps group, hamstring group, rotator cuff muscles, deep back muscles (erector spinae group), and the muscles of facial expression. Understanding the naming conventions — based on shape, location, size, direction, number of heads, and function — dramatically accelerates memorization across all 600+ named muscles.

Hands-On Lab Learning vs. Digital Anatomy Tools: Pros and Cons
- +Physical specimens provide genuine tactile feedback that no digital tool can replicate, building true spatial reasoning skills
- +Hands-on practice with real equipment like sphygmomanometers and microscopes directly prepares you for clinical settings
- +Group lab settings create collaborative learning opportunities and allow peer teaching that deepens understanding
- +Working with preserved specimens or cadavers builds the professional desensitization required for healthcare careers
- +Immediate instructor feedback during lab sessions catches misconceptions before they become entrenched errors
- +Lab practical exams require physical identification skills that only develop through repeated hands-on practice with actual models and specimens
- −Lab hours are fixed and limited, providing insufficient repetition time for students who struggle with visual-spatial identification
- −Preserved specimens degrade over the semester, making late-semester identification progressively more difficult and ambiguous
- −Lab supply budgets vary widely between institutions, creating significant inequality in the quality of available models and specimens
- −Students with dissection anxiety or ethical objections to animal use face unnecessary stress and barriers to full participation
- −Lab practicals under time pressure create high-stakes anxiety that may not accurately reflect actual clinical competency
- −Digital study tools and physical lab models are rarely integrated, forcing students to mentally bridge two separate learning environments
Anatomy and Physiology Lab Practical Exam Prep Checklist
- ✓Obtain your instructor's official practical exam structure list and review every item at least three times before exam day
- ✓Practice identifying all skeletal bones and bone markings on both articulated and disarticulated specimens
- ✓Review histology slides using atlas images or digital tools until you can identify tissue type within 10 seconds
- ✓Quiz yourself on muscle origins, insertions, and actions using flashcards with anatomical diagrams rather than text only
- ✓Practice blood pressure measurement, spirometry, and reflex testing procedures until each step is automatic
- ✓Time yourself on simulated practical rotations — 90 seconds per station — to build comfort with the timed format
- ✓Memorize the cranial nerves (names, numbers, and primary functions) as they frequently appear on neurology lab practicals
- ✓Review your lab notebook and post-lab questions from every completed unit and correct any mistakes you made
- ✓Attend all open lab sessions offered in the week before your practical exam to maximize hands-on practice time
- ✓Get adequate sleep the night before the practical — spatial reasoning and visual recall are significantly impaired by fatigue
The 90-Second Rule: Why Timing Yourself Changes Everything
Most A&P practical exams rotate students through stations with exactly 90 seconds per station. Students who have never practiced under this time constraint frequently run out of time on stations they actually know — they overthink, second-guess, and run the clock down. Simulating this pressure during your study sessions by using a phone timer at exactly 90 seconds per station is one of the highest-yield preparation strategies available. Do it at least twice in the week before your practical.
Common mistakes in the anatomy and physiology lab fall into predictable patterns that instructors see repeatedly every semester. Understanding these pitfalls in advance allows you to sidestep them entirely rather than learning from them the hard way after a disappointing practical exam score.
The most widespread error is confusing similarly named structures because students learned the names without learning the distinguishing visual features. The olecranon process and the coronoid process of the ulna, for example, are both projections of the same bone — but they are located on opposite ends and face different directions. Knowing both names without knowing which is which will cost you points.
A second extremely common mistake is misidentifying tissue types because students focus on cell shape rather than the overall tissue architecture. The classic example involves distinguishing simple columnar epithelium from pseudostratified columnar epithelium — both have tall, column-shaped cells, but pseudostratified has nuclei at different levels creating the illusion of layers. Students who zoom in too closely on individual cells miss the architectural clue that makes identification possible. Always assess tissue at low magnification first to understand the overall organization before zooming in for cellular detail.
Students frequently lose points on physiology labs by recording data without understanding what the data means. A blood pressure reading of 142/94 should trigger recognition that this falls in the Stage 2 hypertension range — but students who record the numbers without interpreting them in clinical context will miss the follow-up question on the lab report. Similarly, a spirometry result showing a reduced FEV1/FVC ratio should suggest obstructive lung disease, while a proportionally reduced FEV1 and FVC with a normal ratio suggests restrictive disease. These interpretive skills are consistently tested.
Another major error is neglecting the directional terminology and body planes that form the foundation of all anatomical communication. Confusing medial and lateral, proximal and distal, or sagittal and coronal sections under exam pressure leads to avoidable errors on both practical exams and lab reports.
These terms must become automatic — as natural as saying left and right — because they appear in every lab unit from the first week to the last. Reviewing them in the context of specific structures (the ulna is medial to the radius in anatomical position, the femur is proximal to the tibia) reinforces their meaning better than memorizing definitions in isolation.
Many students underestimate the difficulty of cat dissection labs and arrive without adequately previewing the dissection guide. Cat musculature differs in important ways from human musculature — for instance, cats have a cleidobrachialis muscle that has no human equivalent, and their superficial pectoral muscles differ from human anatomy.
Instructors who test using cat specimens expect students to know the cat nomenclature, not simply the human equivalent. Read the dissection chapter thoroughly before the lab session and use any available cat dissection photo atlases to familiarize yourself with the appearance of specific structures before you are expected to find them on your own specimen.
Poor lab report writing is a chronic problem that costs students points throughout the semester. Lab reports should use precise anatomical terminology consistently, describe procedures with sufficient detail that another person could replicate them, present data in clearly labeled tables or graphs, and discuss results in terms of the underlying physiology rather than simply restating what happened.
Vague statements like "the heart rate went up after exercise" earn far fewer points than "heart rate increased from 68 bpm at rest to 142 bpm immediately following three minutes of stepping exercise, consistent with increased sympathetic nervous system activation and elevated catecholamine levels driving chronotropy."
Finally, many students fail to use their lab manual strategically. The manual contains not just procedures but also guiding questions, diagrams, and review sections that frequently mirror practical exam content almost exactly. Instructors write practical exams with the manual open — the questions they ask are the same questions the manual asks. Completing every figure labeling exercise, answering every review question, and comparing your answers to the answer key (where provided) is one of the most direct and efficient paths to a high practical exam score available to any student.

Every anatomy and physiology lab has specific safety policies regarding chemical handling, sharps disposal, and personal protective equipment. Violating these policies — including failing to wear goggles during dissection or improperly disposing of used lancets during blood typing labs — can result in immediate removal from lab and a zero for that session's grade. Read your institution's lab safety agreement carefully, ask questions before your first session, and treat every safety rule as non-negotiable regardless of how minor it may seem.
Advanced techniques in the anatomy and physiology lab build directly on foundational skills and connect explicitly to clinical practice in ways that motivate sustained study. One of the most clinically relevant advanced lab activities is the complete blood count simulation, in which students prepare blood smears, stain them with Wright's stain, and perform a differential white blood cell count by classifying 100 consecutive white cells under oil immersion at 100x magnification.
This exercise demands mastery of leukocyte identification under high magnification — a skill that medical laboratory technicians perform hundreds of times daily — and reveals how the relative proportions of neutrophils, lymphocytes, monocytes, eosinophils, and basophils shift in response to infection, allergy, or bone marrow disease.
Electrocardiogram interpretation moves from the introductory level of identifying the PQRST waveform to calculating heart rate from strip paper, measuring intervals (PR, QRS, QT), and recognizing common dysrhythmias such as sinus bradycardia, sinus tachycardia, and first-degree AV block. Students who can read a 6-second EKG strip and calculate rate, assess rhythm regularity, and comment on waveform morphology carry a skill directly applicable to nursing, paramedic, and cardiovascular technician programs. Many A&P instructors introduce this content during the cardiovascular physiology lab unit as a bridge toward clinical application.
Urinalysis provides another rich clinical connection. Beyond the basic dipstick interpretation introduced in earlier labs, advanced urinalysis includes microscopic examination of urine sediment to identify casts, crystals, red blood cells, white blood cells, and bacteria. The presence of waxy casts suggests chronic renal failure; red blood cell casts indicate glomerulonephritis; granular casts appear in acute tubular necrosis. Understanding what each finding means physiologically — and being able to explain why the kidney produces each type of abnormal sediment — elevates lab performance from mechanical identification to genuine clinical reasoning.
Neurophysiology labs that use computerized data acquisition systems allow students to record actual electromyograms from surface electrodes, measure nerve conduction velocity in peripheral nerves (often using the ulnar or median nerve in the forearm), and quantify the effect of muscle fatigue on EMG amplitude. These experiments produce real data that must be analyzed statistically — calculating means, standard deviations, and comparing results to published norms. Students who engage seriously with the data analysis component develop quantitative reasoning skills that serve them in any healthcare profession requiring interpretation of laboratory results or monitoring data.
Blood typing labs, in which students determine ABO and Rh blood type by mixing blood samples with anti-A, anti-B, and anti-Rh sera and observing agglutination, connect immunology and hematology in a single hands-on experience. Understanding why agglutination occurs — because antibodies in the serum cross-link antigens on the red cell surface, forming visible clumps — connects the observable lab result to the underlying molecular immunology. This same principle explains transfusion reactions, hemolytic disease of the newborn, and organ transplant rejection, making blood typing a laboratory activity with extraordinarily broad clinical implications.
For students preparing for healthcare licensure examinations such as the NCLEX-RN, PANCE, or USMLE Step 1, the physiological concepts explored in A&P lab provide the biological foundation for clinical reasoning questions. A nursing student who thoroughly understands the mechanism of tubular reabsorption from kidney physiology lab will approach NCLEX questions about diuretic medications from a position of genuine understanding rather than superficial memorization. This is why excelling in A&P lab is not just about getting a good grade in a prerequisite — it is about building the conceptual infrastructure that makes all subsequent clinical coursework more comprehensible.
Supplementing your lab experience with structured practice questions is one of the most efficient ways to close knowledge gaps before they appear on exams. Online practice tests that cover applied methods, physiological measurement interpretation, and clinical assessment scenarios mirror the cognitive demands of both lab practicals and licensing examinations. Integrating these resources into your weekly study routine — rather than reserving them only for pre-exam cramming — ensures that you are continuously identifying and addressing weak areas across the full span of the semester.
Practical tips for excelling in your anatomy and physiology lab begin with a mindset shift: treat every lab session as a practice practical exam, not a time to passively observe your lab partner. The students who perform best on practicals are those who personally handle every specimen, personally adjust every microscope, and personally record every measurement during lab — not those who watch while someone more confident takes the lead. Rotate responsibilities deliberately and insist on equal participation, even when it feels slower or more uncomfortable to do the work yourself.
Invest in a high-quality atlas early in the semester and use it consistently. The most widely used references include the Atlas of Human Anatomy by Frank Netter, the Photographic Atlas for the Anatomy and Physiology Laboratory by Kent Van De Graaff, and the widely adopted McKinley and O'Loughlin lab manuals.
Your instructor may require a specific lab manual, but a supplementary photographic atlas adds tremendous value — particularly for histology and cadaveric dissection content — that line drawings alone cannot provide. Photographs of real tissue under real microscopes prepare you better for what you will actually see in lab than idealized diagrams ever can.
Use color-coding aggressively in your lab notes and on printed diagrams. Assign consistent colors to structural categories — for example, always color arteries red, veins blue, nerves yellow, and lymphatics green across every system you study. This color consistency builds automatic visual associations that persist under the stress of a timed practical exam. When you see a structure colored in your mental atlas, the name surfaces more quickly than if your study materials were monochromatic throughout the semester.
Create a personal error log for every quiz and practical exam throughout the semester. Every time you miss a question, write down not just the correct answer but the reason you missed it — was it a naming confusion, a directional error, a misidentified tissue feature, or a gap in physiological understanding? Review this error log before every subsequent assessment. Many students make the same categories of error repeatedly because they never systematically analyze their mistake patterns. The error log transforms random mistakes into a targeted study guide.
Take advantage of virtual anatomy tools to supplement physical lab sessions. Platforms like Anatomy & Physiology Revealed, 3D4Medical's Complete Anatomy, and the Visible Body suite allow you to dissect virtual cadavers, examine histology slides with explanatory overlays, and quiz yourself on structure identification from any angle. These tools are available 24 hours a day — unlike the physical lab — and allow unlimited repetitions of the identification exercises that build exam-ready recall. Many institutions provide student access licenses for free; check with your instructor or library before purchasing.
On the day of a lab practical exam, arrive early, take several slow deep breaths, and remind yourself that you have prepared for this. Move methodically through each station: read the question first, then examine the specimen or slide, then commit to an answer.
Do not change your first answer unless you realize you misread the question — research on practical exam performance consistently shows that first-response accuracy exceeds second-guess accuracy. If you are completely uncertain at a station, write your best guess and move on immediately; running out of time at a station you know well because you stalled at one you did not know is a preventable and costly mistake.
After each practical exam — regardless of your score — conduct a thorough debrief. Ask your instructor to review the exam with you, identify the stations you missed, and understand exactly what the correct answer was and why. Many instructors schedule post-practical review sessions for this purpose.
Even if you earned a high score, the structures you nearly missed or took longest to identify reveal the boundaries of your current knowledge. These boundaries define the most productive territory for study before the next practical, keeping your preparation continuously calibrated to your actual needs rather than comfort-seeking review of content you already know well.
Anatomy Physiology Questions and Answers
Human Anatomy and Physiology Book: The Complete Guide to Choosing, Using, and Mastering the Best Textbooks for 2026

McGraw-Hill Anatomy and Physiology Textbook: The Complete Guide to Editions, Features, and Study Strategies
Anatomy and Physiology Definitions: The Complete Beginner's Guide to Key Terms and Concepts
Anatomy and Physiology for Dummies: The Ultimate Beginner's Guide to Understanding the Human Body
Anatomy and Physiology Coloring Workbook: The Complete Guide to Visual Learning, Active Recall, and Mastering Body Systems
About the Author
Educational Psychologist & Academic Test Preparation Expert
Columbia University Teachers CollegeDr. Lisa Patel holds a Doctorate in Education from Columbia University Teachers College and has spent 17 years researching standardized test design and academic assessment. She has developed preparation programs for SAT, ACT, GRE, LSAT, UCAT, and numerous professional licensing exams, helping students of all backgrounds achieve their target scores.