Anatomy and Physiology Chapter 9 Coloring Workbook Answers: Complete Study Guide
Master anatomy and physiology chapter 9 coloring workbook answers with our complete guide. 📚 Step-by-step explanations for every exercise.

If you have ever struggled to complete your anatomy and physiology chapter 9 coloring workbook answers, you are far from alone. Chapter 9 typically covers the muscular system in most editions of the popular Elaine Marieb coloring workbook, and students consistently report it as one of the most demanding chapters in the entire course. Between origin and insertion points, muscle action terminology, and the sheer volume of muscles to memorize, the workbook exercises can feel overwhelming even for well-prepared students.
The anatomy and physiology coloring workbook was designed by Elaine N. Marieb to complement her flagship Human Anatomy and Physiology textbook, and it has been a staple of community college and university courses for decades. The coloring approach is not simply a fun distraction — research consistently shows that the physical act of coloring anatomical diagrams activates multiple memory pathways simultaneously, making retention significantly stronger than passive reading alone. When you color the origin of the biceps brachii in one shade and the insertion in another, your brain encodes spatial, visual, and kinesthetic information together.
Chapter 9 workbook exercises typically include labeling diagrams of major skeletal muscles, identifying the origin and insertion of each muscle, describing the action each muscle performs, and coloring-coded identification of muscle groups by function. Understanding how to approach these exercises systematically — rather than trying to memorize every muscle in isolation — is the key to finishing the chapter efficiently and retaining the information long enough to use it on exams and in clinical practice.
Many students make the mistake of treating the coloring workbook as a fill-in-the-blank exercise to complete as quickly as possible. In reality, the workbook is a diagnostic tool that shows you exactly which muscle groups you understand and which ones need more attention. If you can explain why the gastrocnemius inserts on the calcaneus via the Achilles tendon and what action that produces, you understand the logic of the muscular system — and that logic will carry you through both the workbook and your course exams.
This guide walks you through the most commonly tested concepts in Chapter 9, provides detailed answer explanations for the most challenging workbook exercises, and shows you how to build a study system that makes the coloring workbook a genuine learning tool rather than a homework chore. You will also find strategies for connecting Chapter 9 content to earlier chapters on cell biology and the skeletal system, since those foundations are essential for understanding why muscles work the way they do.
Understanding anatomy and physiology coloring workbook answers requires more than looking up correct labels — it demands understanding the functional relationships between muscles, bones, and the nervous system. Throughout this guide we use real examples drawn from the most widely used editions of the Marieb workbook, so you can follow along with your own copy and fill in exercises with confidence rather than guesswork.
Whether you are a nursing student completing prerequisite coursework, a pre-physical therapy student building your clinical foundation, or simply a dedicated learner working through anatomy independently, this guide will help you master Chapter 9 content and approach future chapters with greater confidence and efficiency.
Anatomy Coloring Workbook by the Numbers

Chapter 9 Workbook Structure: What to Expect
Full-page anatomical diagrams showing anterior and posterior muscle views require you to label each muscle by name, then color-code groups by function. These exercises form the backbone of Chapter 9 and account for the majority of the workbook pages.
Structured tables ask you to fill in the origin, insertion, and primary action for each major muscle. Completing these tables systematically — rather than randomly — builds the logical framework you need for both practical exams and clinical reasoning.
Matching exercises pair muscles with their functional movements, such as flexion, extension, abduction, or rotation. Getting these right requires you to understand joint anatomy from earlier chapters, making cross-chapter review essential for accuracy.
Several exercises specifically focus on decoding muscle names from Latin and Greek roots. Understanding that 'biceps' means two heads, 'brachii' refers to the arm, and 'femoris' means of the thigh lets you infer the location and structure of unfamiliar muscles.
Short-answer clinical scenarios ask you to apply muscle knowledge to real injury and movement contexts. For example, you might be asked which muscles would be weakened after a rotator cuff tear or how a hamstring strain affects gait mechanics.
The muscular system chapter of the coloring workbook is organized around regional anatomy, starting with muscles of the head and neck before moving through the trunk, upper limbs, and lower limbs. Most editions follow the same general sequence: you will encounter the muscles of facial expression and mastication first, then progress to the deep back muscles, the muscles of the thoracic wall, and finally the large muscle groups of the upper and lower extremities that dominate Chapter 9 exercises.
When approaching the coloring diagrams, the single most effective strategy is to assign colors by muscle group function rather than individual muscle. Color all flexors in one shade family — perhaps blues and blue-greens — and all extensors in warm colors like reds and oranges. Abductors might be yellow, adductors purple, and rotators green. This functional color-coding means that when you look at your finished diagram, the movement logic of each body region becomes visually obvious rather than requiring conscious recall of every individual muscle.
The anterior view of the upper limb in Chapter 9 typically asks you to identify and label the deltoid, pectoralis major, biceps brachii, brachialis, brachioradialis, and the forearm flexors as a group. Each of these muscles has a specific origin and insertion that determines what movement it can produce. The deltoid, for instance, originates on the clavicle and scapula and inserts on the deltoid tuberosity of the humerus, giving it the ability to abduct, flex, and extend the arm depending on which fiber group is activated — a nuance the workbook exercises frequently test.
The posterior view introduces a different set of challenges because the muscles of the back are arranged in multiple overlapping layers. The superficial layer includes the trapezius and latissimus dorsi, which are large and easily identified. The intermediate layer contains the rhomboids and levator scapulae, which are smaller and often confused with one another.
The deep layer, sometimes called the erector spinae group, includes the iliocostalis, longissimus, and spinalis muscles running parallel to the vertebral column. Many workbook diagrams use a cutaway view to show these deep layers, and it is critical to identify which layer each muscle belongs to before attempting to color or label it.
For the lower limb, Chapter 9 workbook exercises heavily emphasize the quadriceps group (rectus femoris, vastus lateralis, vastus medialis, vastus intermedius) and the hamstring group (biceps femoris, semimembranosus, semitendinosus). Understanding that the quadriceps extend the knee while the hamstrings flex it is straightforward, but the workbook goes deeper — it asks you to identify which muscles also act on the hip joint. The rectus femoris, for example, is a two-joint muscle that both extends the knee and flexes the hip, making it functionally different from the three vastus muscles that only cross the knee.
The gluteal region is another area where Chapter 9 exercises demand precision. The gluteus maximus is the primary hip extensor and the largest muscle in the body, but the gluteus medius and minimus are hip abductors that are critically important for maintaining pelvic stability during walking. Many students correctly color the gluteus maximus but mislabel the medius or confuse the piriformis — a deep hip rotator — with the gluteus minimus. Taking time to trace the muscle fibers from origin to insertion in your coloring diagram prevents these common errors.
The leg muscles below the knee are often covered in the final pages of Chapter 9, focusing on the tibialis anterior (dorsiflexion and inversion), the gastrocnemius and soleus (plantarflexion), and the fibularis group (eversion). These muscles are frequently tested in clinical anatomy because their dysfunction causes recognizable gait abnormalities, and the workbook exercises reflect this clinical relevance with scenario-based questions that connect muscle identification to functional outcome.
Origins, Insertions, and Actions: Chapter 9 Deep Dive
The biceps brachii originates from two heads on the coracoid process and supraglenoid tubercle of the scapula, then inserts on the radial tuberosity. Its primary actions are flexion of the elbow and supination of the forearm — a combination critical for turning a doorknob or lifting a cup. The triceps brachii, occupying the posterior compartment, originates from three heads and inserts on the olecranon of the ulna, making it the primary elbow extensor. Workbook exercises almost always ask you to distinguish these two antagonistic muscle groups by both location and function.
The rotator cuff muscles — supraspinatus, infraspinatus, teres minor, and subscapularis — form a group the workbook addresses with diagram overlays showing the deep shoulder anatomy. The supraspinatus initiates abduction and is the most commonly torn rotator cuff muscle. Infraspinatus and teres minor externally rotate the humerus, while subscapularis internally rotates it. Memorizing SITS (Supraspinatus, Infraspinatus, Teres minor, Subscapularis) gives you the complete rotator cuff list for any workbook question asking you to name the group members.

Coloring Workbook vs. Digital Flashcards: Which Is Better for Chapter 9?
- +Physical coloring activates kinesthetic memory that purely visual digital tools cannot replicate
- +Spatial relationships between muscles become immediately clear when drawn by hand on anatomical diagrams
- +The workbook forces you to slow down and study each muscle individually rather than rapid-scrolling through flashcard apps
- +Color-coding muscle groups creates visual categories that are faster to retrieve during exams
- +Completing full diagrams builds a reference resource you can review repeatedly without additional cost
- +The Marieb workbook aligns directly with course textbook chapters, eliminating the need to cross-reference multiple sources
- −Physical workbooks cannot update automatically when anatomy nomenclature changes in newer research
- −You can only use a coloring workbook once without purchasing additional copies, unlike reusable digital tools
- −Workbook exercises do not provide immediate feedback on whether your answers are correct
- −Some students find the repetitive coloring process slow compared to active recall flashcard methods
- −Physical workbooks are not searchable, making it harder to quickly locate a specific muscle or concept
- −Without the answer key, identifying errors in your completed workbook requires external verification
Chapter 9 Workbook Completion Checklist
- ✓Read the corresponding textbook chapter section before attempting each workbook diagram
- ✓Write the Latin root meaning next to each muscle name before coloring the diagram
- ✓Color antagonist muscle pairs in complementary colors to reinforce their opposing functions
- ✓Complete the origin-insertion table for all muscles before attempting the action matching exercises
- ✓Verify each labeled muscle against the textbook figure before submitting any graded assignment
- ✓Draw arrows on your diagram indicating the direction of pull for each muscle fiber group
- ✓Complete the clinical application questions even if they are optional — they appear on most course exams
- ✓Use a two-pass approach: first pass for labeling, second pass for verifying and correcting errors
- ✓Create a personal summary table listing every Chapter 9 muscle with its nerve supply
- ✓Cross-reference your completed Chapter 9 exercises with Chapter 7 (skeletal system) to confirm bony landmark accuracy
The Origin-Insertion Rule That Changes Everything
Every muscle pulls its insertion toward its origin — never the other way around. This single rule lets you predict any muscle's action from its anatomy alone. If the biceps brachii inserts on the radius and originates on the scapula, contraction must pull the radius (and forearm) toward the scapula, producing elbow flexion and forearm supination. Apply this logic to every muscle in Chapter 9 and you will never need to memorize actions by rote again.
Memory strategies that work for other anatomy chapters become even more valuable in Chapter 9 because of the sheer volume of muscles involved. The most effective approaches combine visual, verbal, and kinesthetic learning channels simultaneously. When you encounter a new muscle in the workbook, say its name out loud, trace its origin and insertion with your finger on the diagram, and color it before moving on. This three-channel encoding — auditory, proprioceptive, and visual — gives the information three separate retrieval pathways during an exam.
Acronyms and mnemonics remain one of the most time-tested tools for muscle memorization. The rotator cuff SITS acronym (Supraspinatus, Infraspinatus, Teres minor, Subscapularis) is known by nearly every anatomy student, but you can create your own for groups the standard mnemonics do not cover. For the four quadriceps muscles, some students use "Really Very Vain Individuals" (Rectus femoris, Vastus lateralis, Vastus medialis, Vastus intermedius). For the hamstrings, "Best Students Succeed" covers Biceps femoris, Semimembranosus, and Semitendinosus. Creating your own mnemonics, rather than memorizing someone else's, consistently produces stronger retention because the creative process itself reinforces the memory.
The etymology approach is particularly powerful for Chapter 9 because muscle names encode their own anatomy. Understanding that "deltoid" comes from the Greek letter delta (triangle shape), "trapezius" refers to a trapezoid shape, "sternocleidomastoid" literally names three attachment points (sternum, clavicle, mastoid process), and "extensor digitorum" means extender of the fingers removes the need to memorize these muscles as arbitrary word strings. Each name becomes a self-contained anatomy lesson that is harder to forget precisely because it makes logical sense.
Spatial memory techniques, sometimes called the method of loci, work remarkably well for the layered muscles of the back and abdominal wall. Imagine walking through a room where each piece of furniture represents a muscle layer — the couch is the most superficial layer, the rug beneath it is the intermediate layer, and the floor beneath that is the deep layer. Each time you mentally walk through that room, you rehearse the layering sequence. This technique sounds elaborate but takes only a few minutes to set up and dramatically reduces the confusion between similarly named deep muscle groups.
Spaced repetition adds the critical time dimension to your memorization strategy. Research consistently shows that reviewing material at increasing intervals — first after one day, then three days, then one week, then two weeks — produces retention rates two to three times higher than massed practice (studying everything intensively the night before an exam). For Chapter 9, this means starting your workbook exercises at least two weeks before any exam that covers muscular system content, and returning to review your completed diagrams on a spaced schedule rather than completing the chapter in one sitting.
Drawing muscles from memory is one of the most demanding but rewarding study techniques available. After completing your workbook exercises, close the book and draw a blank silhouette of the body region you just studied. Then add in each muscle from memory, including its origin and insertion points. Compare your drawing to the workbook diagram and note any muscles you omitted or misplaced. This retrieval practice — pulling information from memory rather than copying it — is far more effective at building lasting retention than re-reading or re-coloring the same diagrams.
Study groups offer a unique advantage for Chapter 9 content because explaining muscle anatomy to another person reveals gaps in your own understanding that self-study misses. If you cannot explain why the pectoralis major has two heads with different fiber directions, or why the serratus anterior is called the boxer's muscle, you have identified exactly what to review next. Teaching is the highest form of learning, and the Chapter 9 workbook gives you plenty of material to explain, debate, and quiz each other on.

Students most frequently lose points by confusing muscles with similar names: the gastrocnemius and soleus are both plantarflexors but have different origins, so their clinical significance differs. Similarly, the brachialis and brachioradialis both flex the elbow but insert on different bones. Always specify origin AND insertion in workbook answers — partial answers are typically marked incorrect even when the muscle name is right.
Connecting Chapter 9 workbook content to your broader course exam preparation requires understanding how muscular system knowledge integrates with every other system in the body. The muscles you study in Chapter 9 do not act in isolation — they are controlled by specific peripheral nerves, supplied by specific blood vessels, and attached to specific bony landmarks from the skeletal system. On practical exams and multiple-choice tests, questions increasingly test these connections rather than isolated muscle identification.
Nerve supply is one of the most commonly tested integration topics. The musculocutaneous nerve (C5–C7) innervates the biceps brachii, coracobrachialis, and brachialis in the anterior arm compartment. The radial nerve (C5–T1) serves the triceps and most posterior forearm extensors. When a workbook question asks you to predict which muscles would be weakened by a specific nerve injury, you need to know both the nerve-to-muscle mappings and the anatomical pathway of each nerve through the arm. This type of question bridges your Chapter 9 muscular anatomy with the nervous system chapters that follow.
Blood supply adds another layer of integration that workbook exercises in more advanced editions explicitly test. The brachial artery travels with the median nerve through the anterior arm, supplying most of the flexor compartment muscles.
Understanding that muscle compartments receive blood supply from named arteries running within or adjacent to them explains why compartment syndrome — a dangerous condition where swelling within a tight fascial compartment cuts off blood supply — can cause rapid muscle death. Clinical questions about compartment syndrome are common in both nursing and pre-med anatomy courses and connect directly to the compartment anatomy introduced in Chapter 9.
The concept of muscle synergists and antagonists is another Chapter 9 topic that reappears throughout the course and beyond. Synergists are muscles that assist the prime mover in producing a movement, while antagonists resist or reverse that movement. The coracobrachialis and anterior deltoid are synergists to the biceps brachii during elbow flexion because they assist with shoulder positioning, even though they do not cross the elbow. Understanding synergist relationships explains why strength training works — exercises that isolate one muscle always recruit synergists to stabilize joints, producing broader adaptations than single-muscle models predict.
Trigger points and referred pain patterns are clinical applications of Chapter 9 anatomy that appear in physical therapy, massage therapy, and sports medicine contexts. The trapezius, for instance, is the most common site of myofascial trigger points, and its referred pain pattern mimics tension headache. The iliopsoas trigger point refers pain to the lower back and anterior thigh. While coloring workbook exercises do not always cover trigger points explicitly, understanding that muscles can be both a source and a distant cause of pain elevates your anatomical knowledge from textbook facts to clinical reasoning.
Posture and gait analysis depend almost entirely on the Chapter 9 muscles. Normal walking requires precisely timed activation of the hip flexors, knee extensors, ankle plantarflexors, and their antagonists through every phase of the gait cycle. The gluteus medius fires during single-leg stance to prevent the pelvis from dropping on the swing side — a function that, when impaired, produces the characteristic Trendelenburg gait seen in hip abductor weakness. Workbook exercises that connect muscle anatomy to gait deviations are among the most clinically valuable in the entire chapter.
For students using the coloring workbook alongside PracticeTestGeeks resources, the most effective workflow is to complete each workbook section, then immediately test your knowledge with related practice questions that require applying the same concepts in a multiple-choice format. This transition from open-ended workbook exercises to structured test questions mirrors the format shift you will experience on your actual course exams and ensures that your coloring workbook investment translates directly into test performance. The combination of visual-kinesthetic learning through coloring and active recall through practice testing creates a study system that is substantially more effective than either approach alone.
Practical exam preparation for the muscular system requires a different approach than written exam preparation, and students who confuse the two often perform unevenly across assessment formats. Practical exams in anatomy courses typically use tagged cadaver specimens, anatomical models, or projected images where you must identify specific muscles and sometimes describe their function within a set time — often 90 seconds to two minutes per station. The coloring workbook prepares you for written identification questions, but practical exams demand three-dimensional spatial recognition that requires additional preparation strategies.
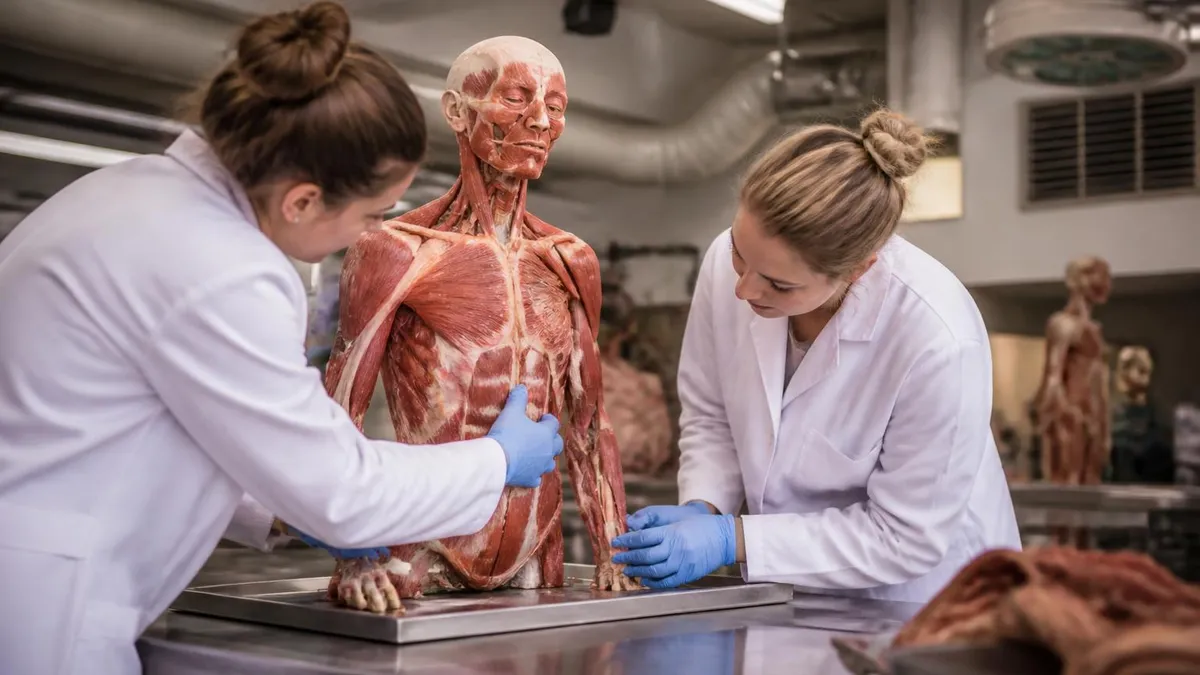
Working with anatomical models is the most direct preparation for practical exams. Most anatomy labs have access to muscular torso models and limb models that show the major muscles in three-dimensional relief. Spending time with these models — identifying muscles by palpating their position relative to bony landmarks, tracing their fiber direction, and locating their tendons at their attachments — builds the spatial memory that written diagrams alone cannot develop. If your lab has open hours outside scheduled class time, using them for model-based review is one of the highest-return study investments available to you.
Palpating muscles on your own body adds the proprioceptive dimension to your study, turning abstract diagram knowledge into physical reality. The biceps brachii is easily palpated by flexing your elbow against resistance. The temporalis can be felt contracting along the side of the skull when you clench your jaw.
The extensor digitorum longus can be traced from the lateral leg down to the dorsum of the foot as you extend your toes. Each time you palpate a muscle on your own body and confirm it matches the workbook diagram, you build a physical reference that survives far longer than memorized text.
Practice cadaver images are widely available through anatomy atlases and educational platforms, and reviewing them alongside your completed workbook exercises bridges the gap between idealized diagrams and real anatomical variation. Real cadaver specimens show that muscles do not always follow textbook descriptions precisely — fiber directions vary, accessory muscles occasionally appear, and the distinction between adjacent muscles can be subtler than diagrams suggest. Exposure to this variation before your practical exam prevents the surprise that causes students to second-guess their answers when a real specimen looks slightly different from their workbook diagram.
Time management during practical exams deserves explicit preparation. Many students spend too long at early stations and run out of time at later ones. A useful practice strategy is to set a timer for 90 seconds per question while reviewing your completed workbook diagrams and covering the labels. Force yourself to identify the muscle, state its origin and insertion, and describe its primary action before the timer sounds. Repeating this timed practice daily in the week before a practical exam builds the rapid-retrieval confidence that prevents time pressure from disrupting your recall during the actual assessment.
Post-exam review is the most neglected phase of anatomy study, and it offers the highest return on investment for students planning to take multiple exams covering cumulative content. After receiving a graded exam or practical assessment back, review every question you answered incorrectly and trace it back to a specific gap in your Chapter 9 workbook knowledge. Did you confuse the semimembranosus with the semitendinosus? Did you misidentify the insertion of the gluteus medius? Identifying your specific error patterns guides your next study cycle and prevents the same mistakes from recurring on the next exam.
Students who approach anatomy as a subject to understand rather than memorize consistently outperform those who rely on rote recall alone. The coloring workbook is designed to facilitate understanding — its diagrams are not random assemblages of labels but visual arguments about how the body is organized.
When you can look at a completed Chapter 9 diagram and explain why each muscle is positioned where it is, what bony landmarks it connects, and what movement that connection enables, you have achieved the level of understanding that will serve you through your entire anatomy and physiology course and into your clinical career.
Anatomy Physiology Questions and Answers

How Hard Is Anatomy and Physiology? The Complete Honest Guide for Students
Human Anatomy and Physiology Book: The Complete Guide to Choosing, Using, and Mastering the Best Textbooks for 2026

Eye Anatomy and Physiology: The Complete Guide to Understanding How Your Eyes Work
Anatomy and Physiology PDF: Complete Free Download Guide for 2026 Students

Anatomy and Physiology Coloring Workbook Answer Key: Complete Chapter-by-Chapter Study Guide
About the Author
Educational Psychologist & Academic Test Preparation Expert
Columbia University Teachers CollegeDr. Lisa Patel holds a Doctorate in Education from Columbia University Teachers College and has spent 17 years researching standardized test design and academic assessment. She has developed preparation programs for SAT, ACT, GRE, LSAT, UCAT, and numerous professional licensing exams, helping students of all backgrounds achieve their target scores.