Phlebotomy Knowledge: Order of Draw, Tubes & Procedures 2026 July
Master phlebotomy order of draw, tube colors, evacuated tube system, 📗 needle gauges, and therapeutic phlebotomy for polycythemia - everything you need
Phlebotomy is the practice of drawing blood from patients for laboratory testing, transfusion, donation, or therapeutic reasons. The word itself comes from the Greek phleb (vein) and tomia (cutting) - and yes, that is exactly what the job sounds like. A phlebotomist is the technician trained to collect those samples safely, label them correctly, and get them to the lab without compromising results. It is precise, hands-on work where small mistakes (wrong tube, mixed-up additive, hemolyzed sample) ripple straight into a doctor's diagnosis.
Scope is broader than most people realize. Routine venipuncture is the bread and butter, but phlebotomists also perform capillary draws on infants, run point-of-care tests, manage donor stations, and assist with therapeutic phlebotomy for conditions like polycythemia vera. Specialty roles cover blood banks, mobile draw services, plasma centers, and research labs. Whether you are studying for the NHA CPT, ASCP BOC, or ASPT exam, mastering tubes, draw order, gauges, and the evacuated tube system is non-negotiable - the certification exams will not let you fake it.
The certification landscape itself is worth a quick map. The NHA Certified Phlebotomy Technician (CPT) is the most widely accepted in physician offices and outpatient clinics. The ASCP Phlebotomy Technician (PBT) sits closer to hospital-based labs and is often required in large health systems. ASPT and NCCT credentials are accepted regionally. All of them test essentially the same core: anatomy, tube identification, order of draw, additive chemistry, infection control, patient identification, and basic complications like hematoma, syncope, and nerve injury. Get the fundamentals right and any of those exams is a single-sitting pass.
State requirements vary too. California, Louisiana, Nevada, and Washington require state-level phlebotomy certification beyond the national credential. Most other states accept any of the four major national certs without additional licensing. If you are planning to move or work travel assignments, check the state board before you sit for an exam - some pathways are not portable. CE requirements run 6-10 contact hours every two years for most bodies; the ASCP also runs a competency-assessment renewal that asks for documented skill checks, not just classroom hours.

Why does anyone need to memorize this material so cold? Because the order of draw is not theory - it is a physical sequence performed at the bedside, and a phlebotomist who reverses two tubes can carry over additives and ruin a coagulation panel. The same goes for needle gauge selection. Pick a needle that is too narrow, and you shear red cells (hemolysis). Pick one that is too wide for a fragile vein, and you collapse the vessel. Choices feel small but the lab results live and die by them.
This guide walks through the things every working phlebotomist - and every certification candidate - needs locked into long-term memory: tube colors and additives, the CLSI order of draw, the evacuated tube system, gauge selection, therapeutic phlebotomy for polycythemia, and the procedural checklist that separates a confident draw from a stuck-and-stab-again attempt. We will work through definitions first, then move into structure (cards), then drill the details (tabs), and finally hit the procedural and decision-making content (checklist and pros/cons) before closing with a focused FAQ block that mirrors the way certification questions are written.
One framing point before we dive in: phlebotomy lives at the intersection of clinical care and laboratory science. The blood you draw is the raw material for roughly 70% of all medical decisions a physician makes. A poor specimen is not just a minor inconvenience - it triggers redraws, delays treatment, and in critical-care settings, can mean a missed diagnosis. Treat every tube like it matters, because it does.
A useful mental model: think of the phlebotomy workflow as three linked phases - pre-analytic, analytic, and post-analytic. The phlebotomist owns the pre-analytic phase almost entirely. That includes patient prep, identification, site selection, draw technique, tube order, mixing, labeling, and transport. Studies consistently show that 60-70% of all laboratory errors originate in the pre-analytic phase. The analyzer in the lab is highly automated and rarely the failure point. The human at the bedside is.
Phlebotomy in one sentence
Phlebotomy is the controlled puncture of a vein (or capillary bed) to collect blood for diagnostic testing, transfusion, donation, or therapeutic removal - performed by a trained phlebotomist using sterile equipment, the correct tube additives, and a strict CLSI order of draw.
Before tubes and needles, get the medical terminology straight. Phlebotomy itself is the procedure. Venipuncture is the specific technique of accessing a vein with a needle. Capillary puncture (fingerstick or heelstick) is used when only a few drops are needed, or for newborns. Therapeutic phlebotomy removes blood as treatment - not for testing - in conditions like polycythemia vera, hereditary hemochromatosis, and porphyria cutanea tarda. Hemolysis is the rupture of red blood cells that wrecks results. Hematoma is the bruise that forms when blood leaks under the skin during or after a draw.
A handful of secondary terms come up often enough on exams that they deserve flashcards too. Antecubital refers to the inner crease of the elbow, the primary venipuncture site. The three veins there are the median cubital (preferred), cephalic (lateral), and basilic (medial, riskier due to nerve and artery proximity). Hemoconcentration is the artificial concentration of blood components caused by leaving a tourniquet on too long.
Lipemic means a fatty serum that interferes with optical testing - often from a non-fasted patient. Icteric means yellow/bilirubin-heavy serum. Phlebotomist is the credentialed professional; phlebotomy lab is the workstation or department where collections are processed and routed to chemistry, hematology, or microbiology.
The four structural pillars below - color order, tube system, therapeutic use, and procedure - are what certification exams hit hardest. Lock them in.
One more vocabulary note that trips students up. Phlebotomy therapy and therapeutic phlebotomy mean the same thing: blood removal as treatment, not testing. You will see both phrasings on exams and in clinical orders. When a physician writes "order therapeutic phlebotomy 500 mL" for a polycythemia vera patient, the order is to remove blood to reduce red cell mass - not to send anything to the lab. The collection bag is typically discarded or, in some programs, sent to the blood bank if the patient meets donor criteria (the FDA allows hemochromatosis units to be used for transfusion under variance).
Phlebotomy Knowledge Pillars
The CLSI sequence prevents additive carryover and protects test accuracy. The order: yellow blood culture first, then light blue (citrate) for coagulation, red or SST gold for serum chemistry, green (heparin) for STAT chemistry, lavender (EDTA) for hematology and blood bank, and finally gray (sodium fluoride and potassium oxalate) for glucose and ethanol. Memorize the mnemonic before exam day - reversing two tubes is the most common preanalytical error in venipuncture, and certification exam writers love to test it with a faked sequence asking you to spot the mistake.
Pre-vacuumed tubes (Vacutainer or the BD system) pull a calibrated blood volume through a double-ended needle and a plastic holder. The vacuum is dosed at the factory to give exact additive ratios - a 4.5 mL light blue tube needs the full 4.5 mL or the 9:1 blood-to-citrate ratio breaks and your PT/INR result is wrong. The system removes guesswork when used correctly. Underfilled tubes, expired vacuums, or skipped inversions are the classic ways to break it. Always check the expiration date stamped on the tube and invert additive tubes 5-10 times immediately after drawing.
Used to manage polycythemia vera (PV) and hereditary hemochromatosis by removing 450 to 500 mL of whole blood per session - the same volume as a standard blood donation. PV protocol typically runs weekly during induction until hematocrit drops below 45%, then transitions to every one to three months for maintenance. Hemochromatosis protocols continue until ferritin is 50-100 ng/mL. The technique uses a large-bore 16G or 18G needle in a sturdy antecubital vein, sterile collection bag, and gravity flow - the bag is weighed mid-collection to track volume.
The phlebotomy scope includes routine adult venipuncture, capillary fingerstick for small-volume tests like glucose meters and HbA1c, infant heelstick on the lateral or medial plantar surface, blood culture collection (always drawn first, two bottles per set), butterfly draws on hand and pediatric veins, arterial blood gas assistance for respiratory therapy, donor unit collection in blood banks, and therapeutic phlebotomy for the iron-overload and erythrocytosis conditions described above. Each procedure has its own CLSI standard - GP41 for venipuncture, GP42 for capillary, and H3 for tube order.
The order of draw exists because tube additives do not stay in their tubes. A pinch of EDTA dragged into a coagulation tube will skew the PT/INR. Heparin carryover throws off potassium and calcium. The CLSI H3 standard fixed the sequence decades ago, and exam writers love to test whether you actually know it - they will throw in a fake order and ask you to spot the error.
Same logic applies to the evacuated tube system. The vacuum in each tube is not a marketing feature - it is a calibrated dose. A 4.5 mL light blue tube needs exactly 4.5 mL of blood to keep the 9:1 blood-to-citrate ratio. Underfill it and the citrate dilutes too much, falsely prolonging the PT.
Overfill (almost impossible with a sealed Vacutainer, but possible with a syringe transfer) and you get the opposite. The system is engineered to remove guesswork - your job is to let it work by drawing tubes in the correct order, letting them fill to the line, and inverting them immediately.
Below, the tabs unpack everything in working detail: the mnemonic for the color sequence, what each additive does and which tests it serves, how therapeutic phlebotomy is dosed and scheduled for polycythemia, and how to choose between 21G, 22G, and 23G needles based on the vein in front of you.
Phlebotomy Reference Tabs
The CLSI order of draw, top to bottom: Yellow (blood culture) - Light Blue - Red/SST - Green - Lavender - Gray. Classic mnemonic: "Your Brother Bought Really Lousy Green Light Goggles" or "Stop Light Red Stay Put Green Light Go". Always draw blood cultures first to keep them sterile and to maximize organism recovery, then citrate (light blue) to protect coag results from clot activator carryover, then serum tubes, then plasma and whole-blood tubes. Gray (fluoride/oxalate) comes last because the fluoride and oxalate contaminate almost everything else - including potassium, calcium, and enzyme assays.
If your facility uses plastic red tubes with a clot activator instead of glass plain reds, the rule still holds: clot-activator tubes come before heparin tubes to avoid contaminating PT/PTT or potassium results.
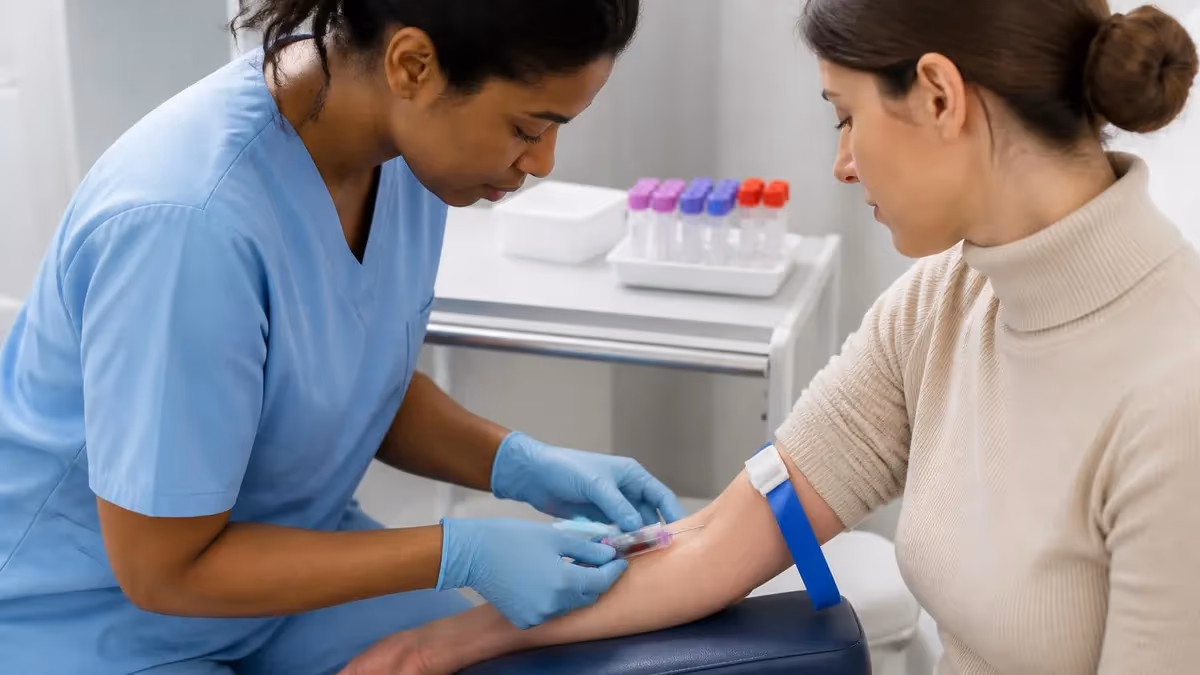
None of this matters if the procedural fundamentals are sloppy. A clean draw starts before the needle even comes out - it starts with positive patient identification using two identifiers (full name and date of birth), proper hand hygiene, and a tourniquet that is on for less than a minute to avoid hemoconcentration. Site selection follows: median cubital first, cephalic second, basilic last (the basilic sits next to the brachial artery and median nerve, so it is a fallback, not a first choice).
Labeling is the next quiet killer. Tubes must be labeled at the bedside, with the patient still present, before you leave the room. Pre-labeling tubes is a clear violation of CLSI GP41 and most hospital policies - if you have a tube ready to go and the patient turns out to be the wrong John Smith, you have a mislabeled specimen the moment the cap touches blood.
After the draw, every tube needs the patient's full name, date of birth, medical record number, draw time, and your initials. No initials, no draw - that is how the lab knows who to call when something looks off.
Below is the procedural checklist new techs should run mentally before every venipuncture, and a quick comparison of butterfly versus straight needle - because picking the wrong device for the vein in front of you is one of the fastest ways to blow the draw.
OSHA bloodborne pathogen standards prohibit two-handed recapping. Activate the safety device immediately after withdrawal and drop the unit into the sharps container in one motion. Recapping is the leading cause of needlestick injury in phlebotomy - and a fast track to a hepatitis B or HIV exposure investigation.
Use the checklist below the way pilots use preflight cards - every single time, in the same sequence. It is short on purpose. Certification exams test the exact items listed here because they map directly to errors that trigger lab redraws, mislabeled specimens, and patient identification incidents. The CLSI GP41 standard formalizes the steps; NHA, ASCP, and ASPT exams pull questions directly from that framework.
Pay particular attention to the tourniquet timing. If you cannot find a vein within 60 seconds, release the tourniquet, wait two minutes, and reapply. Leaving a tourniquet on longer drives potassium up, lactate up, and pH down - all of which corrupt the chemistry panel before the blood ever leaves the arm. The same applies to fist-pumping: do not let patients pump their fist to make a vein pop. Muscle contraction releases potassium from cells and produces a falsely elevated result. A gentle, sustained fist is fine; rhythmic pumping is not.
Phlebotomy Procedure Essentials
- ✓Verify patient identity with two identifiers (full name + DOB) and match against the requisition
- ✓Perform hand hygiene and don gloves; assemble tubes in CLSI order of draw before sticking
- ✓Apply tourniquet 3-4 inches above the antecubital fossa for under 60 seconds
- ✓Clean the site with 70% alcohol in concentric circles; let it air-dry fully
- ✓Anchor the vein, insert bevel-up at a 15-30 degree angle, then advance the tube into the holder
- ✓Release the tourniquet once blood flows; invert additive tubes gently 5-10 times immediately after draw
- ✓Activate the safety device, apply pressure for 3-5 minutes, label tubes at the bedside before leaving

Device choice is the next decision new phlebotomists wrestle with. The straight (multi-sample) needle is faster and cheaper - it screws into the tube holder, you push tubes onto the back, and blood fills directly through the system. The butterfly (winged collection set) has flexible tubing and small wings that let you anchor it against the skin, which is gentler on tiny or rolling veins.
One nuance worth memorizing for exams: when you use a butterfly to draw a coagulation tube first, you must collect a discard tube before the citrate tube. Why? The butterfly tubing holds air. That air takes up vacuum that should have been pulling blood, and the citrate tube ends up underfilled. A throwaway tube clears the line.
Both devices have trade-offs, and exams will absolutely ask you which to choose for a given scenario. Below is a quick breakdown of when each one wins.
Butterfly vs Straight Needle
- + —
- + —
- + —
- + —
- + —
- − —
- − —
- − —
- − —
- − —
One last point on difficulty - new students constantly ask is phlebotomy hard? The honest answer: it is mechanically simple, but mastery is harder than it looks. Most certificate programs run 4 to 8 months and require 100+ supervised successful sticks before sign-off. The procedural steps you can memorize in a weekend. Finding a deep vein on a dehydrated elderly patient with paper-thin skin at 4 a.m. is what separates a credentialed phlebotomist from someone who passed the written test.
The good news: it is one of the fastest healthcare credentials to earn, the work is in steady demand (Bureau of Labor Statistics projects 8% growth through 2032), and skills carry directly into MA, nursing, and lab-tech career paths. Put the time in on tubes, gauges, and order of draw - the rest is muscle memory.
Common rookie complications worth knowing for both work and exams: hematoma from poor pressure or going through the vein, syncope (fainting) which is why patients should be seated or lying down, nerve injury from stabbing too laterally near the basilic vein, and petechiae (tiny red spots from tourniquet pressure that signal a possible bleeding disorder). Recognize them, document them, and know when to stop and call for help.
Pediatric and geriatric draws deserve a final mention because both populations show up heavily on certification scenarios. For infants under one year, heelstick is the default - the lateral or medial plantar surface of the heel, never the arch or the back of the heel where you can hit bone. Warm the site first to increase blood flow. For toddlers and small children, a 23G butterfly on the median cubital with a parent holding the child is standard.
With elderly patients, the veins look prominent but slide easily and tear under aggressive technique. Use a 22G or 23G butterfly, anchor well, and ease in slowly. Lighter tourniquet pressure helps - if you can see the vein clearly without a tourniquet at all, skip it. These small adjustments turn the difference between a one-stick draw and a redraw call from the lab an hour later.
The FAQ below covers the questions that show up most often on certification exams and in real student threads - tube colors, gauge specifics, the evacuated tube system, therapeutic phlebotomy doses, and the practical stuff like how long a tourniquet can stay on. Use it as a final pass before exam day, then go work through the linked practice test to lock everything into recall under timed conditions.
If a topic feels shaky, do not just reread - test yourself on it. The CLSI order of draw, additive-to-test mapping, and gauge selection are the three areas where small confusions cost the most marks. Drill them with flashcards until you can rattle off any tube color, its additive, and at least two tests it serves without hesitation.
Two final exam-day tips: read every question slowly enough to spot the word "NOT" or "EXCEPT" - phlebotomy item writers love negative stems. And when a scenario question asks about a difficult vein, default to the safer choice: butterfly with a smaller gauge, median cubital over basilic, and never deviate from the CLSI order even when the scenario sounds like an exception.
PHLEBOTOMY Questions and Answers
About the Author
Registered Nurse & Healthcare Educator
Johns Hopkins University School of NursingDr. Sarah Mitchell is a board-certified registered nurse with over 15 years of clinical and academic experience. She completed her PhD in Nursing Science at Johns Hopkins University and has taught NCLEX preparation and clinical skills courses for nursing students across the United States. Her research focuses on evidence-based exam preparation strategies for healthcare certification candidates.