MRI Pictures: How to Read Scans Like a Tech
MRI pictures decoded: read T1, T2, FLAIR, and diffusion sequences. See what brain, spine, knee, and abdomen scans actually look like and why.
Open an MRI study and you stare at a grid of grayscale frames. Some look bright. Some look dark. The same kidney can glow on one image and disappear on the next. That is not a glitch. It is the whole point of MRI pictures.
Each picture you see is one slice from one sequence. The sequence is the recipe the scanner used to weight the signal. T1, T2, FLAIR, diffusion, STIR — these are not just labels. They are the reason fat looks white in one frame and gray in another. Once you learn the recipes, the pictures stop being a wall of pixels and start telling a story.
This guide walks through how MRI pictures are made, what the common sequences actually look like, and how to spot anatomy and pathology on brain, spine, knee, and abdomen scans. You will see why radiologists scroll through hundreds of frames before they write a single word — and why one bright spot in the wrong sequence can change a diagnosis.
If you have ever looked at your own MRI report and wondered why the radiologist mentioned "T2 hyperintensity" or "restricted diffusion," the answer sits in the pictures themselves. Each phrase points to a specific sequence and a specific behavior. By the end of this guide you will know exactly what those phrases describe and how to find the matching features when you scroll through your own study.
MRI Pictures by the Numbers
Numbers like 1.5 Tesla and 3 Tesla describe the strength of the magnet. Higher field strength gives sharper pictures and faster scans but costs more and amplifies certain artifacts. A typical brain MRI runs six to ten different sequences. Each sequence might produce thirty to sixty individual pictures. That is why a single "MRI of the brain" can mean hundreds of frames sitting on the radiologist’s screen.
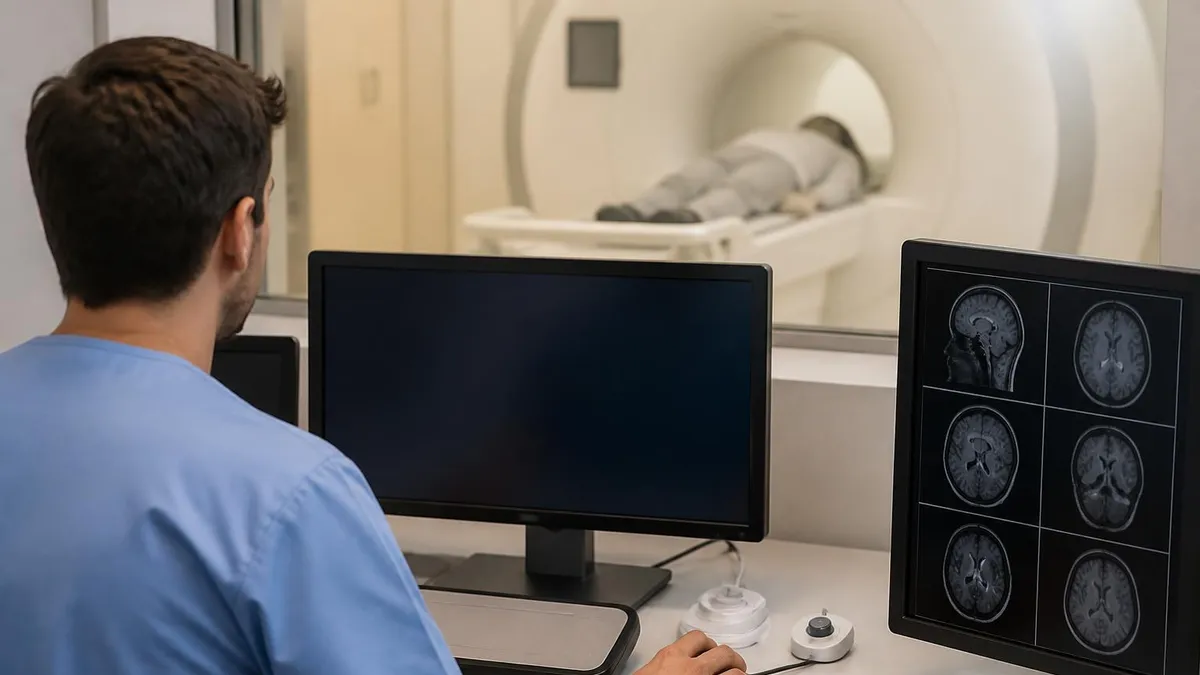
Think of MRI pictures like a stack of bread slices through the body. The scanner doesn’t take one photo. It samples thin cross-sections in three planes — axial (top down), sagittal (side view), and coronal (front to back). You scroll through them the same way you flip through a flipbook, and the anatomy moves with you.
The slice thickness matters too. A routine brain study uses 4 to 5 millimeter slices. High-resolution studies of the inner ear, pituitary, or knee menisci drop down to 1 or 2 millimeters. Thinner slices catch smaller findings but multiply the file count. A modern knee MRI can easily generate 1,500 individual pictures across all its sequences.
The history of MRI helps explain why the pictures behave this way. The original spin-echo sequences were slow but produced beautiful T1 and T2 contrast. Modern fast spin-echo and parallel imaging cut acquisition time without sacrificing too much signal. Every speed-up comes with a trade — faster scans can blur sharp boundaries or amplify motion. Reading MRI pictures from different hospitals means recognizing how each scanner’s defaults shape the final look. A 1.5T from one vendor and a 3T from another produce pictures with subtly different contrast even when the technologist requested the same sequence name.
Never describe a finding without knowing the sequence. "Bright spot in the brain" means nothing on its own. Bright on T1 suggests fat or blood. Bright on T2 suggests fluid or edema. Bright on diffusion suggests acute stroke. Same pixel — three different diagnoses. Radiologists train for years to keep the sequence-signal link straight, and they still check the sequence label at the corner of every frame before they call anything.
This is the trap that catches every first-year resident. Sequences are not interchangeable. Each one suppresses or amplifies certain tissues so the radiologist can compare them. A cyst that looks identical to a tumor on T1 will separate cleanly on T2. A fresh stroke invisible on standard sequences lights up on diffusion-weighted imaging within minutes of onset.
That is why MRI pictures are read in pairs and trios. You hold T1 next to T2. You match FLAIR against diffusion. You compare pre-contrast with post-contrast. The diagnosis lives in the difference between the frames, not in any single picture.
For students, the fastest way to internalize this is to look at a known structure — say, the cerebrospinal fluid in the brain ventricles — across every sequence. CSF is dark on T1, bright on T2, dark on FLAIR (because FLAIR suppresses fluid), and dark on diffusion. Once you can predict CSF behavior cold, you can use it as an internal landmark on any new study. The fluid tells you which sequence you are looking at even when the labels are tiny.
Anatomy review takes work because MRI shows structures most students only see on a textbook diagram. The basal ganglia, thalamus, and internal capsule sit deep inside the brain and only show up well on certain sequences. The hippocampus tucks into the medial temporal lobe and disappears on routine axial slices — you need coronal cuts angled along its long axis to see it clearly.
Spend time with an atlas open beside the PACS screen until the names match the shapes. Anatomy is the slow part of MRI training. Once the map sits in your head, pathology becomes much easier to spot because you instantly know which structure is missing or distorted.
The Core MRI Sequences
Fat is bright. Water is dark. Best for anatomy. Brain gray matter looks gray, white matter looks white — the names actually match. Used as the base map for nearly every study and as the canvas for contrast enhancement.
Water is bright. Fat varies depending on whether it's a fast spin echo. Best for pathology because most disease involves edema or fluid. Tumors, infections, swelling, and cysts pop white against darker normal tissue.
Like T2 but with the bright cerebrospinal fluid suppressed. Lesions next to ventricles — like multiple sclerosis plaques — jump out instead of getting lost in the spinal fluid glow. Essential for brain imaging.
Measures how water moves inside cells. Restricted diffusion turns bright. The gold standard for spotting acute stroke within the first hours, also useful for abscesses, lymphomas, and some hypercellular tumors.
Four sequences cover ninety percent of the clinical MRI pictures you will ever see. T1 gives you the anatomy. T2 shows you the disease. FLAIR cleans up the noise from cerebrospinal fluid. DWI catches strokes the other three miss. Memorize how each behaves with fat and water and you can navigate most studies on your own.
Beyond the core four, you will run into STIR (fat suppressed, used for spine and bone marrow edema), gradient echo or SWI (catches tiny bleeds and calcifications), and MRA or MRV for blood vessels. Each has its own look, but the same principle applies — know the recipe before you read the picture.
Modern scanners also produce specialized maps. Perfusion sequences show blood flow to tumors. Spectroscopy displays a chemical fingerprint of brain tissue. Diffusion tensor imaging traces the direction of white matter tracts in vivid color. These advanced pictures look nothing like standard MRI frames, but they all start from the same physics: hydrogen atoms wobbling in a magnetic field and giving back a faint signal the scanner translates into a grayscale or color value.
Newer scanners add abbreviated protocols designed for screening rather than diagnosis. A 10-minute brain MRI for stroke triage runs only DWI, FLAIR, and a vessel sequence. A breast MRI screening protocol skips the lengthy contrast-enhanced subtraction series and keeps only the critical fat-suppressed and DWI frames.
These shorter protocols don’t replace full studies — they speed up high-volume screening where most pictures will be normal. Knowing which protocol was run matters as much as knowing the sequences inside it. The same patient scanned two ways on the same day might produce two very different reports because the second protocol simply didn’t include the sequence where the finding sits.
MRI Pictures by Body Part
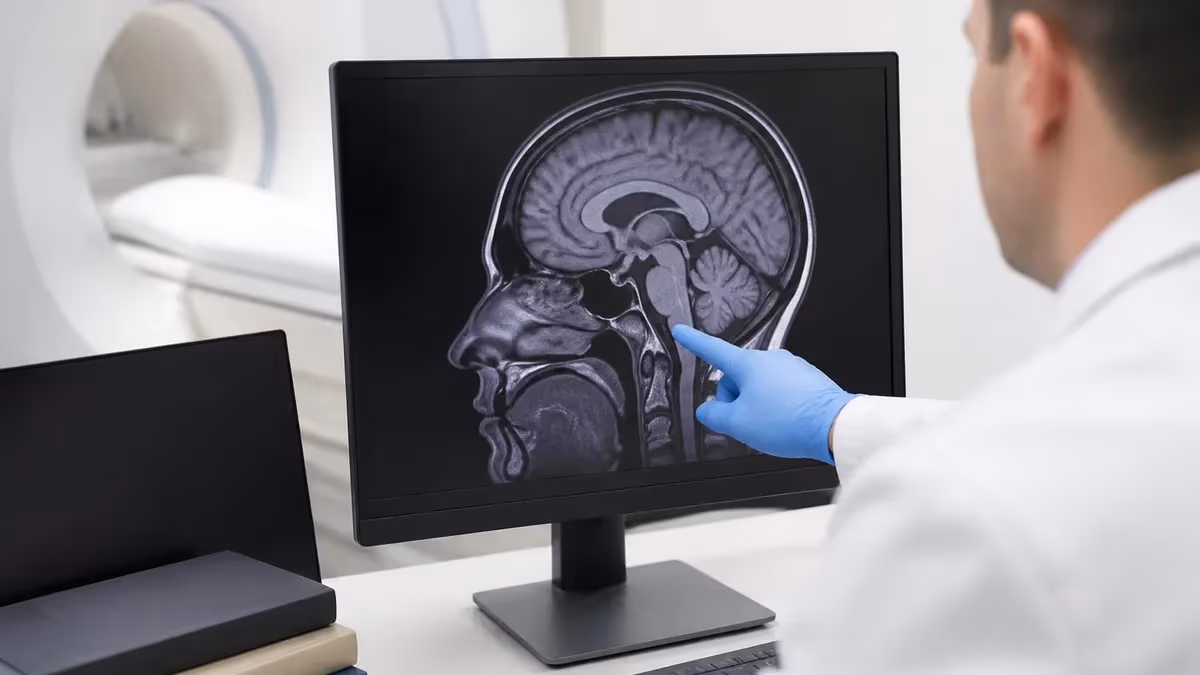
Axial brain pictures are the workhorse. Scroll from the top of the skull down and you pass through the ventricles, basal ganglia, brainstem, and cerebellum. Look for symmetry first — the left and right halves should mirror each other. White spots on FLAIR near the ventricles can mean small-vessel disease, MS, or aging. Acute strokes glow bright on DWI within minutes. Tumors usually show edema on T2 and enhance with gadolinium contrast on post-contrast T1. Sagittal midline pictures are best for the corpus callosum, pituitary, and brainstem.
Each body part has its own viewing habits. Brain readers scroll axial slices and check symmetry. Spine readers live in sagittal views. Knee specialists hop between three planes for every structure. Abdomen requires careful timing of contrast passes through the liver and pancreas. The pictures look different because the protocols are tuned for different questions.
One habit unifies all of them — scroll in both directions. Forward through a stack, then backward. Lesions sometimes hide between slices, and the eye picks up motion better than still frames. Radiologists move through stacks in rhythm. They never read a single picture in isolation.
The other shared habit is comparison. If a prior study exists, radiologists pull it up side by side. A stable finding over two years matters less than a new finding since last month. Some PACS systems link the two studies so scrolling one scrolls the other in sync. The pictures gain meaning when you place them in time, not just in space.
Imaging is also evolving in how it gets delivered. Old-school MRI pictures came on film, then on CDs. Today most patients access their study through a hospital portal or a third-party viewer. The same study viewed in two different apps can look completely different because the default window and level settings change the apparent contrast. Always view MRI pictures in a proper DICOM viewer if you want to see what the radiologist saw. Phone screenshots and PDF reports compress the grayscale range and hide subtle findings.
MRI artifacts mimic disease. Patient motion blurs the picture. Dental metal distorts the field around the jaw. Aneurysm clips produce voids. Magic-angle artifact makes tendons look torn. Before calling a finding, confirm it sits in the right anatomy and shows up on more than one sequence. If the bright spot only appears in one plane and lines up with a known artifact pattern, it is probably not real. The biggest mistakes in MRI reading come from chasing artifact instead of pathology.
Artifacts are the reason MRI pictures need cross-checking. A real lesion respects anatomy and behaves consistently across sequences. An artifact appears in one frame and vanishes in the next. A real tumor shows mass effect on surrounding tissue and matches its signal pattern across T1, T2, and post-contrast images. An artifact comes from outside the patient — chemical shift at fat-water borders, susceptibility from metal, ghosting from arterial pulsation, or wraparound from a body part outside the field of view.
Spotting artifacts is a skill that comes from looking at thousands of pictures. New readers chase ghosts. Experienced readers cross-reference the same slice across every sequence before they commit. The signal that survives every check is the one worth reporting.
Technologists play a huge role here too. A good tech notices when a patient moves mid-sequence and repeats the run. They place coils correctly to keep signal even across the field of view. They watch for breathing artifacts in the chest and abdomen. By the time pictures reach the radiologist, the cleanest possible version of the study is already on screen — and what remains is genuine signal to interpret.
How to Approach Any MRI Study
- ✓Confirm the body part and indication on the order — read with a question in mind
- ✓Check the protocol — which sequences were run, axial vs sagittal vs coronal
- ✓Start with T1 to set anatomy, then T2 to find disease
- ✓Run through FLAIR for brain studies, STIR for spine and MSK
- ✓Add diffusion-weighted images for stroke, infection, or hypercellular tumors
- ✓Compare pre- and post-contrast T1 if gadolinium was given
- ✓Scroll each stack forward and backward at least once
- ✓Match every finding across at least two sequences before calling it
- ✓Pull up the prior study side by side whenever possible
- ✓Check for artifact patterns before reporting any single bright spot
The checklist above is how technologists and radiologists train their eye. It looks slow when written out, but with practice it collapses into a thirty-second routine. The order matters — anatomy before pathology, structure before signal. Skip a step and you risk calling artifact or missing a finding hiding behind the noise.
Reading MRI pictures is a craft. The scanner gives you the raw frames. The protocol gives you the contrast. Your eye and your discipline turn pixels into a diagnosis.
Patients who want to understand their own scans can use the same approach in miniature. Open the disc or web viewer your hospital gave you. Find the sequence label in the corner. Scroll through one stack at a time and notice which structures look bright and which look dark. You won’t out-read a radiologist, but you will follow the conversation when the report uses words like "T2 hyperintense" or "enhancing lesion."
One of the underrated parts of MRI reading is knowing what you don’t need to act on. Plenty of findings show up as incidental — a small cyst on the kidney, a Tarlov cyst in the sacrum, a developmental venous anomaly in the brain. These are the medical equivalent of birthmarks. They look dramatic on the screen and look the same five years from now.
A skilled reader knows which findings deserve a phone call to the ordering doctor and which belong in the report only for completeness. That judgment comes from seeing thousands of normal-variant pictures and tracking which ones never amount to anything clinically.
MRI Imaging Pros and Cons
- +No ionizing radiation — safe for repeat imaging in young patients
- +Outstanding soft-tissue contrast that CT cannot match
- +Multiple sequences let you problem-solve without moving the patient
- +Functional and metabolic data possible with advanced techniques
- +No bone artifact when imaging the brain or pelvis
- −Long scan times — routine studies take 30–60 minutes
- −Loud and claustrophobic for many patients
- −Contraindicated with certain implants and pacemakers
- −Picture quality drops fast with motion, making pediatric imaging harder
- −Expensive compared to CT or ultrasound for the same body part
MRI pictures earn their reputation because nothing else shows soft tissue this well. You see the difference between gray and white matter, between hydrated and dehydrated disc, between healthy meniscus and a frayed tear. CT cannot match that on most days. Ultrasound is faster but less detailed. X-ray sees bone but little else.
The trade-off is time and tolerance. Half an hour inside a noisy tube with breath holds and lying still is hard. People with pacemakers or certain metal implants cannot scan at all. Kids often need sedation. The pictures repay the effort — but only when the patient and the protocol cooperate.
Cost is the other reality. A brain MRI in the United States runs anywhere from a few hundred to several thousand dollars depending on insurance and facility. CT and ultrasound are cheaper and faster. For many clinical questions — pneumonia on chest imaging, kidney stones, broken bones — MRI is overkill. Choose the test that answers the question, not the test with the prettiest pictures.
MRI Questions and Answers
MRI pictures look intimidating because they hide their logic. The grayscale frames feel like a puzzle until you learn the recipes behind them. Once T1, T2, FLAIR, and diffusion click into place, the same images that overwhelmed you become a structured story — anatomy, then pathology, then comparison.
Spend time with normal studies before you chase abnormal ones. The eye needs to know what healthy brain, healthy spine, and healthy knee look like across every sequence before it can flag what is wrong. Radiologists train for years for that reason. The pictures reward the patient reader and punish the rushed one.
If you want to lock in the concepts, run through our MRI practice questions. Working through real cases is how the sequence behavior, anatomy, and artifact patterns move from short-term memory into instinct. The pictures stop being intimidating and start being readable — one sequence at a time.
For technologists in training, working through MRI pictures methodically is the only way to build the intuition described above. Each shift in front of the scanner adds another sample to your memory bank. Each report you read in the days after a case adds another data point about which findings the radiologist called significant and which they ignored. After a year of disciplined practice you stop seeing grayscale chaos and start seeing structured information that points toward a diagnosis. The journey is slow on purpose. Medical imaging is too consequential to learn any other way.
About the Author
Medical Laboratory Scientist & Clinical Certification Expert
Johns Hopkins UniversityDr. Sandra Kim holds a PhD in Clinical Laboratory Science from Johns Hopkins University and is certified as a Medical Technologist (MT) and Medical Laboratory Scientist (MLS) through ASCP. With 16 years of clinical laboratory experience spanning hematology, microbiology, and molecular diagnostics, she prepares candidates for ASCP board exams, MLT, MLS, and specialist certification tests.