Lumbar MRI: What MRI Techs Should Know About Scanning the Lower Back 2026 July
📝 Lumbar MRI guide for MRI techs: positioning, coil setup, T1/T2/STIR protocols, common pathology, artifacts, safety. Practical reference for daily scanning.
A lumbar MRI is one of the most ordered MRI exams in any outpatient or hospital setting, and for good reason. The lumbar spine carries the bulk of a person's body weight, absorbs nearly every impact from walking, lifting, and sitting, and houses nerve roots that travel to the legs and feet.
When something goes wrong down there, MRI is usually the first imaging study a clinician reaches for, because no other modality shows discs, nerves, marrow, and soft tissue with the same clarity. If you are an MRI technologist preparing for your registry exam, refreshing your skills, or just trying to scan more confidently on the lumbar table, this guide walks you through what actually matters at the magnet.
Lumbar MRI sounds simple on paper. The patient lies supine, you drop a spine coil, run a localizer, and fire off a handful of sequences. But anyone who has scanned a real workload knows the exam is full of small decisions that change the outcome. Where do you center the coil? Do you angle obliques on the disc or stay straight? How aggressive should saturation bands be in a patient with bowel motion?
The difference between a clean, diagnostic lumbar study and one the radiologist has to squint through often comes down to those small calls. We are going to cover the anatomy you need to recognize, the standard protocols you will run, the positioning tricks that save scans, and the safety items that keep you and your patient out of trouble.
If you have ever wondered why some lumbar exams come back with sharp discs and crisp nerve roots while others look smeared and grainy, the answer is almost always positioning, coil selection, and sequence parameters working together. Get those three right and even a difficult patient produces a readable study. Get them wrong and you will be rescanning. Let's break down the moving parts so you can walk into your next lumbar slot with a plan.
Lumbar MRI by the Numbers
Before you can scan the lumbar spine well, you have to picture what is inside the bore. The lumbar region runs from T12-L1 down to L5-S1, with five vertebral bodies stacked between the thoracolumbar junction and the sacrum. Each level has a disc, a pair of facet joints, a pair of pedicles, lamina, transverse processes, and a spinous process.
Inside the bony ring is the thecal sac, which holds cerebrospinal fluid and the cauda equina nerve roots after the spinal cord proper ends around L1. That ending point, the conus medullaris, is one of the most important structures to include in your field of view, even though plenty of techs cut it off because they were trained to focus only on disc levels.
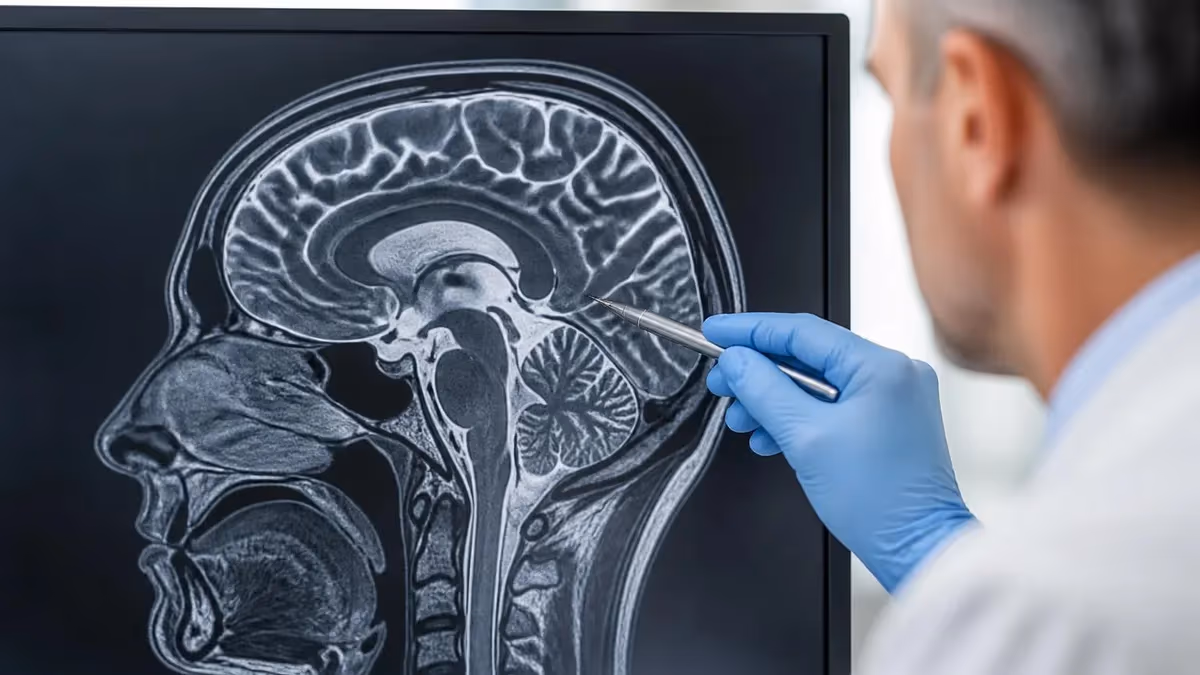
The discs themselves have a tough outer ring called the annulus fibrosus and a gel-like center called the nucleus pulposus. On T2-weighted imaging, healthy discs look bright because the nucleus is rich in water. As discs degenerate, they lose water and darken. This is why the radiologist relies so heavily on sagittal T2 images to grade disc disease.
The neural foramina, which are the side exits where nerve roots leave the spine, are best seen on sagittal images angled correctly through the foramen. Axial images cut across the disc and let you see central canal narrowing, lateral recess stenosis, and disc protrusions in cross section. Knowing this anatomy is not optional. If you cannot picture where the conus ends and where each nerve root exits, you will miss findings and your slice placement will drift.
A complete lumbar MRI must show the conus medullaris, not just the disc levels. Many cases of unexplained leg weakness, bowel or bladder changes, and saddle anesthesia trace back to conus pathology that gets missed when techs crop too tight. Set your sagittal FOV to include from at least mid-T11 down through S2.
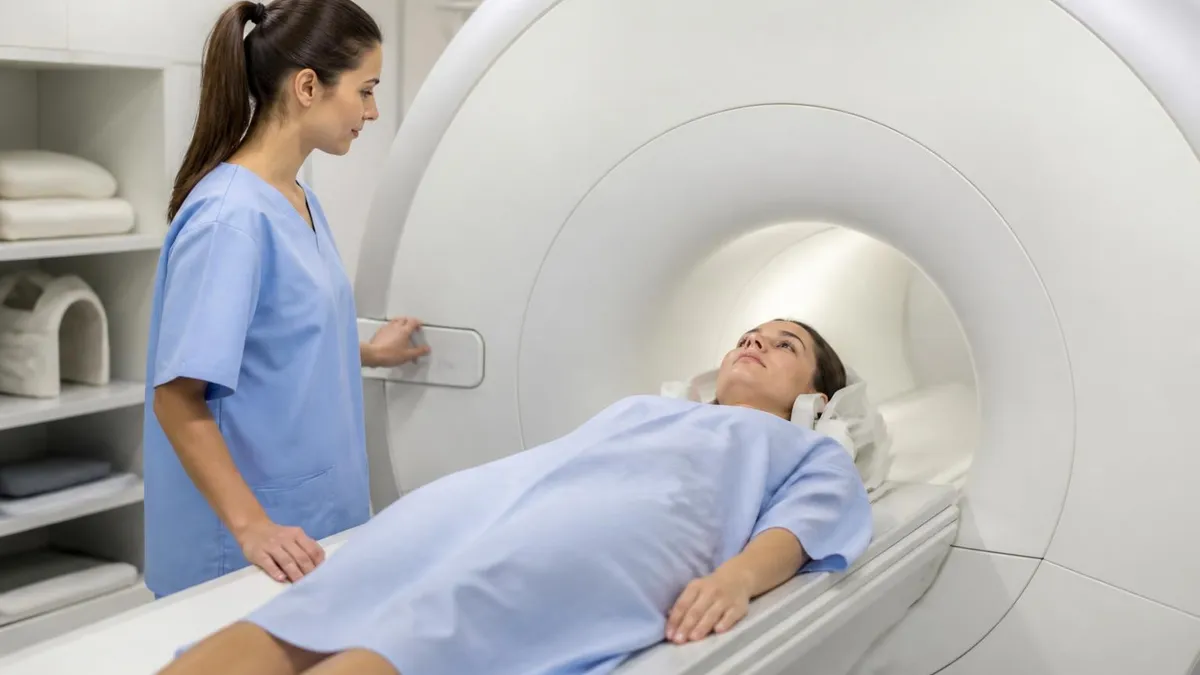
Now let's talk positioning. The patient lies supine on the table, head first, with arms either at the sides or on the chest. Hands at the sides are usually more comfortable for longer exams. Slide a foam wedge under the knees to flatten the lumbar lordosis.
This single move opens the neural foramina, reduces back pain during the scan, and helps the patient stay still. Patients with severe pain or limited range of motion may need a smaller wedge or just a folded blanket. Do not skip it. A flat patient with a lordotic spine is going to fidget, and motion is the enemy of lumbar imaging.
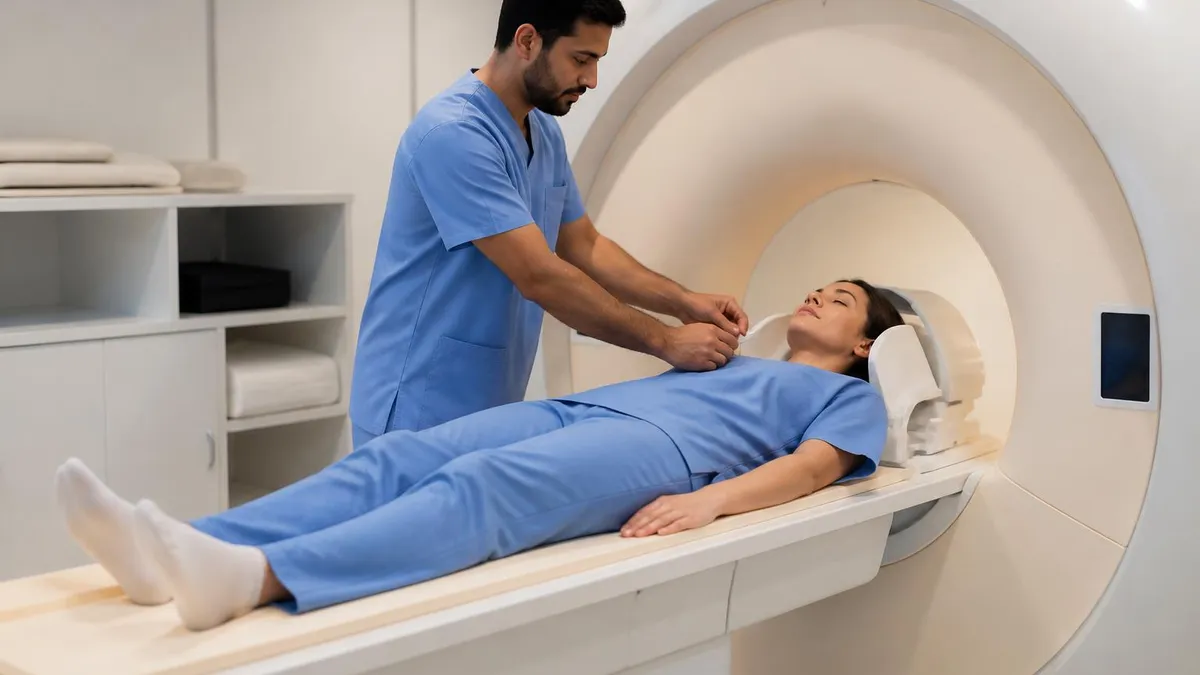
Coil placement is the next make-or-break step. Most systems use a posterior spine array built into the table. You want to center the coil on the suspected level of pathology, which for most lumbar work means centering at the iliac crest, roughly L4. The iliac crests are easy to palpate and give you a reliable external landmark.
Confirm the patient is straight, not rotated, and that the sagittal midline of the body lines up with the center of the coil. A rotated patient produces oblique slices that the radiologist has to mentally untwist, and obliquity makes foraminal stenosis harder to grade.
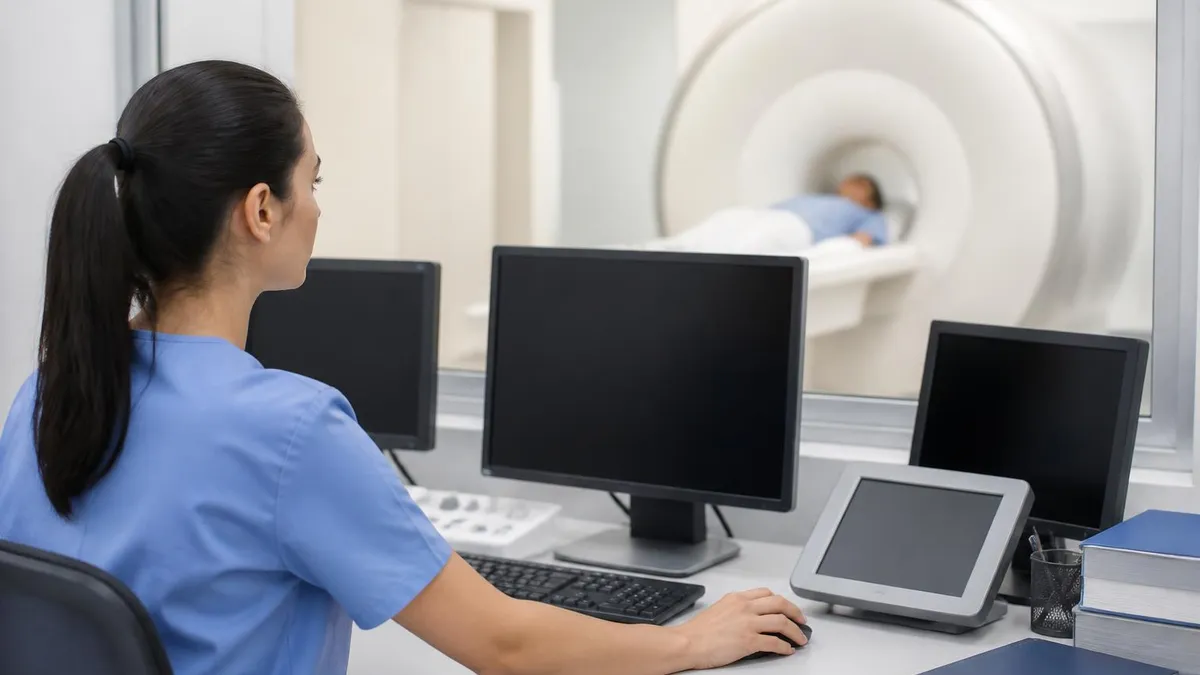
Some sites add an anterior surface coil for higher signal at 3T, especially in larger patients. Whether you do this depends on your scanner and your protocol. The general rule is more coil channels equal more signal, but only if everything is positioned correctly. A poorly placed surface coil can actually add artifact. When in doubt, follow your facility's protocol exactly and ask the lead tech before deviating.
Core Lumbar MRI Sequences
Anatomic overview. Shows marrow signal as bright fat, cortical bone as dark, and CSF as dark. Great for spotting fractures, metastatic marrow replacement, Modic type II fatty endplates, pars defects, and overall vertebral alignment. The first sequence the radiologist usually reviews after the localizer.
The workhorse for disc evaluation. Bright CSF outlines the thecal sac. Healthy nucleus pulposus appears bright while degenerated discs darken. Used to grade disc degeneration on the Pfirrmann scale, see canal narrowing, evaluate the ligamentum flavum, and detect cord signal abnormalities. Indispensable for every lumbar protocol.
Fat-suppressed inversion recovery. Anything bright on STIR is fluid, edema, or pathological inflammation. Lights up occult fractures, Modic type I edema, discitis, osteomyelitis, and inflammatory arthritis. Mandatory in trauma and oncology workups where occult marrow pathology can change management.
Cross-sectional view through each disc level. Angled parallel to the disc plane rather than the magnet bore. Quantifies central canal stenosis, lateral recess narrowing, foraminal compromise, facet hypertrophy, and the morphology of disc bulges, protrusions, and extrusions in true cross section.
Sequence selection drives the entire diagnostic value of the study, so let's slow down and really look at what each one buys you. Sagittal T1 gives you anatomy. Marrow looks bright because of fat content, cortical bone looks dark, and CSF looks dark too. You use sagittal T1 to spot replacement of marrow signal by tumor, infection, or post-surgical change. If a vertebral body suddenly looks darker than the disc next to it on T1, something is replacing the normal fatty marrow, and you need to flag it.
Sagittal T2 is what most radiologists look at first. CSF is bright, healthy discs are bright at the nucleus, and degenerated discs go dark. Disc bulges, protrusions, and extrusions show up clearly because the bright CSF outlines them from behind. Endplate changes and high-intensity zones in the annulus are visible here too. If you only had one sequence on the spine, this would be it, which is why you should never run sagittal T2 in a hurry. Use enough averages to get a clean image, and check for motion before moving on.
Sagittal STIR is your fluid-sensitive workhorse. Because the fat is suppressed, anything bright is either fluid, edema, or pathological inflammation. Acute fractures glow on STIR even when they look subtle on T1. Discitis, osteomyelitis, and inflammatory arthritis all show edema patterns here. If a patient comes in for back pain after a fall, STIR is not optional. The radiologist needs it to call out an occult fracture.
Axial T2 finishes the standard exam. Slices are angled parallel to each disc, usually from L1-L2 down through L5-S1. Some sites do straight axial slices instead, which is faster but harder to read. Angled axials let the radiologist see each disc in true cross section, and that matters when grading central stenosis or measuring foraminal narrowing. A handful of protocols also include axial T1, especially for post-op cases or anywhere fat planes need to be assessed.
Common Lumbar Protocols
Sagittal T1, sagittal T2, sagittal STIR, axial T2 angled through each disc level from L1-L2 down to L5-S1. Slice thickness 3-4 mm with a small interleave or zero gap. Field of view typically 28-32 cm, depending on body habitus. Matrix at least 320 by 256 for diagnostic clarity. Standard order for back pain, sciatica, and radiculopathy referrals. Total table time runs 20 to 25 minutes on modern scanners with parallel imaging. Phase encode direction superior-inferior to push respiratory artifact away from the spine.
Even when your positioning and sequences are perfect, artifacts can wreck a study. The lumbar spine sits right next to the bowel, which moves constantly from peristalsis. That motion blurs sagittal images, especially T2 and STIR. The classic mitigation is a saturation band placed anteriorly over the bowel. Do not place it too far back or you will cut into the vertebral bodies. Some scanners offer flow compensation and motion correction sequences that help with bulk movement, but a well-placed sat band is still the simplest tool you have.
Another common pitfall is the dreaded chemical shift artifact at the disc-bone interface, where fat and water signals shift along the frequency-encoding direction. Increasing bandwidth reduces this, though you trade off some signal. On 3T systems this gets more pronounced, so check that bandwidth is appropriate to your field strength.
Hardware artifacts deserve a mention. Patients with prior lumbar fusion hardware are common. Titanium screws produce manageable artifact, but stainless steel and certain implants can wipe out an entire field. View angle tilting, increased bandwidth, and metal artifact reduction sequences like MARS or VAT can salvage the exam. Always ask about prior surgeries before the scan starts. If hardware is present, get the surgical report or implant card if possible. You need to know it is MR-conditional and the conditions you must follow.
Every lumbar MRI patient needs a full MRI safety screening, not just a quick yes-or-no. Ask about pacemakers, neurostimulators, aneurysm clips, cochlear implants, retained shrapnel, recent surgeries, and any implanted devices. A spinal cord stimulator placed for chronic back pain is a real risk in the bore. Never assume. Verify in writing and visually inspect for surgical scars.
Safety is the part of the exam where small lapses turn into headlines. The lumbar patient population skews older and frequently has chronic pain implants, pumps, and stimulators. Spinal cord stimulators in particular are showing up on more screening forms because pain management has expanded. Some are MR-conditional and need the device powered down and programmed for MRI; others are not safe at all. Check the manufacturer, model, and the patient's implant card every time. Do not rely on memory or the patient's word alone.
Renal function matters when contrast is on the order. Gadolinium-based contrast agents are well tolerated by most patients, but those with severely reduced kidney function need careful screening due to the risk of nephrogenic systemic fibrosis. Most facilities now use macrocyclic agents that have a much lower NSF risk, but a recent eGFR is still standard practice in many departments. Know your facility's policy.
Claustrophobia is another factor on lumbar scans. The exam is not the longest in the MRI world, but at 20 to 30 minutes the patient must stay still through the most pain-sensitive position. A small fan, music through the headphones, a panic ball, and a quick chat about what they will hear in the bore go a long way. Some patients need oral sedation prescribed by their physician; others need an open-bore or wide-bore scanner. Plan ahead during scheduling rather than at the start of the slot.
Pre-Scan Lumbar MRI Checklist
- ✓Verify MRI safety screening, including pacemakers, neurostimulators, aneurysm clips, cochlear implants, and any other implanted devices or retained foreign bodies
- ✓Confirm reason for exam and any specific level of concern flagged by the referring physician on the requisition
- ✓Check eGFR within the institutional window if contrast is ordered and review the patient's gadolinium allergy history
- ✓Position patient supine with a foam wedge under the knees to flatten the lumbar lordosis and open the neural foramina
- ✓Center the spine coil at the iliac crest, roughly L4, after palpating the bony landmark on both sides
- ✓Confirm the patient is straight, not rotated, with the sagittal midline of the body lined up with the coil center
- ✓Set sagittal field of view to include from mid-T11 down through S2 so the conus medullaris is always covered
- ✓Place an anterior saturation band over the bowel to suppress peristalsis motion artifact on sagittal T2 and STIR
- ✓Verify hearing protection is securely in place and the panic ball or squeeze bulb is within easy patient reach
- ✓Document patient cooperation level, body habitus, and any technical limitations on the worklist before scanning
Reading what you scan is the next layer of being a strong lumbar tech. You are not the radiologist, but understanding what they look for makes you a better scanner. Disc disease grading uses systems like the Pfirrmann scale, which runs from grade I (bright, well-hydrated disc with clear nucleus-annulus distinction) to grade V (collapsed, dark disc with no distinguishable structure). On your monitor that means a young, healthy L4-L5 disc looks like a bright stripe on sagittal T2, while an arthritic 70-year-old's might be a thin black line.
Disc herniations are described as bulges, protrusions, or extrusions depending on how far the material extends and whether it stays connected to the parent disc. A bulge is broad-based and diffuse; a protrusion is focal with the base wider than the herniated material; an extrusion is when the herniated material is wider than its connection back to the disc. These distinctions affect treatment planning, so tight, sharp axial images at the level in question really matter.
Stenosis is another major call. Central canal stenosis narrows the room for the thecal sac and can compress the cauda equina. Lateral recess stenosis pinches the descending nerve root before it exits. Foraminal stenosis crushes the exiting root at the foramen. Each shows differently on imaging, and each pattern leads to different symptoms in the patient. When you set up axials angled through the disc, you are giving the radiologist the best possible view of all three.
Modic changes are endplate signal changes seen at the bone-disc interface and come in three types. Type I is edema (dark on T1, bright on T2), Type II is fatty replacement (bright on T1, bright or intermediate on T2), and Type III is sclerosis (dark on both). These signal changes are not just for the radiologist to call out. They tell you that your sequence selection actually picked up the marrow changes. If you ran short on time and skipped STIR, Type I edema may go unrecognized.
MRI vs CT for Lumbar Imaging
- +Excellent soft tissue contrast, especially for discs and nerves
- +No ionizing radiation, safer for repeat imaging
- +Detects marrow edema, infection, and early inflammation
- +Multiplanar imaging without repositioning the patient
- +Best modality for cauda equina and conus pathology
- −Longer scan times, harder for claustrophobic or unstable patients
- −Implants and hardware can produce significant artifact
- −More sensitive to motion, requires patient cooperation
- −Higher cost than CT in most facilities
- −Not ideal for evaluating acute bony detail of fractures
So when do you push for MRI over CT and when is CT actually the better tool? CT wins when the question is purely bony. Acute trauma with suspected fracture, post-op assessment of fusion hardware, and any time you need fine bone detail. CT is fast, tolerant of motion, and shows cortex with stunning clarity. But CT cannot reliably tell you that a disc has herniated onto a nerve root, that the thecal sac is compressed, or that marrow is edematous. For those questions, MRI is the answer.
That is why a lumbar MRI order on a chronic back pain patient with radiating leg symptoms makes sense, while a polytrauma patient hauled in from a motor vehicle accident usually gets a CT first. Smart MRI techs understand the order context.
If you see a routine lumbar MRI on a patient with red flag symptoms like bowel or bladder dysfunction, fever, recent IV drug use, or known cancer, flag it and confirm the protocol is appropriate. A patient with possible cauda equina syndrome needs the scan urgently and may need contrast. A patient with possible metastatic disease may need extended coverage.
Communication with the radiologist before the scan is normal and welcomed. If you are unsure whether to add contrast or whether to extend coverage, ask. The reading radiologist would rather adjust the protocol up front than push the patient back into the bore for additional sequences after they have already gotten dressed and left the changing room.
Building your scanning instincts takes reps, but the framework is consistent. Position with care. Pick sequences that answer the clinical question. Watch for artifacts and fix them in the moment. Treat safety as the part of the exam that never gets shortcuts. Talk to the radiologist when something feels off. Do those things, and even the trickiest lumbar slot ends with a clean, diagnostic study that helps the patient move forward.
MRI Questions and Answers
Wrapping up, the lumbar MRI is one of those exams where craft really shows. Two techs running the same protocol on the same patient can produce two very different studies. The tech who plans ahead, positions deliberately, places the coil with intent, and watches for artifacts every step of the way is the one whose images end up cited in conferences and used to teach. That is not luck. That is the daily habit of slowing down at the right moments and trusting your training.
If you are studying for the ARRT MRI registry or any other certification, lumbar imaging will come up. Know your sequences, your anatomy, your safety screening, and your artifact mitigation strategies. Practice questions help cement what you read here, and there is no substitute for hands-on table time. When you can explain why each sequence is in the protocol, why the coil sits where it does, and what each artifact looks like, you are ready for the exam and for the table.
About the Author

Medical Laboratory Scientist & Clinical Certification Expert
Johns Hopkins UniversityDr. Sandra Kim holds a PhD in Clinical Laboratory Science from Johns Hopkins University and is certified as a Medical Technologist (MT) and Medical Laboratory Scientist (MLS) through ASCP. With 16 years of clinical laboratory experience spanning hematology, microbiology, and molecular diagnostics, she prepares candidates for ASCP board exams, MLT, MLS, and specialist certification tests.
Join the Discussion
Connect with other students preparing for this exam. Share tips, ask questions, and get advice from people who have been there.
View discussion (6 replies)