CPR Cheat Sheet: The Complete Quick-Reference Guide for Adult, Child, and Infant Resuscitation
CPR cheat sheet with compression rates, AED steps, ratios for adults, children, and infants. Free printable guide for students, caregivers, and responders. ✏️
A reliable cpr cheat sheet is the single most useful study tool you can carry into a certification class, a workplace refresher, or a real cardiac emergency. It distills hundreds of pages of American Heart Association and Red Cross curriculum into the numbers, ratios, and sequences your hands and brain need to execute under pressure. This guide gives you that reference plus the context behind every number, so you understand not just what to do but why each step matters in the chain of survival.
Cardiac arrest kills more than 350,000 Americans outside hospitals every year, and survival drops roughly 10 percent for every minute that passes without compressions. Bystander CPR doubles or triples the odds of survival, yet only about 40 percent of victims receive it before EMS arrives. The reason is rarely a lack of willingness. It is a lack of confidence in remembering the steps. A printable, well-organized cheat sheet solves that problem by turning a complicated algorithm into a glanceable map.
This guide covers the full adult, child, and infant CPR sequences, AED operation, compression depth and rate targets, ventilation ratios, and the most common mistakes rescuers make in the first 60 seconds. It also includes a study schedule, a printable checklist, and ten frequently asked questions students bring to instructors. Whether you are preparing for a Basic Life Support exam, recertifying for healthcare provider credentials, or refreshing skills as a parent, this resource is built to be read once and referenced forever.
You will see that high-quality CPR is fundamentally simple: push hard, push fast, minimize interruptions, and use an AED the moment one is available. Everything else, from rescue breath technique to two-rescuer choreography, supports those four principles. The cheat sheet format works because it strips away the noise and leaves you with the actions that change outcomes during the four to six minutes before brain cells begin to die from oxygen deprivation.
Use this article in two ways. First, read it straight through to build a complete mental model of resuscitation. Second, bookmark the quick-reference tables and the printable checklist so you can pull them up the next time you need a fast review. Every component on this page is designed to be scanned in under thirty seconds, which is roughly the time it takes to recognize cardiac arrest and decide to act.
Finally, remember that knowledge without practice fades quickly. Studies show CPR skill retention drops measurably within three months of training, and confidence drops even faster. Pair this cheat sheet with hands-on practice on a manikin at least twice a year, and run through the algorithm mentally whenever you walk into a new public space. The goal is not to memorize a script. It is to make the response automatic, so when seconds matter your hands move before your brain catches up.
CPR by the Numbers
Core CPR Algorithm at a Glance
Confirm the area is safe from traffic, electricity, water, or violence. A rescuer who becomes a second victim helps no one. Take five seconds to scan before you approach the person on the ground.
Tap the shoulder firmly and shout, Are you okay? Look for normal breathing for no more than ten seconds. Agonal gasps are not normal breathing and should trigger CPR immediately.
Dial 911 and request an AED. If alone with an unresponsive adult, call first then start CPR. For children and infants, give two minutes of CPR before leaving to call if no phone is nearby.
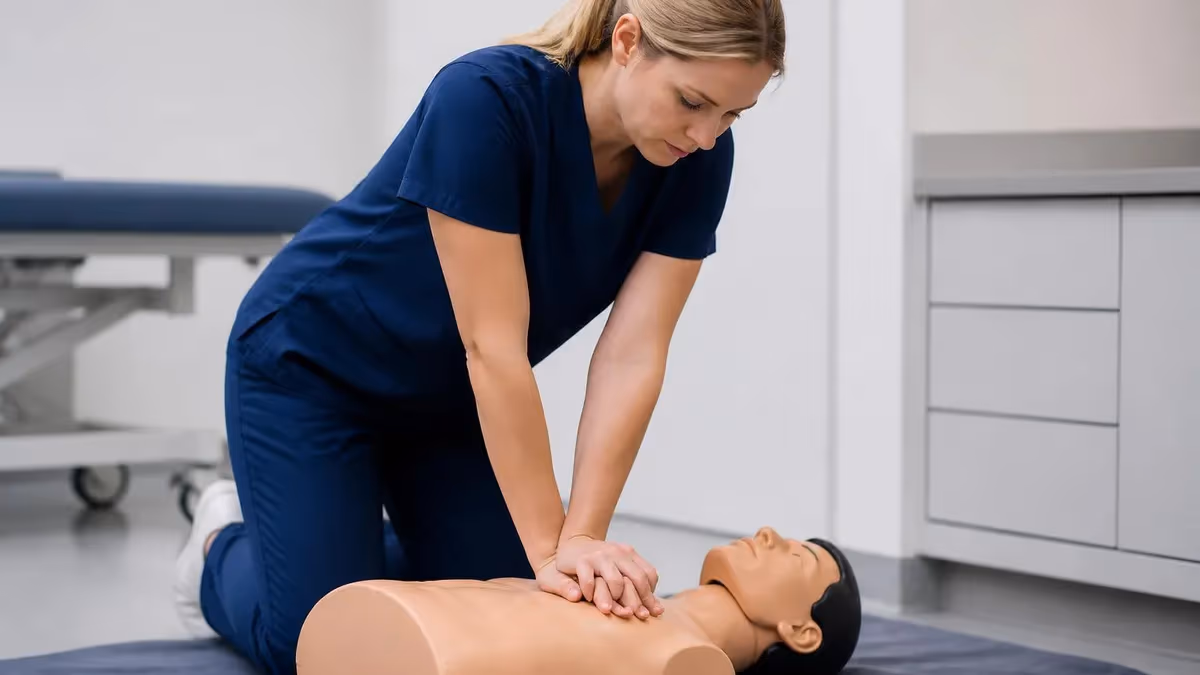
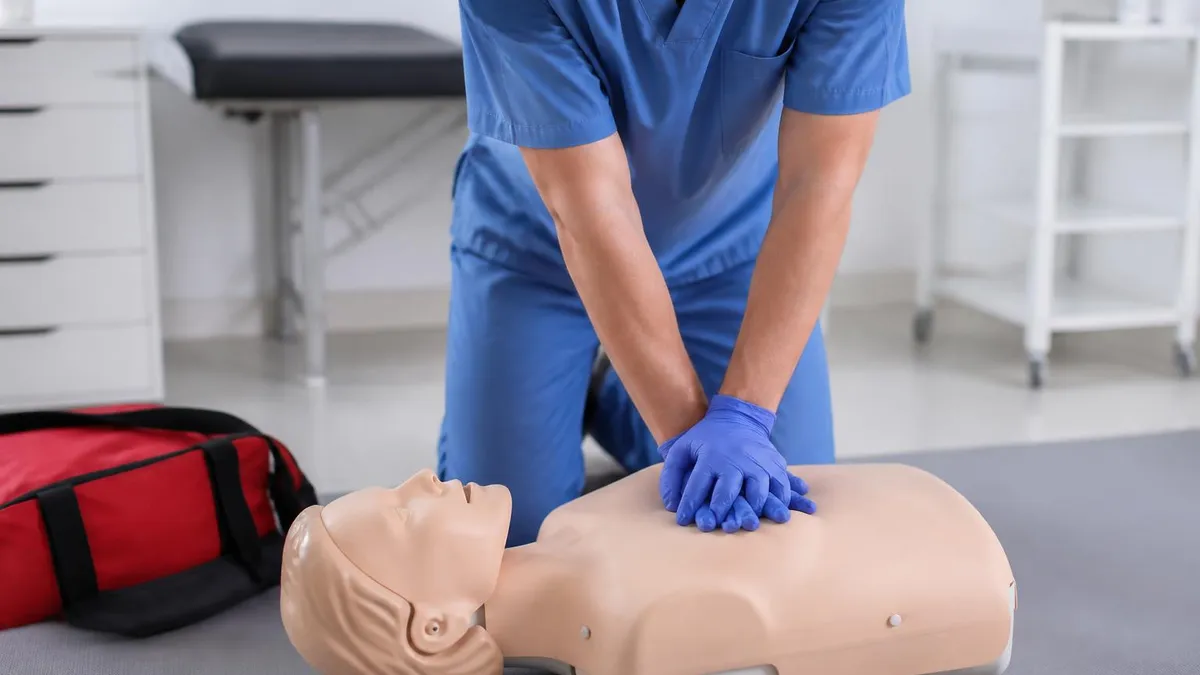
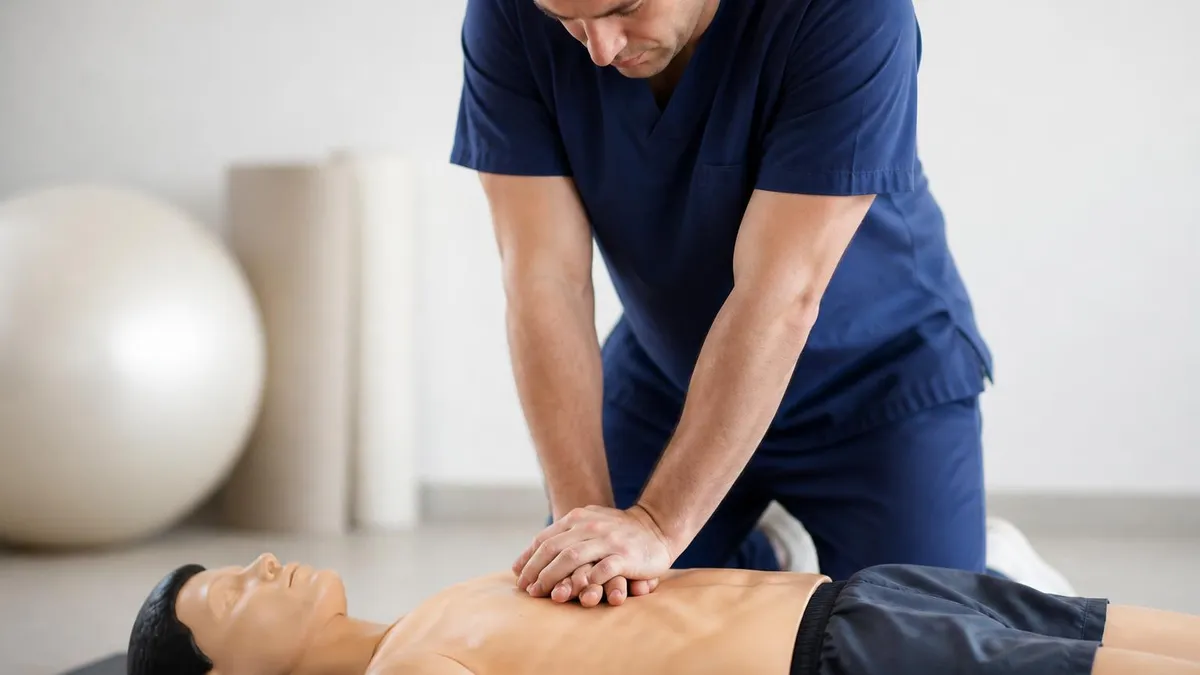
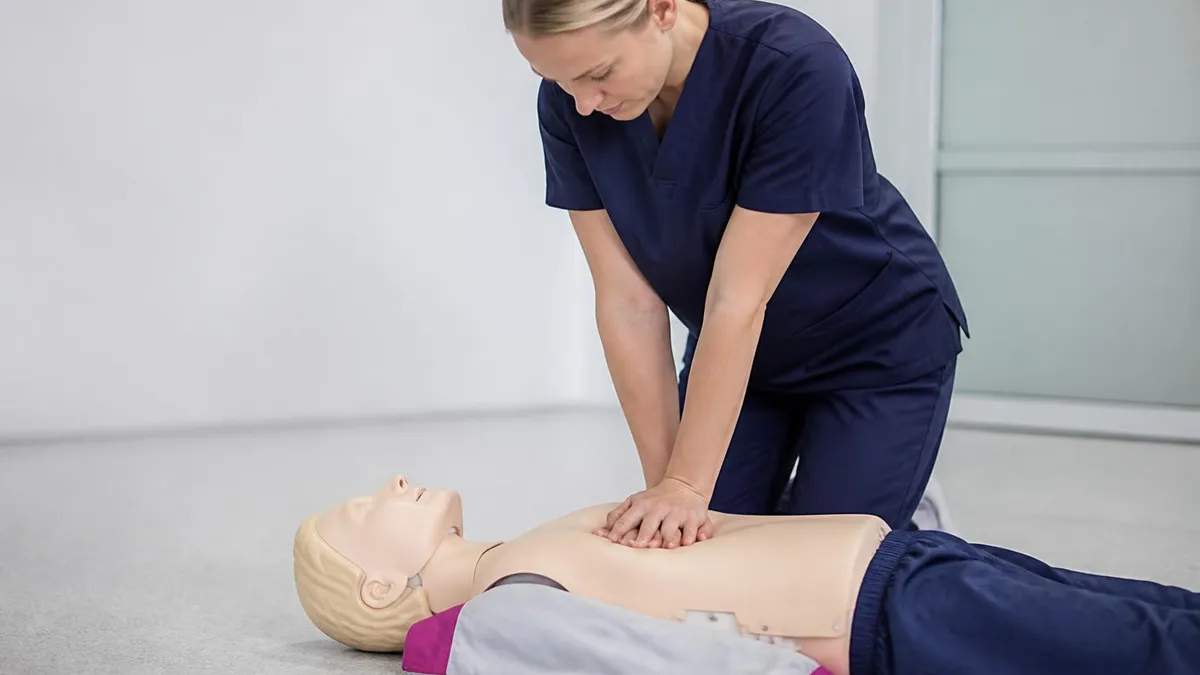
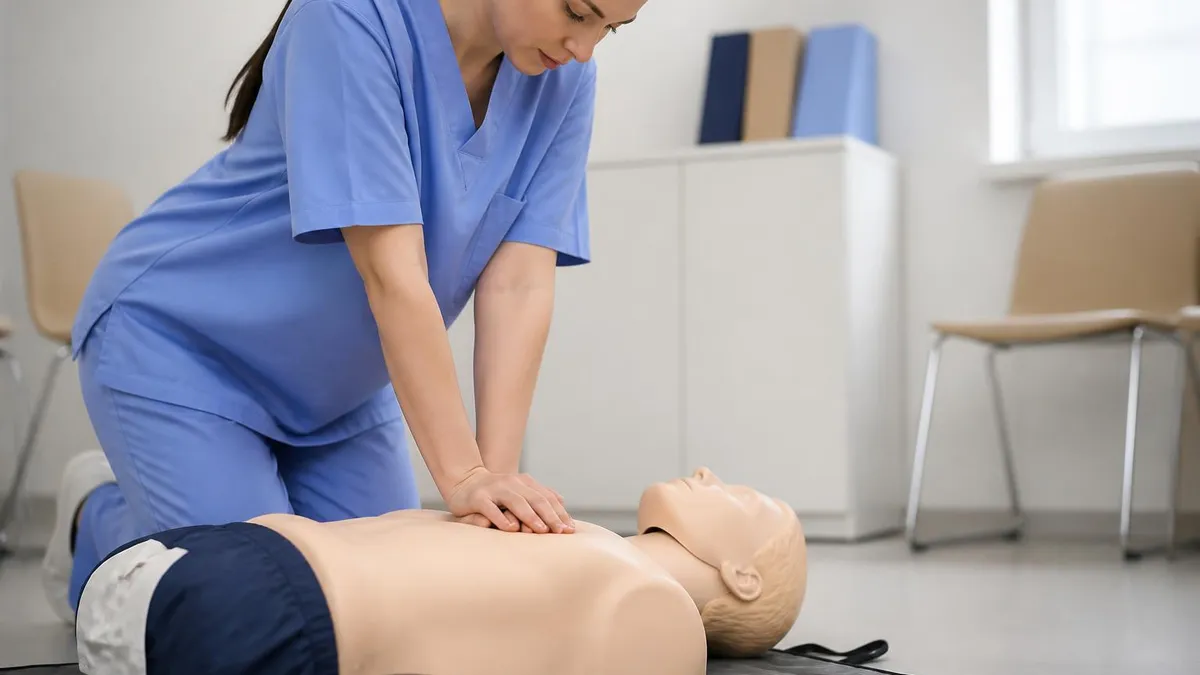
Place heel of hand on lower sternum, interlace fingers, lock elbows. Push 2 inches deep at 100 to 120 per minute. Allow full chest recoil between each compression. Count out loud to keep pace.
After 30 compressions, give 2 breaths over 1 second each, watching for chest rise. Apply the AED as soon as it arrives, follow voice prompts, and resume compressions immediately after any shock.
The numbers you need to memorize change slightly across adult, child, and infant CPR, but the underlying principles stay the same. Compressions drive blood to the brain and coronary arteries, breaths replenish oxygen, and minimizing pauses keeps perfusion pressure high enough to matter. Adults are anyone past puberty, children are roughly one year to puberty, and infants are under one year old excluding newborns in the delivery room, who follow a separate neonatal algorithm.
For adults, single-rescuer CPR uses a 30:2 ratio, compressions at least 2 inches deep but not more than 2.4 inches, at 100 to 120 per minute. Hand placement is the heel of one hand on the lower half of the sternum, with the second hand stacked on top and fingers interlaced. Lock the elbows and use your body weight, not arm muscles, to drive each compression. Fatigue is real, and quality drops noticeably after two minutes, which is why rescuers should swap every two minutes when possible.
For children, the ratio stays 30:2 for a single rescuer but shifts to 15:2 when two trained rescuers are present. Compression depth is about 2 inches, or roughly one third of the chest depth. You can use one hand or two depending on the child's size. The same rate of 100 to 120 per minute applies. Children more often arrest from respiratory causes than from primary cardiac events, so ventilations matter relatively more in pediatric resuscitation than in adult resuscitation.
For infants, use two fingers just below the nipple line for single-rescuer compressions, or the two-thumb encircling hands technique when two rescuers are present. Depth is about 1.5 inches, or one third of chest depth. The ratio is 30:2 single rescuer, 15:2 two rescuers. Breaths for infants are small puffs from your cheeks, not full lung exhalations, because infant lungs are tiny and easy to over-inflate. Watch carefully for gentle chest rise.
Hands-only CPR is a legitimate option for untrained bystanders or rescuers uncomfortable giving breaths to an adult. The AHA endorses compressions-only resuscitation for witnessed adult collapse because circulating residual oxygen in the blood is better than no circulation at all. For children, infants, drowning victims, and drug overdoses, breaths remain important because the underlying problem is often hypoxia rather than a sudden arrhythmia.
Compression quality is the single biggest predictor of return of spontaneous circulation. Real-time feedback devices, metronome apps, and even a song with the right tempo such as Stayin' Alive or Baby Shark all improve rate compliance. Full chest recoil is equally important because the chest must re-expand to allow blood to refill the heart between compressions. Leaning on the chest between pushes is one of the most common quality errors, and it directly reduces cardiac output.
If you want to translate these numbers into reflexes, pair this cheat sheet with timed practice on a manikin. Skill labs let you feel correct depth, hear feedback clicks, and build the muscle memory that survives stress. Reading is necessary but never sufficient, which is why every credible certification course requires a hands-on skills check before issuing a card.
CPR Practice Test Questions
Prepare for the CPR - Cardiopulmonary Resuscitation exam with our free practice test modules. Each quiz covers key topics to help you pass on your first try.
CPR Adult CPR
CPR Exam Questions covering Adult CPR. Master CPR Test concepts for certification prep.
CPR AED Use
Free CPR Practice Test featuring AED Use. Improve your CPR Exam score with mock test prep.
CPR Basic CPR Principles
CPR Mock Exam on Basic CPR Principles. CPR Study Guide questions to pass on your first try.
CPR Child and Infant CPR
CPR Test Prep for Child and Infant CPR. Practice CPR Quiz questions and boost your score.
AED Use Made Simple
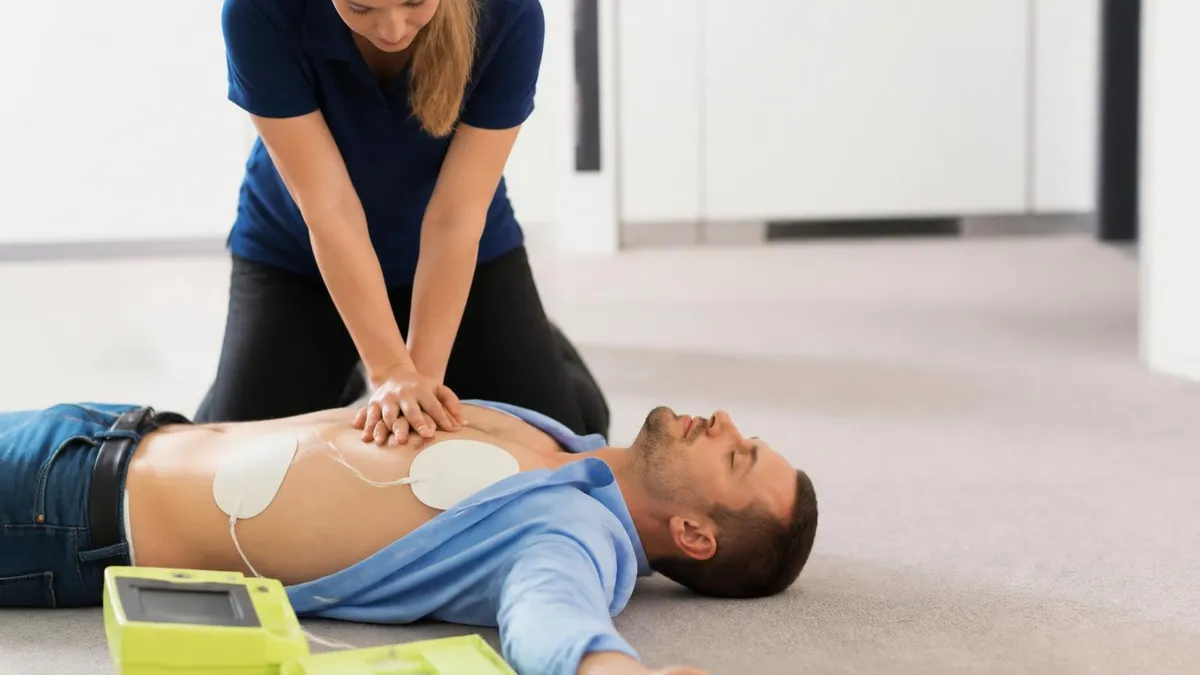
Open the AED and press the power button. Modern units talk you through every step, so listen for the voice prompts and avoid trying to outthink the device. While the unit boots, expose the victim's chest by cutting or tearing clothing. Wipe away sweat, water, or blood with a towel so the pads will stick firmly to dry skin.
Peel the pads and place one on the upper right chest just below the collarbone, and the other on the lower left side a few inches below the armpit. For infants and small children under eight, use pediatric pads if available, or place adult pads front and back to keep them from touching. Avoid placing pads over jewelry, medication patches, or implanted device bumps.
Printable Cheat Sheet vs Memorization: Which Works Better?
- +Reduces cognitive load during high-stress emergencies when memory fails
- +Provides standardized reference everyone on a response team can share
- +Easy to update when guidelines change every five years
- +Useful for occasional rescuers who do not practice weekly
- +Great teaching aid for family members, babysitters, and coworkers
- +Can be laminated and placed in first aid kits, kitchens, or vehicles
- +Reinforces correct sequence and prevents skipped steps
- −Reading during a real arrest wastes precious seconds
- −Paper can be lost, damaged, or unavailable when needed most
- −Risk of relying on the sheet instead of building muscle memory
- −Some users skip hands-on practice because they have the paper
- −Not a substitute for certified training and skills evaluation
- −Outdated copies may teach old guidelines like 15:2 universal ratio
- −Quality depends on the source — verify against AHA or Red Cross
Rescuer Action Checklist
- ✓Scan the scene for hazards before approaching the victim
- ✓Tap and shout to check responsiveness within five seconds
- ✓Look for normal breathing for no more than ten seconds total
- ✓Call 911 or direct a specific bystander to call and request an AED
- ✓Place the victim on a firm, flat surface and expose the chest
- ✓Begin compressions at 100 to 120 per minute, 2 inches deep for adults
- ✓Allow full chest recoil between every single compression
- ✓Give two breaths after every 30 compressions, one second per breath
- ✓Apply the AED as soon as it arrives and follow the voice prompts
- ✓Switch rescuers every two minutes to maintain compression quality
- ✓Continue CPR until EMS takes over or the victim begins moving
- ✓Document the time CPR started for the arriving paramedic team
Push hard, push fast, and minimize interruptions
Research from large registries consistently shows that compression fraction, the percentage of arrest time spent actively compressing, is the strongest modifiable predictor of survival. Aim for at least 80 percent compression fraction. Every unnecessary pause, every fumble with equipment, every second spent debating who should do what reduces the brain's chance of recovery. When in doubt, push.
Even well-trained rescuers make predictable mistakes during cardiac arrest, and most of them come from adrenaline overriding training. Knowing the common errors before they happen is half the battle. The most frequent issue is shallow compressions. Under stress, rescuers tend to push at about 1.5 inches instead of the required 2 inches, often because they fear breaking ribs. Broken ribs heal. Dead brains do not. Push to depth and trust the training.
The second most common error is leaning on the chest between compressions, preventing full recoil. The heart cannot refill if the chest does not re-expand fully. Lift your weight off completely between each push while keeping your hands in contact with the sternum. Some rescuers try to maintain hand contact so lightly that they unintentionally leave residual pressure. A rocking motion from the hips, with elbows locked, is the cleanest technique.
Rate drift is another classic problem. Rescuers either go too slow because they are tired or too fast because they are anxious. Both reduce stroke volume. Use a metronome app, count out loud in groups of ten, or sing a 100 to 120 beats per minute song mentally. Hands-only CPR videos from the AHA pair compressions with Stayin' Alive specifically because the tempo lands inside the target window.
Over-ventilation is a hidden killer. Giving too many breaths or breaths that are too forceful raises intrathoracic pressure, reduces venous return to the heart, and lowers cardiac output. Each breath should last about one second and produce visible chest rise, nothing more. If you see the belly puff up instead of the chest, reposition the head, lift the chin, and try again with a better airway open.
Hesitation is the most dangerous mistake of all. Bystanders often freeze for thirty to ninety seconds while their brain processes what they are seeing. Training cuts this lag dramatically because rehearsed actions bypass the slow deliberative thinking system. If you ever find yourself frozen, force yourself to do one thing: kneel down and push on the chest. Movement breaks the freeze, and once you are pushing the rest of the algorithm comes more easily.
Other recurring errors include forgetting to ask for an AED, failing to delegate the 911 call to a specific person instead of yelling Somebody call, switching rescuers too late, and giving up too early. CPR should continue until EMS arrives or the victim shows clear signs of life such as moving, breathing normally, or speaking. Stopping after a few minutes because the patient does not respond is a mistake. Defibrillation often requires several cycles of high-quality CPR to be effective.
Finally, do not forget to take care of yourself afterward. CPR is physically and emotionally taxing, especially when the outcome is poor. Critical incident stress is normal, not weakness. Talk with peers, your employer's employee assistance program, or your local EMS critical incident stress management team. Caring for the rescuer is part of caring for the system.

In the first minutes after cardiac arrest, up to 40 percent of victims display agonal gasps: noisy, irregular, snoring-like breaths spaced far apart. These are not normal breathing and the heart is not pumping. If breaths are abnormal, infrequent, or gasping, start CPR immediately. Waiting for clearly absent breathing has cost lives.
A structured study plan turns this cheat sheet from a static reference into mastery. Most adults retain procedural skills best when they encounter the material in multiple formats: reading, watching, practicing, and teaching. Allocate roughly six to ten hours over two weeks for a full Basic Life Support certification, plus another two hours every quarter for skill maintenance. Recertification courses run two to four hours and are required every two years for most professional credentials.
Begin with the core algorithm for adults, then layer in pediatric and infant variations on day two. Many students try to learn all three age groups simultaneously and confuse the ratios, depths, and hand placements. The brain encodes information more reliably when one pattern is fully consolidated before similar patterns are introduced. Master adult CPR cold first, then add the pediatric overlays, noting only what is different rather than relearning the whole sequence.
On day three, move to AED operation. Practice on a training unit if your course provides one. Even pressing buttons on a simulator builds the motor memory that prevents fumbling under stress. Run through the special situations: water, hairy chest, implanted devices, transdermal patches, pregnancy, pediatric pad placement. Each takes only a few seconds of training time but resolves a major decision branch in real emergencies.
Days four and five should focus on team dynamics if you are training for a healthcare setting. Two-rescuer CPR, clear role assignment, closed-loop communication, and structured handoffs to EMS all matter. Mock codes with feedback are extraordinarily effective at exposing weak spots that no amount of reading will reveal. Look for opportunities to participate in scheduled mock codes at your workplace or school.
For deeper context on how CPR fits into the broader emergency response, see our complete CPR and First Aid Training guide. It walks through the certification pathways, costs, employer requirements, and renewal timelines so you can pick the right course for your career or family needs.
Recertification is not just a regulatory checkbox. Studies repeatedly show CPR skills decay within three to six months without practice. Even certified providers benefit from monthly two-minute refreshers on a manikin or thigh. If your employer does not require frequent practice, take responsibility for it yourself. Many fire departments, hospitals, and Red Cross chapters offer drop-in skill sessions for nominal fees, and some offer them free during CPR awareness week each June.
Document your training. Keep a digital folder with your current card, the curriculum you completed, and dated photos or videos of your most recent skills check. Some employers, especially in healthcare, will ask for proof of when and where you certified. Renewing on time is much cheaper and faster than letting a card lapse and starting from scratch.
Practical preparation is where most students underinvest. Reading the cheat sheet once gives you familiarity, not fluency. Fluency comes from rehearsal, ideally on a manikin, but at minimum through mental simulation. Pick a few common locations you frequent: your office, the gym, a relative's home, a restaurant you visit weekly. Mentally walk through what you would do if someone collapsed there. Where is the nearest AED? Who would you tell to call 911? Where would you move the person?
This kind of pre-incident planning, sometimes called mental rehearsal or visualization, dramatically shortens response time in real events. Olympic athletes use it. Military operators use it. EMS providers use it. The cognitive science is straightforward: the brain partially encodes rehearsed actions as if they happened, so when reality matches the rehearsal the response feels familiar rather than novel. Familiarity beats panic.
Build a small home kit. A pocket CPR mask with a one-way valve costs under ten dollars and removes one of the biggest barriers to giving breaths to strangers. A pair of disposable gloves, a small towel for wiping sweat off the chest before AED pads, and a printed copy of this cheat sheet fit in a sandwich-sized pouch. Keep one in your car, one in your kitchen drawer, and one in your work bag.
Know where the AEDs are. Most public buildings, gyms, airports, malls, schools, and many large workplaces have AEDs mounted in clearly marked cabinets. Apps like PulsePoint AED, the AHA's locator, and many city-specific maps will show registered units near you. Learning the locations during calm moments saves the seconds you cannot afford during an emergency. When you walk into a new building, glance for the green AED signage as a habit.
Practice with the people around you. Run a five-minute family drill once a quarter. Walk your kids through how to call 911, where the AED is at school, and what an agonal gasp sounds like. Coach coworkers on the basics during a lunch break. The more people in your circle who can act, the less likely you are to be the only responder in a crisis. Shared competence is a form of community insurance.
Stay current with guideline updates. The AHA refreshes its CPR and ECC guidelines every five years, with focused updates in between. Subscribe to a credible newsletter or follow your certifying body's social channels so you hear about changes early. Recent updates have emphasized hands-only CPR for untrained adults, opioid-overdose response with naloxone, and stronger recommendations against over-ventilation. The fundamentals stay stable, but the edges evolve.
Finally, give yourself permission to act imperfectly. Most cardiac arrest victims would not survive without bystander intervention regardless of how perfectly the CPR was performed. Imperfect compressions are vastly better than no compressions. If you remember only one number from this entire cheat sheet, remember 100 to 120, the compression rate. Everything else can be reconstructed from that rhythm and the willingness to keep going until help arrives.
CPR Questions and Answers

Free CPR Practice Test 2026 - CPR Exam Questions
CPR and First Aid Training: Complete Guide to Certification and Skills
CPR and AED: The Complete Guide to Saving Lives in Cardiac Emergencies

Heart Attack vs Cardiac Arrest: Key Differences and What to Do
Hands-Only CPR: How to Save a Life With Just Two Steps
About the Author
Registered Nurse & Healthcare Educator
Johns Hopkins University School of NursingDr. Sarah Mitchell is a board-certified registered nurse with over 15 years of clinical and academic experience. She completed her PhD in Nursing Science at Johns Hopkins University and has taught NCLEX preparation and clinical skills courses for nursing students across the United States. Her research focuses on evidence-based exam preparation strategies for healthcare certification candidates.