Soil Test: How to Test pH and Nutrients & Fix Your Soil
Learn how to test your soil for pH, nitrogen, phosphorus, and potassium. How to collect samples, where to send them, cost, and how to fix results.

What Is a Soil Test?
A soil test is a laboratory analysis of a soil sample that measures the chemical properties of your growing medium. At its most basic, you're finding out the pH and the levels of major nutrients — nitrogen (N), phosphorus (P), and potassium (K). More advanced panels add calcium, magnesium, sulfur, and a full micronutrient profile.
The result is a report that tells you what's present, what's deficient, and what specific amendments your soil needs. Unlike guessing based on how your plants look, a test gives you hard numbers — which means you treat only what's actually missing, not what you assume is missing.
Think of it like a blood test for your garden. You wouldn't take medication without knowing your levels. Fertilizing without a soil test is the same idea: you might be adding exactly what your soil already has plenty of, while the real deficiency goes unaddressed.
State cooperative extension offices — like those in Indiana and Ohio — offer soil testing services through their agricultural programs, often at lower cost than private labs. It's one of the most practical resources available to home gardeners who want reliable, state-specific recommendations.
Soil Testing by the Numbers
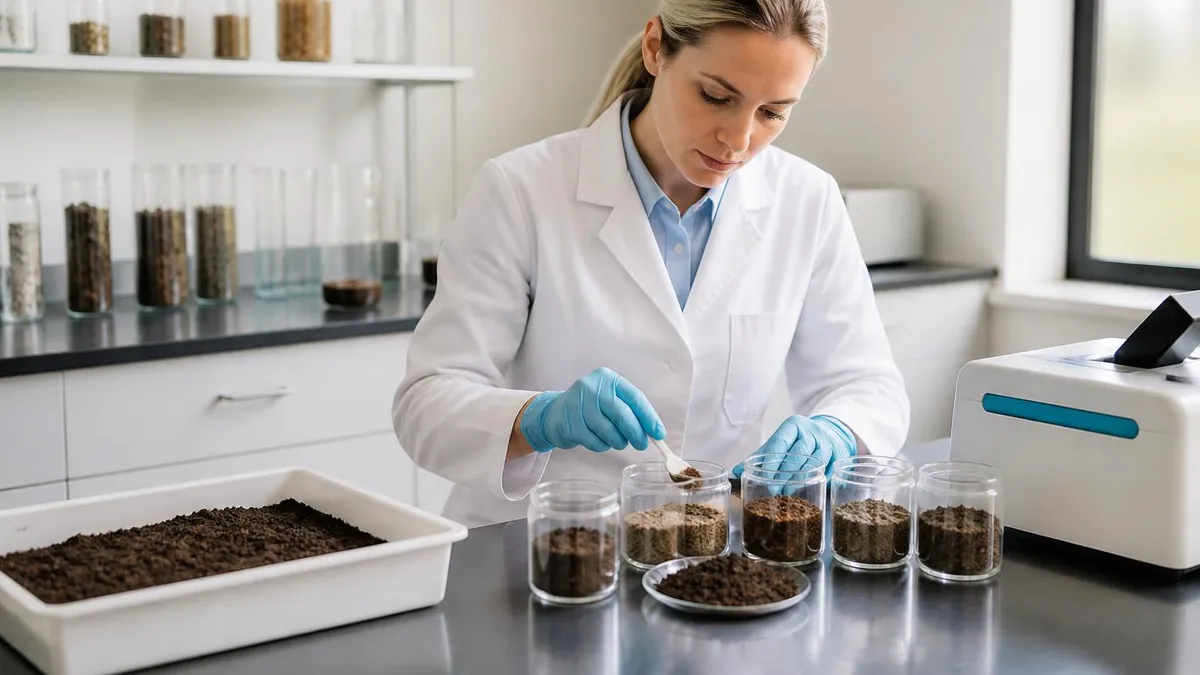
What Soil Tests Measure
Standard soil test panels vary by lab, but most cover the nutrients that matter most for plant health. Here's what you're actually getting when results come back:
pH is the master measurement. Soil pH controls nutrient availability — a pH that's off by even one unit can lock out nutrients that are physically present in the soil. The scale runs from 0 (extremely acidic) to 14 (extremely alkaline). Most garden vegetables and lawn grasses perform best between 6.0 and 7.0. Blueberries are an exception — they prefer 4.5–5.5.
Nitrogen (N) drives leafy, green growth. It's the nutrient most likely to be deficient because it leaches out of soil quickly, especially after heavy rain. Yellowing older leaves are a classic sign.
Phosphorus (P) supports root development and flowering. Unlike nitrogen, it doesn't move through soil easily — it stays where you put it. Over-application is common and creates its own problems, including locking out micronutrients.
Potassium (K) regulates water movement in plant cells and disease resistance. Sandy soils tend to be low; clay soils often have adequate levels.
Advanced panels add calcium, magnesium, sulfur, and micronutrients like iron, zinc, manganese, copper, and boron. If you're dealing with unusual plant symptoms or growing high-demand crops, the full micronutrient panel is worth the extra cost.
Nutrient Levels: What Lab Results Mean
pH below 5.0 — Very Acidic: Most nutrients become less available. Aluminum and manganese can reach toxic levels. Major amendment needed.
pH 5.0–6.0 — Acidic: Works for blueberries and azaleas. Most vegetables and turf will underperform. Lime recommended.
pH 6.0–7.0 — Optimal: The sweet spot for most garden vegetables and lawn grasses. Nutrient availability is maximized across the board.
pH 7.0–7.5 — Slightly Alkaline: Still workable for many crops, but iron and manganese availability starts to drop. Monitor for yellowing between leaf veins.
pH above 7.5 — Alkaline: Problematic for most garden plants. Phosphorus locks up. Sulfur or acidifying fertilizers needed to correct.
Why Test Before Fertilizing
It seems obvious to just buy a bag of balanced fertilizer and spread it. But this approach costs more money and can actively damage your soil chemistry. Here's what actually happens when you skip the test:
Over-applying phosphorus is one of the most common garden mistakes. Phosphorus doesn't leach — it builds up. When levels get too high, the excess phosphorus binds with zinc and iron in the soil, making them unavailable to plants even if they're physically present. You end up with a phosphorus excess and a micronutrient deficiency at the same time.
Over-liming is another expensive error. Adding agricultural lime to raise pH is good practice — when your soil needs it. But if your soil is already at pH 7.0 and you keep adding lime, you push the pH past optimal and start locking out phosphorus and micronutrients. The only fix is waiting years for natural acidification or applying sulfur to correct it.
A $15 soil test tells you your exact starting point. If phosphorus is already high, you skip the phosphorus fertilizer entirely — saving $20–40 on a bag you didn't need. If pH is fine, you skip the lime. If nitrogen is low but everything else is adequate, you buy a nitrogen-only product instead of a complete fertilizer. The math adds up fast.
There's also the environmental angle. Excess fertilizer doesn't disappear — it runs off into waterways, contributing to algae blooms and water quality problems. Testing means you're applying only what the soil can actually use.
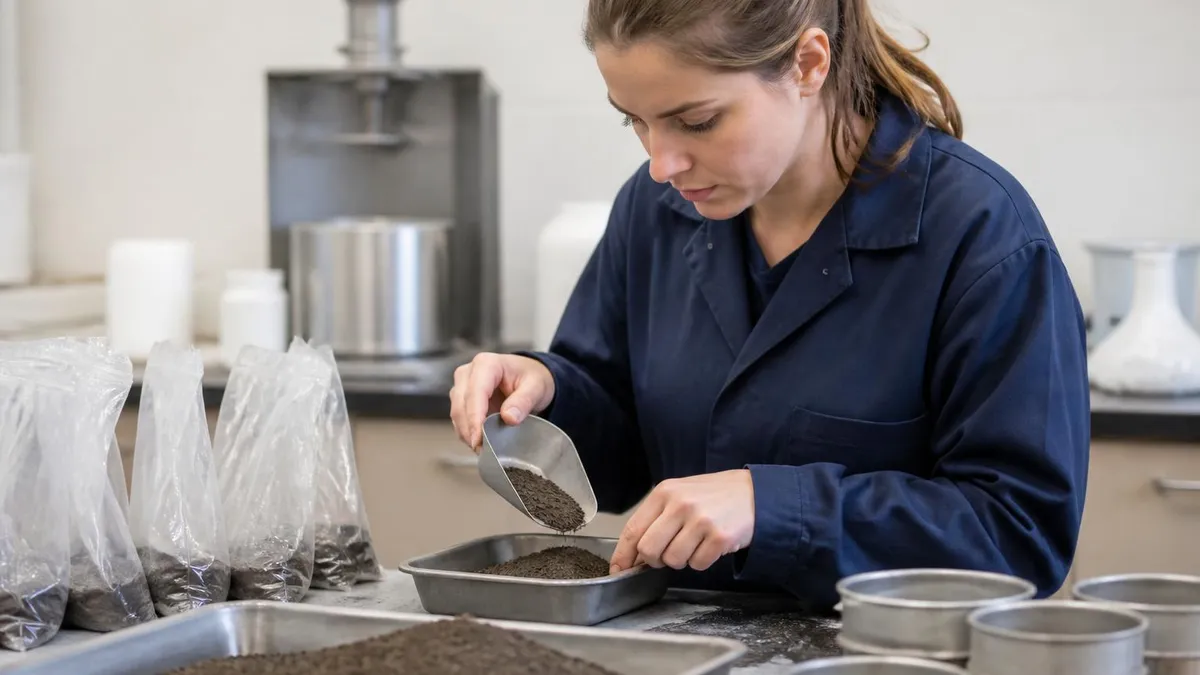
How to Collect a Soil Sample Properly
Bad sampling technique produces bad results, no matter how accurate the lab is. The goal is to collect a sample that represents the entire area you're testing — not just the spot nearest the gate or the area that looks the worst.
Start with a clean plastic bucket and a clean stainless steel trowel or soil probe. Residue from fertilizers or other chemicals on your equipment can skew results. Rinse tools with water and let them dry if you're unsure.
Walk the area you want to test — your vegetable garden, front lawn, or fruit tree zone — and collect 8–12 sub-samples from randomly spaced locations across the full area. Avoid the edges of paths, compost piles, or anywhere you know has been recently amended, as those spots aren't representative.
For garden beds, push the trowel or probe to a depth of 6 inches. For lawns, go 4 inches deep. Remove any thatch or surface debris before sampling. Drop each sub-sample into the bucket.
Once you have all sub-samples, mix them thoroughly in the bucket. From the combined mixture, take out about 1 cup of soil — this is your actual test sample. Spread it on a clean surface and let it air-dry at room temperature for 24 hours before packaging. Wet soil can affect lab results.
Keep different areas separate. Your vegetable garden and front lawn have different needs — mix them together and neither result will be accurate. Test each distinct zone with its own set of sub-samples.
Step-by-Step: Collecting Your Soil Sample
Gather Clean Equipment
Plan Your Sample Points
Take Sub-Samples
Mix and Extract
Dry Before Sending
Package and Label
Where to Send Your Soil Sample
You have three main options, and the right choice depends on how much detail you need and what you're willing to spend.
University cooperative extension offices are the gold standard for home gardeners. Every US state has a land-grant university with an extension service that runs a soil testing lab. Prices typically range from $10–$25 for a standard panel. The advantage isn't just cost — extension labs provide recommendations calibrated to your specific state's soil types and climate. An Indiana extension report tells you to add X pounds of lime per 1,000 square feet based on Indiana soil conditions; a generic recommendation wouldn't be that specific. Extensions in states like Ohio run especially thorough programs with crop-specific guidance.
Private labs like Waypoint Analytical and Logan Labs offer more comprehensive panels, including full micronutrient analysis and organic matter percentages. Cost ranges from $30–$100 depending on the panel. These labs are popular with serious vegetable gardeners and farmers who need detailed data. Turnaround is typically 5–10 business days.
DIY kits from big-box stores cost $10–$30 and give you basic pH and NPK readings in minutes. The convenience is real, but accuracy is significantly lower than lab testing. Color-match systems are particularly prone to user error. Use them as a quick sanity check between professional tests, not as a primary decision-making tool.
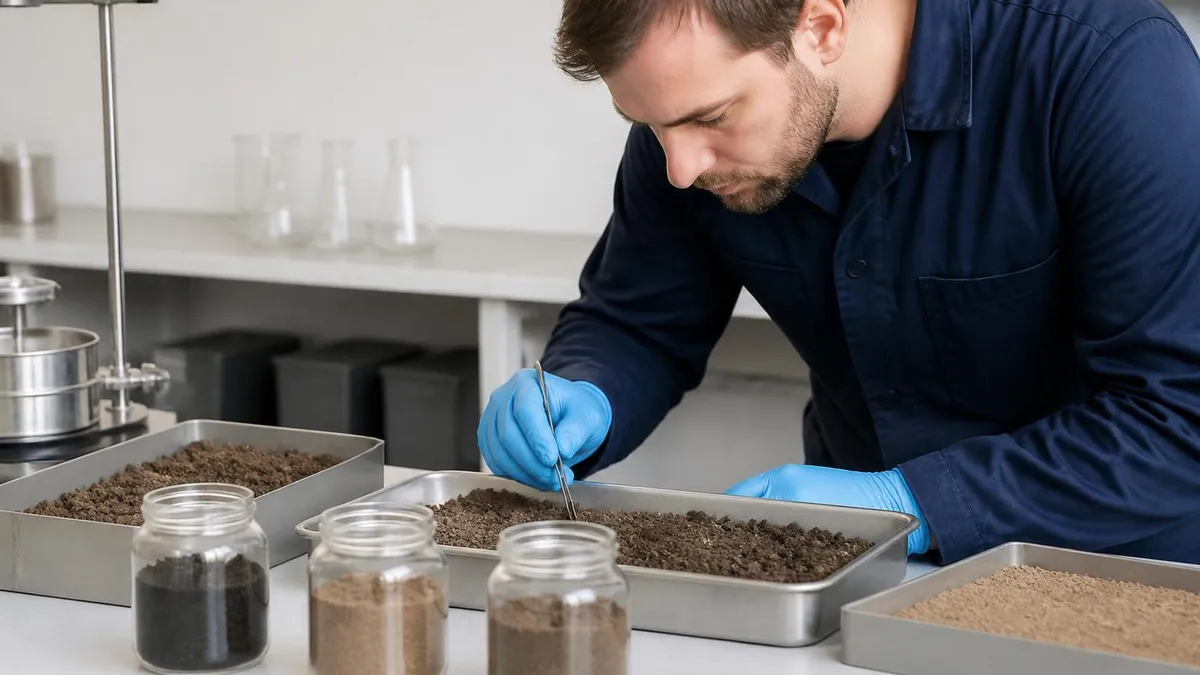
The process resembles laboratory testing in other fields — accuracy depends on sample quality, proper handling, and the precision of the analysis equipment. Certified soil labs use calibrated instruments and standardized methods that DIY kits can't replicate.
Soil Testing Options Compared
- Cost: $10–$25 standard panel
- Turnaround: 1–3 weeks
- Accuracy: High — certified lab equipment
- Recommendations: State-specific, crop-specific
- Best for: Home gardens, lawns, annual vegetables
- Cost: $30–$100 full panel
- Turnaround: 5–10 business days
- Accuracy: High — includes full micronutrient panel
- Recommendations: Detailed with organic matter %
- Best for: Intensive vegetable growing, orchards, farms
- Cost: $10–$30
- Turnaround: Immediate results
- Accuracy: Low — color-match systems prone to error
- Recommendations: Generic, not location-specific
- Best for: Quick checks between professional tests
Reading Your Soil Test Results
Most soil test reports look intimidating at first glance — but they follow a consistent structure once you know what to look for.
The first thing to check is pH. The report will show your current pH and a target range for the crop or use you specified. If your pH is below 6.0, the soil is too acidic for most vegetables and the lab will recommend lime. If it's above 7.5, you're in alkaline territory and the fix is elemental sulfur or an acidifying fertilizer.
Nutrient levels are usually shown in one of two formats: low/medium/high/excessive (a categorical rating) or parts per million (ppm) with a reference range. Either way, the lab's recommendation section is where the practical guidance lives — it will say something like "Apply 3 lb of agricultural lime per 100 sq ft" rather than just giving you a number to interpret yourself.
Pay attention to notes about nutrient interactions. Some labs flag when phosphorus levels are high enough to potentially limit micronutrient uptake. Others include an organic matter percentage — low organic matter (below 3%) is often worth addressing even if nutrients look fine, because organic matter buffers pH swings and improves soil structure.
Don't panic if one nutrient shows as low. A single deficiency is easy to address with a targeted amendment. Multiple deficiencies often point to a pH problem — fix the pH first, and some of those "low" nutrients may become available on their own without additional inputs.
What to Do When Results Arrive
- ✓Check pH first — it governs how well other nutrients work
- ✓Note whether nutrient ratings are low, medium, high, or excessive
- ✓Read the amendment recommendations section (not just the numbers)
- ✓Calculate how much product you need based on your area in sq ft
- ✓Buy targeted amendments, not generic balanced fertilizers, unless that's what's recommended
- ✓Record your results and amendment dates for comparison at next test
- ✓If multiple nutrients are deficient, prioritize pH correction first
- ✓Contact your extension office with questions — they provide free phone or email support
How to Fix Your Soil Based on Results
Once you have your results and recommendations, the amendment process is straightforward. The key is applying the right product at the right rate — and giving it time to work before expecting results.
Raising pH is done with agricultural lime. Two types are commonly available: calcitic lime (calcium carbonate) and dolomitic lime, which adds magnesium alongside calcium. If your magnesium levels are also low, dolomitic is the better choice. Lime is slow — it typically takes 3–6 months to fully change pH, which is why fall application works best. Apply the recommended rate, till it in to 6 inches if possible, and water it in.
Lowering pH requires elemental sulfur or aluminum sulfate. Elemental sulfur is slower but longer-lasting — soil bacteria convert it to sulfuric acid over weeks to months. Aluminum sulfate works faster but can accumulate to harmful levels if over-applied. Always stick to the recommended rate. Acidifying fertilizers like ammonium sulfate also nudge pH down over time with repeated use.
Raising organic matter is a multi-year project, but it's worth doing. Compost is the most reliable amendment — it improves drainage in clay soils, water retention in sandy soils, and provides slow-release nutrients across the board. A 2-inch layer tilled in annually raises organic matter measurably within two to three seasons.
Nutrient deficiencies are addressed with targeted products: blood meal or feather meal for nitrogen, bone meal or rock phosphate for phosphorus, potassium sulfate or greensand for potassium. Micronutrient deficiencies often respond better to foliar sprays than soil applications, especially in high-pH soils where soil-applied micronutrients quickly bind up.
Mastering soil chemistry takes time, but the approach mirrors any structured process — like studying for a knowledge test — where understanding fundamentals first makes everything else fall into place. Know your baseline, apply the right correction, then retest to confirm improvement.
Soil Testing: Pros and Cons
- +Tells you exactly what your soil needs — no guessing
- +Saves money by avoiding unnecessary fertilizer purchases
- +Prevents common mistakes like over-liming or excess phosphorus buildup
- +State extension labs provide location-specific amendment rates
- +Builds a long-term record of soil improvement over seasons
- +Helps diagnose plant problems that aren't caused by disease or pests
- −Standard tests take 1–3 weeks — not useful for urgent plant issues
- −Results are only as good as the sample you collect
- −Nitrogen levels fluctuate quickly and may not reflect conditions at planting time
- −DIY kits are far less accurate than lab tests despite lower cost
- −Doesn't test for contaminants like heavy metals without a special panel
- −Amendment rates need to be recalculated for your specific square footage
When to Test Your Soil
Fall is the ideal time to test. When you get results in October or November, you have all winter for lime or sulfur to work before spring planting. Lime especially needs months in the soil to change pH — applying it in fall means you're planting into corrected soil, not waiting for it to work while your seedlings struggle.
Spring testing is the second-best option. You can still apply amendments and get partial benefit before summer crops go in. For fast-acting amendments like fertilizers (not lime), spring timing works fine. If you test in March and results come back in early April, you'll still have time to apply sulfur or lime before transplanting warm-season crops in late May.
For established gardens, retesting every 2–3 years is sufficient. Soil chemistry doesn't change dramatically year over year under normal gardening conditions. But if you've made major amendments — added several inches of compost, applied lime, or changed your irrigation setup — testing the following year confirms whether corrections worked and whether you overcorrected.
Intensive vegetable beds benefit from annual testing. Heavy feeding crops like tomatoes, corn, and brassicas pull significant nutrients out of the soil each season, and continuous harvest removes material that would otherwise decompose back in. Tracking your soil annually lets you stay ahead of deficiencies rather than diagnosing them after crop failure. It also builds a multi-year picture of how your amendments are working — which is genuinely useful when you're making decisions about compost rates or fertilizer programs.
New garden beds — whether you've just broken ground, imported topsoil, or started raised beds with a commercial mix — should always be tested before adding any amendments. Commercial mixes vary widely in quality, and some imported topsoils have pH or nutrient levels that need correction from day one. Don't assume a fresh start means a clean slate. Raised bed mixes in particular can arrive with pH well above 7.5, especially if they include large quantities of perlite or peat substitutes that haven't been buffered.
The analogy holds whether you're preparing soil or preparing for a test. Understanding where you stand before you act — whether that's taking a knowledge test to gauge readiness, or sending a soil sample to gauge fertility — is what separates targeted, efficient effort from wasted time and money.
Quick tip: Search "[your state] cooperative extension soil test" to find your local program. Most land-grant universities — including Purdue (Indiana), Ohio State, Penn State, and NC State — offer tests for $10–$25 with state-calibrated amendment recommendations. Some counties run free spring test events at local garden centers. If you're not sure where to start, call your county extension office — they'll walk you through the process at no cost.
Free and Low-Cost Soil Testing Programs
Many states offer subsidized or free soil testing through their agricultural extension services. Programs vary by state — some offer free tests in spring as part of a gardening promotion, others provide reduced-cost tests year-round for residential gardeners.
To find your state's program, search for [your state] soil testing extension service or visit your land-grant university's extension website. For example, residents of Indiana can access Purdue Extension's soil testing program, while Ohio State Extension offers testing through OSU labs. Some counties also partner with local extension offices to offer free spring test kits at garden centers and co-ops.
If you're dealing with test anxiety around decoding results, extension offices typically offer free consultation — you can call or email with questions about your specific report, and a local extension agent will walk you through what the numbers mean and what to buy.
For gardeners on a tight budget, free programs are the obvious starting point. Even if your state doesn't have a fully free option, the $10–$25 cooperative extension price is a fraction of what you'd spend on amendments you might not need.
Soil Testing by Use: Lawn vs. Garden vs. Trees
Lawn soil testing focuses primarily on pH and nitrogen. Turf grasses thrive in a pH range of 6.0–7.0, with cool-season grasses (Kentucky bluegrass, fescue) performing best around 6.5 and warm-season grasses (Bermuda, zoysia) tolerating slightly higher pH.
Nitrogen is the main driver of lawn color and density — most lawn fertilizer programs are built around nitrogen timing. Your test will tell you if your soil's base nitrogen level is adequate or if you need to supplement. Phosphorus recommendations for lawns are usually conservative, since most established lawns have built up sufficient levels from years of lawn fertilizers.
Lawn tests also help diagnose thatch problems, since compacted, low-organic-matter soils often accompany thatch buildup. Core aeration and compost top-dressing can address both issues simultaneously.
Soil Test Questions and Answers
About the Author
Attorney & Bar Exam Preparation Specialist
Yale Law SchoolJames R. Hargrove is a practicing attorney and legal educator with a Juris Doctor from Yale Law School and an LLM in Constitutional Law. With over a decade of experience coaching bar exam candidates across multiple jurisdictions, he specializes in MBE strategy, state-specific essay preparation, and multistate performance test techniques.