HVAC Leak Detector: The Complete Guide to Finding Refrigerant Leaks Fast, Accurately, and Without Wasting Refrigerant
✍🏼 HVAC leak detector guide covering electronic, UV dye, ultrasonic, and bubble methods, EPA rules, accuracy tips, and best tools for fast leak finds.
An hvac leak detector is the single most important diagnostic tool a refrigeration technician owns, because almost every comfort complaint, efficiency drop, or compressor failure eventually traces back to a low refrigerant charge caused by a leak somewhere in the sealed system. Without a sensitive, calibrated detector, you are guessing — and guessing leads to repeat callbacks, EPA fines, and customers who lose faith in your work. This guide explains every type of detector on the market, how each one works, and when to reach for which.
Modern HVAC systems use refrigerants like R-410A, R-454B, R-32, and the newer A2L blends that are now mandatory under the 2025 AIM Act phasedown. These chemicals are expensive, regulated, and in some cases mildly flammable, so finding a leak quickly and accurately matters more than ever. A good detector can identify a leak as small as 0.1 ounce per year, which is roughly the rate at which a poorly flared connection bleeds down over a single cooling season.
Technicians typically choose between four main detection methods: heated-diode electronic sniffers, infrared (IR) detectors, ultrasonic acoustic detectors, and visual methods like UV fluorescent dye or soap bubbles. Each method has a specific sweet spot. Electronic sniffers dominate routine service calls, infrared units shine in high-humidity or contaminated environments, ultrasonic tools find leaks under pressure even when refrigerant has already escaped, and dye remains the gold standard for intermittent leaks that show up only under load.
The Environmental Protection Agency under Section 608 requires technicians to repair leaks on commercial and industrial refrigeration systems containing more than 50 pounds of refrigerant once leak rates exceed specific thresholds — 20% for industrial process refrigeration, 30% for commercial systems, and 10% for comfort cooling. A documented leak inspection using a calibrated detector is the only defensible proof you actually found and fixed the source, which matters when an EPA auditor knocks on the door of a supermarket or hospital chiller plant.
Beyond compliance, leak detection is about money. A 410A system losing one pound per month wastes roughly $40 in refrigerant alone, but the indirect costs — reduced capacity, longer runtimes, frozen evaporators, slugged compressors, and acid formation from moisture intrusion — easily push the annual damage past $1,500 per system. Finding that leak in twenty minutes instead of two hours, and fixing it permanently, is what separates a competent tech from a parts-changer.
This article walks through the science behind each detection method, the strengths and weaknesses of leading detectors from Bacharach, Inficon, Fieldpiece, CPS, and Robinair, the step-by-step inspection workflow that catches 95% of leaks on the first pass, and the documentation practices that keep you out of trouble with regulators and customers. Whether you are studying for the EPA 608 exam, building out a service truck, or trying to solve a stubborn callback, the techniques below will sharpen your approach.
If you want a broader refresher on system fundamentals before diving in, our overview of HVAC solutions covers the hvac technician career and air quality components that a leak inevitably affects. Understanding how the whole system behaves under a low charge makes diagnostic decisions much easier when you are crouched in an attic with a sniffer in one hand and a manifold gauge in the other.
HVAC Leak Detection by the Numbers

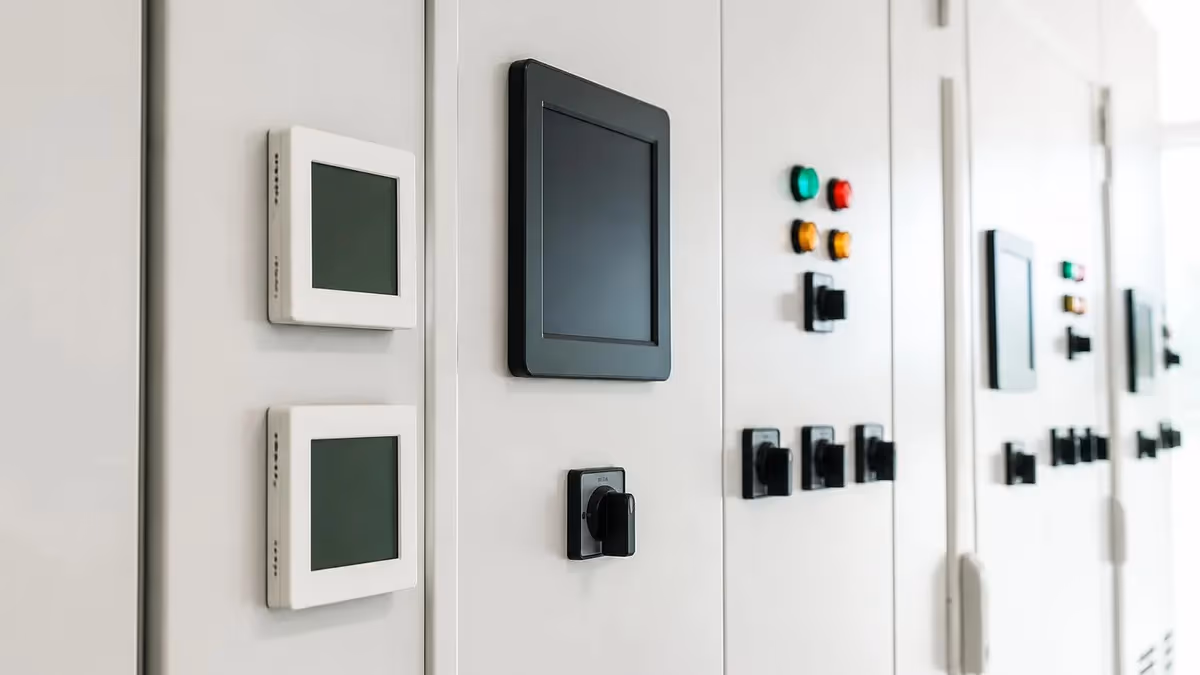
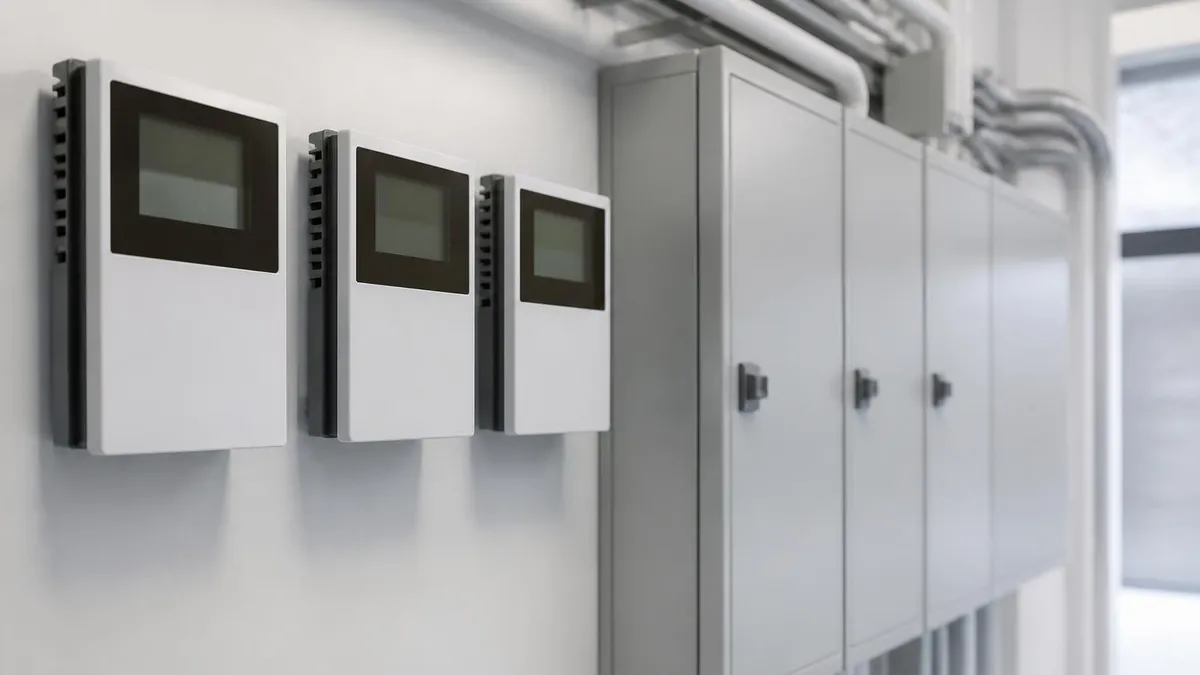
Main Types of HVAC Leak Detectors
The workhorse of residential and light commercial service. A ceramic element heats refrigerant vapor and measures ion flow. Sensitivities of 0.1 oz/yr, fast response, but sensors drift and need replacement every 100 hours.
Uses an IR beam absorbed by halocarbons. Immune to soaps, oils, and humidity that fool diode units. Lasts 5-10 years without sensor swaps. Higher upfront cost but lower lifetime expense for daily users.
Hears the high-frequency hiss of pressurized refrigerant escaping through a pinhole. Works even when the system is empty and recharged with nitrogen. Excellent for outdoor units in windy conditions.
Adds tracer dye to the refrigerant oil; leaks glow yellow-green under UV light. Best for intermittent or vibration-induced leaks. Requires 24-48 hours of runtime to circulate before inspection.
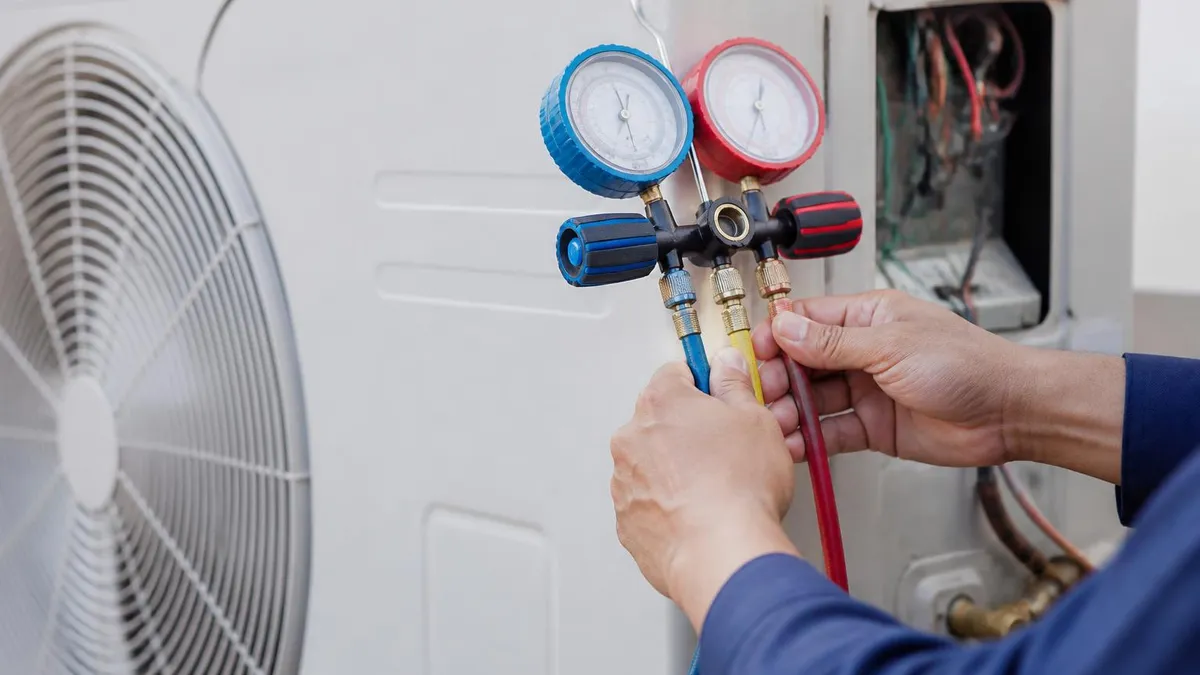
Old-school but reliable for confirming a suspected leak point. Pressurize with dry nitrogen to 150-300 psi, brush on soap solution, watch for bubbles. Always the final verification step.
Choosing the right leak detector starts with understanding your hvac career researchload. A residential service tech who runs eight calls a day in mixed weather needs something different from a commercial refrigeration specialist who spends hours inside a 35-degree walk-in freezer. The wrong tool wastes time, produces false positives, and eventually gets thrown in the bottom of the truck because it never seems to find anything reliably.
For most residential and light commercial work, a quality heated-diode detector like the Fieldpiece SRL8, Inficon TEK-Mate, or CPS LS790B hits the sweet spot. These units sell for $200 to $400, achieve 0.1 ounce per year sensitivity, and respond in under two seconds. Their main weakness is sensor drift — the heated ceramic element degrades from exposure to humidity, oils, and contaminants, and needs replacement every 100 to 200 operating hours. Plan on $40 to $80 per replacement sensor and keep two spares on the truck.
Commercial and refrigeration techs should step up to an infrared detector such as the Bacharach H-10 Pro, Inficon D-TEK Select, or Mastercool Accuprobe. IR units cost $500 to $1,200 but use a sealed optical bench that lasts 5 to 10 years with no sensor swaps. They ignore soaps, oils, alcohol-based cleaners, and high humidity — exactly the contaminants that send diode detectors into false-alarm meltdown inside grocery refrigeration racks. The total cost of ownership over five years is actually lower than diode units for high-volume users.
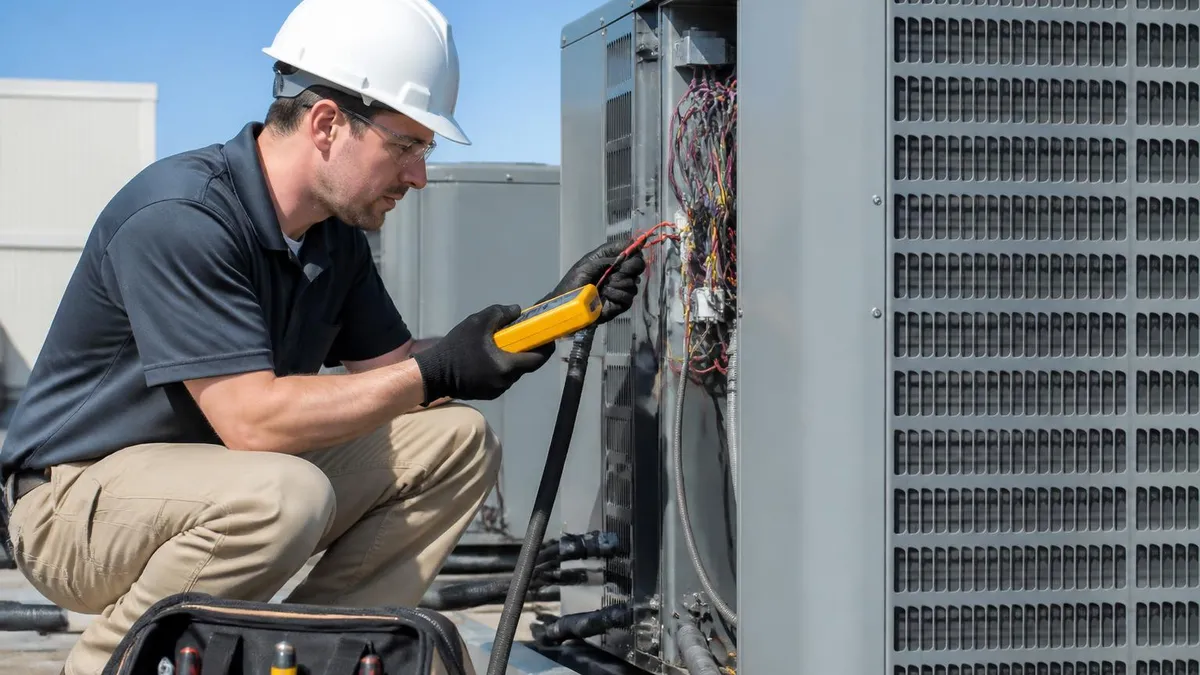
Ultrasonic detectors fill a different niche. When refrigerant has already escaped, a heated-diode or IR tool has nothing to smell. Pressurize the system with dry nitrogen to 150 psi, sweep an ultrasonic probe like the UE Systems Ultraprobe along the suction line, and the high-frequency hiss of escaping nitrogen through a pinhole is clearly audible through the headset. This is the only practical method for finding leaks in outdoor condensers during windy conditions, where airborne refrigerant disperses too fast for chemical sniffers.
UV dye remains the secret weapon for intermittent leaks. Vibration cracks at a schrader valve core, hairline fractures in evaporator U-bends, and slow weeps at flare fittings often show up only under specific operating conditions. Inject dye through the low-side schrader, run the system 24 to 48 hours, then inspect with a UV flashlight. The fluorescent glow stays visible for months and pinpoints the exact source. Just make sure the dye is compatible with your refrigerant and oil — POE oil systems require POE-compatible dye.
Don't overlook the humble bubble solution. Even with a $1,000 IR detector, the final verification before brazing a repair should always be a brush-on soap test under nitrogen pressure. Commercial bubble solutions like Big Blu, Snoop, or even plain dish soap diluted 1:4 produce tight, persistent bubbles at the exact leak point. If your detector alarms but no bubbles form under 200 psi of nitrogen, you almost certainly have a false positive from solvent residue or a wet sensor.
Many techs also benefit from understanding how leaks affect airflow and pressure, which our guide to the HVAC duct calculator touches on from the distribution side. A refrigerant leak changes evaporator superheat, which changes air temperature drop, which can mask itself as a duct or airflow problem to less experienced techs.
HVAC Practice Test Questions
Prepare for the HVAC - Heating Ventilation and Air Conditioning exam with our free practice test modules. Each quiz covers key topics to help you pass on your first try.
HVAC Air Conditioning
HVAC Exam Questions covering Air Conditioning. Master HVAC Test concepts for certification prep.
HVAC Code Compliance
Free HVAC Practice Test featuring Code Compliance. Improve your HVAC Exam score with mock test prep.
HVAC Electrical Controls
HVAC Test Prep for Electrical Controls. Practice HVAC Quiz questions and boost your score.
HVAC Energy Efficiency
HVAC Questions and Answers on Energy Efficiency. Free HVAC practice for exam readiness.
HVAC Heating Systems
HVAC Mock Test covering Heating Systems. Online HVAC Test practice with instant feedback.
HVAC Load Calculations
Free HVAC Quiz on HVAC Load Calculations. HVAC Exam prep questions with detailed explanations.
HVAC Tools and Equipment
HVAC Practice Questions for HVAC Tools and Equipment. Build confidence for your HVAC certification exam.
HVAC Refrigeration
HVAC Test Online for Refrigeration. Free practice with instant results and feedback.
HVAC Safety Practices
HVAC Study Material on Safety Practices. Prepare effectively with real exam-style questions.
HVAC System Design
Free HVAC Test covering System Design. Practice and track your HVAC exam readiness.
HVAC Thermodynamics
HVAC Exam Questions covering Thermodynamics. Master HVAC Test concepts for certification prep.
Leak Detection Methods Compared
Electronic sniffers, including heated-diode and corona-discharge designs, draw a continuous air sample across a sensor that reacts to halogen atoms. When refrigerant vapor crosses the sensor, the unit beeps faster or louder. Sensitivity ranges from 0.05 to 0.5 ounce per year depending on model and battery health. They are fast, portable, and intuitive — point, sweep, listen.
The downside is selectivity. Diode sensors react to anything containing chlorine, fluorine, bromine, or even certain alcohols and solvents. Spray a coil cleaner nearby and you'll chase phantom leaks for an hour. Always purge the work area with fresh air, hold the probe one-quarter inch from the suspected joint, and move at no more than one inch per second. Faster sweeps will skip right over small leaks.
Heated-Diode vs Infrared: Which Detector Wins?
- +Heated-diode units cost $200-$400, half the price of IR equivalents
- +Faster response time, typically 1-2 seconds vs 3-5 for IR
- +Lighter and more compact for tight attic and crawlspace work
- +Replaceable sensors mean no full-unit replacement when damaged
- +Excellent sensitivity to 0.1 oz/yr on most major brands
- +Familiar interface that most apprentices already know how to use
- +Battery life of 8-12 hours covers a full service day
- −Sensors degrade after 100-200 hours and cost $40-$80 to replace
- −False positives from soap, alcohol, oil mist, and high humidity
- −Sensor poisoning from coil cleaner residue is permanent damage
- −Performance drops in cold weather below 32°F ambient
- −Calibration drifts over the sensor life cycle
- −Cannot distinguish refrigerant from other halogenated compounds
- −Requires frequent fresh-air resets to avoid background saturation
HVAC Leak Detector Field Inspection Checklist
- ✓Verify detector battery level and let the unit warm up for at least 60 seconds before use
- ✓Calibrate or zero the sensor in clean outdoor air, away from the equipment being tested
- ✓Confirm the system is at operating pressure — never sweep a system in deep vacuum
- ✓Begin at the highest point of the circuit, since refrigerant vapor is heavier than air and falls
- ✓Hold the probe tip one-quarter inch from each joint and move at one inch per second maximum
- ✓Inspect every flare, braze joint, schrader core, service valve, and access port systematically
- ✓Pay extra attention to evaporator U-bends, condenser return bends, and TXV inlet fittings
- ✓Confirm any alarm by re-sweeping the area three times to rule out background contamination
- ✓Verify suspected leaks with bubble solution under 150-300 psi of dry nitrogen pressure
- ✓Document the leak location, refrigerant type, repair method, and post-repair leak rate test
The Heavier-Than-Air Rule
Refrigerant vapor is significantly denser than air — R-410A is roughly 2.5 times heavier — so leaking refrigerant always falls downward and pools at the lowest point of an enclosure. Always position your detector probe below the suspected joint, not above it. Sweeping above a flare fitting will miss a steady leak that is visibly fogging the floor inches below. This single technique change increases first-pass find rates by an estimated 30%.
A leak detector is only as accurate as its last calibration, and most field failures trace back to neglected sensor care rather than equipment defects. Heated-diode sensors are consumables, much like brake pads — they wear out predictably with use, and pretending otherwise leads to missed leaks and unhappy customers. Build sensor maintenance into your weekly truck routine the same way you check torque wrench calibration or recover-machine oil levels.
Start every shift by powering on the detector outdoors in clean ambient air and letting it complete its self-test. Most modern units auto-zero during startup, establishing a baseline against the current background concentration. If the unit cannot achieve a stable zero within 60 seconds, the sensor is contaminated or worn out. Don't try to compensate by adjusting sensitivity downward — replace the sensor or switch to a backup unit. A detector that won't zero is a detector that will lie to you all day.
Sensor replacement is straightforward on most diode units. Power down, unscrew the probe tip, lift out the old sensor element, install the new one, and let the unit run for 5 to 10 minutes to burn off packaging residues. Always carry at least two spare sensors and a small sealed container of clean reference gas, which lets you verify the new sensor responds correctly before billing time on a call. Some manufacturers like Bacharach offer reference leak standards that emit a known concentration for calibration verification.
Infrared detectors require almost no calibration in normal use, but the optical chamber must stay clean. Dust, oil mist, and water condensation on the IR window will gradually reduce sensitivity. Most IR units include a self-diagnostic that warns when chamber transmissivity drops below acceptable thresholds. When that warning appears, ship the unit to the manufacturer for cleaning rather than attempting field disassembly — the IR source alignment is precise and easily disturbed.
Battery management matters more than most techs realize. Low battery voltage reduces sensor heater temperature on diode units and dims the IR source on optical units, both of which silently reduce sensitivity. Always start a leak hunt with fresh batteries or a fully charged pack, and replace rechargeable battery packs every two to three years even if they still hold a partial charge. The voltage sag under load is what kills detection performance, not total capacity.
Store detectors in a sealed case with a small desiccant pack between calls. Refrigerant vapor, brake cleaner overspray, and humid attic air all damage sensors over time. The case doesn't need to be fancy — a Pelican-style box with foam cutouts costs $40 and extends sensor life by an estimated 40%. Never leave a detector in a hot truck cab during summer; temperatures above 140°F accelerate sensor aging dramatically.
Document your calibration and sensor replacement intervals in a simple log, either paper or in your service software. EPA auditors, manufacturer warranty claims, and customer disputes all benefit from a written record showing the detector was verified working on the date of the inspection. Many techs photograph the detector display showing a successful self-test next to the system nameplate as part of every service ticket.
Federal regulations require certified technicians to repair leaks on systems containing 50 pounds or more of refrigerant when annual leak rates exceed 10% (comfort cooling), 20% (commercial), or 30% (industrial process). Repairs must be verified with a follow-up leak inspection within 10 days, and all activity documented for at least three years. Violations carry civil penalties up to $37,500 per day per violation under the Clean Air Act, and willful violations can trigger criminal prosecution.
EPA Section 608 of the Clean Air Act establishes the legal framework for refrigerant management in the United States, and every leak detection hvac terms to understand exactly what the regulations require. The rules apply to all stationary refrigeration and air conditioning equipment using ozone-depleting refrigerants and most HFC substitutes, including the new A2L refrigerants like R-454B and R-32 being phased in under the 2025 AIM Act transition. Ignorance of the rules is not a legal defense.
For appliances containing 50 pounds or more of refrigerant, owners must repair leaks within 30 days when the calculated annual leak rate exceeds the applicable threshold. The thresholds were tightened significantly in 2019: 10% for comfort cooling, 20% for commercial refrigeration, and 30% for industrial process refrigeration. After repair, a follow-up verification leak test must be performed within 10 days using a method appropriate to the system, and the results documented in the appliance service record.
Service records must include the appliance identification, full charge amount, date of each leak inspection, leak rate calculation method, locations of leaks found, repair actions taken, and verification test results. Records must be kept for at least three years, and EPA inspectors can request them with little notice. Most service software platforms now include refrigerant tracking modules that automate this paperwork — using one isn't optional anymore if you service larger commercial systems.
For technicians, certification under Section 608 is mandatory before purchasing or handling regulated refrigerants. Type I covers small appliances, Type II covers high-pressure systems including most residential and commercial AC, Type III covers low-pressure chillers, and Universal certification covers all three. The exam includes questions specifically about leak detection methods, repair verification, and recordkeeping — topics that overlap directly with daily field practice.
Beyond federal rules, many states have layered additional requirements. California's CARB Refrigerant Management Program requires annual leak inspections on systems above 50 pounds and quarterly inspections above 200 pounds, with electronic reporting through the CARB R3 database. Washington, Massachusetts, and several Northeast states have adopted similar programs. Always check the local jurisdiction before quoting a service contract, because non-compliance penalties can dwarf the repair cost.
Documentation quality matters as much as the inspection itself. A photo of the leak location, a print or screenshot from the detector showing the alarm, and a written description of the repair method and parts used constitute defensible proof. Many service companies now use tablet-based forms that timestamp and GPS-tag each entry automatically. This level of detail seems excessive until the day an EPA auditor walks into your customer's plant and starts pulling records — at which point thorough documentation pays for itself many times over.
For homeowners and facility managers who want to understand what their hvac service co should be doing, our guide on how to find hvac contractors outlines the certifications, insurance, and documentation practices that separate compliant professionals from corner-cutters. A contractor who can't explain Section 608 leak repair rules in plain English is a contractor who will eventually create a regulatory problem for the property owner.
Putting it all together in the field comes down to a disciplined workflow that catches leaks fast without missing the subtle ones. Start every leak diagnosis by pulling system pressures and temperatures, calculating superheat and subcool, and confirming the system is actually low on charge before reaching for the detector. Many supposed leaks are actually airflow problems, faulty TXVs, or misadjusted charge from a prior service. Confirming a real low-charge condition first saves hours of fruitless sniffing.
Once you've confirmed the system is low, isolate where the leak must be. A recently installed system with leaks almost always points to brazing joints, flare fittings, or schrader cores disturbed during installation. A 10-year-old system in coastal salt air points to evaporator coils and condenser bends suffering formicary corrosion. An attic-mounted air handler with vibration history points to suction line elbows and tubing supports. Pattern recognition narrows the search area before you even open the detector case.
Inspect the easiest, most likely locations first. Service valve stems, schrader cores, and flare nuts at the outdoor unit are the highest-probability leak sites and take 90 seconds to check. If you find the leak there, the call is essentially over. Only after eliminating the obvious targets should you move indoors to evaporator coils, where access is harder and inspection takes longer. Working obvious-to-obscure cuts average diagnosis time roughly in half.
When you suspect an evaporator leak, remove the access panel and let the cabinet stabilize for two to three minutes so circulating air doesn't dilute the sample. Sweep the probe slowly across the bottom of the coil first, since refrigerant vapor pools low. Then work up each face systematically. Pay particular attention to the U-bends at the ends of each circuit, distributor tubes feeding the TXV, and the brazed connections where copper meets aluminum. Formicary corrosion tends to attack the copper U-bends first.
For outdoor units in windy conditions, build a temporary wind shield from cardboard or use a plastic trash bag taped over the suspected leak area for 5 to 10 minutes to allow vapor to accumulate. This concentrates an otherwise diluted leak signal enough to detect. Ultrasonic detectors work better than chemical sniffers outdoors because wind doesn't disperse the acoustic signal, only the gas itself.
After locating any leak, mark it clearly with a paint pen or piece of tape before moving on. Refrigerant systems frequently have multiple leaks, especially on older equipment, and finding the first one doesn't mean you've found the last. Continue the full circuit sweep before recovering refrigerant and starting repairs, otherwise you'll end up evacuating, repairing, recharging, and watching the system bleed down again within weeks because a second leak went undetected.
Finally, always perform a post-repair verification leak test. Pressurize the repaired section with dry nitrogen to the system's design test pressure, hold for at least 10 minutes, and sweep the repair with both detector and bubble solution. Only after the repair passes a leak-tight verification should you pull a deep vacuum and recharge. This single discipline — verify before recharge — eliminates the embarrassing callback where the customer calls back a week later complaining the air isn't cold.
HVAC Questions and Answers
HVAC Solutions: The Complete Guide to Heating, Cooling, and Indoor Air Quality Systems for Homes and Buildings

HVAC Vents: The Complete Homeowner's Guide to Types, Sizing, Placement, and Airflow Optimization

HVAC Duct Calculator: The Complete Guide to Sizing Ductwork for Airflow, Static Pressure, and System Efficiency
Certified HVAC Contractors: How to Find, Vet, and Hire the Right Professional for Your Home or Business

Best HVAC Repair in Bandon, OR: Local Services Near Me Guide
About the Author
NATE Certified HVAC Technician & Licensing Exam Trainer
Universal Technical InstituteMike Johnson is a NATE-certified HVAC technician and EPA 608 universal-certified refrigerant handler with a Bachelor of Science in HVAC/R Technology. He has 19 years of commercial and residential HVAC installation and service experience and specializes in preparing technicians for NATE certification, EPA 608, A2L refrigerant safety, and state HVAC contractor licensing examinations.