Shed Plans 2026 July
❓ Boost your Shed Plans exam score with practice questions and detailed answer explanations. Track progress with instant feedback.
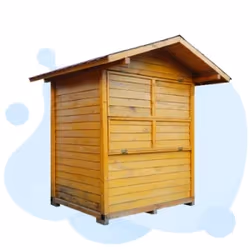
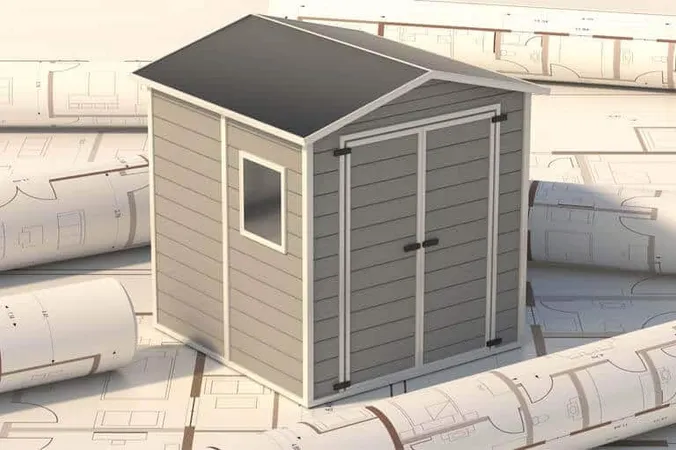
Top 10 Tips to Build Your Own Shed
- Size
- Building Code
- Foundation
- Material
- Location
- Maintenance
- Weather Proof
- Door
- Interior
- Property Inspection
Shed Plans Questions and Answers
- Create a square by using four of your two by-4s. Each board’s 2-inch edge needs to be facing up. Place the 4-inch side of one board next to the 2-inch end of the other. Utilizing your nail gun, fasten the boards together. The final product should resemble an L. By securing your other two boards; you can close the square.
- Make a pencil mark 17 inches from the end of one side of your square. Make another mark at 17 inches from your initial pencil mark. Once you have seven pencil marks that are 17 inches apart, keep going in this manner. Put this same action into action on the board across from you.
- One of your two by 4s should be placed inside your square with the ends aligned with the first pencil mark. Install the boards by using your nail gun. Nail into the ends of the board from the outside of your square. On each succeeding pencil mark, continue to position and nail the remaining two by 4s into the square. Your floor joists are this set of boards.
- Two feet from each end, measure the distance between your square’s two opposite sides. Cross these marks with your four by 4s. Your kids are the larger boards. Your kids will be mailed to your frame in the opposite direction from your floor joists. The distance between each board and the sides of your square should be two feet. Use your nail gun to affix your skids to the floor joists and frame. Your kids will need to be angle-nailed to your frame and joists.
- Put your gun’s tip on the skid about two inches above your frame. While keeping the tip of your gun compressed against the skid, raise it at a sharp angle. Make the shot. Your skid should be nailed into the frame with a nail. Continue across both skids until each floor joist has a nail driven through the skids and into it. Floor and Foundation Frame:
- 6 inches in from the ends of your skids, place a concrete block. Four blocks ought to be in position by this point. Place the final two blocks exactly in the middle. At this point, you ought to have two rows of blocks, each with three blocks. On these pillars, your skids will land.
- The remaining two by 4s should be placed across one of your block rows. Put the level on the board. You must adjust your blocks if your board is not level. You can level your construction by removing dirt or placing gravel underneath your blocks to change the height. Follow the same procedure for the second row of blocks.
- To lift your floor frame and place it on your blocks, enlist the aid of a helper. The skids of your frame should support your blocks. If not, you must reposition your body.
- On your frame, place two of your 34-inch plywood sections side by side, facing the same way as your floor joists. Using your nail gun, fasten your flooring by driving nails through your plywood and into the floor joists.
- Measure the remaining sheet of plywood and cut it into 2-by-8-foot sections. To finish the rest of your floor, you will require these sections. These sections should be on the side and at the back of your shed. These areas will see a decrease in foot traffic.
- Floor The floor is pressure-treated wood. Two 26’s should be 8′ long for the floor bands, and seven should be 7′ 9″. Nail 3 1/2-inch nails through floor bands and into floor joists. 16-inch O.C. floor joists. Attach 8′ 4×4 skids to the floor frame. Measure diagonally to square the floor frame. Three 1/2-inch nails through the floor frame and 4×4 skids secure them.
- Floor Deck Install 3/4″ T&G plywood. 2″ deck screws secure the plywood.
- R&L Wall Frame 2x4s frame the walls. The top and bottom plates are 8′ 2x4s. For wall studs, cut ten 2x4s to 6 5/8″
- Front/back wall frame The top and bottom plates are 7′ 5″ 2x4s. For wall studs, cut ten 2x4s to 6′ 5/8″.
- Ridge Top Two 2x4s should be 1’2 3/8,” and one should be 8′. Install 3 1/2′′ nails as shown.
- Rafters Rafters are 2×4. Cut ten 2x4s for roof rafters as shown. Install 2-foot-apart roof rafters. Three 1/2-inch nails through rafters, wall frame, and ridge board.
- T1-11 Exterior Siding Use 1 1/4″ finishing nails to install 4’x8′ siding. After installing siding, cut along the rafters.
- Rooftop Install 1/2-inch plywood roof deck with 2-inch nails. As shown, install 26 roof trim and 14 corner trim. Felt, shingles, and drip edge.
- Tools needed To build a loft, you’ll need: Plywood Spanners jigsaw Measurements Woodcuts 2×4 2×6 shed woodcuts Ladder Hanger-joist Drill Cutters
- Cut Plywood to Desired Size Find studs in the loft’s location. Cut plywood to loft length. 8-inch-wide. Screw plywood to wall studs using deck screws. Next, secure 2-by-4 joist hangers to plywood with deck screws. 12-16 inches apart.
- Screw Joist Hangers Fasten cut wood to joist hangers with deck screws. They’re now ceiling joists. Mark the shed’s walls and storage area’s width. Mark the joists if you’re using the full shed width.
- Braces for ceiling joists From rafters to ceiling joists, cut twice as many joists. These braces will strengthen the ceiling joists to support more weight. Screw braces to rafters and ceiling joists. Plumb the braces for maximum strength. Measure and cut plywood to fit the storage area’s ceiling joists. Fasten it to ceiling joists with deck screws.
- A small, pitched-roof shed can be built using 2×4 framing, cedar boards, and plywood shelves.
- Assemble the Framing With a center crosspiece and an angled top, construct three identical 2×4 frames. Using 2x4s at the top, bottom, front, and back, join the three frames around the door openings on the front of the framing and nail 1x2s. Utilizing a glue-like Gorilla Wood, A 2×6 header should be glued, glued, and screwed across the front.
- Install a floor and shelves. To ensure that the piece is flush with the 1x2s in the front, leave a 34-inch overhang when cutting a piece of plywood to fit inside the base of the framing. To fit around the framing, notch the plywood. Put screws and glue in it. To support shelving, screw crosspieces inside the middle and right frames. Shelving made of plywood should be screwed down.
- Side the Shed Nail tongue-and-groove cedar boards to the outside of the frame on the sides and the back. Using a circular saw, cut the top edges of the boards flush with the framing.
- Put on the Roof Nail tongue-and-groove boards to the top of the frame. The front and sides of the roof overhang.
- Construct and Install the Doors Doors’ heights should be used to determine the length of the boards (to fit below the header). For support, screw 1×3 strips across the back. Each door’s front has a 1×3 frame attached to it. Heavy-duty hinges are used to fasten the doors to the shed.
Lean to Shed Plans
- Integrate Your Home
- Extremely Economical
- Fantastic in High-Precipitation Areas
- Ideal for More Compact Spaces
Shed Plans Practice Test Questions
Prepare for the Shed Plans exam with our free practice test modules. Each quiz covers key topics to help you pass on your first try.
Shed Plans Building Shed Plans and Regulat...
Shed Plans Exam Questions covering Building Shed Plans and Regulations. Master Shed Plans Test concepts for certification prep.
Shed Plans Building Storage Shed
Free Shed Plans Practice Test featuring Building Storage Shed. Improve your Shed Plans Exam score with mock test prep.
Shed Plans Shed Design and Materials
Shed Plans Mock Exam on Shed Design and Materials. Shed Plans Study Guide questions to pass on your first try.
Shed Plans Shed Construction Tools and Tec...
Shed Plans Test Prep for Shed Construction Tools and Techniques. Practice Shed Plans Quiz questions and boost your score.
Shed Plans Shed Doors and Windows
Shed Plans Questions and Answers on Shed Doors and Windows. Free Shed Plans practice for exam readiness.
Shed Plans Shed Electrical and Lighting
Shed Plans Mock Test covering Shed Electrical and Lighting. Online Shed Plans Test practice with instant feedback.
Shed Plans Shed Foundation and Flooring
Free Shed Plans Quiz on Shed Foundation and Flooring. Shed Plans Exam prep questions with detailed explanations.
Key Takeaway: Shed Plans certification demonstrates expertise in this field. Most candidates spend 4-8 weeks preparing with practice tests before taking the exam.
Shed Roof Pole Barn Plans
- Gambrel Roof
- Hip Roof
- Gable Roof
- Monitor Roof
- Monoslope Roof
Pallet Shed Plans
- Select a Location
- Setting up the pallets
- Installing your posts
- Putting up your walls
- Affix the rafters and purlins.
- Assemble the roof
Generator Shed Plans
- Noise
- Security
- Aesthetic
- Weather
- Access
- Wildlife
- Storage
Shed Dormer Framing Plans
- Layout
- Trim Ceiling
- Dormer Framing and Existing Structure Modifications
- Taking Off the Old Roof
Trash Shed Plans
- Measure the frame.
- Side framing pieces should be cut.
- Remove the Top
- Building Front Supports
- Place the Front Crosspiece in Place
- Build the Supports for the Back Crosspieces.
- Construct a Lid Support
- The First Siding Piece Must Be Attached
- Finalize the frame's siding
- Cut off any extra sheathing.
- Put the doors and lids together.
- Put the caps and lids on.
- Putting in the Front Doors
Shed Plans: Pros and Cons
- +Shed Plans credential is recognized by employers and industry professionals
- +Higher earning potential compared to non-credentialed peers
- +Expanded career opportunities and professional advancement
- +Structured learning path builds comprehensive knowledge
- +Professional development that stays current with industry standards
- −Preparation requires significant time and study commitment
- −Associated costs for exams, materials, and renewal fees
- −Continuing education needed to maintain credentials
- −Competition for advanced positions can be challenging
- −Requirements and standards may vary by state or region
About the Author
Certified Professional Development Expert & Niche Certification Advisor
University of Pennsylvania Graduate School of EducationDr. Alexandra Kim holds a PhD in Professional Studies from the University of Pennsylvania and is a Certified Professional in Learning and Performance (CPLP) and Certified Professional in Talent Development (CPTD). With 17 years of corporate training and professional certification advisory experience, she helps professionals navigate specialized, emerging, and cross-industry certification programs.