
How to Print the Lines in Excel: The Complete 2026 September Guide to Printing Gridlines, Borders, and Row Headings
🔎 Learn how to print the lines in Excel including gridlines, borders, and row headings. Step-by-step 2026 September guide with settings, fixes, and pro tips.

Learning how to print the lines in Excel is one of those small skills that quietly transforms a messy printout into a clean, professional document. By default, Excel shows faint gridlines on screen, but those lines vanish the moment you hit print unless you change a specific setting. If you have ever printed a spreadsheet only to find a floating sea of numbers with no visual structure, you already understand the frustration this guide solves once and for all.
Gridlines matter because they give the human eye a way to track rows and columns across a wide table. Without them, a reader scanning a printed budget or schedule can easily slide from one row into the next and misread a value. This is the same reason people search for how to freeze a row in excel when working on screen. The goal is always visual structure, and printed lines deliver that structure on paper just as frozen panes do digitally.
There is an important distinction many beginners miss. Excel has two different kinds of lines: gridlines and borders. Gridlines are the light gray lines that appear automatically around every cell on the worksheet. Borders are lines you deliberately add to specific cells using formatting tools. They look similar on screen, but they print using completely different settings, and confusing the two is the single most common reason a printout comes out wrong.
Printing gridlines is controlled from the Page Layout tab in a section called Sheet Options. You simply check a box labeled Print under the Gridlines group, and Excel will render those faint lines on every printed page. It sounds trivial, yet thousands of people search for this exact answer every month because the setting is tucked away in a spot most users never explore during normal data entry.
Borders, on the other hand, always print regardless of the gridline setting. If you select a range and apply All Borders from the Home tab, those lines become part of the cell formatting and travel with the document wherever it goes. This makes borders the more reliable choice when you need guaranteed, crisp lines on a polished report, an invoice, or any document you plan to share with clients or managers.
This guide walks through every method in detail, from the quick checkbox to advanced print area control and troubleshooting. Whether you are preparing a one-page summary or a forty-page data dump, you will learn exactly which setting to change, where to find it across Windows, Mac, and Excel for the web, and how to avoid the pitfalls that waste paper and ink. By the end you will print lines with total confidence.
Printing Lines in Excel by the Numbers

How to Print the Lines in Excel: Step by Step
Open Page Layout Tab
Find Sheet Options
Check Print Under Gridlines
Preview With Ctrl+P
Adjust Print Area If Needed
Print the Document
The difference between gridlines and borders is the foundation of everything in this guide, so it is worth slowing down to truly understand it. Gridlines are a worksheet-wide display feature. They appear automatically around every cell, they are light gray, and they exist whether or not you do anything. Their purpose is purely to help you see the cell grid while you work, much like how people rely on tools to learn how to merge cells in excel to organize a visual layout.
Borders are entirely different. A border is a formatting attribute applied to a specific cell or range that you choose. You add borders deliberately through the Home tab, the Format Cells dialog, or the border dropdown button. Because a border is baked into the cell formatting, it always prints, it can be any color or thickness, and it stays visible even when you turn off gridlines completely. This permanence is exactly why borders are the professional choice for reports.
Here is the practical consequence. If you only enable the gridline print setting, every cell in your print area gets a uniform light gray line. That is great for raw data tables and quick reference sheets. But if you want a heavy line under a totals row, a colored line separating sections, or a box around a key figure, gridlines cannot do that. You need borders for any kind of selective or stylistic line work on the page.
Many users accidentally create double lines without realizing it. If you turn on gridline printing and also apply All Borders to the same range, the printout shows both the gray gridline and the black border stacked together, which can look slightly muddy. The cleaner approach is to pick one method per area: gridlines for plain data zones, and borders for anything you want to emphasize or style on the final printed sheet.
Color is another key distinction. Printed gridlines always come out in the default light gray defined by Excel, and you cannot change that color from the print setting itself. Borders, by contrast, let you choose any color from the palette, set the line weight from hairline to thick, and even use dashed or double styles. For branded documents or color-coded reports, borders give you the creative control that gridlines simply do not offer.
Finally, consider portability. When you save a workbook as a PDF or email it to a colleague, borders survive perfectly because they are part of the cell data. Gridline print settings also save with the file, but they only apply to the sheets where you enabled them. If you frequently share spreadsheets, leaning on borders for important structure guarantees that your intended lines appear identically on every device and in every export, with no surprises.
Microsoft Excel Practice Test Questions
Prepare for the Microsoft Excel exam with our free practice test modules. Each quiz covers key topics to help you pass on your first try.
Microsoft Excel Excel Basic and Advance
Microsoft Excel Exam Questions covering Excel Basic and Advance. Master Microsoft Excel Test concepts for certification prep.
Microsoft Excel Excel Formulas
Free Microsoft Excel Practice Test featuring Excel Formulas. Improve your Microsoft Excel Exam score with mock test prep.
Microsoft Excel Excel Functions
Microsoft Excel Mock Exam on Excel Functions. Microsoft Excel Study Guide questions to pass on your first try.
Microsoft Excel Excel MCQ
Microsoft Excel Test Prep for Excel MCQ. Practice Microsoft Excel Quiz questions and boost your score.
Microsoft Excel Excel
Microsoft Excel Questions and Answers on Excel. Free Microsoft Excel practice for exam readiness.
Microsoft Excel Excel Trivia
Microsoft Excel Mock Test covering Excel Trivia. Online Microsoft Excel Test practice with instant feedback.
Microsoft Excel Advanced Data Analysis Tools
Free Microsoft Excel Quiz on Advanced Data Analysis Tools. Microsoft Excel Exam prep questions with detailed explanations.
Microsoft Excel Advanced Formula and Macro...
Microsoft Excel Practice Questions for Advanced Formula and Macro Creation. Build confidence for your Microsoft Excel certification exam.
Microsoft Excel Advanced Formulas and Macros
Microsoft Excel Test Online for Advanced Formulas and Macros. Free practice with instant results and feedback.
Microsoft Excel Basic and Advance Question...
Microsoft Excel Study Material on Basic and Advance Questions and Answers. Prepare effectively with real exam-style questions.
Microsoft Excel Creating and Managing Charts
Free Microsoft Excel Test covering Creating and Managing Charts. Practice and track your Microsoft Excel exam readiness.
Microsoft Excel Data Visualization with Ch...
Microsoft Excel Exam Questions covering Data Visualization with Charts. Master Microsoft Excel Test concepts for certification prep.
Microsoft Excel Formulas and Functions
Free Microsoft Excel Practice Test featuring Formulas and Functions. Improve your Microsoft Excel Exam score with mock test prep.
Microsoft Excel Formulas and Functions App...
Microsoft Excel Mock Exam on Formulas and Functions Application. Microsoft Excel Study Guide questions to pass on your first try.
Microsoft Excel Formulas Questions and Ans...
Microsoft Excel Test Prep for Formulas Questions and Answers. Practice Microsoft Excel Quiz questions and boost your score.
Microsoft Excel Functions Questions and An...
Microsoft Excel Questions and Answers on Functions Questions and Answers. Free Microsoft Excel practice for exam readiness.
Microsoft Excel Managing Data Cells and Ra...
Microsoft Excel Mock Test covering Managing Data Cells and Ranges. Online Microsoft Excel Test practice with instant feedback.
Microsoft Excel Managing Tables and Data
Free Microsoft Excel Quiz on Managing Tables and Data. Microsoft Excel Exam prep questions with detailed explanations.
Microsoft Excel Managing Tables and Table ...
Microsoft Excel Practice Questions for Managing Tables and Table Data. Build confidence for your Microsoft Excel certification exam.
Microsoft Excel Managing Worksheets and Wo...
Microsoft Excel Test Online for Managing Worksheets and Workbooks. Free practice with instant results and feedback.
Microsoft Excel MCQ Questions and Answers
Microsoft Excel Study Material on MCQ Questions and Answers. Prepare effectively with real exam-style questions.
Microsoft Excel Questions and Answers
Free Microsoft Excel Test covering Questions and Answers. Practice and track your Microsoft Excel exam readiness.
How to Freeze a Row in Excel vs Printing Lines Across Platforms
On Excel for Windows, go to the Page Layout tab, locate the Sheet Options group, and check the Print box under Gridlines. This is the fastest, most reliable path. You can also press Ctrl+P to open the print preview, then click Page Setup at the bottom and check Gridlines under the Sheet tab for the same result through a different route.
Windows also lets you print row and column headings. In that same Sheet Options group, check Print under the Headings label. This adds the column letters and row numbers to your printout, which is invaluable for proofreading, referencing specific cells in meetings, or sharing a layout that mirrors what people see while working on screen.

Gridlines vs Borders for Printing: Which Should You Use?
- +Gridlines enable with a single checkbox and require zero formatting work
- +Gridlines cover the entire print area uniformly with no manual selection
- +Gridlines are ideal for quick raw data dumps and reference tables
- +Borders print on every platform including Excel for the web
- +Borders survive PDF export and email sharing perfectly intact
- +Borders allow custom colors, thickness, and dashed or double styles
- −Gridlines only print light gray and cannot be recolored from the setting
- −Gridlines may not appear reliably in older Excel for the web versions
- −Gridlines cannot emphasize specific rows like totals or headers
- −Borders require manual selection and applying to each range
- −Combining borders and gridlines can create muddy double lines
- −Borders take longer to set up on very large multi-page tables
Pre-Print Checklist Before You Print the Lines in Excel
- ✓Open the Page Layout tab and locate the Sheet Options group
- ✓Check the Print box under Gridlines to enable line printing
- ✓Decide whether you also need Headings printed for row and column references
- ✓Set a print area if you only want part of the sheet to print
- ✓Apply borders to any rows you want emphasized like totals or headers
- ✓Press Ctrl+P to open print preview and confirm lines are visible
- ✓Check page orientation is correct for wide tables, usually landscape
- ✓Use Fit Sheet on One Page if the table spills awkwardly across sheets
- ✓Verify margins are not cutting off the outer gridlines on edges
- ✓Send a single test page before printing a long multi-page document
View and Print are two separate checkboxes
In the Sheet Options group, Gridlines has both a View box and a Print box. Unchecking View only hides lines on screen, while checking Print is what actually puts them on paper. Many users toggle the wrong box and wonder why nothing changes on the printout. Always confirm the Print checkbox specifically.
When gridlines refuse to print, the cause is almost always one of a few predictable culprits, and working through them methodically saves a lot of frustration. The first and most common issue is simply that the Print checkbox under Gridlines was never checked. Remember that the View checkbox and the Print checkbox are separate. Seeing lines on your monitor does not guarantee they will print, so always confirm the Print box specifically in the Sheet Options group.
The second frequent cause is a fill color sitting on top of your cells. If you applied a white or light fill to a range, that fill physically covers the gridlines and prevents them from printing even when the setting is enabled. To fix this, select the affected cells, open the fill color dropdown on the Home tab, and choose No Fill. Suddenly the underlying gridlines reappear in both the preview and the final printout.
Draft quality printing is a sneaky third culprit. Some printers and some Excel page setups have a Draft Quality option that strips gridlines to speed up printing and conserve ink. Open the Page Setup dialog, go to the Sheet tab, and make sure the Draft Quality box is unchecked. This single overlooked option has confused countless users who had every other setting correct but still got a blank, lineless page.
A fourth scenario involves the print area being set incorrectly. If you previously defined a print area that excludes part of your data, gridlines will only appear inside that defined region, and anything outside it prints nothing at all. Go to Page Layout, click Print Area, and choose Clear Print Area to reset, or redefine it to cover the full range you actually intend to send to the printer.
Printer driver issues form the fifth category. Occasionally a printer driver renders very light gray gridlines so faintly that they appear missing, especially on low toner. If your preview clearly shows lines but the paper does not, the workaround is to switch from gridlines to actual borders, which print in solid black and survive even weak printer output. Updating or reinstalling the printer driver can also resolve persistent faint-line problems.
Finally, scaling can interfere. When you compress a large sheet to Fit All Columns on One Page, Excel may shrink everything so dramatically that gridlines blur together or become nearly invisible at the reduced size. If your printout looks like a gray smear, reduce the amount of data per page, switch to landscape orientation, or split the table across multiple pages so the lines retain enough spacing to read clearly on paper.
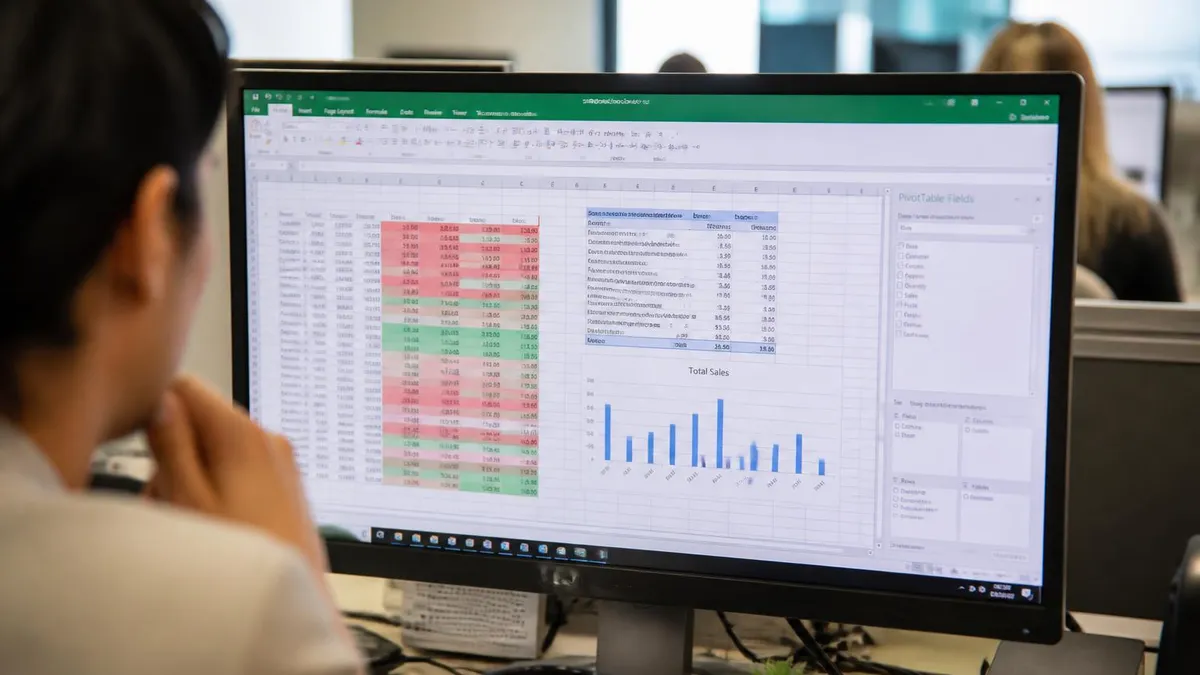
A white or pale cell fill silently covers gridlines and stops them printing, even when every print setting is correct. If your lines appear on some cells but vanish on others, select the empty-looking range and set fill to No Fill. This is the most overlooked reason gridlines disappear from an otherwise perfect printout.
Once you master the basic gridline toggle, advanced print layout control turns an ordinary spreadsheet into a polished, presentation-ready document. The single most powerful tool is the print area. By selecting exactly the cells you want and choosing Set Print Area under the Page Layout tab, you tell Excel to ignore everything else. This stops stray notes, helper columns, or scratch calculations from appearing on the page, and it ensures gridlines only render around the data you actually care about.
Page breaks give you the next layer of control. Switching to Page Break Preview from the View tab shows blue lines indicating where Excel will split your pages. You can drag these lines to force a logical break, keeping related rows together so a totals row never gets orphaned at the top of a fresh page. Combined with printed gridlines, deliberate page breaks make multi-page reports flow naturally and remain easy for readers to follow.
Repeating header rows is an underused feature that pairs beautifully with printed lines. Under Page Layout, click Print Titles, then in the Rows to Repeat at Top box select your header row. Now every printed page shows the column headers above the gridlined data, so readers never lose track of what each column means. This is the print-world equivalent of the on-screen technique people use when they want to know how to create a drop down list in excel for cleaner, more guided data.
Scaling options deserve careful attention. The Fit Sheet on One Page setting is tempting, but on large tables it can shrink text and gridlines into an unreadable smudge. A smarter approach is Fit All Columns on One Page, which keeps the width contained while letting rows flow naturally across multiple pages. This preserves legible line spacing and keeps your gridlines crisp instead of compressing them into an indistinct gray block.
Margins and orientation round out the layout toolkit. Wide tables almost always print better in landscape orientation, which you set under Page Layout, Orientation, Landscape. Narrow margins squeeze more columns onto each page, but be careful not to push gridlines so close to the paper edge that your printer crops them. The Print Preview pane is your safety net here, showing exactly where every line will fall before you commit paper and ink.
For truly professional output, consider combining techniques thoughtfully. Use printed gridlines for the bulk of your data, add bold borders under section headers and totals, repeat your header row on every page, and define a clean print area. Layered together, these settings produce a document that looks deliberately designed rather than dumped from a spreadsheet, and the structure helps every reader navigate your numbers with confidence and zero guesswork.
With the mechanics covered, a few practical habits will make printing lines effortless every single time you open a spreadsheet. First, always preview before you print. Pressing Ctrl+P shows you the exact output, and a five second glance at the preview pane catches missing lines, awkward page splits, and cut-off columns long before you waste a single sheet of paper. Treat the preview as a mandatory checkpoint rather than an optional convenience, and your printed results will improve dramatically.
Second, build a clean template for documents you print regularly. If you produce a weekly report, set up the print area, enable gridline printing, configure repeating headers, and save the file as a template. Every future report inherits those settings automatically, eliminating the repetitive clicking and guaranteeing consistent output. This small upfront investment pays off enormously over months of recurring printing tasks and keeps your formatting uniform across an entire series of documents.
Third, prefer borders over gridlines whenever a document leaves your computer. Because borders are part of the cell formatting, they print reliably on any printer, survive PDF conversion, and appear correctly when a colleague opens the file on a different Excel version. Reserve gridline printing for quick personal reference sheets, and lean on real borders for anything you email, present, or hand to a client who expects a professional finish.
Fourth, mind your color and ink usage. Printed gridlines are light gray and use minimal ink, which is perfect for draft work. But if you add colored borders or heavy line weights across a large table, you can burn through toner quickly. For internal documents, keep lines simple and gray. Save bold colored borders for the final presentation copy where the visual polish genuinely matters to your audience.
Fifth, learn the keyboard shortcuts that speed up the whole process. Ctrl+P opens print preview, Ctrl+P then Page Setup reaches the gridline checkbox, and the border dropdown on the Home tab applies All Borders in two clicks. These shortcuts feel minor individually, but combined they shave real time off every printing session and let you focus on the data instead of hunting through menus for the right option.
Finally, test your knowledge and keep building your Excel fluency. Printing lines is a gateway skill that connects to broader competencies like page setup, formatting, and document design. The more comfortable you become with the Page Layout tab, the faster you will handle every print challenge that comes your way. Bookmark this guide, run through the checklist before important print jobs, and you will never again be surprised by a lineless, hard-to-read spreadsheet on paper.
As a closing reminder, the entire workflow comes down to one decision and one checkbox. Decide whether you want quick uniform gridlines or deliberate styled borders, then either check Print under Gridlines on the Page Layout tab or apply borders from the Home tab. Everything else, from print areas to scaling, simply refines that core choice. Master this and clean, structured printouts become a guaranteed result rather than a lucky accident every time.
Excel Questions and Answers

Excel Functions List: The Complete Reference Guide to Every Formula You Need in 2026

Excel Finance Functions Guide With PMT, NPV, IRR and Loan Models

How to Convert Text to Excel: The Complete 2026 Guide to Importing TXT and CSV Files Into Spreadsheets

Excel Merge Tables: The Complete 2026 Guide to Combining Data Across Worksheets

Lock Formulas in Excel: The Complete 2026 Guide to Protecting Cells, Sheets, and Workbook Calculations
About the Author

Business Consultant & Professional Certification Advisor
Wharton School, University of PennsylvaniaKatherine Lee earned her MBA from the Wharton School at the University of Pennsylvania and holds CPA, PHR, and PMP certifications. With a background spanning corporate finance, human resources, and project management, she has coached professionals preparing for CPA, CMA, PHR/SPHR, PMP, and financial services licensing exams.