Book Design
Boost your Book Design exam score with practice questions and detailed answer explanations. Track progress with instant feedback.

Book Design Questions and Answers
- Getting a variety of book cover ideas will enable you to focus on what you want to achieve with your cover design by understanding what appeals to you, what works, and what doesn’t. Once you’ve amassed a sufficient number of ideas, you should begin to recognize specific patterns in the images, themes, and layouts that you find appealing.
- Describe the key topics of the novel. Outline the primary ideas of your book and keep these in mind as you choose the type of artwork you want to put on the cover.
- Think about the genre Look at similar books to get an idea of what the genre anticipates. If they all adhere to a particular convention, you’ll probably want your cover to reflect it so that readers of that genre can recognize it immediately.
- Employ visual hierarchies Generally speaking, your hierarchy should put the title and cover visuals first, then a subtitle, then the author’s name.
- Remove the clutter For your cover, decide on a single focal point. The book’s title or a portion of the image used on the cover could both contain this.
- Consider thumbnails when thinking Make sure the most visible portion of your visuals is recognizable and that your title is readable at small sizes.
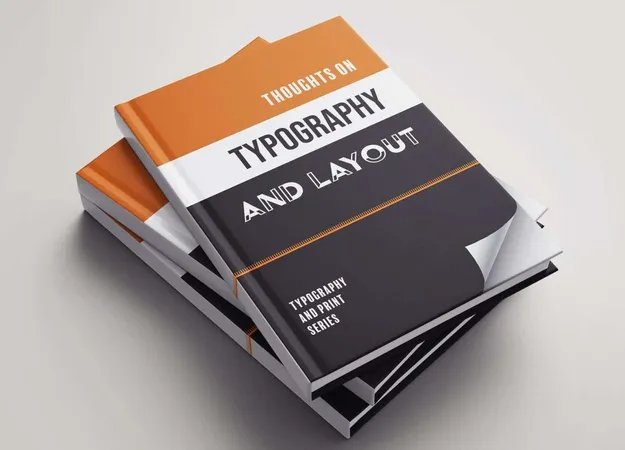
- Select a suitable typeface and color scheme Deciding on a typeface for your book cover cannot be easy. It must be beautiful when seen on the full-size cover and yet be readable in small sizes on thumbnails.
- You should make your title distinct. Titles have already been stated, but they must stick out on your cover.
- Pay attention to the spine and back cover. Although the front cover of a book receives most of the attention, the spine and rear cover are also significant design components. When a reader is perusing bookshop shelves, where the majority of books are organized on shelves with only the spine showing, spines are very crucial.
- Be in the proper location. While freelancers can reside almost anywhere, it still helps to be close to major publishing hubs like New York or London. Exist any situations where the book designer is located abroad or across the country but the publisher is based in New York? Certainly. However, it can be quite advantageous for you to meet your employer in person if you’re a freelancer hoping to land a job on your first print book.
- Treat your workplace with respect. It’s ideal to set up a personal design studio no matter where you are, whether that’s a rented office space, a room in your home, or just a corner of your bedroom. Give yourself room to succeed since creating a quality cover needs meticulous attention to detail.
- Build a network of independent writers. Before having a few publications under your belt, most major publishing organizations won’t offer you a break. Working with self-publishing writers is smart if you want to build a strong cover portfolio. Some authors only require an ebook cover, and others will use print-on-demand to distribute paper copies. Meet them, read their writing, and discover which book they cover to enjoy. After you’ve analyzed everything, give them cover idea suggestions. Although it might not be the most profitable business model, this could be the fastest way to market your book cover designs.
- Work sacrificially. The purpose of a novel, anthology, or nonfiction book is not to express the book designer’s vision. The primary focus of these novels is on the authors. You might contact writers or publishers whose perceptions of what makes a great book cover differ from yours. That does not suggest that you give up. It will be well worth the effort if you can stick with it and develop a version that incorporates both your knowledge and the author’s preferences. And if you want to express yourself artistically to the fullest extent, try DIY: publish your book with a cover you love.
- Show respect to every customer. You probably won’t be working on a best-selling book when you receive your first book cover design job. That doesn’t mean you shouldn’t make an excellent book cover if you can. If you decide to slack off and use a bunch of stock photos and a boring typeface for the title and author’s name, it will not look good on you and the author. Every book should be created as though it were for your bookshelves. In the long run, such professionalism will be rewarded.
- Advertise yourself online. Even though you might not enjoy bragging, the current economy demands that you self-promote. Show the world the amazing covers you’ve been producing by joining social media platforms or creating your website. You want to be prepared for your next client to find you online, especially if you don’t have an exclusive contract with a publishing business.
- Start Canva Launch Canva and type “Book Covers” into the search bar to get started.
- Choose a template. Consider Canva’s extensive collection of book cover designs for your needs in self-publishing. To reduce your options, use the search tool to filter by genre, style, or theme.
- Create a unique book cover. Utilize our amazingly simple drag-and-drop design tools to tailor your book cover to your preferences and style. You may change the text, fonts, and colors with just a few clicks.
- Examine various aspects. To make your book cover ideal, use Canva’s various tools, which include countless font and color combinations and access to millions of free and premium stock pictures and vectors.
- Post and distribute satisfied with the outcome? Your book cover design should be downloaded and saved as a PNG, JPG, or PDF file. Share it across all your social media platforms to increase interest in your book.
- The genre must be obvious at a glance. Going back to the thirteen milliseconds problem, your book cover quickly transmits information to potential readers. It won’t even register with them. That initial glance is typically unconscious.
- It needs to resemble other independent books. Going the traditional publishing route can be effective if you’re aiming for books in a category where the genre is obvious, even to established publishers.
- Rather than telling the story literally, it should express the idea. In general, your goal is to draw readers to a particular genre. They’ll read the pages’ real story. They enter the door via the cover. It’s more crucial to convey the genre than to focus on your particular story.
- Should make a good impression. Authors frequently express the desire to stand out. Being unique or inventive isn’t always a good thing. In terms of the genre, you want to appear similar to other covers, but you can stand out by having a captivating cover that is expertly created.
- Verify that it’s up to date. Trends shift. I’ve noticed variations in the types of typefaces and pictures even in the last few years in clean romance. Check for changes in patterns.
- Avoid cramming the cover with much text. A thumbnail will be displayed to readers. Make sure kids can read the title and author’s name if possible. If they can’t, at least a tiny typeface size should express the genre. Taglines, subtitles, and series names are frequently hidden.
- Locate your tale.
- Create Cover using Desygner can be tapped.
- Select a template, begin with a blank canvas, and then use the Desygner tools to customize it.
- Select Export by clicking the More icon in the top right corner.
- Upload to Wattpad by tapping.
- Choose a story.
- Canva
- Blurb
- BookWright
- Visme
- GIMP
- Select “File>Open” in Photoshop, then browse to the PDF you downloaded. Make sure the following choices are appropriately selected when this window appears: CROP TO- Select “Media Box” RESOLUTION- 300 Pixels/Inch MODE: CMYK Color Press OK
- A new window will appear with the template. Your template will be tough to see at this time. The only layer will be the template layer, so lock it by selecting it and clicking the padlock button. Then click “Layer>New>Layer” to add a new layer. After the template layer is created, a new layer will appear; drag it below the template (by selecting the layer in the layer stack, holding the mouse button down, and dragging it down below the template layer). After that, select all of “Select>All” with the new layer chosen (it will be highlighted; the shortcut is Command+A on Macintosh systems and Cntrl+A on PC). Put White in the background.
- When the “Edit>Fill” dialog box appears, choose “White” under contents and make sure opacity is set to 100%. Lock also this new layer. Your template will now be completely displayed. To begin creating your art, add a new layer between the template and your white background layer. You can also place an existing piece of art between the two locked layers and begin aligning your elements.
- When your artwork is finished, save it as a PDF (PDF/X4:2008 is the LATEST version of the PDF/X format we prefer, but older is fine). Remember to save frequently and save as PSD so you can easily rectify any problems. The template directions should be hidden or deleted before saving your finished work as a PDF because you won’t want them to appear on your final result. This PDF document will then be uploaded to your account for editing.
- You’ll want to first prepare a basic arrangement to make sure your cover or jacket will have space for every aspect you wish to add. This should outline the placement of each project component as well as the available space for it. For instance, you might wish to include the author’s biography on the back flap or the back cover, and you are aware that, wherever it appears, it will take up at least half a page.
- Experiment with several formats until you find one that works for you, and use a rubric to ensure you don’t forget anything. If you’re unsure where to start, start with the arrangement in the image above.
- Perform research. Investigate current comic book trends and note what grabs your attention as a reader. study the covers of comic books
- Generate potential comic book covers Make a list of potential cover scenes that relate to the plot by considering the cover as a teaser for your audience.
- Decide on a character’s stance and perspective. Each character’s size, posture, and facial expression can reveal a lot about their talents and personalities.
- Draw the cover illustration. To acquire a feeling of scale, you should sketch up the cover like you did the internal pages. Remember that the eye usually scans the page from left to right, then descends from the middle to the bottom. You’ll be able to design a final layout that is unambiguous, well-balanced, and compatible with the material inside by experimenting with thumbnail sketches.
- Make a heading. Create a list of terms that describe this comic book issue as a starting point, and then try incorporating a character’s name, a conflict, a symbol, a location, or even wordplay in the title. A long main title will make the layout crowded, so keep it short. Avoid using too many colors, special effects, or shadows in the text because they might be distracting. Instead, keep the script style straightforward and readable.
- Create the cover image. If you have finished your inside pages, you are already familiar with the procedure. First, pencil your cover illustration and title name using your thumbnail sketches as a guide. Continue once you are satisfied with the general shapes, sizes, and spacing.
- Include the author’s name, publication information, and a fee. If your thumbnail sketches are well-prepared, you’ll have enough place to accommodate the entire cover without sacrificing important aspects of the illustration.
- Finish the drawing. Once everything has been penciled in, and the text elements added, begin inking over your drawing. Use consistent shading, depth, and texture effects that complement the internal pages’ appearance.
- Use a color scheme. Pick a color scheme that complements the tone of your comic. If the interior drawings are complete, you are aware of the color scheme you are using.
- Put your cover-up Now is the perfect moment to add your cover design if you’re using BookWright to create the internal pages. Additionally, you might digitally incorporate text components, publisher information, or text boxes into your finished design at this stage.
- Research your book’s intended readership; come up with cover ideas that fit your genre; look into the design preferences of book cover artists.
- Be aware of resources for cover designers
- Start the selection process
- Use a rating system to help you choose the best book cover designer.
- Hire your book cover designer.
- Use a strategy to choose the best cover designer within your budget.
- Your book’s summary (about 150 words)
- Details regarding you, the Author (about 100 words)
- If you have any, one or two outstanding testimonials (also known as a book blurb or cover blurb) (optional)
- Go to the Kindle settings page.
- Choose “Device Options”
- Click “Show Cover” and choose “On.”
Pro Tip: Focus your Book Design study time on areas where you score lowest. Most exam questions test application of knowledge, not memorization.
- ✓Review the official Book Design exam content outline
- ✓Take a diagnostic practice test to identify weak areas
- ✓Create a study schedule (4-8 weeks recommended)
- ✓Focus on your weakest domains first
- ✓Complete at least 3 full-length practice exams
- ✓Review all incorrect answers with detailed explanations
- ✓Take a final practice test 1 week before exam day

Book Design Practice Test Questions
Prepare for the Book Design exam with our free practice test modules. Each quiz covers key topics to help you pass on your first try.
Book Design Book Cover Design
Book Design Exam Questions covering Book Cover Design. Master Book Design Test concepts for certification prep.
Book Design Color Theory in Books
Free Book Design Practice Test featuring Color Theory in Books. Improve your Book Design Exam score with mock test prep.
Book Design Digital and Ebook Design
Book Design Mock Exam on Digital and Ebook Design. Book Design Study Guide questions to pass on your first try.
Book Design Page Layout and Grid Systems
Book Design Test Prep for Page Layout and Grid Systems. Practice Book Design Quiz questions and boost your score.
Book Design Print Production and Binding
Book Design Questions and Answers on Print Production and Binding. Free Book Design practice for exam readiness.
Book Design Typography in Book Design
Book Design Mock Test covering Typography in Book Design. Online Book Design Test practice with instant feedback.
Graphic Design Book
Book Design: Pros and Cons
- +Book Design credential is recognized by employers and industry professionals
- +Higher earning potential compared to non-credentialed peers
- +Expanded career opportunities and professional advancement
- +Structured learning path builds comprehensive knowledge
- +Professional development that stays current with industry standards
- −Preparation requires significant time and study commitment
- −Associated costs for exams, materials, and renewal fees
- −Continuing education needed to maintain credentials
- −Competition for advanced positions can be challenging
- −Requirements and standards may vary by state or region
About the Author
Certified Professional Development Expert & Niche Certification Advisor
University of Pennsylvania Graduate School of EducationDr. Alexandra Kim holds a PhD in Professional Studies from the University of Pennsylvania and is a Certified Professional in Learning and Performance (CPLP) and Certified Professional in Talent Development (CPTD). With 17 years of corporate training and professional certification advisory experience, she helps professionals navigate specialized, emerging, and cross-industry certification programs.