Arthrogram MRI: What It Is, Procedure, Results and Cost 2026 July
Arthrogram MRI explained: how the joint injection works, what the scan shows, recovery, cost ranges, risks and how to prepare for the test. ✅
What an Arthrogram MRI Actually Is
An arthrogram MRI combines two procedures into one diagnostic punch. First, a radiologist injects contrast directly into a joint capsule under image guidance. Then you slide into the MRI scanner, and that contrast spreads across every tiny surface inside the joint. The result is a stunningly detailed map of cartilage, labrum, ligaments, and small tears that ordinary MRI misses.
Doctors order this scan when standard imaging has failed to explain the problem. You feel a deep ache in your shoulder. The plain MRI looks clean. The orthopedic surgeon suspects a small labral tear but cannot confirm it. An arthrogram MRI fills the joint with contrast, and suddenly the tear is obvious.
The technique is decades old, yet still considered the gold standard for many joint problems. Shoulders, hips, wrists, elbows, ankles, and knees all benefit when subtle internal damage refuses to show up any other way. The combination beats either test alone.
If you have never had advanced imaging before, our broader complete MRI guide covers how the magnet works at the atomic level. For joint-specific questions, keep reading. The procedure is more involved than a standard scan, and knowing what is coming makes the day far less stressful.
Direct Versus Indirect Arthrogram MRI
Two flavors exist, and the difference matters. A direct arthrogram MRI means contrast goes straight into the joint via needle injection. An indirect arthrogram MRI means contrast goes into a vein, circulates through your bloodstream, and slowly diffuses into the joint over twenty or thirty minutes.
Direct is more invasive but produces sharper images. Most shoulder, hip, and wrist studies use the direct approach. The radiologist uses fluoroscopy or ultrasound to guide the needle into exactly the right pocket of the joint. You feel pressure, sometimes a quick sting, then it is done.
Indirect skips the needle in the joint but trades away some image clarity. It works for patients who refuse joint injection or have specific contraindications. The contrast still highlights inflamed tissue and synovium, just not as crisply as direct injection.
Most ordering physicians know which version they want before scheduling. If you are unsure, ask. The two are sometimes interchangeable, sometimes not, depending on what the surgeon needs to see.
Arthrogram MRI by the Numbers
Quick Take
An arthrogram MRI combines a joint injection with magnetic resonance imaging to reveal small tears, cartilage damage, and labral injuries that standard MRI misses. The contrast injection takes 15 to 30 minutes, the scan takes 30 to 45 minutes more, and most patients return to light activity the next day. It is the gold standard for shoulder labrum, hip labrum, and complex wrist problems.
How the Arthrogram MRI Procedure Actually Goes
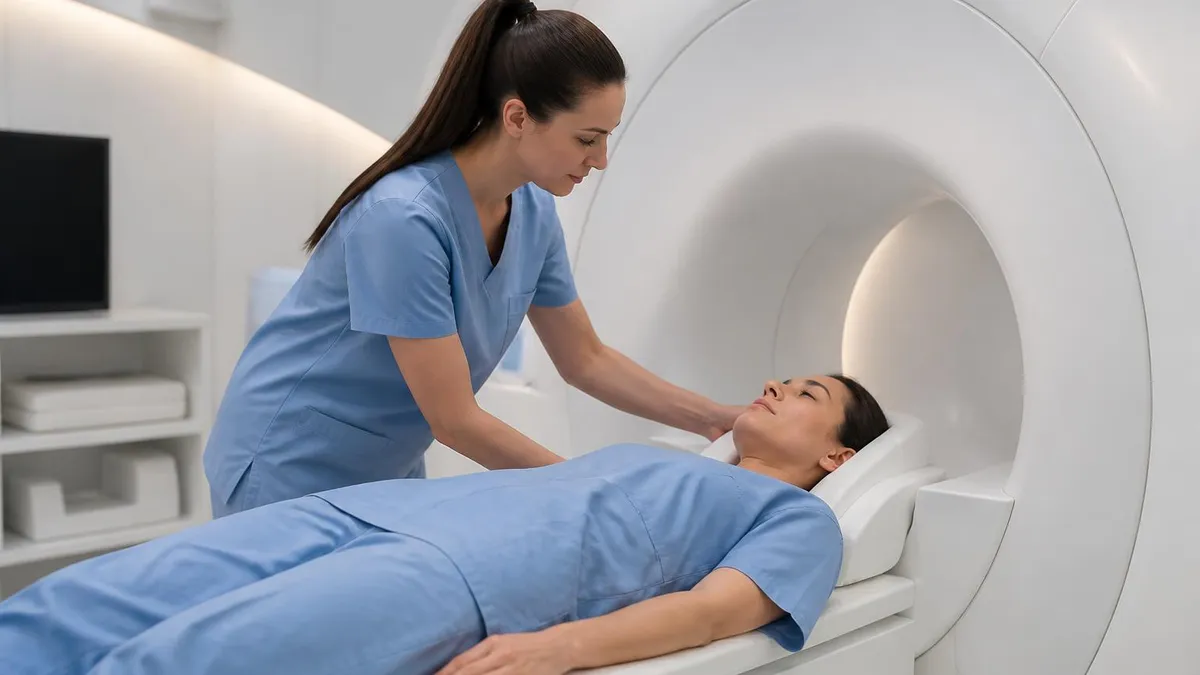
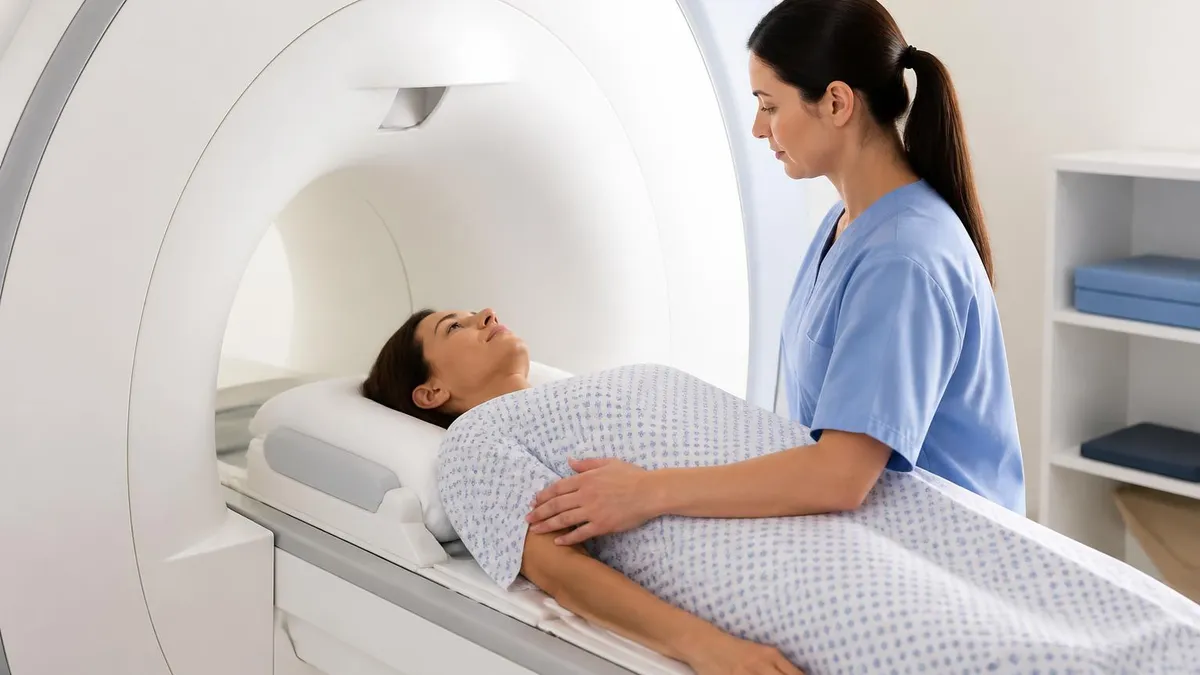
The day starts in a fluoroscopy suite, not the MRI room. A radiologist greets you, reviews your history, and asks about allergies, kidney function, and prior surgeries. You sign consent and change into a gown. Your skin gets a generous swab of antiseptic over the target joint.
The radiologist uses fluoroscopy (a real-time X-ray video) to guide a thin needle into the joint space. You feel pressure, then a sharp sting as numbing medication enters the skin. Within a minute the area feels heavy and dull rather than painful. The needle slides deeper, into the joint capsule itself.
A small test dose of iodinated dye confirms the needle is in the right spot. The dye spreads along the joint surfaces in a recognizable pattern. Once placement is confirmed, the radiologist switches to gadolinium contrast diluted with saline. Five to fifteen milliliters fill the joint, depending on which joint and how tight the capsule feels.
The needle comes out. A small bandage goes on. You walk (with help if the joint is a hip or knee) to the MRI suite. Most facilities have the scanner room right next door because contrast leaks back out of the joint surprisingly fast and image quality degrades within twenty to thirty minutes.
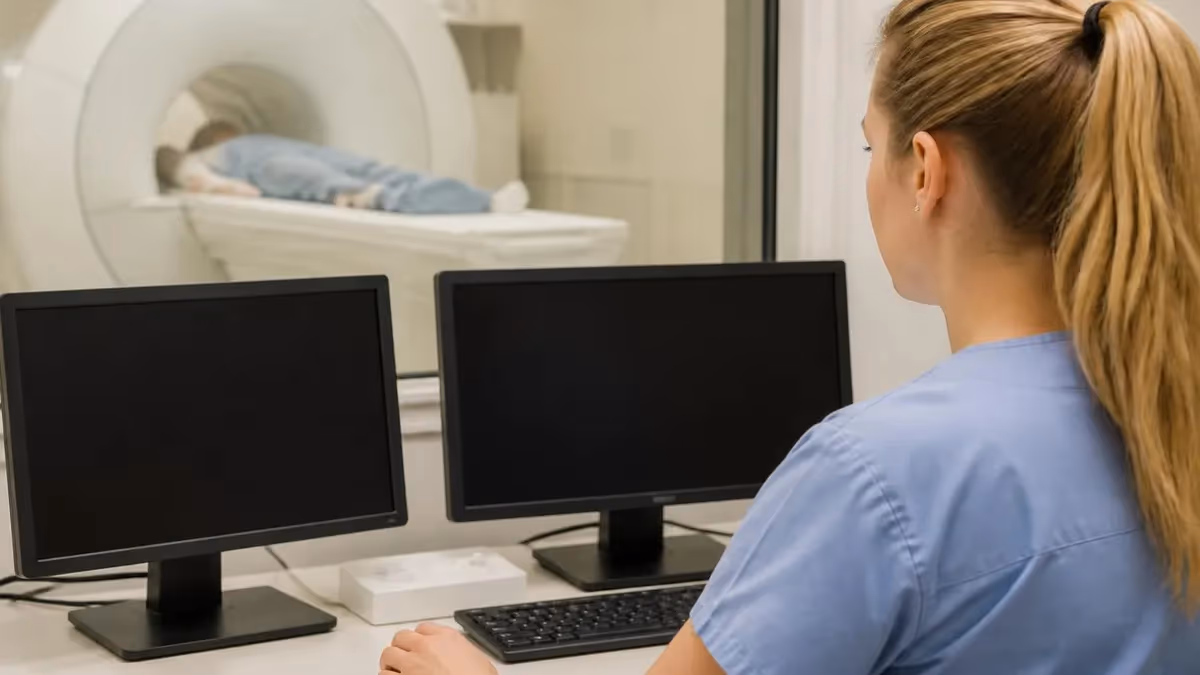
The MRI portion is identical to any other joint MRI. You lie still on a padded table. A specialized coil wraps around the joint. Sequences run for 30 to 45 minutes. Some last two minutes, some six. You hear loud knocking and humming. Headphones with music help. The technologist talks to you between sequences through a microphone.
Sedation and pain control
Most patients tolerate the injection just fine with local anesthetic alone. Some clinics offer mild oral anxiolytic medication if you are needle-phobic. General sedation is rare and almost never needed for adults. Children sometimes need sedation, especially under age 10. Anyone receiving sedation needs a driver home.
Joints Most Often Studied with Arthrogram MRI
The most common arthrogram MRI by far. Reveals labral tears, including SLAP and Bankart lesions, partial rotator cuff tears, and capsule pathology in chronic instability cases.
Detects labral tears, femoroacetabular impingement, cartilage delamination, and ligamentum teres injury. Often the first study before considering hip arthroscopy or preservation surgery.
Maps tears of the triangular fibrocartilage complex, scapholunate and lunotriquetral ligaments, and small chondral defects that plain MRI smudges past entirely.
Identifies subtle ulnar collateral ligament tears, osteochondral lesions of the talus, and small loose bodies that surgeons want to find before going inside.
Arthrogram MRI Protocol Choices
Gadolinium goes straight into the joint capsule through a thin needle under fluoroscopy or ultrasound guidance. This is the gold standard for shoulder labrum, hip labrum, and complex wrist studies. Adds 20 to 30 minutes to the appointment but delivers the sharpest possible images of internal joint structures.
What an Arthrogram MRI Catches That Standard MRI Misses
This is the heart of the matter. Why bother with the injection at all? Because contrast inside the joint reveals tears and surface damage that a dry joint hides completely.
Labral tears of the shoulder. The labrum is a rim of cartilage around the shoulder socket. Tiny tears (SLAP lesions on top, Bankart lesions on the front) cause clicking, instability, and pain during overhead motion. On standard MRI the labrum can look intact even when a real tear is hiding. Inject contrast, and the tear fills with bright fluid that screams at you on the images.
Hip labral tears. Similar story in the hip. Young adults with groin pain often have a labral tear from femoroacetabular impingement. Plain MRI catches maybe half of these. Arthrogram MRI catches almost all of them and lets the surgeon plan treatment with confidence before going into hip arthroscopy.
Triangular fibrocartilage complex tears in the wrist. The TFCC is a tiny cartilage disc between the ulna and carpal bones. Small tears cause persistent ulnar-sided wrist pain that nags for months. Arthrogram MRI shows the disc clearly, including central and peripheral tears that change surgical plans.
Partial rotator cuff tears on the joint side. Full-thickness tears show up on standard MRI. Partial tears that only involve the deep surface of the tendon are tricky because plain MRI can underestimate them. Contrast inside the joint outlines the undersurface and reveals tears that an orthopedist needs to know about before deciding on surgery versus rehab. Compare your findings with our rotator cuff MRI overview.
Loose bodies and chondral defects. Tiny pieces of cartilage or bone floating in the joint cause catching and locking. They blend into surrounding fluid on standard MRI. Arthrogram MRI makes them stand out clearly because the contrast outlines them on every side.
Cartilage delamination. Cartilage can peel away from the underlying bone without an obvious tear. Contrast seeps under the loose flap and reveals the defect. This finding changes treatment from physical therapy alone to surgical intervention in many cases.
Arthrogram MRI uses two contrast agents back to back. Iodinated dye for fluoroscopy guidance and gadolinium for the MRI scan. Allergies to either agent change the plan. Metal implants near the target joint, pacemakers, and recent surgical hardware all matter. List every medication, supplement, and prior reaction honestly when the team asks.
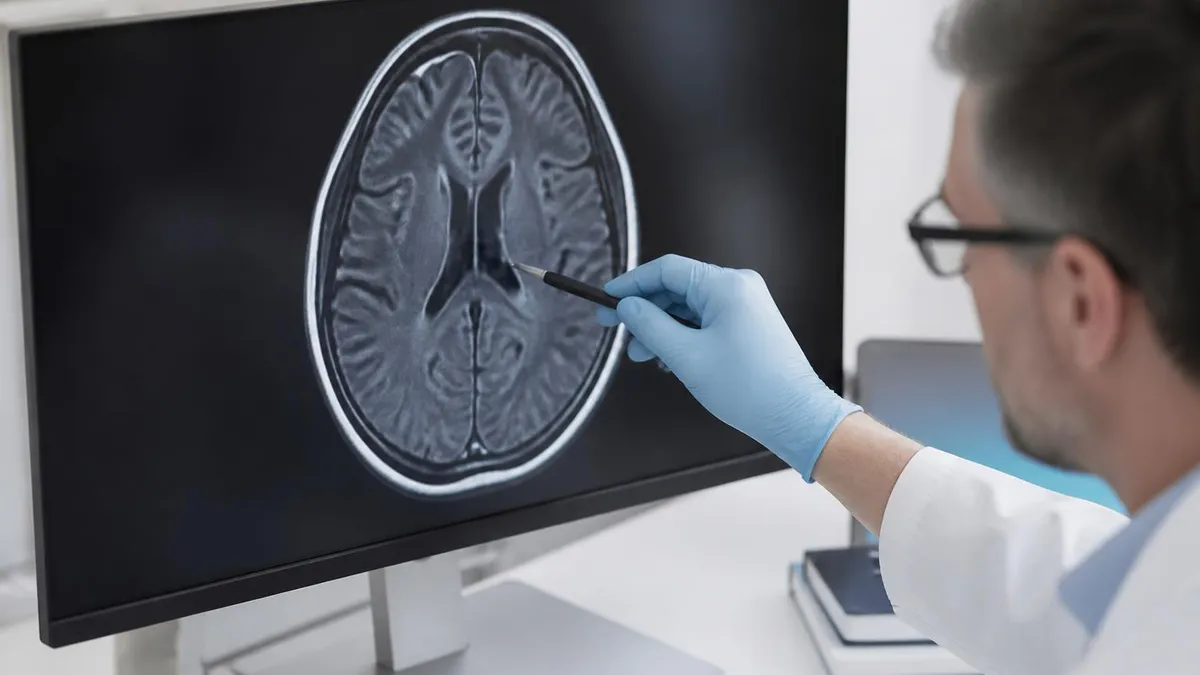
Reading the Arthrogram MRI Report
Your report follows the standard radiology format. A short clinical summary at the top. A list of findings organized by anatomic region. An impression at the bottom that answers your doctor's question directly.
Start with the impression. That single paragraph distills everything the radiologist saw into actionable language. Words like "intact," "no tear," and "normal appearance" are reassuring. Watch for "tear," "defect," "signal abnormality," "chondral fissure," and "loose body." Those typically prompt next steps.
Then work backward through the body of the report. The labrum, cartilage, ligaments, tendons, and bone marrow each get a sentence or two. Numeric measurements (in millimeters) describe tear size, cartilage thickness, and any defects. Volume of contrast injected appears near the top, which matters if you compare scans over time.
Some terms confuse patients. "Capsular distention" simply means the joint was successfully filled with contrast (a good sign that the injection worked). "Extravasation" means a small amount of contrast leaked outside the joint. Usually this is minor and not concerning unless tracked along a torn ligament. "Fluid signal" describes bright spots on certain sequences, often inflammation or actual fluid.
Do not panic at incidental findings. Many shoulders show small bone spurs or mild tendinopathy that exist in plenty of pain-free people. Many hips show small subchondral cysts that mean little on their own. Your orthopedist interprets the report alongside your actual symptoms, exam, and X-rays.
Cost, Insurance, and What You Will Actually Pay
An arthrogram MRI in the United States runs from about $800 at a freestanding outpatient center to $4,000 or more at a hospital. The wide range reflects facility type, geography, contrast use, and your insurance contract. Add a separate radiologist fee for the injection portion at some practices.
Outpatient imaging centers almost always cost less than hospital-based radiology departments. Hospitals carry higher overhead and pass it along. If you have a high-deductible plan or no insurance, call ahead. Ask for the cash or self-pay price. Many centers offer a discounted bundle that combines the injection, the scan, and the radiologist read.
Insurance typically requires prior authorization for arthrogram MRI. The clinical justification usually centers on failed conservative treatment for at least six weeks, persistent symptoms despite physical therapy, and a specific clinical suspicion the standard MRI cannot confirm. Your doctor's office handles the paperwork, which takes a few business days.
Want broader pricing details across body parts and countries? Check our MRI scan cost guide, which breaks down typical fees by region and scenario.
Preparing for Your Arthrogram MRI
Prep is light for most patients. Eat and drink normally. Take your usual medications unless told otherwise. If you take blood thinners, your doctor may have specific instructions, sometimes asking you to hold the medication for a day or two before the injection. Never stop a blood thinner without talking to the prescribing physician first.
Wear loose, comfortable clothing without metal zippers, snaps, or decorative threads. Many facilities ask you to change into a gown anyway. Leave jewelry at home or with a companion before entering the imaging suite.
If you are claustrophobic, ask your doctor about a mild sedative such as lorazepam. Take it about an hour before the appointment, and arrange a ride home. Some imaging centers offer wider-bore scanners. Our guide on wide bore MRI covers the differences and where to find one near you.
Bring any prior imaging on a CD or USB drive. Comparison studies help the radiologist track changes, which often matters more than the absolute findings on the new scan. If you saw an orthopedist or sports medicine doctor recently, bring the clinical notes too.
Arthrogram MRI Prep Checklist
- ✓Arrive 30 minutes early to complete consent forms and a comprehensive safety questionnaire with the team
- ✓Confirm with your prescribing doctor whether to hold blood thinners or antiplatelet medications before the injection
- ✓Wear loose comfortable clothing without metal zippers, snaps, underwires or decorative metallic threads
- ✓Leave jewelry, watches, hairpins, hearing aids and phones outside the scan room in a secure locker
- ✓List every implant, surgery, piercing, tattoo and medical device on the form even items you assume are irrelevant
- ✓Disclose every allergy, especially reactions to iodinated CT contrast, gadolinium, latex or local anesthetics
- ✓Confirm recent kidney function lab results showing creatinine and eGFR within accepted ranges for gadolinium
- ✓Arrange transportation home if you plan to take an oral sedative for claustrophobia or needle anxiety
- ✓Bring prior imaging on disc or USB if previous scans were done elsewhere for direct side-by-side comparison
- ✓Plan a quiet day after the procedure with light activity only and ice packs ready for joint soreness
Safety, Risks, and What Can Go Wrong
Arthrogram MRI is safe for nearly all patients when proper screening happens. Serious complications are rare. That said, the procedure does carry slightly more risk than a standard MRI because of the joint injection.
The most common annoyance is post-injection soreness. The joint feels stiff and achy for 24 to 48 hours as the contrast fluid reabsorbs and the small needle track heals. Ice packs and over-the-counter pain medication usually handle it. Avoid heavy lifting, sports, or strenuous use of the joint for the first 24 hours.
Infection at the injection site is uncommon but real. The risk runs roughly one in ten thousand or lower with sterile technique. Watch for spreading redness, fever, severe worsening pain, or warmth around the joint over the next several days. Call your doctor immediately if those appear.
Allergic reactions can happen with either iodinated dye (used for the fluoroscopy step) or gadolinium (used for the MRI). Severe reactions are very rare, on the order of one in ten thousand or fewer. Mild reactions like itching or hives are more common, especially with iodinated contrast. The team has emergency medications ready in the room.
Gadolinium contrast carries a separate concern called nephrogenic systemic fibrosis in patients with advanced kidney disease. The condition is now extremely rare with modern contrast agents and proper screening. Patients with eGFR below 30 may need a different test or an alternative contrast agent.
Pregnant patients should avoid arthrogram MRI when possible. The injection and contrast both carry uncertain risks to a developing fetus, and the scan can usually be deferred. Our MRI and pregnancy guide covers the details.
The MRI portion itself is very safe. No radiation. The biggest risk is forgotten metal. Pacemakers, certain aneurysm clips, cochlear implants, neurostimulators, and some older orthopedic hardware are absolute contraindications unless the device is specifically labeled MRI-conditional. Modern pacemakers are often safe with strict protocols. Older ones may not be.
Arthrogram MRI Strengths and Limitations
- +Reveals labral and small chondral tears that standard MRI misses entirely
- +Gold standard for shoulder, hip and wrist internal derangement diagnosis
- +Maps loose bodies and cartilage delamination with striking clarity
- +Helps surgeons plan arthroscopic procedures with confidence ahead of time
- +No ionizing radiation from the MRI portion of the study
- −Requires a needle injection into the joint, which is uncomfortable
- −Costs $800 to $4,000+ depending on facility and contract
- −Takes 60 to 90 minutes total when you add up both procedures
- −Post-injection joint soreness can last 24 to 48 hours afterward
- −Small risk of infection, allergic reaction or fluid leakage outside joint
Arthrogram MRI vs Other Joint Imaging Tests
Standard MRI without contrast remains the first imaging step for most joint pain. It catches major tendon tears, full thickness rotator cuff injuries, large meniscus tears, and obvious cartilage loss. It also costs less and avoids the needle. Many patients never need anything more than a plain MRI.
CT arthrogram exists too. Instead of gadolinium in the joint and an MRI scan, the radiologist injects iodinated contrast and uses a CT scanner. CT arthrogram delivers excellent bone detail and works for patients who cannot have MRI (such as those with non-compatible pacemakers). The downside is radiation exposure and slightly less soft tissue detail than MRI.
Ultrasound is fast, cheap, and surprisingly good for superficial tendons. Rotator cuff, Achilles, patellar, and biceps tendons all show up well. Operator skill matters enormously. Two sonographers may read the same shoulder differently. Ultrasound also guides injections in the office without radiation.
Diagnostic arthroscopy is the most invasive option but the most definitive. A surgeon inserts a small camera into the joint under anesthesia and looks directly at the structures. The downside is surgical risk, recovery time, and cost. Most ordering physicians want a good arthrogram MRI first to plan what to expect inside before going to the operating room.
Plain X-ray still has a role. Cheap, fast, available anywhere. It catches obvious fractures, dislocations, advanced arthritis, and bone alignment problems. It misses everything soft tissue. X-ray is usually done first, then escalated to MRI or arthrogram MRI based on what the X-ray showed (or did not show).
Arthrogram MRI wins when the clinical question centers on the labrum, small ligament tears, cartilage delamination, or partial joint side tendon tears. It loses when the question is about bone, large soft tissue masses, or marrow signal, where standard MRI handles things just fine without the needle.
Practice Your Knowledge: MRI Concepts and Beyond
Imaging concepts can feel overwhelming, especially terms like T1, T2, fat suppression, STIR sequences, and the chemistry of gadolinium-based contrast. If you are a student, a technologist trainee, or a curious patient who wants to truly understand the scan, working through structured practice problems is one of the fastest ways to lock in the material.
Active recall beats passive reading every time. The MRI category on this site contains hundreds of practice questions covering safety, anatomy, pulse sequences, contrast agents, artifacts, and patient positioning. Each question includes a detailed explanation so the reasoning sticks long after the test is over.
Working through quizzes also surfaces gaps you did not know existed. Maybe you think you know the difference between T1 and T2 weighted images until a question about fat behavior in different sequences trips you up. That is the productive struggle that builds real understanding rather than the illusion of mastery.
Why practice questions work better than re-reading
Reading a textbook chapter feels productive but rarely sticks. The brain glides over familiar phrases without storing them in long-term memory. Practice questions force retrieval, and retrieval is what builds memory. That is why students who do hundreds of questions outperform classmates who only re-read notes.
If you are studying for the ARRT MRI registry, an ARMRIT exam, or a clinical advancement assessment, mix safety, anatomy, sequences, and contrast questions in random order. Random interleaving beats studying one topic at a time. The brain has to switch contexts the way it will on the actual exam day.
Patients reading this article have a different goal. Understanding the report, not memorizing protocols. Even so, working through a few quiz questions on MRI safety and contrast helps you ask better questions at your appointment, and that conversation often shapes how confident you feel walking into the scanner.
Spaced repetition matters too. Take a quick quiz today, then revisit the same topic three days later, then again next week. Spacing the reviews drives the material into long-term memory far better than cramming the night before an exam or appointment. Even fifteen minutes a day adds up across a month of preparation.
Finally, do not be discouraged by missed questions. Each wrong answer flags an exact gap you can now close. Read the explanation, look up the underlying concept in your textbook, then return to the question pool. Watching your score climb week by week is one of the most motivating parts of structured exam prep.
Recommended MRI Practice Topics
Test your understanding of metal screening, contrast protocols, and patient safety procedures used before every scan in a clinical setting.
Recognize tendons, ligaments, bones and soft tissue across different planes and sequences with detailed practice questions and clear explanations.
Drill T1, T2, STIR, fat suppression and gradient echo concepts that appear constantly on registry exams and clinical assessments.
Master gadolinium use, kidney function thresholds, allergy management and the science behind enhanced imaging studies.
MRI Questions and Answers
About the Author

Medical Laboratory Scientist & Clinical Certification Expert
Johns Hopkins UniversityDr. Sandra Kim holds a PhD in Clinical Laboratory Science from Johns Hopkins University and is certified as a Medical Technologist (MT) and Medical Laboratory Scientist (MLS) through ASCP. With 16 years of clinical laboratory experience spanning hematology, microbiology, and molecular diagnostics, she prepares candidates for ASCP board exams, MLT, MLS, and specialist certification tests.
Join the Discussion
Connect with other students preparing for this exam. Share tips, ask questions, and get advice from people who have been there.
View discussion (6 replies)