
Creating Graphs in Excel — Complete Guide (2026 September)
Creating graphs in Excel: 🎓 pick the right chart type, customize titles, axes, trendlines, sparklines, and templates. Step-by-step with screenshots in mind.

Excel Charts at a Glance

Creating Graphs in Excel — Complete Guide (2026)
Open Excel. Pick two cells. Hit Alt + F1. You just made a chart. That's the fastest path — but it's almost never the best chart for what you're trying to show. The real skill in excel isn't clicking Insert Chart. It's picking the right chart type, prepping the data so Excel reads it correctly, and stripping out the visual clutter Excel adds by default.
This guide walks through every step. Two ways to insert a chart (Recommended Charts and direct Insert). Seventeen-plus chart types and when each one wins. How to customize titles, axes, legends, gridlines. Trendlines, sparklines, data labels, error bars. Dynamic charts powered by offset formula excel and named ranges. Excel 365's newer charts — Funnel, Treemap, Sunburst, Box & Whisker, Histogram, Pareto, Waterfall.
You'll also see what breaks charts most often. Wrong chart type for the data shape. Too many series crammed into one plot. 3D effects that distort the values. Blank rows that fool Excel's auto-range. Each of these gets a fix.
Short answer if you only read one line: select your data with headers, go to Insert → Recommended Charts, pick the one that matches your story (comparison, trend, parts-of-whole, correlation), then delete chart junk. That's 80% of charting. The rest is polish.
If you'd rather practice than read, take the Microsoft Excel Data Visualization with Charts Questions and Answers quiz first to see where your gaps are, then come back to the sections you need most.
The 30-Second Decision Tree
Before you click Insert, answer one question: what do I want the reader to see?
- Comparing categories? → Column or Bar chart.
- Showing change over time? → Line chart (or Area if you want cumulative shading).
- Showing parts of a whole? → Pie or Doughnut — but only if you have 5 slices or fewer.
- Looking for correlation between two variables? → Scatter (XY) plot.
- Two metrics on different scales (revenue + units)? → Combo chart with a secondary axis.
Get this right and the rest is formatting. Get it wrong and no amount of polish will save the chart.
Two Ways to Insert a Chart
Best for beginners and anyone unsure which chart fits. Excel scans your data and suggests four to six charts it thinks tell the story well.
Steps:
1. Click any cell inside your data range — Excel auto-detects the boundaries.
2. Go to Insert tab on the ribbon.
3. Click Recommended Charts (the icon with the lightbulb).
4. Browse the suggestions in the left panel. Hover for a live preview.
5. Click your pick, then OK.
Excel places the chart on the current sheet as a floating object. Drag it where you want. Resize via the corner handles.
Chart Types and When Each One Wins
Excel ships with seventeen-plus chart types. Most users only need six or seven. Here's what each one is actually for — and where people misuse it.
Column and Bar — for comparing categories
Column charts show vertical bars; Bar charts show horizontal ones. Use Bar when category names are long (the labels get more room on the y-axis). Use Column for short labels or time-ordered data. Subtypes: Clustered (groups side-by-side), Stacked (segments add up), 100% Stacked (proportional). Avoid 3D versions — they distort perceived height.
Line — for trends over time
One independent variable on the x-axis (usually dates), one or more series plotted as connected points. Strong for showing direction and rate of change. Weak when you have only two or three data points — those should be a Column chart instead. Use markers (the small dots at each data point) when readers need exact values; hide markers when the line itself tells the story.
Pie and Doughnut — only with very few slices
Pie charts work for two to five slices. Above five, the human eye can't compare slice areas accurately. Doughnut is a Pie with a hole — useful when you want to put a total in the center. If you find yourself with eight categories, switch to a Bar chart. Always sort slices largest to smallest, starting at 12 o'clock and moving clockwise.
Scatter (XY) — for correlation
Two numeric variables. Each dot is one observation. The pattern of the cloud tells you whether the variables move together (positive correlation), opposite (negative), or not at all. Add a trendline to quantify the relationship. Don't use Line chart when you mean Scatter — Line treats the x-axis as categories, not as continuous numbers, which produces misleading slopes.
Area — for cumulative volume
Like a Line chart with the area below filled in. Best for showing how a total accumulates or how parts contribute to a stacked total over time. Stacked Area can highlight composition changes. Don't use it for negative values — they render confusingly.
Combo — for two metrics on different scales
Plots two series on the same chart, often as a Column for one series and a Line for the other, with the Line read off a secondary axis on the right. Classic example: monthly revenue (column, left axis) overlaid with conversion rate as a percentage (line, right axis). Insert → Combo → Create Custom Combo Chart. Tick the Secondary Axis box for whichever series has the different scale.
Match the Chart to the Story
Compare values across categories. Bar for long labels, Column for short or time-ordered.
- Best for: Category comparison
- Avoid: 3D versions
Show trends and rate of change over time. One x-axis variable, one or more numeric series.
- Best for: Time series
- Avoid: Categorical x-axis
Show parts of a whole — only when you have five or fewer slices. Sort largest first.
- Best for: 2–5 slice composition
- Avoid: More than 5 slices
Plot two numeric variables to see correlation. Add a trendline to quantify the pattern.
- Best for: Correlation analysis
- Avoid: Confusing with Line chart
Like Line but filled — shows cumulative volume. Stacked Area shows composition over time.
- Best for: Cumulative totals
- Avoid: Negative values
Two series on different scales — Column + Line with a secondary axis on the right.
- Best for: Mixed-scale metrics
- Avoid: More than 2 axes
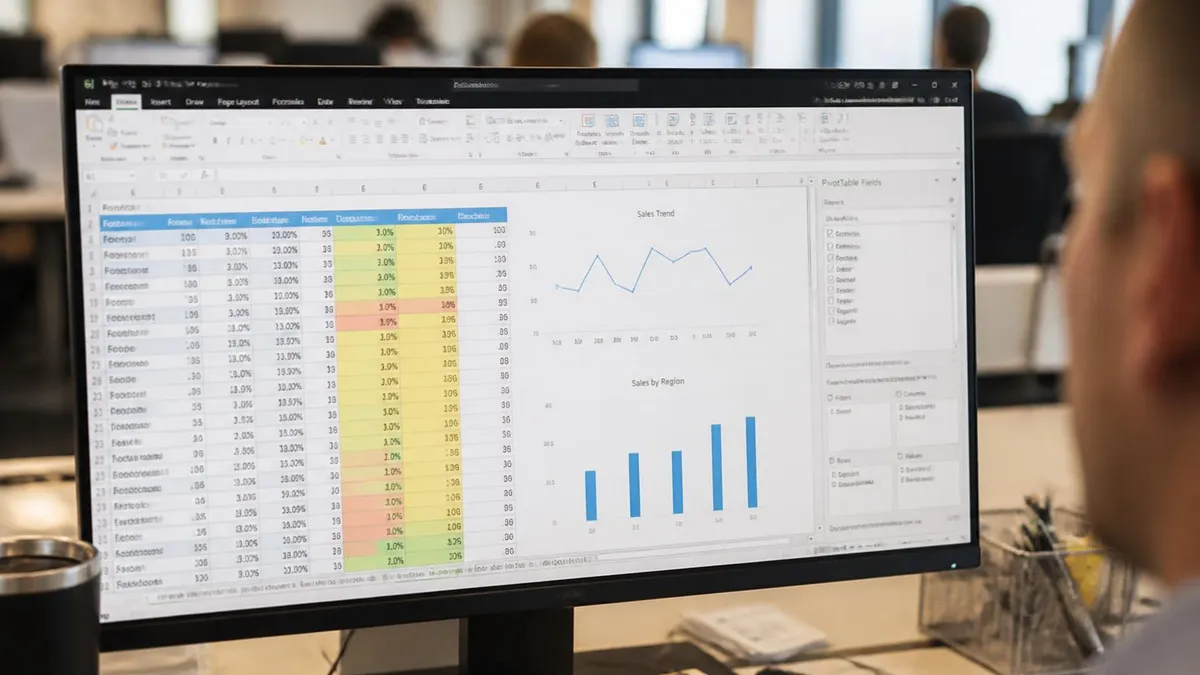
Customizing the Chart — Titles, Axes, Legend, Gridlines
Excel's default chart is rarely the final chart. Six small edits turn a generic template into something readable. Click the chart once to select it, then look for the three icons that appear on the right side: + (Chart Elements), 🖌 (Chart Styles), and 🔍 (Chart Filters).
Chart title — replace, don't delete
The default title is the column header. Click it once, click it again to enter edit mode, and type something descriptive. Good titles state the takeaway, not the data — "Q3 revenue beat target by 12%" beats "Quarterly Revenue 2026." Want the title linked to a cell? Click the title, then in the formula bar type =Sheet1!$A$1 and the title pulls from that cell.
Axis labels
Click + → check Axis Titles. Excel adds placeholder text for each axis. Replace it. For the y-axis label, you can rotate the text vertical or horizontal: right-click the label → Format Axis Title → Text Direction. Horizontal reads faster when there's space; vertical saves room.
Axis range
Right-click the y-axis → Format Axis → Axis Options. By default Excel auto-scales to start near zero for column charts and at the data minimum for line charts. Override Minimum and Maximum when you want to crop or expand the view. Warning: a column chart with a non-zero baseline exaggerates differences and is generally considered deceptive. Line charts can start at any value.
Legend placement and removal
If you have one data series, delete the legend — it adds no information. Click the legend → press Delete. For multiple series, position it where it doesn't fight the chart: + → Legend → choose Top, Right, Left, Bottom, or Position dialog for custom.
Gridlines
Excel adds horizontal gridlines by default. They help readers estimate values but clutter the chart if data labels are present. Click + → uncheck Gridlines or pick which gridlines (primary major, primary minor) to show.
Data labels
Add values directly on the chart points: + → check Data Labels. Position options include Inside End, Outside End, Center, Above, Below. For column charts, Outside End is cleanest. For pie charts, use Category Name and Percentage together: right-click the labels → Format Data Labels → check both boxes.
Chart Polish Checklist
- ✓Title is descriptive — states the takeaway, not just the data
- ✓Both axes labeled — no anonymous numbers
- ✓Y-axis starts at zero for column/bar charts (or note the truncation)
- ✓Legend removed if only one series; positioned cleanly if multiple
- ✓Gridlines minimized or removed when data labels are visible
- ✓Colors are intentional — no rainbow gradient unless ordinal
- ✓Font size on axis labels readable at presentation size (≥10pt)
- ✓No 3D effects — they distort perceived values
- ✓Source data and date noted in a small caption below the chart
Trendlines, Sparklines, Data Labels, Error Bars
The basics get you a working chart. These four features turn working into insightful.
Trendlines
Right-click any data series → Add Trendline. Excel offers six types: Linear, Exponential, Logarithmic, Polynomial (with order 2–6), Power, and Moving Average. Linear is the default and fits straight-line relationships. Polynomial handles curves. Moving Average smooths noisy data — set the period (e.g. 3, 7, 30 days). Tick Display Equation on chart and Display R-squared value to see how well the trendline fits. R-squared above 0.7 is a reasonable fit; above 0.9 is strong.
Sparklines — tiny charts inside cells
Sparklines are mini in-cell charts perfect for dashboards. Select the cells where you want them, go to Insert → Sparklines, pick Line, Column, or Win/Loss, then specify the data range. Each row of data gets its own miniature chart in the cell next to it. Right-click the sparkline cells → Sparkline menu to set markers (high point, low point, first, last), axis settings, and color. Sparklines update automatically when underlying data changes.
Data labels — positioning matters
Data labels show exact values on the chart. For column charts, Outside End is standard. For line charts with sparse data points, Above works. For dense line charts, skip data labels entirely — they overlap and create visual noise. To label only specific points (e.g. just the max and min), click a single data label once to select all, click it again to select that one only, then drag it or right-click → Format Data Label. Use Value From Cells to pull custom label text from a worksheet range.
Error bars
Click the chart → + → Error Bars. Choose Standard Error, Percentage, or Standard Deviation for quick options, or Custom to specify exact values per data point. Error bars communicate uncertainty — a forecast with ±15% bars tells the reader the range. Right-click the error bars → Format Error Bars to control direction (plus, minus, both) and end style.
Secondary axis on a single click
If one series dwarfs the others (e.g. total revenue alongside conversion rate), right-click the smaller series → Format Data Series → tick Secondary Axis. Excel adds a right-side axis scaled to that series. Combo charts often need this. Don't add more than two axes — readers can't track three.
Recommended Charts vs Direct Insert
- +Excel scans your data and offers four to six chart options that fit the shape
- +Live preview lets you compare layouts before committing
- +Great when you're unsure which chart type tells the story best
- +Catches mismatches — won't suggest a Pie chart for trend data
- +Especially helpful with unfamiliar data — you see Excel's interpretation
- −Faster once you know what you want — one click from the ribbon icon
- −Lets you go straight to a subtype (Stacked vs Clustered) without a dialog
- −Required for less-common types like Funnel, Treemap, Box & Whisker
- −Better for templates and repeat work — you skip the suggestion shuffle
- −Forces you to think about chart choice up front rather than browse options

Data Prep Tips — Get the Shape Right Before You Chart
Most bad charts start with bad data layout. Excel's chart engine reads your selection top-to-bottom, left-to-right, treating the first row as headers and the first column as category labels by default. Get the shape right and Excel does most of the work for you.
Use real headers, one per column
The header row becomes legend entries and axis labels. Avoid merged cells in the header — Excel treats the merged range as one cell, which can hide series. Avoid blank header cells. Avoid two-row headers — flatten them into one descriptive header per column.
No blank rows or columns inside the data
Blanks tell Excel the data range ends. A single blank row in the middle truncates the chart. If you absolutely need visual spacing, use cell formatting (borders, fill) rather than inserting empty rows. To force a chart to ignore blanks, right-click the chart → Select Data → Hidden and Empty Cells → choose Gaps, Zero, or Connect data points with line.
Format dates as actual dates
If your x-axis is dates and Excel is plotting them as text, the chart can't space them proportionally. Select the column → Home → Number Format → Short Date. Check by clicking a date cell — if it's right-aligned by default, it's a real date; left-aligned means it's text. Use the DATEVALUE function to convert text dates: =DATEVALUE(A2). Related: date calculations in excel.
One observation per row
Excel charts work best with tidy data — each row is one observation, each column is one variable. If your data is wide (cross-tabulated), use a excel pivot tables to reshape it before charting.
Numeric columns should be numeric
Numbers stored as text (left-aligned, with a small green triangle) won't chart correctly. Select the column → click the warning indicator → Convert to Number. Or use the VALUE function: =VALUE(A2). For sheets with many text-numbers, paste a 1 in an empty cell, copy it, select the offending column, and Paste Special → Multiply.
Build a Dynamic Chart — Step by Step
Set up the source data
Create a named range with OFFSET
Create a matching name for dates
Insert a chart from the static range
Swap absolute refs for named ranges
Add new data and watch it expand
Excel 365 — The Newer Chart Types Worth Knowing
Excel 365 (and Excel 2019+) added seven chart types that didn't exist in Excel 2013 and earlier. Most have specific use cases — knowing when to reach for them separates intermediate users from advanced ones.
Funnel
Designed for sales pipeline or any sequential drop-off process. Each bar represents a stage; the bars stack vertically with each shorter than the one above. Insert → Funnel chart. Best for data with 4–8 stages where you want to show conversion at each step.
Treemap
Hierarchical data shown as nested rectangles. The size of each rectangle is proportional to its value. Treemap shines for things like budget breakdowns by department and sub-department, or sales by region and product line. Insert → Treemap. Limitation: too many small rectangles become illegible — keep top-level categories under eight.
Sunburst
Same hierarchy idea as Treemap but radial — concentric rings outward, each ring a level of hierarchy. Visually striking for presentations but harder to compare exact values than Treemap. Best with 2–3 hierarchy levels.
Box & Whisker
Statistical chart showing min, first quartile, median, third quartile, and max for each category. Outliers appear as separate dots. Use for distribution comparison across groups — e.g. test scores across multiple classes. Insert → Statistical → Box & Whisker.
Histogram and Pareto
Histograms group continuous data into bins to show distribution. Pareto is a Histogram sorted descending with a cumulative percentage line — the classic 80/20 chart. Pareto is built for quality control and root-cause analysis. Both under Insert → Statistical.
Waterfall
Shows how a starting value flows to an ending value through positive and negative changes. Common for financial reporting (net income walks, budget variance). Each bar floats at the level the cumulative total reached. Excel auto-colors increases green, decreases red, totals dark — you can mark specific columns as Subtotal or Total by right-clicking → Set as Total. Related visual: excel flow chart template for process diagrams (different concept — flowcharts show steps, Waterfall shows financial flow).
Templates, Mac Differences, Common Errors
Once you've built a chart you like — fonts, colors, axis ranges, layout — save it as a template. Right-click the chart → Save as Template. Excel saves a .crtx file in the user templates folder. Next time, Insert → All Charts → Templates → pick yours. This saves hours when you make the same chart weekly. For team consistency, share the .crtx file via OneDrive or a shared folder; teammates drop it in %appdata%\Microsoft\Templates\Charts.
Mac differences
Chart functionality is almost identical between Windows and Mac Excel 365, with three quirks. The keyboard shortcut for default chart is Fn + Option + F1 on Mac (not Alt + F1). Some advanced chart options sit under Format → Chart menus rather than ribbon icons. Mac doesn't expose every fill pattern available on Windows — gradient fills are fine, but some texture options are missing.
Common errors and fixes
Chart appears blank: data range includes the wrong cells. Right-click → Select Data → fix Chart Data Range.
Axis dates plotted as text: dates aren't real dates. Reformat the column as Short Date or use DATEVALUE.
Pie slices in wrong order: sort source data largest-first before charting. Pie charts respect source order.
Two series overlap and one is invisible: change one series to a Line in a Combo chart, or set transparency in series fill.
3D chart looks dramatic but is hard to read: switch to 2D. Right-click → Change Chart Type → pick the 2D version. Avoid 3D except for very specific dashboard moments.
For deeper Excel topics, see how to add lines to a chart in excel and countifs excel for filtering chart source data with conditional counts. Heavy users also lean on excel vba to automate repetitive chart generation.
Excel Questions and Answers




About the Author

Business Consultant & Professional Certification Advisor
Wharton School, University of PennsylvaniaKatherine Lee earned her MBA from the Wharton School at the University of Pennsylvania and holds CPA, PHR, and PMP certifications. With a background spanning corporate finance, human resources, and project management, she has coached professionals preparing for CPA, CMA, PHR/SPHR, PMP, and financial services licensing exams.