AutoFit in Excel: 4 Ways to Resize Columns and Rows Fast 2026 July
AutoFit in Excel resizes columns and rows to fit content. Learn 4 fast methods: double-click, Format menu, Alt+H+O+I shortcut, and VBA. 🆕

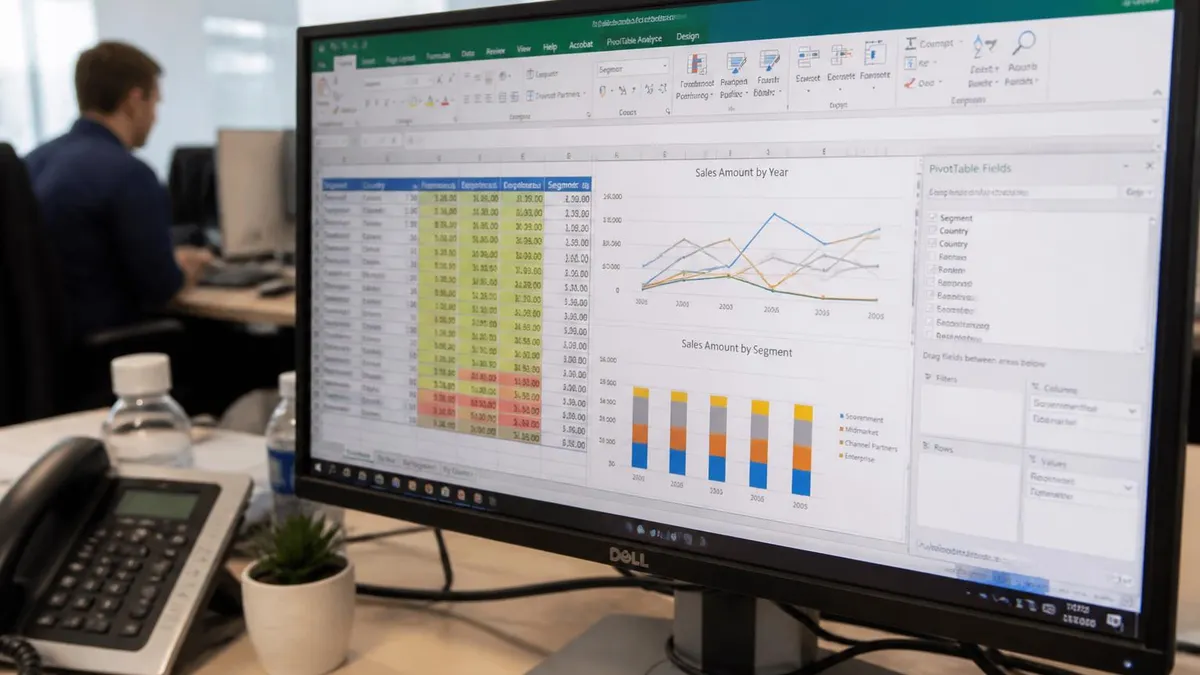
AutoFit in Excel makes a column or row stretch—or shrink—until every visible cell fits its content. You have probably seen those #### symbols when a number is too wide for a cell, or watched text vanish behind a neighbor. AutoFit fixes both in a single click.
It does the job with mathematical precision. The column grows to the width of the longest string. The row climbs to the height of the tallest wrapped paragraph. The sheet starts to look like a real document instead of a grid of half-shown values.
The reason it matters is simple. Excel is mostly read by humans, and humans skim. A report with clipped numbers feels broken, even if the formulas are correct. AutoFit removes that friction in seconds.
This guide walks through every AutoFit method that works in modern Excel (Microsoft 365, 2021, 2019, and 2016). You will see the exact keystrokes, then dig into the situations where AutoFit gets weird: merged cells, wrapped text, tables, and VBA loops across thousands of rows.
If you only have thirty seconds, here is the short version. Select the columns you care about. Press Alt+H, then O, then I. Done—every selected column now fits its content. For rows, swap the last key: Alt+H, O, A.
One last note. AutoFit is not the same as Wrap Text, and the two are commonly confused. AutoFit resizes the column or row to fit content as-is. Wrap Text forces long content onto multiple lines inside the cell. Combine them and you get readable multi-line cells without any manual dragging.
The Four Ways to AutoFit in Excel
Excel ships with four genuinely useful ways to trigger AutoFit. Each has a moment where it is the fastest. Knowing all four means you never reach for the mouse when the keyboard is faster.
Method 1: Double-click the border
This is the one most people learn first. Move your cursor to the right edge of a column header—the line between A and B at the top of the sheet. The pointer changes to a black double-headed arrow. Double-click. Column A snaps to the width of its longest visible cell.
The same gesture works on rows: hover the bottom border of a row number, wait for the arrow, double-click. Select multiple columns first by Shift-clicking headers, then double-click any border in the selection — all chosen columns AutoFit at once.
Method 2: Home tab, then Format menu
Click the Home tab, find the Format drop-down in the Cells group, and the AutoFit options sit right at the top: AutoFit Row Height and AutoFit Column Width. Both apply to whatever range you currently have selected.
The visual route is invaluable when training a new analyst, recording a tutorial, or working on a touch screen where the keyboard is not the fastest input.
Method 3: The keyboard shortcut
Excel does not give AutoFit a dedicated single-key shortcut, but the ribbon chain is short enough: Alt+H, O, I for columns, Alt+H, O, A for rows. Press the keys in sequence, not at the same time.
Pro tip: combine the shortcut with Ctrl+A to format an entire worksheet at once. Press Ctrl+A, then Alt+H, O, I, then Alt+H, O, A. The whole sheet is now fitted in under three seconds.
Method 4: Select All plus AutoFit
Click the gray triangle in the top-left corner of the worksheet—just above row 1 and to the left of column A. That selects every cell. Then trigger AutoFit using any method. The Select-All + AutoFit combo is the most defensive final pass before sending a report out.

AutoFit Methods Compared
Fastest for one column or row. Hover the right edge of a column header until the cursor becomes a double-headed arrow, then double-click. Works on multi-column selections too.
- ▸Best for 1–5 columns
- ▸Mouse-driven
- ▸Works on rows too
Visual route through the ribbon. Home tab, Format drop-down, AutoFit Column Width or AutoFit Row Height. Slowest but most discoverable for new users.
- ▸Best for training
- ▸No memorization needed
- ▸Includes Default Width dialog
Alt+H, O, I for columns; Alt+H, O, A for rows. Press in sequence, not together. Combine with Ctrl+A to fit the entire sheet at once.
- ▸Best for power users
- ▸Under 1 second
- ▸Pairs with Ctrl+A
Click the gray triangle above row 1 to select every cell, then trigger AutoFit. Defensive final pass before sending a report out.
- ▸Best for cleanup
- ▸Catches hidden columns
- ▸Pairs with PDF export
AutoFit Selection: Only What You Highlight
Most real workbooks mix columns that should AutoFit (data, labels) with columns that should stay fixed (a comments column you want 30 chars wide, a timestamp column you want exactly 18). AutoFit Selection is the answer.
Highlight only the columns or rows you want resized — Ctrl-click to grab non-adjacent ones — and trigger AutoFit. Excel only touches what you selected. Untouched columns keep their previous width down to the pixel.
For weekly reports, build the selection into a one-line macro: Range("D:H,K:M").EntireColumn.AutoFit. A single click fits only the columns that change between weeks, leaving headers, totals, and dashboard cells alone. The pattern scales: you can chain comma-separated ranges as long as you like.
One quirk: AutoFit measures the longest visible string in each column. If a column has hidden rows, those rows are ignored. Filtered views should not change widths — that is usually what you want. If you have manually hidden a few outlier rows, AutoFit may produce narrower columns than expected.
Another helpful tactic: select non-adjacent columns by Ctrl-clicking their headers, then double-click any border in the selection. Every chosen column resizes individually based on its own content. The columns in between stay untouched. This is faster than selecting all and reverting widths column by column afterwards.
For partial-sheet AutoFit on rows, the same logic applies. Click a row number, Ctrl-click additional rows, then press Alt+H, O, A. Only the highlighted rows resize. Everything else stays at its current height, which is essential when you are working in a finished report and need to fix only a few rows without disturbing the rest.
AutoFit in Action: Three Common Scenarios
Right after a CSV import, column widths are usually wrong — Excel uses the default width regardless of content. Press Ctrl+A to select all, then Alt+H, O, I. Every column snaps to its longest visible value. If text columns contain long descriptions, enable Wrap Text on those columns and run AutoFit Row Height (Alt+H, O, A).
One gotcha: CSV imports sometimes leave trailing spaces. Use =TRIM(A1) to verify and Find & Replace to strip them before AutoFit, or your columns will be wider than they need to be.
When AutoFit Misbehaves: Merged Cells and Tables
AutoFit is reliable on plain rectangular data. It gets weird the moment you mix in merged cells, wrapped text, or live Tables.
Merged cells block AutoFit
The single biggest AutoFit pain point is merged cells. When cells are merged horizontally and you trigger AutoFit Column Width, Excel ignores the merged content when calculating width. It only measures unmerged cells in the column.
The fix is to AutoFit before merging, or use Center Across Selection instead of true Merge. Center Across Selection looks identical to a merge but does not break AutoFit. Find it under Format Cells, Alignment tab, Horizontal drop-down.
Wrap Text + AutoFit = readable rows
This is the killer combo. Enable Wrap Text on a column with long descriptions, then AutoFit Row Height across all data rows. Excel calculates exactly how many lines each cell needs and resizes each row to match.
Caveat: if you change the column width afterwards, the row heights become stale. Re-run AutoFit Row Height after any column-width change to keep things tidy.
Tables (Ctrl+T) auto-resize as you type
If your data lives in an Excel Table, columns expand on the fly when you type a value longer than the current width. The exception: when you paste pre-existing wide text, Tables do not retroactively fit. Explicitly run AutoFit Column Width on the affected column.

AutoFit Pros and Cons
- +Resizes columns and rows to fit content in a single click or shortcut
- +Works on selections — only the columns or rows you highlight are touched
- +Pairs perfectly with Wrap Text for readable multi-line cells
- +Scriptable in VBA with one-line macros for full-sheet cleanup
- +Built into Excel Online, Mac, and every desktop version since 2007
- −Ignores merged cells when calculating column width — common source of frustration
- −Caps at 255 characters wide and 409.5 points tall; longer content needs Wrap Text
- −Does not persist as a column property — re-run after data changes
- −Fails silently on protected sheets without the Format columns permission
- −Manual row-height changes block subsequent AutoFit Row Height until reset
AutoFit in VBA: Macros That Resize Everything
Once a report has more than a dozen columns, manual AutoFit becomes tedious. VBA solves that with one-line macros. Below are the patterns every Excel power user should have in muscle memory.
Fit every column in the active sheet: Cells.EntireColumn.AutoFit. The Cells shortcut refers to the entire used range, and EntireColumn expands the reference to full columns. One line, every column fitted.
Fit a specific range: Columns("A:Z").AutoFit. Use this when you have a known column set that always needs resizing.
Fit every row: Rows.AutoFit, or for a specific range, Rows("2:1000").AutoFit. Combine with Wrap Text first — Range("D:D").WrapText = True — and you have a two-line macro that turns a paste-dump into a readable report.
Loop across multiple sheets: if you have a workbook with twenty tabs that all need resizing, wrap the AutoFit call in a For Each loop. Half a second of CPU cleans up all twenty tabs.
One performance caveat: Cells.AutoFit across millions of rows can be slow on shared network drives. If your sheet has a fixed used range, AutoFit only that range. Bracket the call between Application.ScreenUpdating = False and = True to avoid screen flicker.
Pre-Send Cleanup Checklist
- ✓Ctrl+A to select all cells (twice if inside a Table)
- ✓Alt+H, O, I to AutoFit every column
- ✓Enable Wrap Text on long-description columns (Alt+H, W)
- ✓Alt+H, O, A to AutoFit every row so wrapped text shows
- ✓Scan for any remaining #### in number columns and widen manually if needed
- ✓Unmerge or convert merged cells to Center Across Selection
- ✓Verify no manual row heights remain stale after wrap changes
- ✓Save and export to PDF — confirm no clipped values in preview
AutoFit Limits, Edge Cases, and Online Excel
AutoFit has hard ceilings baked into Excel. A column cannot exceed 255 characters wide (about 1,789 pixels). A row cannot exceed 409.5 points tall. If a cell contains text longer than the column ceiling, AutoFit caps the column at 255 and stops; the rest of the text overflows or hides.
The fix is to enable Wrap Text and let AutoFit Row Height take over. The cell can now use multiple lines, and the column stays within Excel's limit.
Excel Online supports AutoFit through double-click and the Format menu, but the keyboard shortcut chain may differ because the browser intercepts some Alt sequences. If Alt+H+O+I does not respond, use the ribbon route. On Mac, the keystrokes are similar but use Cmd for shortcut hints.
Conditional formatting does not affect AutoFit calculations. Width is determined by the underlying cell value, not by the rendered color or icon. Frozen panes work fine with AutoFit — the frozen header row keeps its current height, and unfrozen data rows resize as expected.
AutoFit state does not persist as a column property. If you reopen a workbook tomorrow and add new data, the column does not magically re-fit. The exception is Tables, which behave dynamically.
AutoFit Workflow: From Paste to Polished
Step 1 — Paste or import data
Step 2 — Select all (Ctrl+A)
Step 3 — AutoFit columns (Alt+H, O, I)
Step 4 — Enable Wrap Text
Step 5 — AutoFit rows (Alt+H, O, A)
Step 6 — Handle merged cells
Step 7 — Save and export
Best Practices: Building AutoFit Into Your Workflow
The smartest analysts do not run AutoFit manually every time. They build it into the workflow so the sheet stays clean automatically. The patterns below are battle-tested across thousands of recurring reports.
Template-level structure. Build recurring reports once with locked column widths for headers, totals, and reference columns. Use AutoFit only on the data block. Save as a template (.xltx). Each new month starts with the same structure, and your AutoFit macro only touches the cells that actually change.
Auto-run on workbook open. Drop Cells.EntireColumn.AutoFit inside a Workbook_Open event handler in ThisWorkbook. Every time someone opens the file, columns size themselves to current content. This is especially useful for dashboards consumed by people who never touch the keyboard.
Power Query refresh. Power Query resets column widths every refresh by default. Disable that under Query Properties (uncheck "Adjust column width") and add an AutoFit macro tied to the workbook's AfterRefresh event. You stay in control of widths instead of letting Power Query overwrite them randomly each time.
Defensive AutoFit on print prep. Right before exporting to PDF, run a full AutoFit pass. PDF renders widths as they appear at the moment of export. A three-second cleanup pass saves you from emailing a report with #### in column F.
Avoid AutoFit on protected sheets. If a sheet is protected without the Format columns permission, AutoFit silently fails. Either grant the permission when you protect the sheet, or run AutoFit before applying protection. Both approaches work; pick whichever fits your security model.
Pair with conditional formatting cleanup. Conditional formatting rules accumulate over time as people copy-paste cells across sheets. Right before exporting, clear unused rules under Home > Conditional Formatting > Manage Rules. Combined with a fresh AutoFit pass, your output looks brand-new even after months of edits.
AutoFit Settings to Lock In
Troubleshooting AutoFit That Refuses to Work
Here are the five most common reasons AutoFit looks broken, and the one-line fix for each.
First, merged cells. Unmerge first, then AutoFit, then switch to Center Across Selection if needed.
Second, sheet protection. Unprotect the sheet (Review > Unprotect Sheet) and try again. If you do not have the password, AutoFit cannot run.
Third, manually-set row height. If a user has dragged a row to a specific height, Excel remembers it as manual and AutoFit Row Height will respect that on later calls. Select the affected rows, set row height to a default like 15, then re-trigger AutoFit Row Height.
Fourth, very long strings with embedded line breaks. A cell with Alt+Enter line breaks calculates row height from those breaks plus wrap rules. If the row looks too tall, check for hidden line breaks using =LEN(A1).
Fifth, data from CSVs or web copies sometimes contains trailing spaces. Run =TRIM(A1) and use Find & Replace to strip whitespace before AutoFit.
One last edge case: AutoFit in legacy shared workbooks can be flaky. Switch to a co-authored OneDrive file or take the workbook out of shared mode.
Putting It All Together: A 30-Second Cleanup Routine
Here is the exact sequence we recommend for cleaning up any new spreadsheet. Memorize this and your reports will look professional with almost zero effort.
Step one: paste or import your data. Do not worry about widths yet. Step two: press Ctrl+A to select all (twice if inside a Table). Step three: Alt+H, O, I to AutoFit every column.
Step four: enable Wrap Text on any column with long descriptions by selecting it and pressing Alt+H, W. Step five: Alt+H, O, A to AutoFit every row so wrapped text shows in full. Step six: scan for merged cells and either unmerge or convert them to Center Across Selection. Step seven: save.
That is the entire workflow. Six keystrokes, one scan, one save. If you build it into muscle memory, you will never email a colleague a report with clipped numbers again. The whole sequence takes under thirty seconds once the muscle memory is in place.
For an even faster pass, build a macro that does steps two through five with a single button click. You will have automated 30 seconds out of every report you produce for the rest of your career — and your spreadsheets will look noticeably more polished than the average analyst's output.
One advanced refinement: bind your cleanup macro to a custom keyboard shortcut under File > Options > Customize Ribbon > Keyboard Shortcuts. Map it to something fast like Ctrl+Shift+F. Now every workbook you open is one keystroke away from a fully fitted, professional-looking sheet. The compound time savings across a career easily reach hundreds of hours.
Finally, remember the trade-off. AutoFit is fast and forgiving, but it does not replace good template design. For dashboards and presentations, lock down structural widths first and use AutoFit only where the data legitimately varies. The combination of disciplined structure plus on-demand AutoFit produces the cleanest, most reliable output of any approach.
Excel Questions and Answers
About the Author
Business Consultant & Professional Certification Advisor
Wharton School, University of PennsylvaniaKatherine Lee earned her MBA from the Wharton School at the University of Pennsylvania and holds CPA, PHR, and PMP certifications. With a background spanning corporate finance, human resources, and project management, she has coached professionals preparing for CPA, CMA, PHR/SPHR, PMP, and financial services licensing exams.