How To Set Up A Product Photography Shoot 2023
Product photography is one of the most popular forms of online content. It involves taking photos of a single object and using different props or backgrounds to enhance the shot. This method of photography is very versatile and can be used with any type of product. However, it is important to use the right camera for the job. In this article, I’ll discuss how to set up a photo shoot to capture product images.
Free Product Photography Practice Test Online
Product Photography Questions and Answers
Each image from product photography should cost $20 to $90. A whole commercial photo shoot might cost up to $10,000 per day.
Product photography, also referred to as e-commerce photography, is just what it sounds like: images shot and utilized on websites and social media platforms to promote sales of your good or service.
- Work on your photography techniques (pay attention to light).
- Create a portfolio.
- Invest in the appropriate tools.
- Make appointments with clients.
- Prepare your backdrop.
- Set up your product.
- Change the lighting.
- Utilize a tripod.
- Select the proper camera.
- Take several photos and assess them.
- Enhance your photos.
- Image optimization.
- Determine the ideal lighting. Lighting is the most important component of any photography setup.
- Make use of natural lighting.
- Set up your product background.
- Examine various camera perspectives.
- Make use of the manual camera settings.
- Take pictures of your products.
- Prepare your backdrop.
- Set up your product.
- Change the lighting.
- Make use of a tripod.
- Select the proper camera.
- Take several photos and assess them.
- Enhance your photos.
- Image optimization.
- Prepare your table.
- Prepare your sweep.
- Change the settings on your camera.
- Set up your product. Your reflector card should be set up.
- Take the photo and assess it.
- Enhance your photos.
- Image optimization for your website.
- Create a thorough plan.
- The right colours
- Remove Extraneous Information to Highlight a Product
- Correct errors
- Add Shadows
- Items with Crop Needles
- Photograph a 3D product to
- Use the Mirror Effect to Get a Catchy Result
- Take Mannequins Down
- Make Your Work More Efficient by Using Batch Editing
- Improve Your Photos to Speed Up Loading
- Establish a portfolio of your work. This will show potential clients you have the skills and experience necessary to produce high-quality product photos.
- Network with other photographers and businesses in your area. Get connected with people who might need someone to photograph their products, and let them know what services you offer.
- Start your own business. This can be a great way to attract clients looking for someone they can trust to photograph their products.
- Check online job boards and classifieds websites for opportunities to photograph products for businesses or individuals.
- Cut the box’s top flaps off with the box cutter. After that, remove the box’s three edges, leaving a 1-inch border on each side. As you can see, mine is free-hand and a little sloppy, so you don’t need to stress about getting it perfect.
- Cut the tissue paper to size and tape it. Tissue paper should be roughly the same size as the box’s sides (leaving edges that can be taped down). The tissue paper should then be taped to the box’s exterior, covering each hole. As a light diffuser, the tissue paper will soften the incoming light and eliminate sharp shadows.
- Drape the poster board to create a white background in step three. The poster board should be cut to fit the box’s width. Ensure that the poster board is long enough to protrude from the box. To create a white background with no edges, tape the top of the poster board to the top of the box’s back and then let it hang down and outward from the box. To prevent it from curling upward, tape the bottom of the poster board to the base of the box.
One way to do it is to use a special rig with multiple cameras attached. This will allow you to capture images all around the object. Another method is to use a specially designed panoramic head to let you take pictures in all directions. Another option is using software that can stitch multiple images into a 360-degree image. This option can be useful if you don’t have access to any specialized equipment. Finally, you could also use virtual reality technology to create a 360-degree view of your product. This would require some additional hardware, but it would give you the most realistic results.
You need to place your product in the center of the lightbox. Using a white background, you can use a white poster board to reflect more light onto your product. You can also use some white fabric to create a softer look. If you’re using a black background, you should place your product on a black poster board. This will help to create contrast and make your product stand out more. You can also use black fabric to create a more dramatic look. Experiment with different backgrounds and lighting setups until you find what works best.
- Turn on the ring light. Setting it up is the first step in using ring lights to capture video. To accomplish this, screw the spherical object to its base. Plug the light into a socket with voltage once it has been attached to the stand, then turn it on. When electricity is applied, the ring light will turn on instantly. Before using the bulbs, make sure they are functioning properly.
- Place your camera in the beam of light’s center. Your camera should be in the middle of the ring light for the style of photography you intend to take to produce a stunning final image. Some ring lights will have a camera stand in the middle, but some don’t. You’ll need to get creative. To alleviate the strain of making a stand, you must acquire one with a camera stand at the center. Connect your camera, a mobile device, or a professional camera to the stand. Make sure it’s properly fitted to prevent pixelated images.
- Prepare the background for your photo. The background is a crucial component of any photography process. It is what enhances your image and makes them appear appealing to viewers. White backgrounds are the finest for photographing products out of all the colors that may be used as a backdrop for photo sessions. Blue, pink, and yellow are other lovely hues, although they could complicate the picture.
- Document the item using pictures. Your merchandise is prepared for a picture shoot once the background is set up neatly. By adjusting the ring light stand, you may take images of your product from various angles in the space. To provide your buyer with a clear view of how the product seems from a distance, you can decide to move the stand a few meters away from the item. Additionally, you may place the ring light in the room’s corner to produce a different effect.
- It’s crucial to edit a shot after a photo shoot. It assists you in making your work more professional and distinctive. To make the necessary alterations to the photograph, use robust photo editing software, such as Adobe. Boost the image’s quality by including filters, effects, backgrounds, and other elements.
- DSLR Camera
- Lenses
- Tripod and Remote Shutter Release
- Lighting Equipment
- Backdrops and Surfaces
- Styling props and tools
- Photo editing softwares or apps
Make use of a 50mm or larger lens.
Product photography is also referred to as e-commerce photography.
It’s perfect for food and product photography because it’s constructed of a circle of LED lights that cast an equal glow over people and items.
While regular and wide-angle lenses have their place in product photography, a macro lens is required if you’re photographing incredibly small or intricate objects.
Over 1,000 lumens is the ideal brightness intensity for photography. The greatest photography effects come from a high-brightness output that resembles natural lighting.
The average cost of hiring a professional photographer is about $170 per hour.
To shoot downward at your product, raise your camera slightly higher than you would to illuminate a backlit glass object. This will get rid of reflections and let you angle your merchandise nicely. Additionally, as always, confirm that your goods have been meticulously cleaned.
Utilizing a light source while photographing the object is the greatest approach to producing natural shadows. Whether natural or artificial, ensure the light source is positioned to the side of your subject. This allows it to throw the shadow from your goods at an angle, giving it a more three-dimensional appearance.
A flash is the best option for a completely white background, although two 100-watt daylight tungsten lights placed at the corners of the frame come in second. When photographing products for Amazon, use two lights to reduce shadows.
Use a tripod. If you’re using a phone, you’ll want to prop it up on something, so it’s at the same height as your product. You could also use an object like a stack of books to raise the height of your phone. Then, find a place in your home with good natural light. A window is ideal, but if that’s not possible, try to find somewhere with indirect sunlight. Once you’ve got your setup ready, take some test shots and adjust the angle and positioning of your phone until you get the best shot possible.
- Start with a reliable strategy.
- The allure of a white backdrop
- Choose the proper lighting.
- Maintain a good image resolution.
- Consider the product size.
- Display the product from various angles.
- Make use of a tripod or stable surface.
- Refrain from combining the product with other goods.
- Avoid Posting Indecent Content
Good lighting is essential for any photograph, and for clothing, it is especially important to capture the detail and colors of the fabric. Natural light is often best, but if you use artificial light, be sure to use a soft light that will not create harsh shadows. The fit of the garment is also important – ensure that the model is wearing the clothes in a way that showcases their silhouette and allows for clear views of all the details. Cropped photographs can help show off garments that are particularly intricate or detailed.
Start by studying the work of professional product photographers. Look for clean and polished photos, and try to figure out what makes them effective. Then take some simple products (like fruits or flowers) and practice shooting them differently until you develop your style. Try to experiment with different angles, lighting setups, and compositions. Finally, find some online tutorials or workshops to help you take your skills to the next level. There are a lot of great resources out there, so don’t be afraid to spend some time learning everything you can about product photography.
- Determine whether your strengths are in location or studio work. Industrial photography requires you to be comfortable working in challenging environments, such as a factory or outdoors, where the product is being used. Choose the product categories that enable you to provide a unique service or method, such as automotive photography or furnishings in an interior environment. Choose clients who have products that let you play to your strengths.
- Examine local businesses. To cover their current range of items or add new ones, look for businesses with a wide range of offerings. Identify businesses that frequently advertise in trade journals; to stand out from the competition, they require excellent product photography. Contact marketing and advertising companies. They hire photographers to work on campaigns, selecting various photographers depending on the kind of product or the desired outcome. Contact the production or creative directors depending on how the agency’s creative department is organized.
- Speak to catalog-producing businesses. Publishers of catalogs may employ a design consultancy or have their in-house production team provide material and hire photographers. Stress your capacity to work under pressure and deliver reliable results in various subjects.
- Create a website where you can display samples of your work. Sort your photos into categories so potential customers can assess how well your work fits their needs. Send prospective customers an email outlining your services and include a link to a gallery on your website. You can stay in touch with potential clients and customers by posting an online newsletter with information about your most recent projects. Join a professional organization like Professional Photographers of America, and list your preferred specializations in their directory of photographers. Consider a listing in a directory used by agencies to find suppliers, such as the Creative Review Handbook.
- Submit your images to a library. Design and marketing firms frequently use stock photography from libraries for client projects that lack the funding for original photography. Newspapers and periodicals also use stock images to illustrate articles about goods or businesses.
Start by confronting the side of your product directly with your light at a 90-degree angle from the camera. Then, play with the light’s direction.
- Use foam or Styrofoam blocks to create a stable base for your product.
- Use kitchen tongs, chopsticks, or other long objects to hold your product in place.
- If you’re shooting a small object, try using a toothpick or needle to prop it up.
Use tools like the Healing Brush and Clone Stamp to edit product photographs in Photoshop and eliminate all flaws. If you need to select many areas of the image for rectification, use the healing brush. When you do this action, Photoshop will fill in this region with pixels that match the colors of the area around them.
The best way to shoot clothing product photography will vary depending on the specific product and the desired aesthetic. However, some tips on how to shoot clothing product photography include using natural light whenever possible, using softboxes or diffusers to create softer light, and using a tripod to ensure that images are sharp and focused. Additionally, it’s important to pay close attention to detail when shooting clothing products, ensuring that all wrinkles and seams are smoothed out, and that stray threads are removed.
- To combat reflections, use lighting. Reflections are the main issue when photographing items made of glass. While not all reflections are undesirable, we prefer to eliminate them when photographing objects made of glass. Glass photography advice: how to take a picture of a champagne glass on a white background. And this is how the identical set-up appears when a champagne glass is used.
- Produce backlight without specialized tools. You can utilize a variety of techniques to produce backlight. Not all of them demand expensive photography gear. You can use two speedlights to illuminate a piece of white plastic (or even white paper). Use your softbox as a white background if you have one. This frequently occurs when photographing products.
- To save time, make false reflections. You can take an actual reflection and picture it by setting your glass on plastic. However, there is now a second surface to consider. Be cautious with any dust particles on the surface. Additionally, keep an eye out for any undesirable reflections that a surface may add to a photograph.
- To enhance the drama, take a picture of glass on a dark background. A piece of black paper should be placed directly behind the glass to achieve the same effect with a black background. The sheet must have adequate width to enclose the region directly behind the glass. But also small enough to allow you to see the boundaries of your light source. This produces a gorgeous white shimmering outline.
- Add depth by utilizing two sources of light Even while the image with just one backlight appears clean and simple, it could lack depth, especially if there is a non-transparent object in the frame. Put another light source there, this time on the side of your object.
- Make shooting simpler by using a long focal length. I used 105 mm lenses to take this picture. Such a focus length offers two benefits. You can first move further away from the action. Doing so reduces the likelihood of seeing your own reflection in the glass.
- Wipe the glass to prevent streaks and smudges. It should go without saying, but thoroughly clean every glass surface. The image will show any dust and fingerprints on the glass.
- Incorporate motion for more dramatic photographs. Try adding drama to your flawless product photo if you still think it’s a little flat. Transparent glass makes pouring water, bubbles, and splashes look beautiful.
Scale images put a thing next to other objects to illustrate size. To take a scale photo successfully, you must contrast your product with an object that your buyers are familiar with. Never be hesitant to utilize something as straightforward as a ruler. Some merchants use coins or other everyday objects as scale.
To begin, position your softbox 45 degrees away from the subject of your photo shoot. Raise the softbox so that the point falls down on the product and the middle of the softbox is slightly over the middle. A fantastic lighting effect should result from this for product photography.
The light source should be situated halfway between your item and the umbrella’s underside. Aim the light source straight at the umbrella’s shade. The entire reflective underside of the umbrella should be illuminated.
Either professional photography services are provided or not. However, given the vast number of people who have made photography their profession, the answer is true.
The conversion rates of good product photography might rise by 30%. Any firm that wants to establish its brand among the first in the visually dominated online world and be profitable must invest in high-quality product photography.
The most popular and secure backdrop color to utilize is white. White guarantees a clear background and a sharp focus on the product.
The Fujifilm GFX 50S II is the greatest “cheap” camera for taking pictures of products.
Product photography targets ISO 100, but outdoor photography may need a higher ISO setting (due to the unpredictable light and distance to the object). It is advised to utilize the lowest ISO setting feasible, up to ISO 400 or ISO 800, in extreme circumstances when the ISO value of 100 is difficult to attain.
Lifestyle product photography, also known as in-context or just context photography, is the technique of photographing your product in a carefully curated scenario, occasionally with models, to establish the idea of a particular lifestyle or aesthetic advocated by the business.
Filmmaking, video production, audio production, and photography all involve post-production. All stages of production that take place after the main photography or recording of certain program parts are referred to as post-production.
These factors considered, an off-camera, medium to large size (12 to 18 inches), LED-based ring light with a stand is the best ring light for product photography.
After considering everything, we concluded that a big softbox would be appropriate for photographing large groups of people and portraits, while a small to medium-sized softbox would be appropriate for photographing food or other products.
For any e-commerce firm, the product photography is essential. Your product photos must sell your products for you because your buyers cannot touch or see them in person. Professional product photography can help boost internet traffic and foster customer confidence in your company.
Customers only get a small view of your stuff from certain angles. Take photos from as many angles as you can. As long as the angles are flattering, take straight-on side shots, shots from the front, shots from the back, the top perspective, angled side shots, detail shots, and any permutations of those suggestions.
In the e-Commerce sector, product photography is in high demand to raise brand awareness and draw customers’ attention to products.
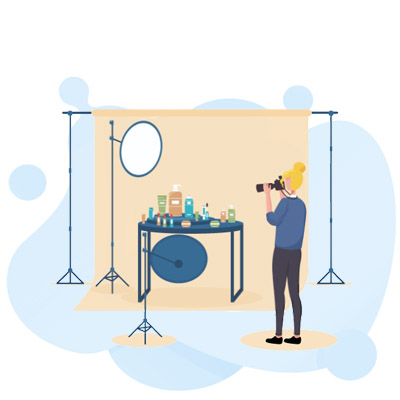
Product Photography Setup
Having the proper product photography setup can be crucial for capturing the best shots. Props are essential for product photography, but they should match the products you’re photographing. Here are some tips for selecting the right props. For best results, use natural light and a shallow depth of field. Also, always use a fast lens and a tripod.
Lighting is one of the most important aspects of product photography. Fortunately, there are a number of great lighting options available for photographers. LED lights, scrims, and diffusers are just a few of the options available. These items are designed to give your product a more professional look, and are a fraction of the price of professional lighting.
Proper product photography is vital for online businesses. A great product picture can convince customers to purchase a product. With the internet at their fingertips, customers can research products online. With so many competitors selling similar items on the web, it is vital for stores to present their products in the best possible light. In order to attract more customers, the pictures of your products must convey the best qualities.
Product Photography Pricing
When pricing for product photography, there are several factors to consider. One important aspect is the number of photographs you need. You should choose the number that works best for your budget. A professional photographer should take multiple shots, so the higher the number, the lower the cost. The photographer should also be able to give you an estimate of the cost of each photo.
You should also consider the experience of the photographer. If you need a high-end professional photographer to capture a wide variety of products, you should choose someone who has experience in product photography. A freelance photographer will usually cost less than a full-time photography team. You can also work with a solo photographer if you’re on a tight budget. A solo photographer also has the advantage of taking more time with the editing of the product images.
The type of products you want photographed also plays a role in pricing. Simple, basic items like coffee mugs, for example, are easy to photograph. Editing is also easy, so you can expect to pay less per picture. Large, bulky items, such as sports equipment, will cost more per picture.
Product Photography Lighting
Product photography lighting is a critical aspect in capturing your products in the most attractive and professional manner. It makes the difference between a great photo and a poor one. Good lighting can enhance your subject and reduce distractions. Whether the light comes from the front or sides, it is important to use the right combination to create the right look.
Lights that are close to the subject give off a softer look, while ones that are far away cast shadows. Ideally, you should place your product in the middle of the frame or set. In a product photography setup, you should use two lights: a continuous light on the right and a strobe light on the top. Then, you should place a reflector on the left side of the product to add softer light from the left side.
After selecting your lighting setup, you can now test the lighting. First, take some test shots and analyze them on a computer monitor. This will give you a better view of the photos and make it easier to identify problems. Once you have the test photos, identify any problem areas and try to fix them. The most common areas that pose problems are shadows and reflections. These areas can obscure the product or make labels difficult to read.
Best Camera for Product Photography
A good camera for product photography is a digital SLR. A DSLR allows you to change the lenses and adjust the light, which will make it easier to capture the best photos. Compared to mirrorless cameras, a DSLR is more versatile and has larger sensors. Some models offer zoom lenses and other useful features. For example, the Canon EOS R5 features a powerful zoom lens and a 1-inch sensor, and it is extremely compact. Another good camera for product photography is the Canon EOS M50.
If you are a professional product photographer, the Sony RX100 III offers a number of great features. For example, it offers pro-level BIONZ X image processing, a fast AF system, and auto-exposure. It also has a range of lenses, including large apertures that allow you to take stunning shallow depth of field photos.
A good camera for product photography should also be equipped with a wide range of lenses. Macro lenses are best for jewelry photography, while a 24-70 mm lens is perfect for fashion editorial work. A camera’s megapixel count is also important, as the higher the number, the higher the quality of the photo. This will allow for easy post-processing and printing.
Product Photography Ideas
The three most important parts of a product photograph are the subject, the lighting setup, and the scene. Think of it like an orchestra – you’re the conductor and you need to make the best use of all the visual elements in order to make your photos stand out from the crowd. Here are a few ideas to help you create a memorable product shot:
Use asymmetry to draw the viewer’s attention. Asymmetry can be very effective for a product photo, because it gives a more stylized look. It also allows the products to shine through. You can also use plants to add color and interest to your product photography. Whatever you choose, just make sure to follow the guidelines for arranging props.
Make sure your models are representative of the target market. Adding models of different sizes and ethnicities can help potential buyers identify with the product, and make your brand seem progressive. Also, consider the makeup and clothing of your models, as they should be representative of your customer base.

Product Photography Near Me
If you’re looking for product photography near me, there are a few things to consider. First, determine how many images you need. This will give you an idea of the total cost of the project. Next, determine the type of images you’ll need. For example, if your product consists of different parts, it will need a different type of image than a standard one.
When presenting a product online, an excellent image is essential for building trust between the seller and the consumer. When the image is accurate and enticing, consumers are more likely to buy. This is particularly important in e-commerce, since customers are not physically able to try the product. A good photograph also helps answer questions and give the buyer the information they need to make a decision. Quality images also help to reduce the number of returns and product wastage.
In order to make sure that your products look as good as possible, you should consider hiring a professional photographer. These professionals will create beautiful images that are guaranteed to increase your sales. In addition, they will handle shipping and drop-off. These photographers can also shoot special events and foods.
Product Photography Jobs
Product photography jobs can be a lucrative career. This industry spans from food to real estate, and if you are a skilled photographer, you can charge high rates. Although most people associate product photography with physical goods, you can also find lots of work in supermarkets, Walmart, and Target. Food and beverage products are meticulously crafted, and you can charge high rates for high-quality images.
If you are interested in working as a product photographer, you need a degree in Fine Arts or a related field, at least two years of experience, and a strong portfolio. You should also have excellent communication skills and be able to travel for shoots. You should also be creative and have experience using different cameras and lighting equipment.
Product photography jobs are often based on hourly rates. This is good for new photographers, as it will ensure that you get paid for every hour of work. It is also important to make sure that you are charging the right rate. However, you should avoid charging too much or too little, because this can be confusing for the client and can hurt your business.
Product Photography Props
Props can help convey a brand’s message and help the product stand out. Consider incorporating a few of these items into your product photography shoot. The right props can make the photo stand out, convey a specific message, or even make the image aesthetically pleasing. Props for product photography can be a fun part of the shoot process, but planning is key.
When choosing props for product photography, remember to coordinate the props and background colors. Use neutral or complementary colors for a more appealing aesthetic. Alternatively, consider using a single prop with a pop of color. Props can make the photo stand out, but should never compete with the product.
Adding props for product photography can also help create an environment that can add more visual interest to the product. Props such as dried leaves, dried flowers, and other materials can make the photo more interesting. Props can be used for flat lays or even to set up a small product scene.