Adobe Photoshop Free Practice Test 2023

What is Photoshop?


Photoshop is a picture editing, image creation, and Photoshop graphic designing program developed by Adobe. Many image editing features are available for both raster (pixel-based) and vector graphics in this software. It employs a layer-based editing system that allows for image creation and modification with many transparent overlays. Layers can also be used as masks or filters to change the color of the background. The layers can be enhanced with shadows and other effects. To eliminate the need for repetitive work, Photoshop actions contain automation options. Photoshop CC (Creative Cloud) is a feature that allows users to work on content from any computer.

Photographers, graphic designers, video game artists, advertising, and meme makers all utilize Photoshop. The software is offered for a monthly charge ranging from $9.99 to $49.99, depending on the user’s needs and options selected at the time of writing. Photoshop CC runs on Intel-based Mac systems as well as Windows PCs.

Take the Adobe Photoshop Free Practice Test Online!

Photoshop Software Purpose

Photoshop is a powerful photo editing program created by Adobe Corporation. Not just for graphic editing, but also for digital creative projects, the program is employed all over the world. Numerous capabilities, filters, and tools have been added to the raster graphics editor to make editing tasks easier for users. If you’re seeking for another reason to use Photoshop, we’ve listed a few more options below.

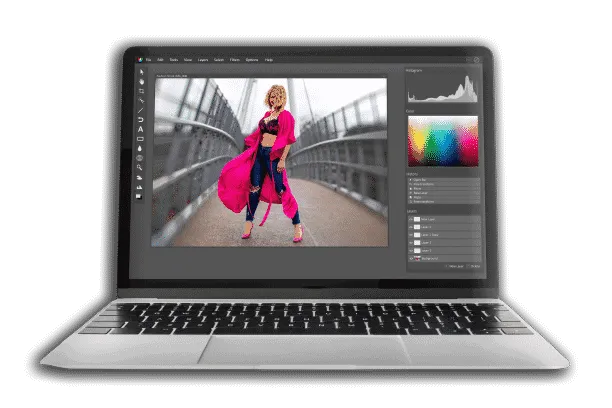
1. Photo Restoration

Photographs that have been damaged or are old can be restored with Photoshop. You can use Photoshop’s tools      and filters to repair small damages.

2. Resizing/Cropping

One of the most common Photoshop tasks is resizing and cropping photos. Simply select “Image” from the “Menu” option and then click ”Size” to resize your photo. You’ll see a dialog box where you can adjust the pixel height, width, and resolution.

3. Animation

Photoshop may also be used to create graphical animations. All you have to do now is make frames in the form of layers. When you’re finished, go to the timeline and activate the Animation panel. To construct your animation,  select ”Make Frames from Layers” and then export it as a GIF.

4. Website Graphics

Photoshop may be used to create graphics for your website layouts in addition to photo editing and animation. For example, you can make a simple button form with the Shape Tool set to ”Fill.”

5. Website Layout

Photoshop may be used to design web page layouts in addition to creating graphics. You only need to design and construct the various sections of a web page in the manner that you like.

Adobe Photoshop Training Classes

The following are the best Photoshop Classes Online:

  • Best Overall: CreativeLive Adobe Photoshop CC: The Complete Guide
  • Best Photoshop for Beginners: Photoshop online course for beginners
  • Best Free: Adobe Get Started
  • Best SkillShare Course: Essentials Training Course
  • Best LinkedIn: Photoshop CC 2022 Essential Training
  • Best Quick Class: Photoshop Beginners Mastery – Zero to Hero
  • Best Adobe Photoshop for Photographers: Photoshop Cafe – Photoshop 2022 for Digital Photographers

Adobe Photoshop and Illustrator Certification

A certification exam must be passed in order to acquire an Adobe certification. You can become an “Adobe Photoshop Certified Associate” or “Adobe Certified Expert” depending on the exam level. These exams must be retaken every few years to ensure that you are up to speed on the latest Photoshop app versions. The revised Creative Cloud examinations were supposed to be released in 2021, but like so many other things, it was delayed. Get certified in photoshop.

Best book to learn Photoshop

Adobe Photoshop Classroom in a Book (2022 release) has 15 lessons that cover everything from the basics to advanced methods, as well as a number of tips and strategies to help you become more productive with the program. You can read the book from beginning to end or pick and choose which lessons you want to learn.

Adobe Photoshop Price

Photoshop is offered as part of Adobe Creative Cloud as a subscription with a variety of options. The Creative Cloud Photography Plan, which costs $9.99, is the greatest bargain for Photoshop. Photoshop costs $20.99 per month as a stand-alone program. No matter which subscription plan or purchase option you choose, Photoshop is a powerful tool for editing photos.

Here are the top 10 jobs that use Photoshop:

Here are the top 10 jobs that use Photoshop:

       1. Graphic Designer
       2. Photographer
       3. Freelance Designer
       4. Web Developer
       5. Designer
       6. Graphic Artist
       7. Externship
       8. Art Director
       9. Production Artist
       10. Interactive Developer

Adobe Photoshop Questions and Answers

Select the ‘Quick Selection Tool’ from the tools to remove the background. Select ‘Add to Selection.’ Depending on the size of the photo, you may need to open the ‘Brush Picker’ and increase or decrease the brush size. Drag your cursor over the background that you don’t want. Toggle the tool’s subtraction mode by holding down the ‘Alt’ or ‘Option’ key, then click and drag your mouse around the background area you want to delete. When you’re ready to add to your selection again, release the ‘Alt’ or ‘Option’ key. Right-click within the marching ants and choose ‘Refine Edge’ from the pop-up menu once the selection is complete.

In Photoshop, open your image. Select “Image Size” from the “Image” menu at the top of the window. A new window will open. To keep your image’s proportions, check the box next to “Constrain Proportions.”
Select the desired inches, resolution, width, and height under “Document Size.” Now you may save your work.

The yearly plan billed monthly costs $20.99/mo, but you can buy it for $239.88/yr if you pay it all at once.

Begin by going to Image, then Adjustments. Select  Replace Color. To replace a color, tap on it in the image. To add to the selection, pick the eyedropper with the plus sign. Hit the OK button when you’ve completed choosing all of the colors that need to be changed.

In Photoshop, open the images you want to work with. The Timeline window should now be open. Create a new layer for each each frame by clicking “Create Frame Animation” in the Timeline box. Choose “Make Frames From Layers” from the same menu item on the right, and then pick how long each frame should appear before shifting to the next frame. Select the number of times you want it to loop at the bottom of the toolbar. Press the play icon to see a preview of your GIF. You can now save and export your GIF.

In Photoshop, open the product image. Click  Select Subject after selecting Select from the menu. Create a new layer with what you’ve selected so far. Use the lasso tools and eraser to smooth your work. To remove any additional background areas, click around the outer perimeter of the object. Finally, in the Layers panel, you’ll need to choose the background layer. You’ll only see the selection you made at the beginning after you remove this layer. If you want to maintain your image’s transparency, save it as a PNG file.

To improve your composition, you’ll need to crop the image. Make sure the exposure is correct. If necessary, make color adjustments. It’s time to make some selected edits now that you’ve fixed the color of your image. Remove any blemishes. Filters for sharpening and blurring can be used.

To make a selection, you can use the Select Subject tool. Select the Quick Selection tool from your toolbar, then set the selection mode to “Subtract From Selection.” Paint around the areas you want to eliminate with your picture layer selected. Simply hit the layer mask icon while your image layer is selected to add the active selection to a layer mask. After you’ve finished with the mask, go to the Adjustment Layer button and select Solid Color. That color will be applied to your object. Click on the icon for the mask that was made to make it the background. Then, under the Properties panel, select Invert. Double-click the mask layer to refine it. From the left menu, select Refine Edge Brush. To smooth off the edges, go over them all. Finally, you have the option of changing the background color.

To begin, open your photo in Photoshop. Select Image then Image Rotation from the top menu bar. Select Flip Canvas Horizontal/Flip Canvas Vertical. In only one click, you can flip an image.

To begin, choose the layer that you wish to resize. The resize bars will appear above the layer if you go to “Edit” on your top menu bar and then choose “Free Transform.” Drop the layer to the size you want. Check the box in the top choices bar.

Take a photo from your computer and open it. Select Filter, then Blur Gallery. Choose Field Blur. You may pick which sections of your image to blur inside the field blur window. Photoshop placed the first pin for you automatically. Drag and drop that pin into the background, or the area farthest away from the focal point, until you get the blur you want. Place more blur pins on the subject, one at a time, until the entire subject is sharp. Continue to smooth the blur. If required, adjust the blur effects.

Select the Crop Tool from the toolbar. To set the crop limits in your photo, draw a new cropping area or drag the corner and edge handles. To crop the photo, press Enter (Windows) or Return (Mac OS).

Select an option from the “Image Rotation” submenu by clicking the “Image” menu. Now is the time to save your work.

Find a site that offers downloaded fonts. Choose a font and download it. If the font file is in a Zip, WinRAR, or 7zip archive, extract it. Select “Install” from the menu when you right-click on the font file.

In the Layers Window, select the layer you wish to turn active by clicking on it. Go to  Edit then Transform. To flip the layer, click Flip Horizontal / Vertical.

Photoshop Express may be considered of as a light version of Photoshop for the iPhone, and it does a good work by giving a wide range of editing tools, as well as selective changes, to cover just about every editing need you would have while on the go.

Choose the Zoom tool from the Tools Palette on the left side of the screen. Click on the section of the image you want to see in greater detail to zoom in.

Choose Select Subject from the Quick Selection Tool’s menu. Make adjustments to your plans. Click Select and Mask. You may modify the radius by selecting Show Edges. Select the Refine Brush, then circle the areas that need to be polished with the refine edge brush tool. Create a new layer with the Layer Mask tool. Open the new image as the backdrop. Return to your subject’s cutout picture and drag it to the new backdrop image’s tab. To make adjustments with the new picture in place, use Ctrl/cmd+t to transform your selection.

Go to File, then New in Photoshop. Type your text using the Text tool (T). Click the “Create warped text” icon in the toolbar with the text layer selected and the Type tool (T) active. Select the “Arc” style in the Warp Text window, check the Horizontal option, then change the Bend value to +20 percent or whatever you desire. Click the OK button.

Go to the Photoshop website. Free Trial is located at the top of the page. Launch the Photoshop installer after opening the Photoshop free trial. Log in with your Adobe ID and password. Click Continue after indicating your level of Photoshop experience. Any on-screen directions should be followed. Finally, wait for Photoshop to complete its download.

In Photoshop, open the image you want to edit with. Select Layer, then Duplicate Layer. Click OK to name this new layer “Mirror,” then go to Edit with the Mirror layer selected. Click Transform and Flip Horizontal. Select Image, then Canvas Size. Set the Width to 200 and choose the Anchor grid’s top right arrow.

Select File then Place Embedded. Go to an image file in File Explorer (Windows) or Finder (macOS) and click Place. To prevent distorting the image, hold down the Shift key while dragging the image border’s edges to resize it. Drag the additional picture inside the border to the desired location.

The first option is to use Photoshop to import your image. Create a duplicate of a layer. Make a smart object out of a layer. Use the Transform Tool for Free. The Sharpening Tool may be used to fine-tune your cropped image. The second strategy is to use Layer Mask. To begin, click on the background layer’s small lock icon to unlock it. Select the area of your layer that you want to keep now. When you choose the layer mask icon, you’ll notice that everything but your selection has disappeared.

To deselect the chosen area on Windows, click Ctrl+D. Press Command+D on a Mac. The targeted area on your photo will be deselected instantly by Photoshop.

Open Photoshop and a new or existing document to which you want to add a line. To get the line tool, click and hold the rectangle tool, then pick the line tool from the menu that appears. Click and drag to the ideal line length, then let go of the mouse button after you’re satisfied with it.

Go to Windows, then Layers. To merge selected layers in Photoshop, go to the Layers panel on the right and choose the layers you want to merge, holding the Ctrl key on your keyboard to select several layers at once. It may be done by right-clicking one of the chosen layers and selecting “Merge Layers.”

From the tools panel, pick the Quick Selection brush and click-drag over the area you wish to select. Because the brush works intuitively, you don’t need to be overly precise. Leave it to the Refine Edge brush to take care of it. The Refine Edge brush tool helps in the inclusion of fuzzy elements such as hair and fur.

Select Undo from the Edit menu, or press Ctrl + Z.

If you want to completely clear a scratch drive of past data, you’ll have to manually locate and remove the files. Once there, look for the file Photoshop Temp, followed by a series of numbers. This is the file that includes all of Photoshop’s temporary data when it starts up. To clear this file, delete it.

Open the Photoshop document containing the text you’d like to change. In the toolbar, select the Type tool. Choose the text you want to edit. You may change the font type, font size, font color, text alignment, and text style in the top settings bar. Now, save your changes by clicking on the options bar.

Make a plain background. Create the logo’s foundation with the shape tool and then add color. Adjust the path’s shape by dragging on the path lines rather than the anchors. Combine simple designs and decorate with smaller details like shapes or lines. After merging it, add text to your logo. Select both text layers and then Right-Click then Convert to Shape if you’re satisfied with your text.

In Photoshop, open the image from which you want to remove the watermark. By pressing CTRL & + symbol, choose Magic Wand Tool and zoom to the part of the image with watermark. Select the watermarked area you like to delete using the Magic Wand Tool.

Over the original image, create a new adjustment layer. Make a selection that goes around the edges of the teeth with the Lasso tool. It’s fine if some part of the lips or gums are captured. Select the Hue/Saturation adjustment layer from the adjustments drop-down menu. It will change your selection into a layer mask automatically. Click the choices bar labeled Master in the Properties panel of your Hue/Saturation layer and pick Yellows, since that’s all you’ll need to whiten your teeth. Move the saturation slider to the left to reduce the yellows in your selection. If you see a rough edge to your selection, select Masks in the Properties tab to correct it. Increase the feather slider in the Masks panel to give your pick a softer edge.

To create place for the border, zoom out. The Background layer must be unlocked. The Canvas Size dialog box will appear. Add a Solid Color fill layer and extra canvas around the photo. Pick a color for the picture border.

Select your isolated object layer and then select Drop Shadow from the fx button at the bottom of your layers menu. The dialog box for Drop Shadow will appear. Set your shadow color to the same hue as your foreground color to create a drop shadow.

Select the Horizontal Type tool from the tools panel. Select the area of your image where you’d want to add text and enter a phrase. Press Escape to exit the text area when you’re finished.

Combine the images you wish to combine by copying or pasting them into the same document. Each image will be placed on its own layer. See Duplicate layers. Choose the layers you’d want to blend. Select Edit while the layers are still selected. Select the Auto-Blend Objective. To change the color and tone for blending, go to Seamless Tones And Colors. Click the OK button.

Open Photoshop and type or open an existing document with the text you wish to outline. Customize the size, location, blend mode, opacity, and color of the outline by going to the layers section, right-clicking the text layer, and selecting Blending Options. Mark the checkbox next to Stroke.

You must first open your image and then select the Lock button. Each locked layer now has a little padlock icon beside it. Simply choose a layer and click the Lock button again to unlock it. The padlock icon should be removed.

Choose Layer and New, then click Layer, or use the Layers panel option to choose New Layer. Select a name and other choices before clicking OK. You may also just click the + symbol in the Layers window to add new layer.

Select the Settings menu icon in the top-right part of the panel to add additional brushes. Select Import Brushes. Select your downloaded third-party brush ABR file in the Load file selection box. To install the brush into Photoshop, choose your ABR file and click the “Load” button.

Duplicate the layer in Photoshop after opening the image. Make a hair mask and then edit it. Under Image then Adjustments, select Hue/Saturation. Click the “colorize” button at the bottom of the pop-up and move the sliders around until you have the hair color you want. Make the mask more natural by editing it.

Click where you want the line to begin with the brush, then hold down the shift key and click where you want the line to stop. Between your start and finish points, it will create a straight line.

Open Photoshop and import the image you’d want to invert. Select Image from the menu bar at the top. Hover your cursor over Adjustments in the drop-down menu to add a new sub-menu. Select Invert from the Adjustments sub-menu.

Create a new layer to work on by clicking the “add layer” button in the layers panel. Click the layer mask button at the bottom of the layers panel after selecting the layer you wish to mask. To make a layer mask your active layer, choose it in the layers panel’s thumbnail. Apply black to conceal and white to reveal with the brush tool. To blend, add gray.

In your layers panel, right-click on it and select “Rasterize.” Alternatively, go to Layer, then Rasterize and select the type of layer or layers you want to rasterize.

Select Filter, then Sharpen. Smart Sharpen should be selected. Sets the amount of sharpening that will be applied. A larger value boosts the contrast between edge pixels, providing the appearance of more sharpness.

The monthly fee of Photoshop is $20.99.

In Photoshop, create a new file. To create Layer 1, click the square with a folded corner icon at the bottom of the Layers palette. To use the Brush tool, select the icon that looks like a small paintbrush. To open the Brushes palette, right-click on the canvas. It comes with all of the standard brushes. By clicking on the small down arrow next to the brush size, you may change the brush’s hardness, which controls whether the brush’s edge is hard or soft. You can play around with the settings to see how they effect your brush strokes. You are now free to begin sketching.

Select Image, then go to Canvas Size in Photoshop. This will open a pop-up box where you can adjust the size in either vertical or horizontal directions. From the Photoshop toolbar on the left side of your screen, select the Magic Wand Tool. Then choose the newly added area of your image by clicking on it. Select Edit, then Fill. After making sure the “Use” option is set to Content-Aware, click OK.

In Photoshop, open the images you want to work with. Make a new file for your Photoshop collage and start putting your images in one by one. Arrange your images. You can use the Move tool to change the photo placements. Merge all layers and add image spacing. Select the Crop tool or Image, then Image Size to crop and resize the final image. You can now save and export your collage.

To change the size of an image, go to the Image Menu and select Image Size. Make sure the Constrain Proportions Option is selected in the Image Size dialog box. Simply increase the width or height of the photo by entering a greater value.

In Photoshop, open the image you want to work with. Select Image Size from the Image menu. In the width or height area, type a new size. Both fields will change in response to a single input as long as Constrain Proportions is checked. In the Resolution section, enter the output resolution, then provide an output size if you want to resize the image based on output size. After that, click OK.

Create a new canvas. Fill in the canvas with your own pattern. You could place anything in the center that will repeat, or you could fill the entire space. Go to Edit and then Define Pattern. To save your new pattern, rename it and hit “OK.”

Hover your cursor slightly outside of any transform box corner. A U-shapes arrow will emerge, indicating that the selection can be rotated. To rotate your layer, click and drag it to the left or right.

Simply grab your Move Tool by hitting V while your text layer is selected, or go to Edit and click Free Transform. Hover your mouse over any corner of your text until a double-sided U shaped arrow appears. Rotate the text with your mouse by clicking and dragging it to the desired orientation.

Rename the Background layer after you’ve made a copy of it. Add  a High Pass filter. When you use this filter, your image will become grey and the borders of the person’s face will be highlighted in outline. Go to Filter, then Blur, then Gaussian Blur. Between 5 and 10 pixels should be added. Go to Image, then Adjustment, and then Invert to invert the effect. By right-clicking on the layer and selecting Blending Choices, you can change the blend options. Hold the Option key when clicking the layer mask tool to create an inverted layer mask. Blur should be applied on the skin. Increase the opacity of your layer if you want more blur.

Using the shortcut P, select the Pen tool. To make a selection, click two points to connect them with a line, and then drag a point to produce a curved line. To change your lines, press Alt/opt-drag. To make a shape out of your path, right-click it in the Paths tab on the right and pick Fill Path.

To vectorize an image, first open it. Copy the selection to a new layer. To generate a selection of the image, click the layer icon in the Layers panel while pressing down the Control key on the keyboard. From the tools panel, pick the Marquee Tool, drag the cursor over the selection, and right-click, then choose Make Work Path from the menu. To create a vector mask, switch to the Direct Selection tool and right-click on the image once more. Select Photoshop EPS file format from the Save As Type option by going to File > Save As > Save As Type. Save the vectorized image by clicking the Save button.

The exact amount you’ll need will vary depending on what you’re doing, but you’ll need at least 16 GB, and 32 GB is a requirement if you want to be productive.

Your subscription can be cancelled at any time using your Adobe Account or by contacting Customer Support.

After clicking the New Layer button, go to the File menu. When you click Place Embedded, your computer’s file browser will open. Place the image you wish to import after selecting it. At the top of the screen, click the checkmark.

Open the image you’d like to convert. Go to Image, then Mode. Select Grayscale from the menu. If you’re asked if you wish to discard color information, choose OK.

Trace around the subject you want to delete with a selection tool. Fill the selection of the person with other parts of the image using Content-Aware Fill. Make your selections based on your personal preferences. To output the newly selected material, pick New Layer as the method and click OK. By placing the new content on its own layer, Photoshop creates a nondestructive edit.

Using the Move tool, choose the image. For Windows, press Ctrl + T, and for Mac, press Cmd + T. You can now expand the image horizontally or vertically by moving the handles. The image will be proportionally stretched.

In Photoshop, open the image you want to edit.  For your vignette, make a new layer. Click Filter in the Photoshop menu when the Vignette layer is chosen. Then choose Lens Correction. On the right-hand panel, select the Custom tab. Adjust the Amount and Midpoint sliders under the Vignette heading until you’re satisfied with the vignette effect. Click the OK button.

In Photoshop, go to Image, then Image Size to adjust the DPI of an image. Remove the check mark next to Resample Image, as this setting will upscale your image, lowering its quality. Type in your selected resolution next to Resolution, then select Pixels/Inch.

Open the Layer Styles Dialogue box first. Make sure your logo has a transparent background when you open it in Photoshop. Check the box next to “Color Overlay” in the Styles menu. Choose a new color for your logo.

In the Layers Panel, double-click the fill layer thumbnail. Then, in the color picker that displays, choose a new color for the fill layer and click OK. This will change the color of your fill layer and apply it to your project.

By holding Command or Control and clicking on the layer thumbnail, you can choose the layer. After that, go to Select and then Modify. Set the appropriate feather amount by clicking Feather. To feather the image’s edges, apply a layer mask to the image layer.

Save Brushes after clicking the Brush Presets Options button. Fill in the set’s name (with a ABR extension). Select where you wish to save the brush set by clicking the Save In (Windows) or Where (Mac) list arrow.

Go to File and choose New to start a new document. After that, you can choose your fonts or copy your logo into the new document. Draw a rectangle around your watermark with the Marquee tool. Select Define Brush Preset from the Edit menu. Click OK after giving your brush a name. In your brush catalog, you’ll find your new brush. You can adjust the color or reduce the brush’s opacity.

Pick a tool for creating shapes. Select Rectangle, Ellipse, Triangle, Polygon, Line, and Custom Shape from the toolbar by clicking and holding the Shape tool () group icon. Optionally configure the shape tool. Draw a shape. Edit the properties of the shape after that.

In Photoshop, access the Layer Styles panel by double-clicking on your layer. Choose “Stroke” as the style, and “Outside” as the stroke type. To get the style you desire, simply modify the color and width of your outline.

Move your cursor to the area you want to replicate and Alt+click for Windows or Option+click for Mac on the precise position you want to start copying from with the Clone Stamp tool selected.

Thomas and John Knoll, two brothers, created Photoshop in 1987.

Yes. Photoshop has the ability to edit video. The standard edition of Photoshop CS6 has the ability to deal with video.

From the toolbar, choose the Smudge tool. If the Smudge tool isn’t visible, click and hold the Blur tool to see other related tools, then choose the Smudge tool. In the settings menu, select a brush tip and a blend mode.

You’ll see a sequence of rectangles and lines on your top settings bar. To center your layer within the selection, click the button for the “align horizontal centers/vertical centers” option.

Select the Marquee or Lasso tool icon. To copy a picture, pick the area you wish to copy by clicking and dragging on it. Control+C will copy the current layer’s chosen portion. Open the image you’d like to paste. To paste the selection, use Control+V on your keyboard.