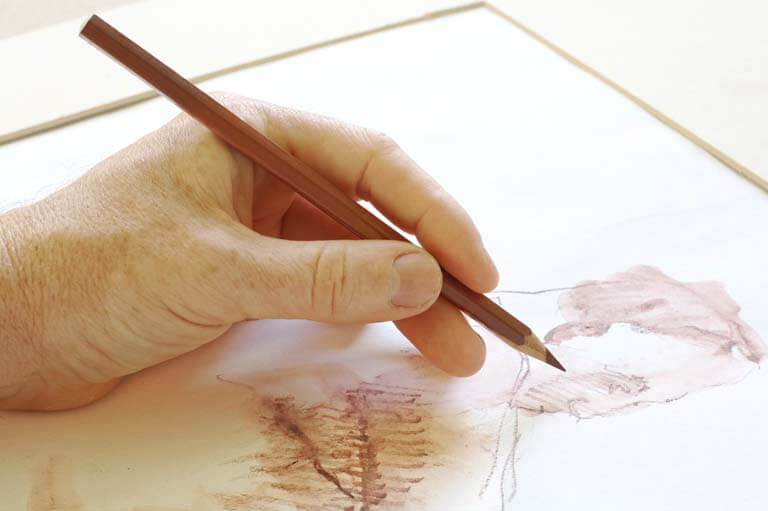
Best Figure Drawing Tips 2023

A figure drawing is a portrayal of the human form in various shapes and poses that may be created with any drawing medium. Creating such a drawing is likewise referred to by the word. Realism can range from extremely detailed, anatomically accurate depictions to loose, expressive drawings. A figure drawing can be a finished piece of art or a figure study for more finished work, such as a painting. It is undoubtedly the most challenging subject an artist will ever meet, and entire classes are dedicated to it. The human form is a timeless subject in the visual arts, serving as the foundation for portraiture, illustration, sculpting, medical illustration, and other fields.
Figure drawings, often known as still-life drawings, are created by artists by making observations of the physical world. Subjects are frequently human models but can also be objects such as food, automobiles, or nature items. Figure drawing artists attempt to depict the world as they view it. Art educators commonly use Figure drawing to teach foundations and help pupils understand perspective, proportions, and shading. Drawing continues to be the foundation for all sorts of great art, including painting, sculpture, and architecture. Other kinds of art that benefit from good figurative draughtsmanship include illustration and illuminated manuscripts, as well as caricature art and cartoons.
Free Figure Drawing Practice Test Online
This skill extends beyond a single figure sketching session for a student artist. The goal of figure drawing is to try to capture life as it is or as it appears to the artist. Understanding illustration requires learning to trust and respect the peculiarities and distinctiveness of perception. Figure study can help you improve your understanding of anatomy and gesture drawing, which can help you improve your illustration skills. Real-life sketches will help you develop as a sketch artist, illustrator, and digital artist.
Figure Drawing has the following advantages:
- Improve your knowledge of anatomy.
- Learn to recognize living creatures.
- Discover the fundamental forms.
- Movement, weight, balance, and stress are all factors to consider.
Female Figure Drawing
Everyone has a pretty clear image of what a human figure should look like, so any deviation will be detected immediately – the legs are created too short, they would say, or that arm is too thin and can’t bend like that. Drawing the girl naked puts you on an even tighter leash than usual. Make the body outlines for your female models proportionally right if you want to take your artwork to the next level. Instead of drawing the body freehand, establish a simple grid of lines and draw horizontal lines that are precisely spaced between the shoulder, chest, waist, hips, and knees. Then, draw little circles and a line at the joints to construct the body’s contour. After drawing a female body, you can add facial characteristics, design clothing, and color to the figure.
Figure Drawing Models
There is more to being a Figure Model than meets the eye. Many Figure Models require specific talents to carry out their obligations. They earn an average of $37.28 per hour or $77,551 per year. If you want to be a Figure Model, one of the first things you should consider is how much education you need. We discovered that 66.7 percent of Figure Models hold a bachelor’s degree or more.
Regarding higher education, 5.9 percent of Figure Models hold a master’s degree or more. Even though most Figure Models have a college degree, becoming one with only a high school diploma or GED is achievable. Posing as a model for figure drawings provides visual artists with a living reference for portraying the human art form. Whether an artist creates a highly detailed, anatomically perfect piece of art, a simple outline, or a preparatory drawing for future work, such as a painting, you serve as an inspiration and muse. It’s a creative professional option that anyone can pursue with little experience.
Male Figure Drawing
Learning to draw a man is vital for many people who enjoy sketching. However, painting a man is difficult due to its delicate anatomical traits and proportional body structure. However, after you’ve mastered the step-by-step procedure from a tutorial, it’ll be fun and games. The following are the steps for drawing a man model:
- Figure the dimensions
- Guidelines for the head and torso
- Draw the shoulders back.
- Make a torso.
- Draw the arms and legs’ lines.
- Completing the body skeleton
- Include some relief.
- Add details
- The last touches
An Isometric Drawing Shows a View of a Three-Dimensional Figure
Isometric projection is a technique used in technical and engineering drawings to portray three-dimensional objects in two dimensions visually. It is an axonometric projection in which each of the three coordinate axes seems to be equally foreshortened, with a 120-degree angle between any two of them. The technique aims to combine the appearance of depth, as in perspective rendering, with an undistorted display of the object’s significant dimensions—that is, those parallel to a set of three mutually perpendicular coordinate axes. An isometric projection occurs when the plane is angled to make equal angles (thus “isometric” or “equal measure”) with the object’s three significant planes. Therefore, the three visible faces of a cube appear as equilateral parallelograms in an isometric drawing. In contrast, the cube’s parallel edges are projected as parallel lines; the horizontal edges are depicted at an angle (typically 30°) from the conventional horizontal. The vertical edges, parallel to the major axes, are displayed in their actual proportions.
Anime Figure Drawing
Designing the body can be difficult if you want to draw your favorite anime character or your own. Anime figures can take on a variety of shapes and sizes but start by drawing them in human dimensions before changing them to your liking. While male and female figures have comparable proportions, their body forms differ slightly. With some practice and time, you’ll be able to draw any anime figure. Female anime characters’ anime bases are typically more elaborate than male anime characters. Look for the character’s headgear and outfit if you’re looking for an anime female drawing reference. Female clothing typically has sleeves and skirts. Female headgear will often resemble that of the anime character, or it will be some form of headgear that fits around their neck.
Figure Drawing for Artists: Making Every Mark Count
It is not your regular sketching book; it outlines the two-step approach used by studios such as DreamWorks, WB, and Disney. Though there are numerous books on drawing the human figure, none teach how to draw a figure from the initial few markings of a rapid sketch to the final virtuoso stroke of a finished masterpiece in a practical, easy-to-understand approach. Figure Drawing for Artists: Making Every Mark Count teaches beginners and experts alike the two fundamental concepts underlying the greatest masterpieces in art and how to apply them to their success. The book complements other figure drawing books that teach you how to draw every body aspect. This book delves into the more delicate issues, such as structure, your point of view, and lighting. The explanations are plain and straightforward. Each chapter concludes with a brief activity involving examining and analyzing an Old Master’s work.
Charcoal Figure Drawing
Charcoal art is a type of art that uses charcoal powder and several varieties of charcoal- vine, compressed, and pencil form. Many of us are probably not familiar with the term “charcoal art.” Many people are aware of this yet lack expertise. For millennia, artists have used charcoal to sketch the human figure. While it may appear frightening, it is a very forgiving and enjoyable medium to work with.
Items needed:
- Charcoal stick
- The image you’ll use as a reference
- Drawing Paper or Newsprint
- Masking tape
- Chamois
- Masking tape
- Kneaded eraser
- Drawing board (optional)
Dynamic Figure Drawing
A dynamic pose displays the subject moving. Dynamic postures allow artists to bring movement and energy to their illustrations. Once you’ve mastered basic sketching and human anatomy, you may bring your drawings to life by sketching your people in dynamic poses. You may make your drawings more lively and engaging by adding a bit of dynamism to your artwork. Dynamic positions also aid storytelling by adding activity into an otherwise still scene, implying feelings, dialogue, or meaning. Dynamic poses can also be used to begin advanced drawing work. You learn to analyze lighting, shadows, and body structure more attentively by adding life and movement to your image. These are all excellent tools to have in your illustration toolbox. You can advance your artistic career by practicing dynamic position sketching.
Analytical Figure Drawing
In architectural and product design, analytic sketching is frequently employed. The analytic drawing artist begins by constructing an object from everyday life with simple, straight lines and then defines it over time. Analytic drawing can also be used with other drawing techniques. Analytic drawing is typically intimately tied to perspective drawing skills.
Types of Analytical drawing:
- Portrait
- Product design
- Concept
- Figure
- Still Life
Figure Drawing Proportions
Proportions are fundamental to human figure drawing, sketching, and painting. Proportions are the relationships, or ratios, between a subject’s heights, widths, and depths. Depending on how you employ proportional systems, your designs can become more generic or detailed. Every body is unique, and no one physique is flawless or ideal. Proper body proportions should not be confused with perfect body proportions. Even if you aren’t the greatest artist in the world, the proper proportions on your figure drawing will preserve the reality and integrity of the figure. We see bodies all the time, and the eye can tell when the proportions are off. When drawing bodies, the first thing to learn is proportions because they teach you how to be anatomically correct. This can be performed by mapping out the body and determining which joints correspond to which others.
Tips for drawing a proportional figure:
- Don’t grow too reliant on ‘standard’ figure proportions – all bodies and stances are unique, so be prepared to sketch surprising shapes.
- To help you determine horizontal and vertical relationships in the model, use straight lines in the walls and furniture surrounding it.
- Check the width of the shoulders in relation to the head size – this is where most life drawings go wrong.
What is Figure Drawing for
Drawing from a live model in various stances is known as figure drawing. This is usually done with live models and working from life (not photos). We train with the human figure primarily because it has so much to give. More than simply forms, muscles and bones are involved in mastering the figure. It all comes down to movement, weight, balance, and tension. It examines the model’s weight-bearing leg or how they place their hips to hold a specific pose. You’ll learn to notice small nuances everywhere as you explore them through figure sketching. In animals, objects, and, of course, other humans. However, painting persons fully clothed makes it more challenging to see the entire scope of each stance.
Drawing the Figure in Perspective
We’ve all heard of linear perspective, a drawing technique that uses lines to create the appearance of space on a flat, 2-D surface. One-point perspective, two-point perspective, and three-point perspective are the three types of linear perspective. The artist chooses and implements each form based on the viewer’s point of view. While linear perspective is most commonly employed for sketching a landscape’s buildings, trees, and roads, its principles can also be applied to painting the human body in perspective. Linear perspective assists the artist in better understanding how we view objects in three-dimensional space and communicating that knowledge through sketching. This is accomplished by structuring the distortion when we draw things in an area.
Figure Drawing Question and Answers
- Start by making a little circle in the center of the paper with a pencil.
- To represent the eyes, draw two large dots spaced evenly apart.
- To illustrate the mouth, draw a little downward smiling curve. The circle with the dots and curve now symbolizes a happy face.
- Starting from the circle’s bottom center point, draw a vertical line.
- Starting from the left side’s bottom edge of the vertical line, draw a little slanting line.
- From the vertical line’s bottom edge, draw a second, thin, slanting line in the right side.
- Join the lines that slope downward to form a triangle.
- Starting from the triangle’s base, draw two vertical lines.
- To depict the foot of the vertical lines, draw two brief horizontal lines, one at each end.
- Just below the circle’s face, draw two slanted lines, one pointing left and the other pointing right.
- To depict the hairs on the skull, draw two curving “S” shapes starting from the circle’s upper center point.
- The stick woman figure is now prepared for coloring.
- Build the torso
Once the gesture is in place, divide it into the ribcage, abdomen, and hips. The limb apertures should then be indicated. Then, group the muscles using straightforward shapes. Offer planes as a final suggestion to help the torso gain structure. - Identify the limbs
Begin by defining the limbs as long, slender rectangular shapes that extend from the torso to the fingers or toes. Add cross-sections thereafter to show their location and motion. Finally, add muscles and mark the kneecaps and elbows with simple ovals. - Simplify the anatomy
Starting with the torso, arrange the muscles that surround the shoulder in the upper back into basic shapes. Highlight the elbows, knees, and hip bones where they are visible. - Start the head
When drawing a rapid head, start with the gesture and exterior contour, making sure the tilt and rotation are accurate. The key planes, such as the brow and side of the head, should then be included. Add the features last, then outline the neck muscles. - Sketch the hands
Because hands can be complicated, depending on how the fingers are positioned, start with a box or oval shape. Next, adjust the form while keeping the fingers together. Finish by separating the thumb and forefinger, or any other fingers need to give the hand life. - Draw the feet
Due to the small, crowded toes, the feet are rather simple to simplify. To begin, draw a triangle to represent the gesture, emphasizing the point of contact. The ankle and shape of the clustered toes should then be improved. Lastly, detach the big toe and any other required toes. - Exaggerate overlaps in poses with a side view
A large portion of the figure is hidden in a side view. Overlaps should be emphasized and exaggerated to make the drawing work. The limbs are excellent tools for forming overlaps at the torso when they are available. - In foreshortened positions, emphasize overlaps
Similar to a side view, emphasize overlaps. Accentuate how the hips and abdomen overlap if the torso is moving away. Use the rib cage and human anatomy to produce overlaps if the torso is moving in your direction. If visible, the well-drawn cross-sections of the limbs can also add depth. - Pay attention to the contact points in reclining postures
You can exaggerate the body in seated and reclining poses that makes touch with the surface. Increase the level of detail at the fingers and wrist to emphasize the hands making contact when it is visible. - Add tone
If the lighting is good, add tone to complete the sketch. Blocking in the shadow and giving the shape a proper tone are two ways to achieve this.
The following steps will help you complete a fashion drawing:
- Center the page by drawing a vertical line through the middle. The balance point of the fashion figure will be along this line that runs from the head to the feet.
- Equally divide the paper into nine halves. The fashion figure’s head, bust, waist, hips, thighs, calves, ankles, and feet will be among the nine portions.
- Sketch the pelvic region. Draw a square for the pelvis of the fashion figure in the center of the balance line. To create diverse stances, this can be angled in various directions.
- Draw the shoulders and torso. To form the torso, extend two lines upward from the top of the pelvic square.
- Sketch the head and neck. The neck should be half the length of the head and one-third the width of the shoulder. In proportion to the body, draw a circle for the head.
- Draw the legs. The sketched head should be around four times as long as the figure’s legs.
- Spread your arms. Make the arms tapered from the shoulder to the elbow and from the elbow to the wrist.
- Draw the feet. The feet ought to be around the same length as the head.
- Come up with a fashion concept. You may now start to construct your design projects on top of the fashion figure that has been sketched.
- Show examples of your design. Shade the pattern to demonstrate how the cloth moves or to draw attention to the areas of the garment where the material gathers. For more depth, color the fashion illustration.
The art of figure drawing involves sketching the human body, frequently when a naked model is standing or sitting in a figure-emphasizing position. This method aids the artist in capturing the musculature, texture, and poses of the human body.
- Figure dimensions.
- Guidelines for the head and torso
- Draw the shoulders
- Draw the body
- Create lines for the arms and legs.
- Filling the body skeleton
- Increase comfort. Specifics
- Add some last touches
Stretch your arms out against a wall while standing with your back to the wall to determine your draw length. The length of both arms, hands, and chest should be measured from the tip of one middle finger to the tip of the other middle finger. Your draw length is this measurement divided by 2 and then multiplied by -15.
- Age of 18 or older
- Research inventive poses
- Work on your poses.
- Apply for jobs or schedule auditions.
- Promote yourself.
- Establish a reputation.
- Before drawing your comic book character you need to visualize.
- Sketch a stick figure.
- Steps three and four are to sketch the head, face, and muscles.
- Fill in the Details
- Add Color to Make Your Character Come To Life
- Get your setup right,
- Draw for 20 seconds to warm up.
- Avoid focusing solely on one area of the figure.
- Ignore the predetermined ratios you were taught in high school art.
- Avoid getting too at ease.
- Sketch the hood’s inside contour.
Create a pear-shaped figure to do this. - Add the hood’s exterior outline.
Draw a rounded line with the same shape on the left side. - Draw the cloak’s one side.
From the hood, trace a long, slender line downward. - Include the second side.
Replicate the last action and draw a lengthy, straight line on the opposite side. - Sketch the trailing edge.
Draw a straight line from the hood down the middle. - Include the other side’s front edge.
Draw out a second smooth line from the same spot. - Sketch the cloak’s bottom edges.
Draw wavy lines on each side at this point. - Provide more information.
To represent the creases in the fabric, sketch a few feint lines. Join the cloak’s two sides. - Add color to the image.
Pick any shade. Both the outside and the inside should have light-colored shades.
- Choose a reference image for tracing. We use the My Modern Met logo in this instance. (For ideas, browse our list of websites with free stock photographs.)
- Choose your image under “Page Layout” -> “Background.”
- Select the full spreadsheet, then use the right-click menu to reduce the column and row widths to fit into smaller cells. You should add your colors here. Therefore, you can add more information if the cells are smaller.
- Is to set the spreadsheet’s zoom level to roughly 60%.
- Fill the cells with the correct colors using the paint bucket symbol. Try experimenting with various colors to add additional detail.
- Add lines to a Word document to draw on it.
- Modify the form and outline fill to change the color of the drawing.
- Apply shape effects to alter the appearance of drawings. 4. Modify your illustration by erasing spots
- Open your PDF in Acrobat by choosing File > Open.
- Choose Comment from the menu on the right.
- To use the Draw Free Form tool, click the marker icon in the Comment toolbar. Draw on the PDF,
- In the Comment toolbar, you can modify the line’s color, thickness, and opacity.
- Save your PDF when you’re finished.
- Open the Indicator Panel – From the main menu, choose Indicators
- In the Indicator Panel’s left column, choose Point and Figure.
- Modify the Reversal amount in the Indicator Panel’s center.
- Alter the Box Dimensions
- Decide whether to use the High/Low, Closing, or Typical Price price options.
- Save your decision in the right column
- Shut off the indicator panel.
- Click Logarithmic scale On/Off in the main menu’s View or on the toolbar.
- Make a large oval. At the bottom, place a rectangle that just slightly overlaps the lower margin.
- Add two more compact ovals. To show the face’s form, add two lines. It should now resemble a stick figure punching another stick figure or reaching up to give them a high five.
- On one side of the large oval, draw a semicircle, and add a triangle at the bottom. The rear of the head will be represented by the arc, and the curve of the neck by the triangle.
- Highlight the nose, lips, and chin. Connect the forms so that the silhouette begins to resemble a face rather than an abstract piece of art.
- Remove all unnecessary lines from the image. Add a few tufts to the top and rear of the hair to create a shadow of the hair.
- Using black ink, outline the picture (or crayon if you want). To complete the silhouette, cover everything in the color black.
The Image Size dialog box in Photoshop is the greatest tool for pixel art enlargement.
- Open the Image Size dialog box.
Open it by selecting Image Size: from the Image menu in the Menu Bar. - Enable the Resample feature
Make sure the dialog box’s Resample option is selected. With Resample disabled, the pixel sizes are fixed and the only setting that can be altered is the print size. Resample must be activated for pixels to be added or removed. - Fill in the Width and Height boxes with a percentage
The best way to enlarge pixel art is by using percentages rather than upsampling it to a specific size.
Go to File > Export in Photoshop and select the Export As option.
A wonderful place to start with figure drawing is by learning to draw armatures. Making the armature resemble the subject you are drawing is not a concern. What remains after you remove all the specifics is a schematic showing how someone is posed.
- Draw a cylinder first.
- On the cylinder’s two ends, draw two ovals.
- Inside the cylinder, draw two acute arcs that are parallel to one another.
- Create the hourglass based on the outline.
- Remove the superfluous outlines.
- Make your hourglass colorful!